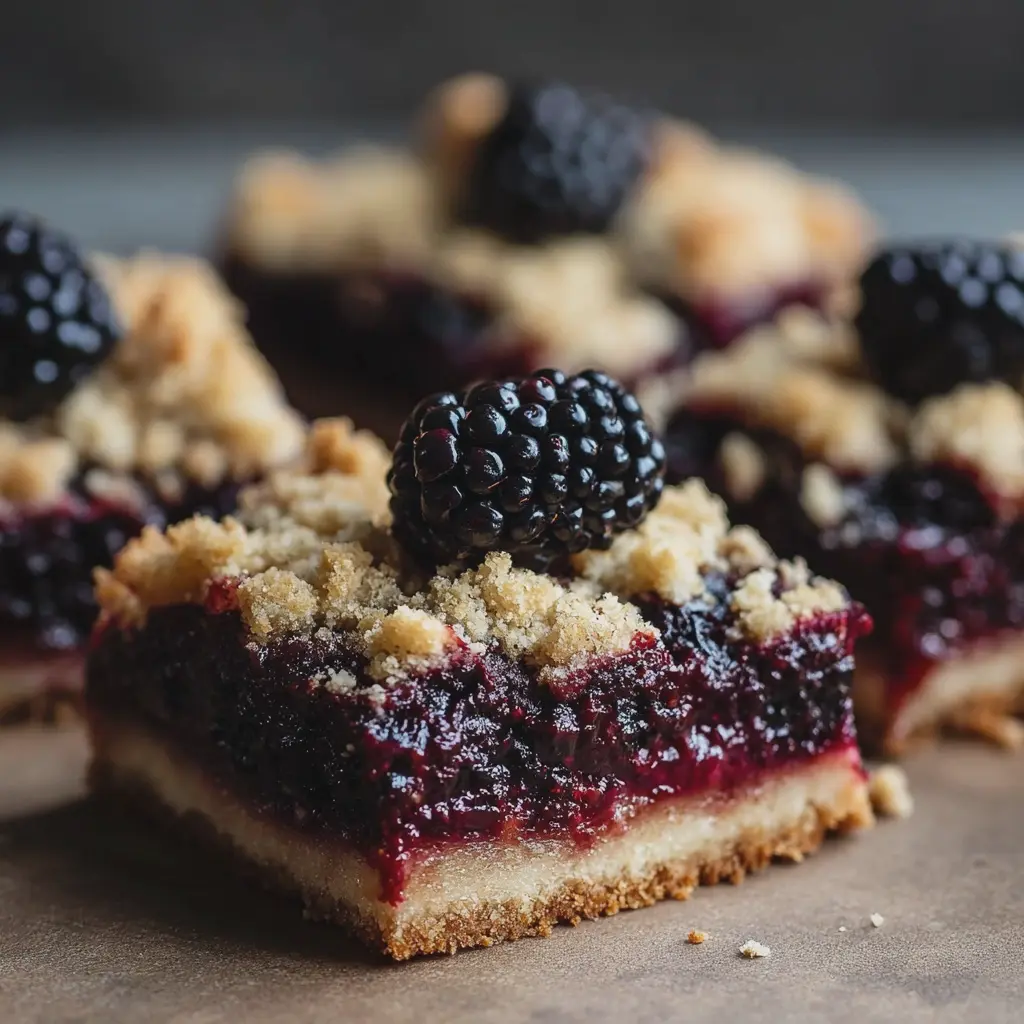
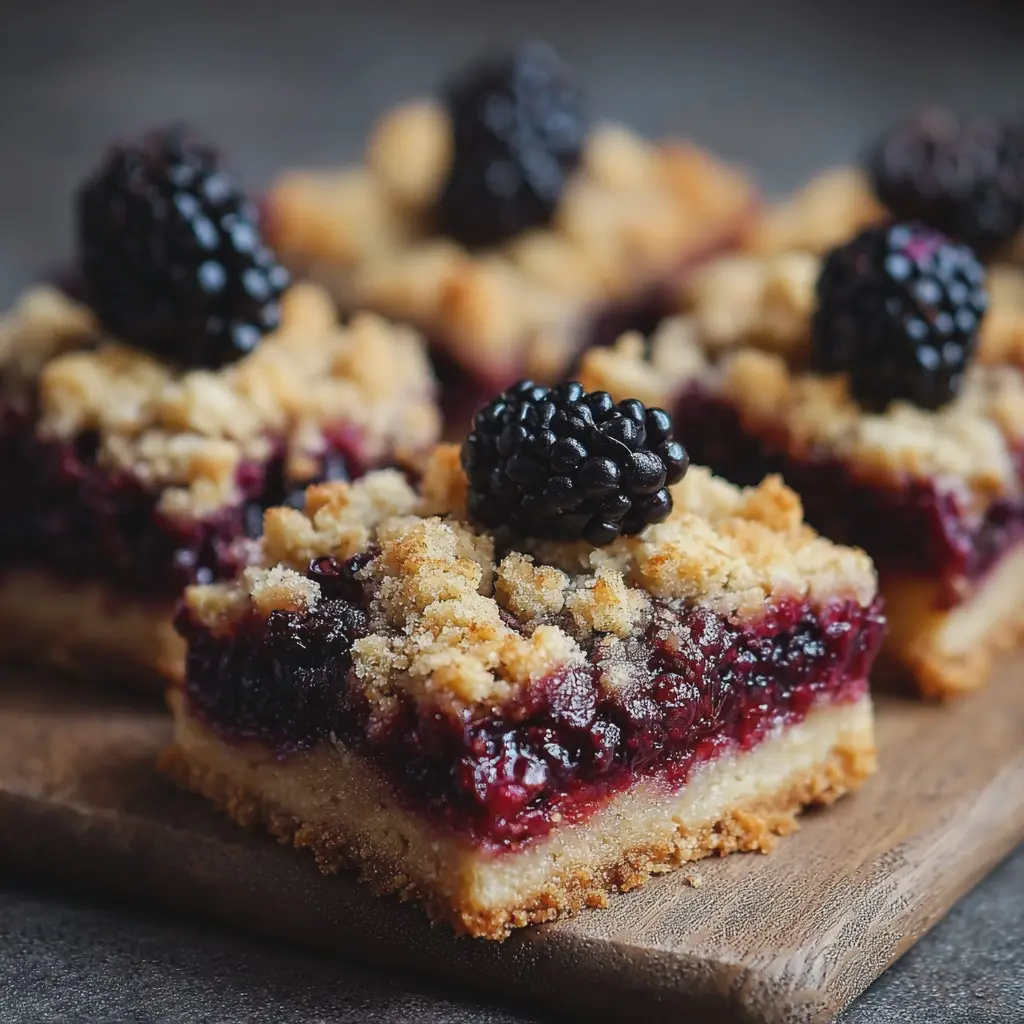
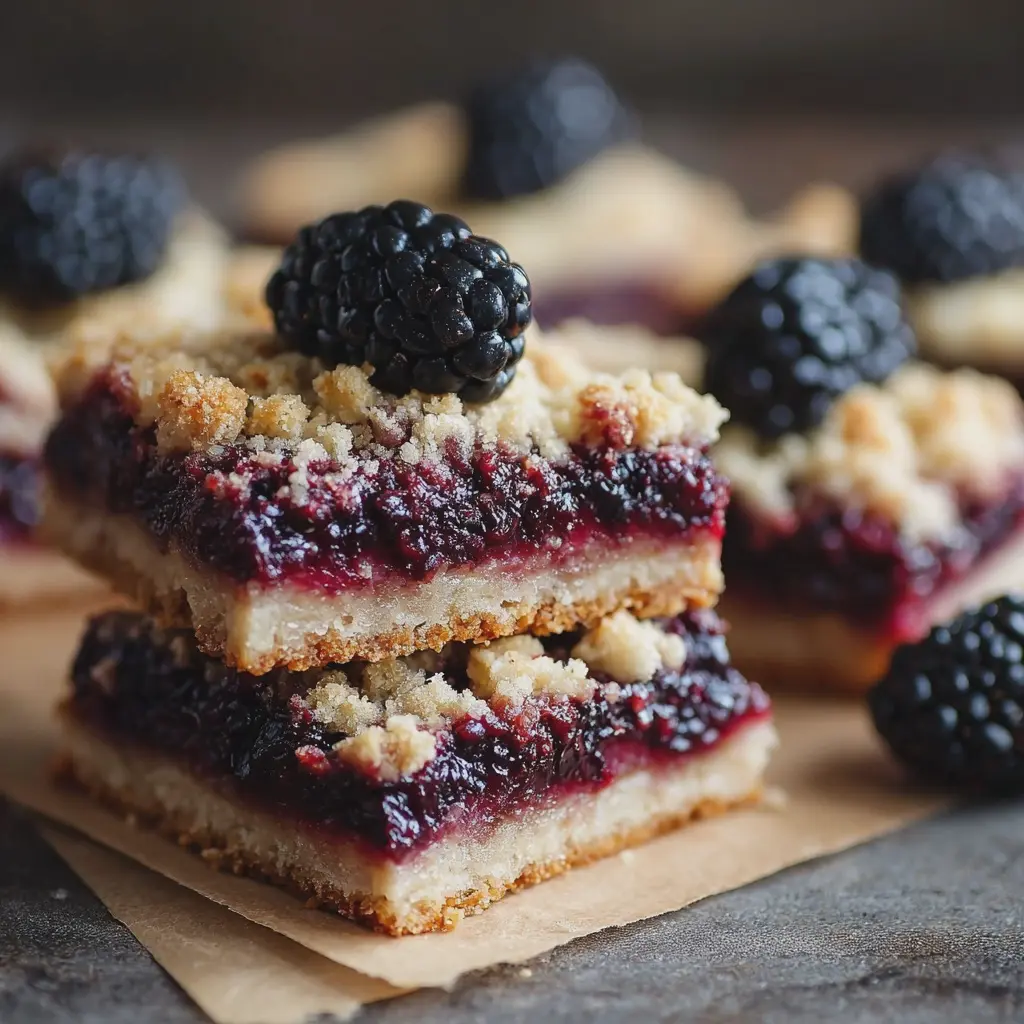
Introduction to Blackberry Crumble Bars
There’s something undeniably delightful about homemade desserts. The process of baking not only fills your kitchen with tempting aromas, but it also offers a wonderful opportunity to create lasting memories with friends and family. Imagine sharing a plate of warm, sweet blackberry crumble bars, each bite bursting with rich flavor and a satisfying crunch. These bars are not just a treat; they’re a nostalgic experience, transporting you back to carefree afternoons spent baking in your grandmother’s kitchen.
Blackberry crumble bars fit perfectly into busy lives. They are great for meal prep, allow you to use fresh or frozen blackberries, and can be made ahead of time. Plus, they make the ideal dessert for gatherings, potlucks, or even cozy nights in. You’ll impress your guests with both trees and taste while enjoying the perks of convenience. The best part? You can enjoy these bars sans guilt, knowing that they’re made with wholesome ingredients, unlike many store-bought options that can be loaded with preservatives.
Baking is not merely about following a recipe; it’s a chance to express creativity. With blackberries, you’re working with a fruit that’s both tart and sweet, making it ideal for a dessert that elevates your palate. If you’re wondering about the nutritional benefits of blackberries, they’re an excellent source of vitamins, fiber, and antioxidants — all essential for a balanced diet. You can learn more about their health benefits from sources like the Harvard Health Blog.
As we delve into the steps to create these scrumptious bars, remember that each layer plays a vital role – the buttery crumble, the luscious blackberry filling, and the delightful, crunchy topping almost epitomize comfort food in a bar form. So, whether you’re planning a casual get-together or simply want to indulge in a slice of something delicious, keep these blackberry crumble bars in your back pocket. They’re bound to impress and bring a smile to everyone’s face.
Get ready to discover how easy it is to create this unforgettable dessert that enhances any occasion!
Ingredients for Blackberry Crumble Bars
Creating delicious blackberry crumble bars starts with gathering the right ingredients to ensure a delightful experience. Let’s break it down into two essential categories: the filling and the crumble crust.
Essential Ingredients for the Filling
For the filling, you’ll need:
- Fresh blackberries: About 2 cups will bring that juicy, sweet-tart flavor that’s simply irresistible.
- Granulated sugar: Typically around 1/4 cup to enhance the berries’ natural sweetness without overpowering them.
- Lemon juice: A tablespoon of this bright acidity elevates the flavor and adds a refreshing zing.
- Cornstarch: Just 1 tablespoon will help thicken the filling, ensuring it holds together perfectly.
Ingredients for the Crumble Crust and Topping
Now, let’s talk about the crumble crust:
- All-purpose flour: Approximately 1 1/2 cups serves as the base of your crust.
- Oats: Rolled oats (3/4 cup) provide that hearty texture.
- Brown sugar: About 1/2 cup adds depth and a toasty flavor.
- Butter: You’ll need 1/2 cup, preferably unsalted, to create a rich and crumbly topping.
- Salt: A pinch will balance the sweetness.
These components come together beautifully to create blackberry crumble bars that are sure to impress your friends or make a cozy treat for yourself. For detailed prep instructions, you can check out this fabulous guide on how to make the most of your berries. Happy baking!
Preparing Blackberry Crumble Bars
Making blackberry crumble bars is not just about following a recipe; it’s a delightful experience that fills your kitchen with the sweet aroma of fresh berries and buttery crumble. This guide will walk you through the steps you’ll need to create these delicious bars. Let’s dive into the preparation!
Preheat the oven and prepare the baking pan
The first step in every baking journey is to preheat your oven. Set it to 350°F (175°C) to ensure it’s nice and warm by the time your bars are ready to go in. While that energy-efficient beast is warming up, grab a 9×9-inch square baking pan and line it with parchment paper. This makes for easy removal and cleanup later on. If you don’t have parchment paper, a light greasing with butter will also do—just make sure not to skip this step, or you might find yourself wrestling with sticky bars later!
Prepare the blackberry filling
Next up, let’s create the star of the show: the blackberry filling. You’ll need about 2 cups of fresh blackberries. If you can find them locally, that’s even better—they tend to taste sweeter. Place the blackberries in a bowl, sprinkle with 1/4 cup of granulated sugar, and gently mix them. Allow the mixture to sit for about 10 minutes. This resting is crucial; it allows the berries to release their juices, resulting in a more flavorful filling. If you’re curious about the science of flavor development, you can check out this insightful article on how fruits react when mixed with sugar.
Now, to thicken the mixture, you’ll want to sprinkle 2 tablespoons of cornstarch and a squeeze of lemon juice into the bowl. The acidity of the lemon will brighten the flavor and balance the sweetness—trust me, your taste buds will thank you!
Make the crumble crust and topping mixture
In a separate bowl, it’s time to get your hands a little messy – but in a good way! Combine 1 cup of all-purpose flour, 1 cup of rolled oats, and 1/2 cup of brown sugar. A pinch of salt will elevate the flavors nicely. Once mixed, add in 1/2 cup of softened unsalted butter, and use your fingers (or a pastry cutter) to incorporate the butter until the mixture resembles coarse crumbs.
This crumbly goodness acts as both the base and topping for your blackberry crumble bars. By using rolled oats, you add a chewy texture that contrasts perfectly with the juicy filling.
Assemble the bars
Now comes the fun part—assembly! Press half of the crumble mixture evenly into the bottom of your prepared baking pan. Pour the blackberry filling over the crust, spreading it out gently to cover every inch. Finally, sprinkle the remaining crumble mixture over the top of the blackberries, creating an even layer of deliciousness.
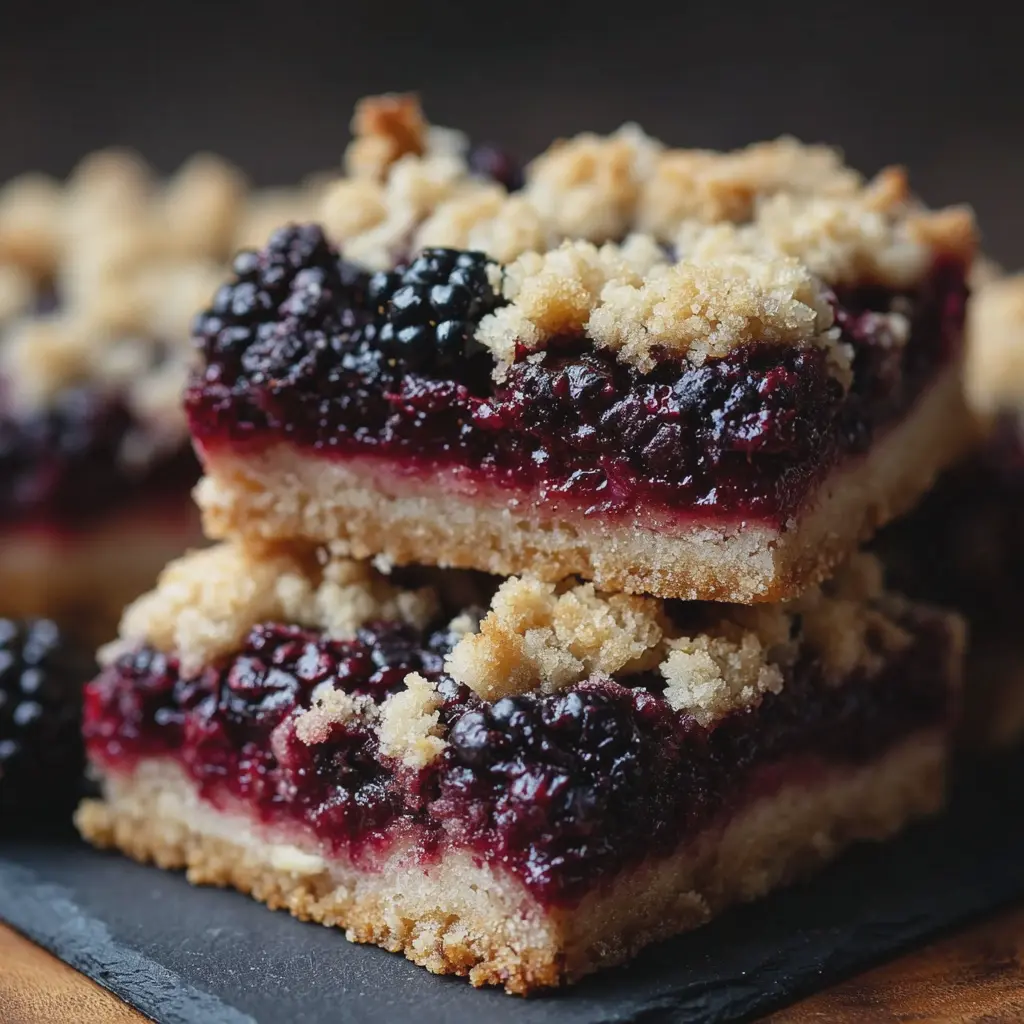
Take a moment to admire the stunning contrast between the dark blackberries and the light-colored crumble; isn’t it pretty? It’s a feast for the eyes and the taste buds alike!
Bake to perfection
Place your baking pan in the preheated oven and let your blackberry crumble bars bake for about 30-35 minutes. You’ll know they’re ready when the top is golden brown and the filling is bubbling lightly. Keep an eye on it towards the end—every oven behaves a little differently!
Once baked, allow the bars to cool in the pan for at least 15 minutes before lifting them out using the parchment paper. This cooling period helps everything set up nicely. Cut them into squares or rectangles, then serve warm or at room temperature as a sweet snack. You might even enjoy these bars with a scoop of vanilla ice cream on top for that extra touch of indulgence!
With these steps, you’re all set to create your very own blackberry crumble bars. Delicious, simple, and sure to impress, they’re perfect for sharing with friends or keeping all to yourself. Happy baking!
Variations on Blackberry Crumble Bars
Peach or Raspberry Crumble Bars
If you’re in the mood for a little twist, consider swapping out the blackberries for fresh peaches or raspberries. Both fruits offer a delightful sweetness that pairs wonderfully with the buttery crumble topping. For peach crumble bars, sliced peaches mix beautifully with a hint of cinnamon to create a summery vibe. On the other hand, raspberry bars introduce a tart contrast that can really elevate your dessert experience. According to Food52, using ripe seasonal fruits can enhance the flavor and texture of your crumble bars, making them even more enjoyable.
Gluten-Free Crumble Options
For those following a gluten-free diet, you can easily adjust the recipe without sacrificing taste. Substitute regular flour with your favorite gluten-free blend, or try alternatives like almond flour or oat flour for a nutty flavor. Here’s how to make them gluten-free:
- Flour swap: Use a 1:1 gluten-free baking flour.
- Oats: Ensure that the oats used in your crumble topping are certified gluten-free.
These alternatives not only make the dish accessible but can also add a new dimension to your blackberry crumble bars. You might even surprise yourself with your newfound love for these variations!
So, whether you stick with the classic blackberry version or try something new, these bars are sure to please everyone. Your next baking adventure awaits, don’t you think?
Cooking tips and notes for Blackberry Crumble Bars
When making blackberry crumble bars, achieving the perfect texture and flavor is essential. Here are some friendly tips to help you create an irresistible treat.
How to keep the bars from being too mushy
To ensure your blackberry crumble bars maintain a nice firmness, consider these simple steps:
- Use fresh blackberries: Frozen can release extra moisture, making your bars soggy.
- Thicken the filling: Mixing a bit of cornstarch with the blackberries can help absorb excess liquid. As a rule of thumb, one tablespoon of cornstarch for every 2 cups of berries works well.
- Cool before cutting: Let the bars cool completely before slicing. This helps the filling set up nicely.
Tips for achieving a golden brown topping
The topping is where the magic happens! For that perfect golden-brown crust:
- Chill the butter: Ensure your butter is cold before mixing it in; this leads to a crumbly texture.
- Don’t skip the brown sugar: It adds both sweetness and color, contributing to that lovely caramelized finish.
- Bake in the center: Position your blackberry crumble bars in the center of the oven for even baking.
With these tips, you’ll be well on your way to making scrumptious blackberry crumble bars that friends and family will love. Happy baking!
Serving suggestions for Blackberry Crumble Bars
Pairing with Ice Cream or Whipped Cream
Imagine biting into a warm blackberry crumble bar and then immediately getting a spoonful of vanilla ice cream melting over the top. Sounds delightful, right? The creamy texture of the ice cream complements the tartness of the blackberries perfectly. If you’re not an ice cream fan, a dollop of whipped cream works wonders, too!
- Scoop it up: Serve bars warm and let the ice cream gently melt onto them for a gooey treat.
- Flavor variations: Consider using flavored whipped cream—like lavender or vanilla bean—to elevate your dessert experience. For inspiration, check out some flavor ideas from Serious Eats.
Best Ways to Serve at Gatherings
When it comes to entertaining, blackberry crumble bars steal the show without any fuss. Cut them into bite-sized pieces for easy serving; this makes it simple for guests to enjoy while mingling.
- Platter perfection: Arrange your bars on a colorful platter and dust with powdered sugar for a chic presentation.
- Pair with drinks: They go well with flavored sparkling water or a homemade lemonade, adding a refreshing touch to your gathering.
These serving ideas not only enhance the experience of your blackberry crumble bars but also help you impress your guests effortlessly!
Time breakdown for Blackberry Crumble Bars
Preparation time
Making blackberry crumble bars is a breeze! You’ll need about 15-20 minutes to gather your ingredients and prepare the mixture. While this may seem quick, it’s the perfect time to enjoy your favorite tunes or podcast to set the mood for baking.
Baking time
The baking phase requires a bit more patience—25-30 minutes in the oven will do the trick. During this time, the delightful aroma of blackberries will fill your kitchen, making it hard to resist peeking!
Total time
In total, you’re looking at approximately 45-50 minutes from start to finish. That’s just enough time to whip up a treat that will impress your friends and family.
For more tips on perfecting your blackberry crumble bars, check out Serious Eats for additional baking insights and inspiration!
Nutritional Facts for Blackberry Crumble Bars
Calories per Serving
Indulging in blackberry crumble bars doesn’t have to ruin your healthy eating plan. Each bar typically contains around 150-200 calories. This sweet treat manages to deliver a satisfying bite while keeping your caloric intake in check. Pair it with a cup of herbal tea, and you have an afternoon snack that not only tastes good but feels good too.
Sugar and Fiber Content
When it comes to the sugar and fiber content, blackberry crumble bars pack a punch. Generally, you can expect about 10-15 grams of sugar per serving, thanks to the natural sweetness of blackberries. The fiber content is equally impressive, with approximately 3-4 grams per bar. This fiber helps support digestive health and keeps you feeling fuller longer, making these bars a smart snacking choice.
For more tips on maintaining a balanced diet, consider checking out resources from the American Heart Association or Healthline for reliable information.
FAQ about Blackberry Crumble Bars
Can I freeze blackberry crumble bars?
Absolutely! Freezing blackberry crumble bars is a great way to enjoy them later. Just let the bars cool completely, then wrap them tightly in plastic wrap or aluminum foil. Place them in an airtight container or a freezer bag to prevent freezer burn. They can last up to three months in the freezer. When you’re ready to indulge, thaw them in the fridge overnight or pop them in the microwave for a few seconds!
What if I can’t find fresh blackberries?
No worries! If fresh blackberries are out of reach, you can use frozen blackberries instead. In fact, they can be just as flavorful and often require no additional preparation. Just toss them in straight from the bag — no need to thaw! You can also consider using other berries like raspberries or blueberries for a different twist. Exploring berry varieties is part of the fun!
How do I store leftover crumble bars?
Storing leftover blackberry crumble bars is simple. Just place them in an airtight container at room temperature if you plan to eat them within a couple of days. For extended freshness, store them in the fridge, where they can last up to a week. Make sure to layer parchment paper between the bars to keep them from sticking together.
Remember, reheating your leftover bars will bring back that delightful crumbly texture and enhance the berry flavor. Want to know more about the benefits of storing berries properly? Check out this guide for tips!
Let’s get baking!
Conclusion on Blackberry Crumble Bars
The joy of sharing homemade treats
There’s something undeniably special about welcoming friends and family with blackberry crumble bars. These delightful bars are more than just a dessert; they’re a token of connection. When you share a batch of these tasty treats, you’re not just giving away food, you’re offering a piece of your heart.
Imagine a cozy gathering where laughter fills the air, and your friends savor the sweet and tangy flavors of fresh blackberries baked into a buttery crumble. Consider exploring a blog post on the benefits of sharing food or this article about the psychology of baking. These bars are perfect for picnics, coffee dates, or simply cozy nights at home. So, whip up a batch, share the joy, and relish every bite!
Print
Blackberry Crumble Bars: Easy and Indulgent Treats for Everyone
- Total Time: 50 minutes
- Yield: 12 bars
- Diet: Vegetarian
Description
These Blackberry Crumble Bars offer a delicious balance of sweet and tart flavors, making them a perfect dessert for any occasion.
Ingredients
- 1 cup all-purpose flour
- 1/2 cup rolled oats
- 1/2 cup brown sugar
- 1/4 teaspoon salt
- 1/2 cup butter, softened
- 2 cups fresh blackberries
- 1/4 cup granulated sugar
- 1 tablespoon lemon juice
Instructions
- Preheat the oven to 350°F (175°C) and grease a 9×9 inch baking pan.
- In a bowl, mix together the flour, oats, brown sugar, and salt. Add the softened butter and mix until crumbly.
- Press half of the crumble mixture into the bottom of the prepared pan.
- In another bowl, combine blackberries, granulated sugar, and lemon juice. Spoon the blackberry mixture over the crust.
- Sprinkle the remaining crumble mixture over the blackberries.
- Bake for 30-35 minutes or until the top is golden brown. Let cool before cutting into bars.
Notes
- For a sweeter option, you can add more sugar to the topping.
- Feel free to substitute blackberries with other berries like blueberries or raspberries.
- Prep Time: 15 minutes
- Cook Time: 35 minutes
- Category: Dessert
- Method: Baking
- Cuisine: American
Nutrition
- Serving Size: 1 bar
- Calories: 180
- Sugar: 10g
- Sodium: 50mg
- Fat: 8g
- Saturated Fat: 5g
- Unsaturated Fat: 3g
- Trans Fat: 0g
- Carbohydrates: 24g
- Fiber: 2g
- Protein: 2g
- Cholesterol: 25mg
")