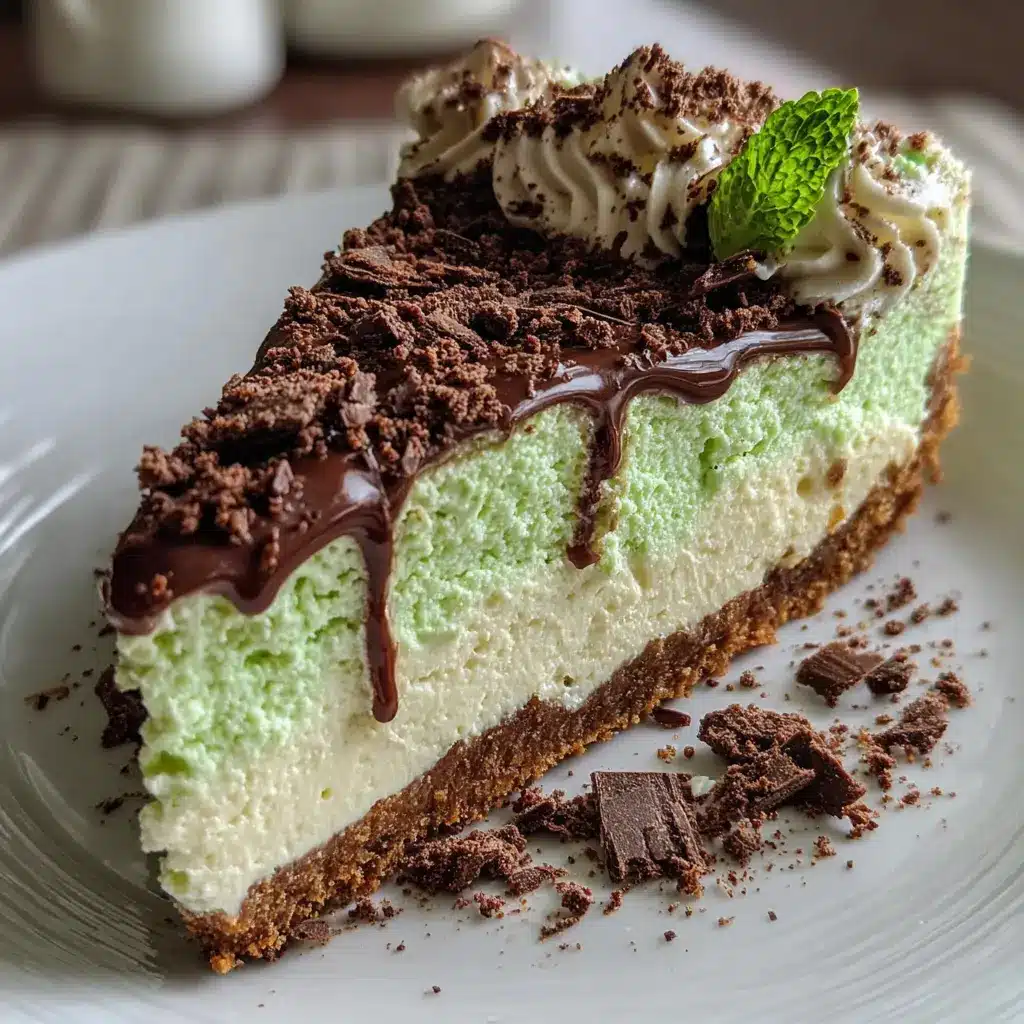
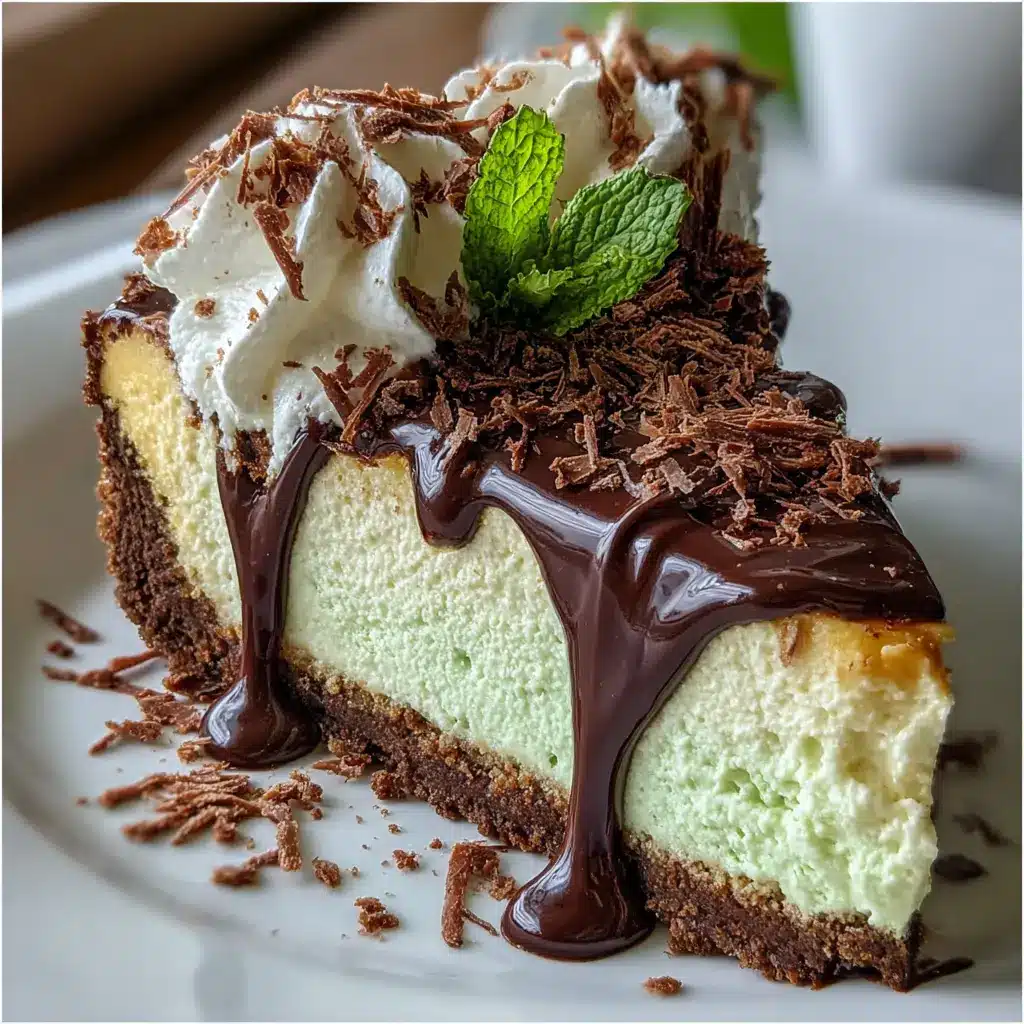
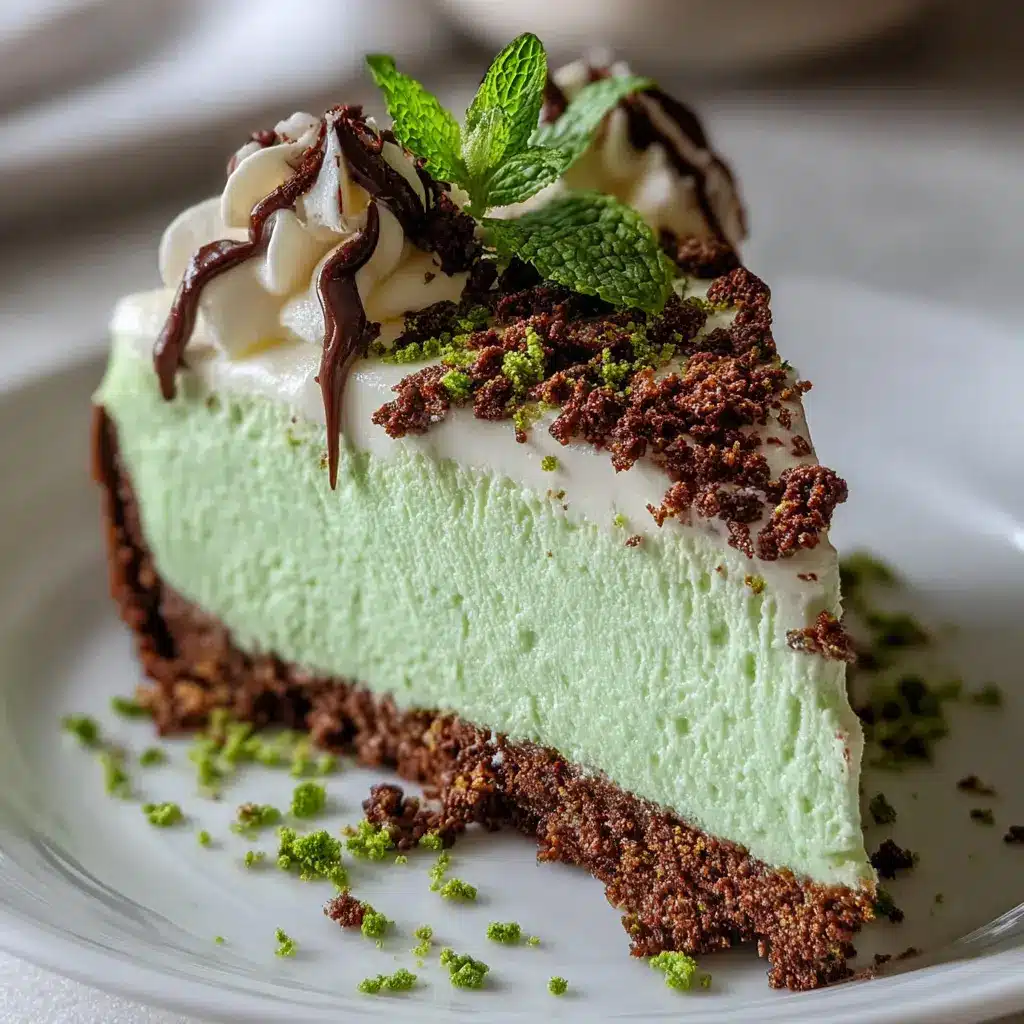
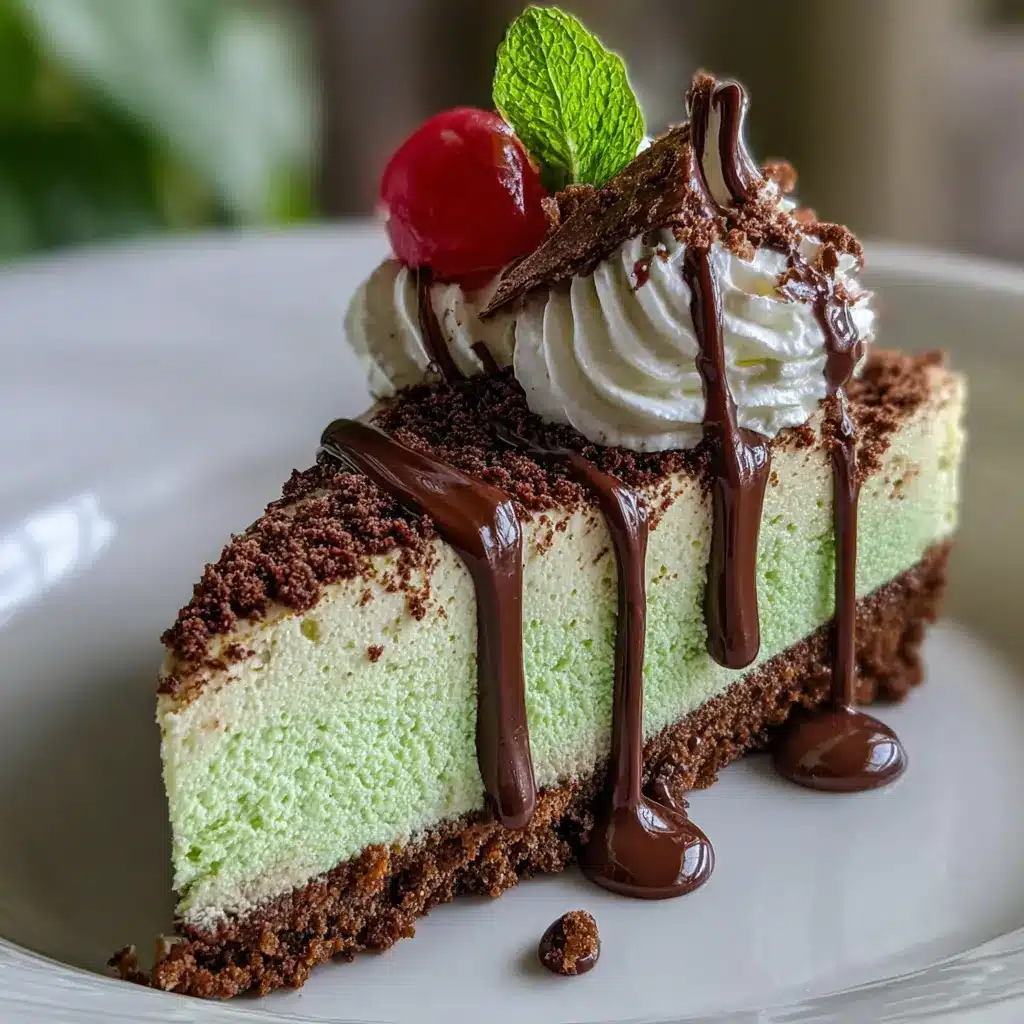
Introduction to Grasshopper Cheesecake
When it comes to indulgent desserts that also bring a touch of fun, grasshopper cheesecake is a delightful choice, especially for young professionals looking to impress at gatherings or unwind at home. Creamy, rich, and with a hint of mint, this cheesecake combines familiar flavors in an unforgettable way. Whether you’re a seasoned baker or a newbie in the kitchen, the appeal of this dessert lies in its straightforward preparation and innovative flavor profile.
Why Grasshopper Cheesecake is Perfect for Young Professionals
Time-Saving and Easy to Make
We know that young professionals are often juggling multiple responsibilities. This grasshopper cheesecake not only satisfies your sweet tooth but also has a relatively simple preparation process. Most of the ingredients are easy to find, and you don’t need intricate baking skills to create this masterpiece. Plus, it can be made in advance, allowing you to maximize your time during busy weeks.
Impressive Flavor Combination
Imagine the delightful blend of cream cheese, cool mint, and rich chocolate all coming together in a single bite. This dessert strikes the perfect balance between refreshing and indulgent, making it a fantastic conversation starter at dinner parties or casual get-togethers. The unique flavor profile is sure to impress friends and family, showing that you know how to have fun while also taking gastronomy seriously.
Perfect for Any Occasion
From casual nights in to festive gatherings, a grasshopper cheesecake fits all occasions. Its vibrant green hue is not only eye-catching but also aligns well with celebratory themes like St. Patrick’s Day or even springtime brunches. Everyone loves a dessert that brings a splash of color and joy to the table!
For those looking for more tips on making your desserts shine, check out resources such as Bon Appétit or Serious Eats. Both sites are fantastic for discovering culinary inspiration that complements your baking skills.
In summary, if you’re searching for a dessert that’s easy to prepare, deliciously elegant, and fun to share, grasshopper cheesecake should definitely be on your list. With just a few steps, you can create a dessert that’s as delightful to make as it is to enjoy. So, let’s dive into the recipe and get started!
Ingredients for Grasshopper Cheesecake
Creating a delightful grasshopper cheesecake is easier than you might think! Let’s break down the key ingredients you’ll need for this mouthwatering dessert.
Essential ingredients for the crust
To set the perfect foundation for your cheesecake, you’ll require:
- Graham cracker crumbs: About 1 ½ cups for that classic crunch.
- Granulated sugar: A few tablespoons to add sweetness.
- Unsalted butter: Melted, roughly ½ cup; it helps bind the crust together.
Ingredients for the creamy filling
The heart of your grasshopper cheesecake lies in its rich filling. Gather these:
- Cream cheese: Two packages (8 ounces each) must be at room temperature for the best texture.
- Granulated sugar: ¾ cup balances the creaminess.
- Heavy whipping cream: 1 cup will add that luscious, velvety feel.
- Peppermint extract: ½ teaspoon to capture that signature flavor.
- Green food coloring: Just a few drops to achieve that vibrant hue!
Optional garnishes for a stunning presentation
Elevate your cheesecake with some optional garnishes:
- Whipped cream: A dollop on top adds a light finish.
- Chocolate shavings or mint leaves: For an elegant touch—who doesn’t love a bit of flourish?
Now that you have your ingredients, you’re ready to impress family and friends with your homemade grasshopper cheesecake! For more tips on cheesecake variations, check out this guide on The Science of Cheesecake. Happy baking!
Step-by-Step Preparation for Grasshopper Cheesecake
Creating a delightful Grasshopper Cheesecake is not just about the final product; it’s about the joy of making it! Picture this: a creamy, minty cheesecake resting on a crisp crust, ready to dazzle your friends at your next gathering. Let’s dive into this step-by-step guide that will help you whip up this decadent treat with ease.
Prepare the crust
The first step in making your grasshopper cheesecake is to get that crust just right. A classic cheesecake typically uses a buttery crust, and for this recipe, you’ll want to go with a graham cracker or Oreo base. Choose whichever feels right for your taste buds!
Mix the crust ingredients
In a mixing bowl, combine your crust ingredients:
- 1 ½ cups of crushed graham crackers or Oreo cookies
- ½ cup of melted butter
- ⅓ cup of sugar (if using graham crackers)
Stir together until everything is well combined, creating a sandy texture. You want it moist enough to hold together but not too wet.
Chill the crust for best results
After mixing, it’s time to press that mixture into your springform pan. Use the flat bottom of a glass or measuring cup to pack it down firmly. This step ensures your grasshopper cheesecake has a solid base. For the best results, pop the crust in the fridge while you prepare the filling. Chilling helps it set and become nice and crisp.
Beat the cream cheese to perfection
Next up, you’ll want to focus on the filling. Start by beating two packages of room-temperature cream cheese in a large mixing bowl. Use a handheld mixer or stand mixer, aiming for that velvety texture. This may take about 2-3 minutes. If you’re unsure about your cream cheese’s temperature, a quick tip: it should feel soft to the touch. This will ensure a smooth and lump-free filling!
Add sugar and flavorings for that unique taste
Once your cream cheese is looking perfect, add in the following ingredients:
- ¾ cup of granulated sugar
- 1 teaspoon of vanilla extract
- 1 teaspoon of peppermint extract (you want that mint flavor to shine!)
Mix everything together until smooth. This combination of sugar and flavorings gives your filling a delightful taste that will have everyone asking for seconds.
Incorporate color to achieve that signature green
For that signature grasshopper cheesecake green, it’s time to add food coloring. A couple of drops of green food coloring will do the trick. Add until you reach your desired shade. Don’t worry; you can always add more, so start small!
Whip the cream to a light, fluffy consistency
In a separate bowl, whip 1 cup of heavy cream until it forms soft peaks. The goal here is to achieve a light, airy consistency. This step adds to the fluffiness of your cheesecake, making each bite feel like a little cloud of joy.
Fold the whipped cream into the cream cheese mixture
Now, here comes the fun part—folding! Gently incorporate your whipped cream into the cream cheese mixture. Use a rubber spatula to ensure you retain that airiness you worked hard for. This gentle folding helps maintain that light texture in your grasshopper cheesecake.
Pour the filling into the chilled crust
With everything mixed, it’s time to pour your green cheesecake filling back into the crust. Use the spatula to spread it evenly, ensuring there are no bubbles or air pockets that might ruin its perfect surface.
Chill to set before serving
Finally, cover your cheesecake with plastic wrap and refrigerate it for at least 4 hours—overnight is even better. This will allow the cheesecake to fully set up, making for a slice that holds its shape beautifully when served.
And there you have it! With these clear steps, you’re well on your way to making a delicious and visually stunning grasshopper cheesecake. Enjoy the process, and most importantly, enjoy sharing your creation! For more dessert tips and tricks, check out Epicurious and Food Network for additional inspiration.
Variations on Grasshopper Cheesecake
Mint Chocolate Chip Variation
If you’re a fan of the refreshing taste of mint chocolate chip ice cream, this grasshopper cheesecake variation is your dream come true! Start by folding finely chopped mint chocolate chips into the cheesecake batter before pouring it into your crust. Not only does this add delightful texture, but it also enhances that minty flavor we all love. For an extra touch, garnish the finished cheesecake with additional chips and a sprinkle of crushed mint leaves. This variation brings a fun, nostalgic twist that’s perfect for gatherings or just a cozy night in with friends.
Gluten-Free Crust Option
Craving a slice of grasshopper cheesecake, but need a gluten-free option? You’re in luck! Simply substitute traditional graham crackers with a gluten-free cookie or nut-based crust. Almond flour mixed with melted butter makes for a simple, delicious alternative. Here’s how you can whip it up:
- Ingredients: 1 ½ cups almond flour, ¼ cup melted coconut oil, 2 tablespoons honey or agave syrup.
- Instructions: Combine the ingredients, press them into the bottom of your cheesecake pan, and bake for about 10 minutes at 350°F. This crust not only tastes great but also complements the rich flavor of your cheesecake beautifully.
Whether you opt for the mint chocolate chip twist or the gluten-free crust, these variations ensure everyone can enjoy this decadent dessert. For more ideas on alternative crusts, check out this helpful guide on gluten-free baking techniques. Happy baking!
Cooking Tips and Notes for Grasshopper Cheesecake
Achieving a smooth filling
Getting that perfect, creamy consistency in your grasshopper cheesecake filling is essential for a delightful dessert. Start by ensuring all ingredients are at room temperature before mixing; this helps them blend evenly. If you’re using cream cheese, consider softening it in the microwave for about 20 seconds, but keep a close eye to ensure it doesn’t start melting. When mixing, beat the cream cheese, sugar, and other wet ingredients until they’re alight and fluffy—this adds air to the mixture, resulting in a light texture.
For the flecks of mint in your cheesecake, opt for high-quality mint extract or a natural green food coloring to maintain that visual appeal. Also, making sure to scrape down the bowl helps avoid any lumps and provides a smooth finish.
Tips for a perfect crust
The crust is the foundation of any grasshopper cheesecake, so let’s get it just right! Start with finely crushed graham crackers or digestive biscuits for a consistent base. For a twist, consider adding a sprinkle of cocoa powder or even crumbled turkey bacon for a salty touch—it might sound odd, but trust me, it adds depth to the flavor!
When you’re mixing the crust, use melted butter to bind everything together nicely. Don’t skimp on pressing it firmly into your pan; a sturdy crust will hold all that creamy filling beautifully. Bake it for a few minutes to set before pouring in your filling, creating a delightful contrast of textures. If you’re looking for some additional inspiration, check out the New York Times Cooking for fantastic dessert crust ideas.
Serving Suggestions for Grasshopper Cheesecake
Perfect Temptation for Special Occasions
When it comes to serving grasshopper cheesecake, think celebrations! This decadent dessert is perfect for occasions like:
- Birthdays: Surprise friends with something unique.
- Holidays: Whether it’s St. Patrick’s Day or Christmas, its alluring green hue fits right in!
- Dinner Parties: Impress your guests with a show-stopping finale.
Meal Pairings That Delight
To create a complete dining experience around your grasshopper cheesecake, consider these dinner pairings:
- Appetizers: Start with a fresh salad or creamy spinach dip served with whole-grain crackers.
- Main Course: Go for a comforting dish like herb-roasted chicken, complemented by sides like seasoned roasted vegetables and quinoa.
- Mocktail Options: Serve a refreshing sparkling water with lemon and mint to cleanse the palate.
Now, isn’t that a meal that anyone would enjoy? Consider exploring more about meal pairings through resources like Epicurious for inspiration. With these suggestions, your grasshopper cheesecake will not just satisfy your sweet tooth but create lasting memories around the table!
Time Breakdown for Grasshopper Cheesecake
Preparation Time
Getting your grasshopper cheesecake ready is easier than you might think! You’ll need about 30 minutes for the preparation, which involves mixing the crust ingredients, whipping the filling, and layering it all together. This is the fun part, where you can unleash your inner chef!
Chilling Time
Once the cheesecake is assembled, it’s time for it to chill in the refrigerator. You’ll want to let it set for at least 4 hours, but overnight is even better! This allows the flavors to blend beautifully and gives that perfect creamy texture.
Total Time
In all, you’re looking at around 4.5 to 5 hours to have your grasshopper cheesecake ready to serve. Just imagine the delight of cutting into that delicious slice after waiting! If you’re curious about more delicious desserts or want to refine your technique, check out resources like Serious Eats for expert tips. Happy baking!
Nutritional Facts for Grasshopper Cheesecake
Calories per serving
Each slice of this grasshopper cheesecake comes in at approximately 350 calories, making it a delightful treat that doesn’t completely derail your healthy eating habits. If you’re looking to satisfy your sweet tooth without guilt, this dessert strikes a lovely balance between indulgence and moderation.
Key nutritional information
When indulging in grasshopper cheesecake, it’s essential to be aware of what’s in that delicious slice. Here’s a breakdown of key nutrients:
- Total Fat: 22g
- Saturated Fat: 10g
- Cholesterol: 60mg
- Sodium: 230mg
- Total Carbohydrates: 35g
- Dietary Fiber: 2g
- Sugars: 20g
- Protein: 6g
This grasshopper cheesecake not only satisfies your cravings but offers some protein and fiber as well! For more in-depth nutritional information, sites like NutritionData and MyFitnessPal can provide fantastic insights, making it easier to keep track of your dietary needs.
FAQs About Grasshopper Cheesecake
Can I make this cheesecake ahead of time?
Absolutely! In fact, making your grasshopper cheesecake a day or two in advance can enhance its flavor. The cheesecake needs time to set properly in the refrigerator, which makes it easier to slice and gives the flavors a chance to meld. Just be sure to cover it tightly with plastic wrap or store it in an airtight container to prevent it from absorbing any odors from the fridge.
What if I don’t have heavy whipping cream?
No problem! If you find yourself without heavy whipping cream, you can substitute it with an equal amount of half-and-half or opt for a homemade alternative using milk and butter. Simply melt 1/4 cup of unsalted butter and mix it with 3/4 cup of milk to get a similar richness. While it might slightly change the texture, your grasshopper cheesecake will still come out deliciously.
How do I store leftover cheesecake?
Storing leftover grasshopper cheesecake is straightforward! Just make sure it’s covered. You can use plastic wrap or transfer it to an airtight container. It should stay fresh in the refrigerator for about 3 to 5 days. If you’re looking to extend its life, consider freezing it. Just slice portions before freezing, wrap them tightly, and store in a freezer-safe container—this way, you can enjoy a slice whenever the craving hits!
For further tips on storing dairy products, you might find this USDA resource useful. Enjoy your delicious grasshopper cheesecake!
Conclusion on Grasshopper Cheesecake
Making grasshopper cheesecake at home is not just a baking task; it’s an opportunity to impress your friends and enjoy a delightful dessert that combines refreshingly minty flavors with rich creaminess. By whipping up this treat in your kitchen, you get to customize it to your taste, perhaps substituting the typical ingredients for healthier options or adding your favorite toppings.
You’ll find that homemade desserts bring a sense of accomplishment and joy that store-bought options simply can’t match. Plus, this cheesecake is perfect for any occasion, whether it’s a cozy dinner party or a casual gathering with friends. So, gather your ingredients, unleash your creativity, and indulge in the sweet taste of success. For more inspiration, check out Epicurious and discover even more delicious dessert ideas!
Print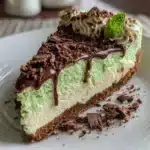
Grasshopper Cheesecake: The Best Indulgent Treat for Home Chefs
- Total Time: 4 hours 20 minutes
- Yield: 8 servings
- Diet: Vegetarian
Description
Indulge in the rich and refreshing flavors of Grasshopper Cheesecake, a delightful treat that combines the classic taste of mint and chocolate.
Ingredients
- 1 1/2 cups graham cracker crumbs
- 1/4 cup granulated sugar
- 1/2 cup unsalted butter, melted
- 2 cups cream cheese, softened
- 1 cup powdered sugar
- 1 teaspoon vanilla extract
- 1/2 cup heavy cream
- 1/2 cup mint chocolate syrup
- 1/4 cup green food coloring
- 2 cups whipped cream for topping
Instructions
- Preheat the oven to 325°F (162°C).
- In a medium bowl, mix graham cracker crumbs, granulated sugar, and melted butter.
- Press the mixture into the bottom of a 9-inch springform pan.
- In a large mixing bowl, beat the cream cheese until smooth.
- Add in powdered sugar, vanilla extract, and mint chocolate syrup, mixing until combined.
- Fold in heavy cream and green food coloring until fully incorporated.
- Pour the cheesecake filling over the crust and smooth the top.
- Bake for 45 minutes, or until the center is set.
- Remove from the oven and let cool completely before refrigerating for at least 4 hours.
- Top with whipped cream before serving.
Notes
- For a stronger mint flavor, increase the amount of mint chocolate syrup.
- This cheesecake can be made a day in advance for best flavor.
- Prep Time: 20 minutes
- Cook Time: 45 minutes
- Category: Dessert
- Method: Baking
- Cuisine: American
Nutrition
- Serving Size: 1 slice
- Calories: 320
- Sugar: 24g
- Sodium: 250mg
- Fat: 22g
- Saturated Fat: 12g
- Unsaturated Fat: 8g
- Trans Fat: 0g
- Carbohydrates: 30g
- Fiber: 1g
- Protein: 4g
- Cholesterol: 80mg
")