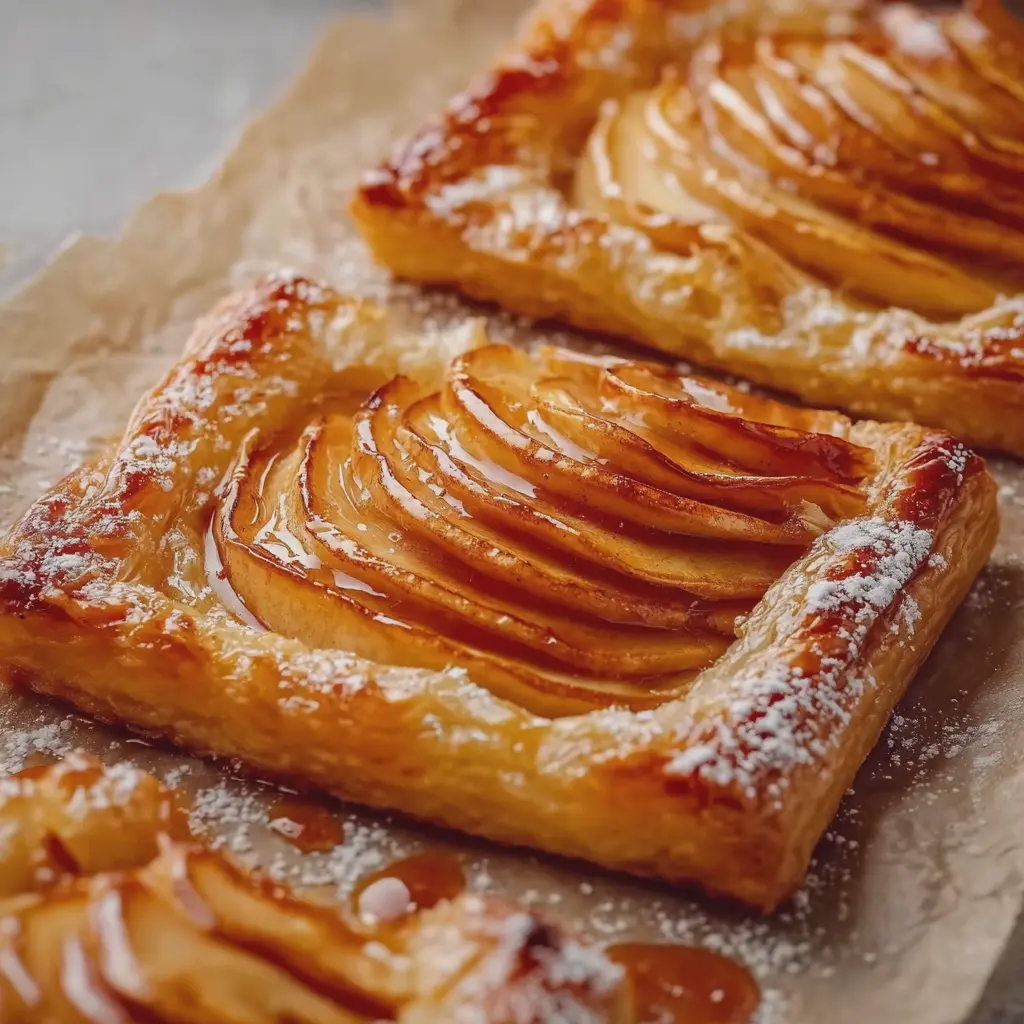
Introduction to Puff Pastry Apple Tart
The joy of homemade desserts
There’s something incredibly rewarding about whipping up a dessert from scratch, especially when it’s a crowd-pleaser like a puff pastry apple tart. Imagine the delightful aroma of apples and spices wafting through your kitchen, enveloping your home in a warm, welcoming embrace. Homemade desserts not only satisfy your sweet tooth but also create lasting memories, whether you’re baking for family gatherings or enjoying a quiet evening at home.
For many, baking is a creative outlet, a way to unwind after a busy week. The blend of precise measurements and artistic flair brings out the inner chef in all of us. Plus, when you opt for homemade, you can control the ingredients, ensuring freshness and flavor that store-bought alternatives simply can’t match. If you’re curious about the joy of baking, check out this fantastic guide on the benefits of homemade desserts.
Why choose puff pastry for your tart?
When it comes to creating that perfectly flaky and buttery crust for your tart, puff pastry is an absolute game changer. Unlike traditional doughs, puff pastry is layered with butter, which creates a light, airy texture as it bakes. It rises beautifully, giving your tart an elegant appearance—a standout centerpiece for any dessert table.
Here are a few reasons to love puff pastry for your apple tart:
- Ease of Use: Puff pastry is available in pre-made sheets, allowing even novice bakers to achieve professional-looking results without the hassle of making dough from scratch.
- Versatility: While this recipe focuses on apples, puff pastry can be paired with a range of fruits, chocolate, or even savory fillings, making it a staple in your baking repertoire.
- Incredible Texture: The unique layering creates a delightful crunch that perfectly contrasts the tender, juicy apples.
Combining these advantages, a puff pastry apple tart not only appeals to the taste buds but also to the senses. Next time you’re in the mood for a treat, remember that making this delightful dessert can be as easy as pie—well, in this case, tart! If you’re looking for more baking inspiration, check out this comprehensive guide to fruit tarts.
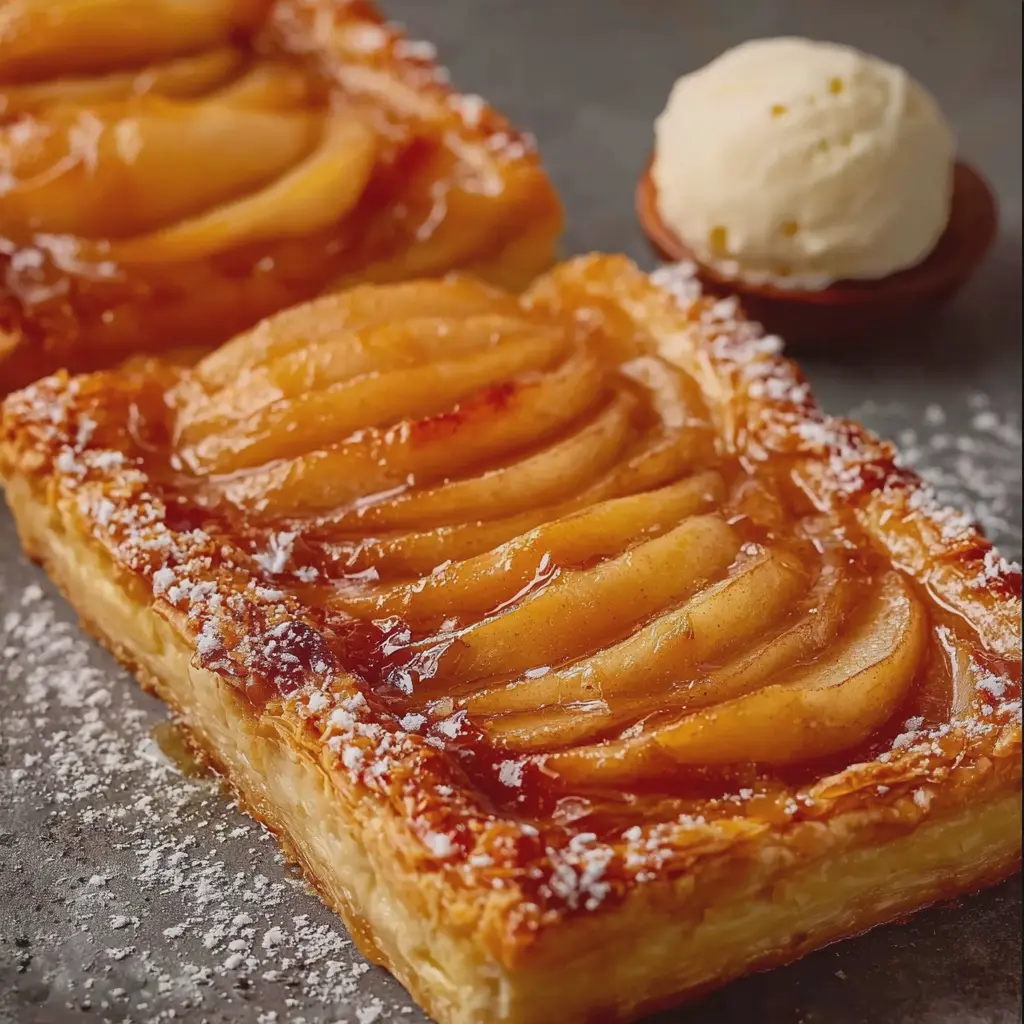
Ingredients for Puff Pastry Apple Tart
Creating a delightful puff pastry apple tart is an exciting culinary adventure! You’ll need a handful of fresh ingredients to ensure your tart shines with flavor and texture. Here’s what you’ll want to gather:
- Puff Pastry: Store-bought or homemade, this flaky base is the star of the show. Aim for quality, as it provides that irresistible buttery crunch.
- Apples: Choose a mix of sweet and tart varieties like Granny Smith and Honeycrisp for a well-rounded taste. Around 3 to 4 should do.
- Sugar: Granulated sugar helps balance the tartness of the apples. Brown sugar can add a hint of molasses flavor if you prefer.
- Cinnamon & Nutmeg: A sprinkle of these spices elevates your tart, evoking the cozy warmth of fall.
- Butter: A few pats of unsalted butter brushed on top will add richness and assist in browning the pastry.
For more tips on apple varieties, check out resources from sites like The Kitchn or Serious Eats. Ready to dive into baking? Let’s make magic in the kitchen!
Preparing Puff Pastry Apple Tart
Creating a classic puff pastry apple tart may sound intimidating, but it’s truly a delightful experience that can elevate your dessert game without requiring you to be a pastry chef. Let’s break down this process into manageable steps that will have your kitchen filled with the warm aromas of baked apples and flaky pastry.
Preheat and Prepare Your Baking Pan
The first step is always about setting the stage. Preheat your oven to 400°F (200°C). This ensures that the puff pastry turns beautifully golden and rises perfectly as it bakes. While the oven is heating up, grab a baking sheet and line it with parchment paper. This not only prevents any sticking but also aids in easy clean-up later. Trust me, you’ll appreciate this step when it’s all said and done!
Unfold and Cut the Puff Pastry
Next, get your puff pastry, which you can find in the freezer section of most grocery stores. Allow it to thaw for about 30 minutes at room temperature. Once it’s pliable, unfold it carefully to avoid tearing. Don’t worry if you get a couple of cracks; it happens to the best of us!
Using a pizza cutter or sharp knife, cut the pastry into rectangles or squares. About 4×4 inches works great for individual tarts. If you want to get a bit fancy, you can use a round cookie cutter for a circular shape. The key is to ensure that each piece is roughly the same size for even baking.
Prepare the Apple Filling
Ah, the star of the show: the apple filling! For this step, you’ll need about 3-4 medium-sized apples, preferably a mix of sweet and tart varieties (like Granny Smith and Honeycrisp). Core and thinly slice them—aim for even slices so they cook uniformly.
In a mixing bowl, toss the apple slices with sugar, cinnamon, and a splash of lemon juice. This not only enhances the flavor but helps prevent browning (because who wants a dull apple tart?). You can also add a pinch of nutmeg for an extra layer of warmth.
Here’s a fun tip: while you’re chopping, think about adding some raisins or chopped nuts for an additional crunch. You can find more inspiration for apple combinations on Serious Eats.
Assemble the Tarts
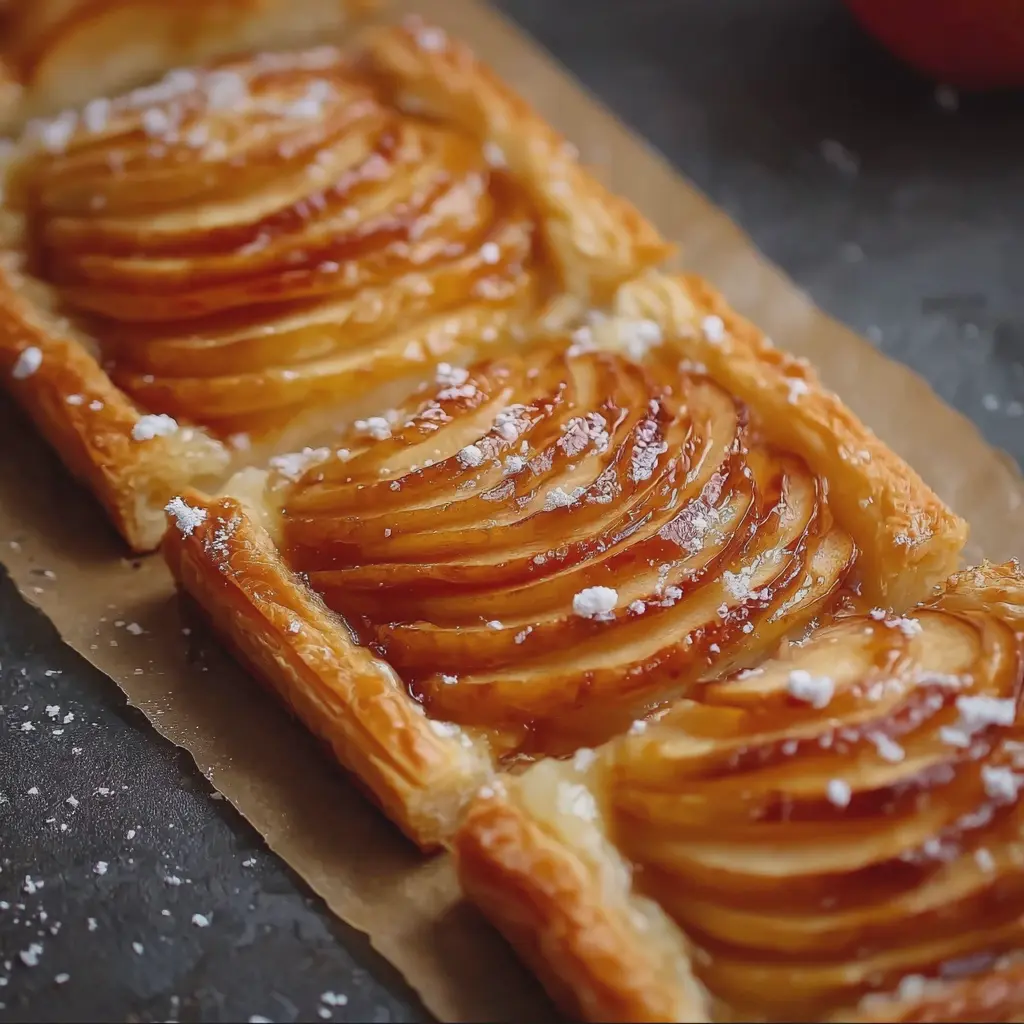
Once your filling is ready, it’s time for the fun part! Take each piece of puff pastry and lay it on the prepared baking sheet. Use a fork to create a border by gently pressing down about half an inch from the edge—this helps form a little wall that will keep all that juicy apple goodness inside.
Spoon your apple mixture onto the center of each pastry. Don’t be shy; there’s no such thing as too many apples! You can also brush the edges lightly with an egg wash made from one beaten egg and a tablespoon of water. This will give your tarts that enviable golden sheen as they bake.
Bake to Golden Perfection
Now that your puff pastry apple tarts are all assembled, pop them into the preheated oven. Bake for about 20-25 minutes or until the pastry has risen and is beautifully golden. You might want to rotate the baking sheet halfway through to ensure even browning.
Once out of the oven, allow them to cool for a few moments before serving. You can dust them with powdered sugar or serve them warm with a scoop of vanilla ice cream or a dollop of whipped cream. The contrast of hot pastry and cold dessert is simply divine!
With these straightforward steps, your puff pastry apple tart is sure to impress anyone lucky enough to indulge. Enjoy the process, and don’t forget to snap a photo for Instagram—your friends will want to know how to make this too!
Variations on Puff Pastry Apple Tart
Adding Nuts for Texture
Enhancing your puff pastry apple tart with nuts is a fantastic way to bring in extra flavor and crunch. Consider adding a handful of chopped walnuts, pecans, or almonds to the apple filling. Not only do these nuts provide a delightful texture contrast, but they also complement the sweetness of the apples beautifully. For a touch of indulgence, try toasting the nuts beforehand to heighten their flavor. If you have a sweet tooth, a sprinkle of brown sugar on top of the nuts can create a caramelized layer during baking, adding a delicious twist to your tart.
Exploring Different Fruit Combinations
While apples are a classic choice, don’t be afraid to experiment with other fruits. Pears, for instance, pair wonderfully with apples and bring a subtle sweetness to the puff pastry apple tart. Feel adventurous? Try a mix of berries, such as blueberries or raspberries, to create a vibrant tart with a tangy punch. Seasonal fruits like peaches or plums can also shine in this dish, allowing you to enjoy a delightful variation all year round.
You can even consider adding a hint of citrus zest—think lemon or orange—to elevate the tart’s flavor profile. For more inspiration, check out this guide on fruits in baking that highlights ideal pairings and tips.
In summary, by integrating nuts and experimenting with various fruits, the possibilities for your puff pastry apple tart become endless. Get creative and let your taste buds guide you!
Cooking tips and notes for Puff Pastry Apple Tart
Ensuring the pastry puffs perfectly
To achieve that desirable puff pastry effect, start with cold dough and a preheated oven. A hot oven (around 400°F) helps steam form quickly, creating those flaky layers. Roll out your pastry on a lightly floured surface to avoid sticking, and don’t forget to cut slits in the edges for decorative flair. Make sure to apply an egg wash before baking—this not only gives your crust that lovely golden color but also seals in the moisture.
Tips for slicing apples
For your puff pastry apple tart, choosing the right apples is key. Opt for a mix of tart and sweet apples like Granny Smith and Honeycrisp. When slicing, aim for thin, even pieces to ensure they cook uniformly. A mandoline slicer can speed up this process, making for perfectly consistent slices. As you layer them on the pastry, don’t shy away from overlapping; it adds texture and looks beautiful!
For additional resources, you might find this guide on apple varieties incredibly helpful when making your selection. Enjoy your baking!
Serving suggestions for Puff Pastry Apple Tart
Classic accompaniments
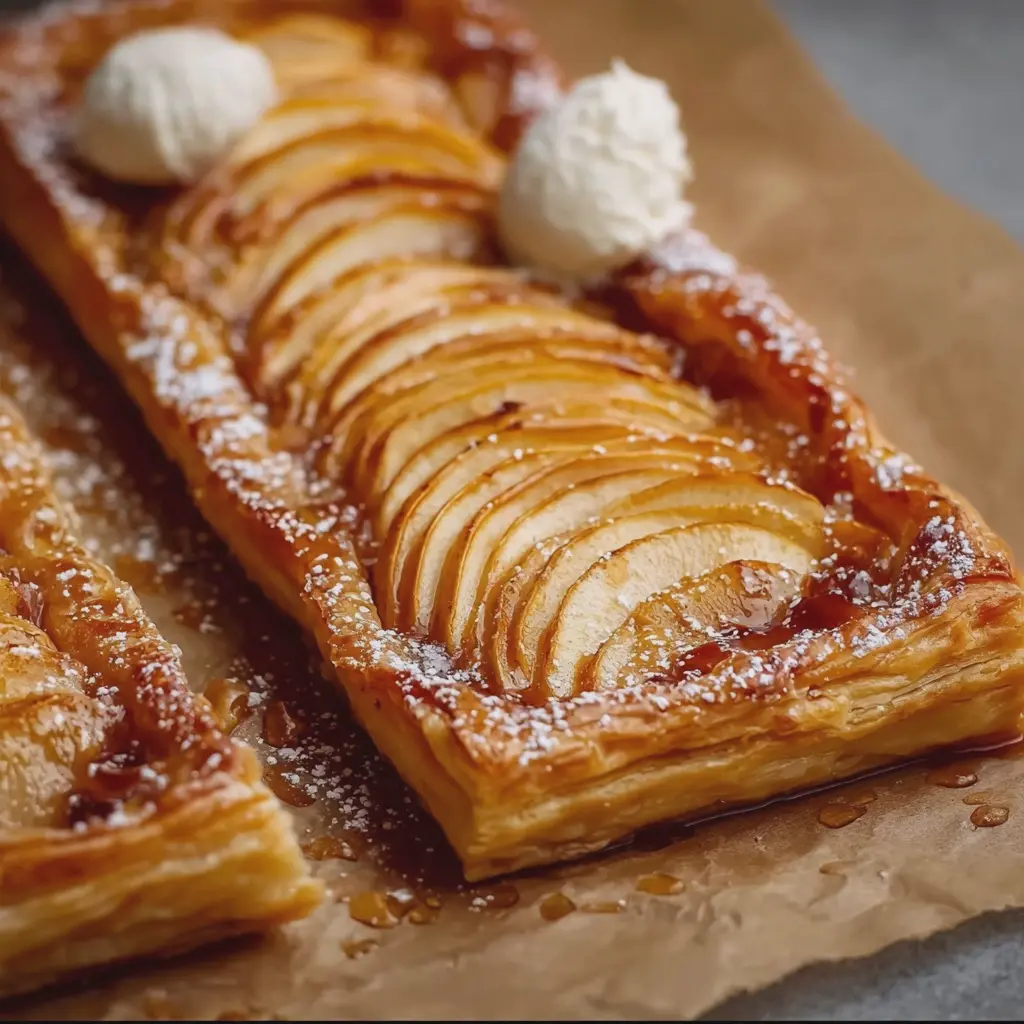
When you’re ready to enjoy your puff pastry apple tart, consider pairing it with classic accompaniments that elevate the experience. A dollop of fresh whipped cream or a scoop of vanilla ice cream can create a delightful contrast to the tart’s flaky, buttery layers. If you’re in the mood for something extra indulgent, drizzle some caramel sauce over the top — it’s an excellent balance of sweetness!
Don’t forget about flavors that complement apple beautifully, like cinnamon or nutmeg. A sprinkle of these spices right before serving can add warmth and depth to each bite. For a refreshing twist, a side of Greek yogurt with honey can enhance the flavor while providing a creamy texture.
Creative serving ideas
Looking to get a bit adventurous with your puff pastry apple tart? Try transforming it into a breakfast treat by serving it with turkey bacon or chicken ham, paired with a side of fresh fruit. You could even turn it into a sophisticated dessert by accompanying it with a chai tea or a fruity herbal tea for an aromatic experience.
For a fun twist, consider cutting the tart into smaller pieces and turning it into mini tarts for gatherings or brunches. They’re perfect for sharing and add a playful touch to your table. If you want to jazz it up, try topping individual servings with a sprinkle of toasted nuts for added crunch.
So, what’s your favorite way to enjoy puff pastry apple tart? Feel free to explore your creativity while serving it!
Time breakdown for Puff Pastry Apple Tart
Preparation time
Getting ready for your puff pastry apple tart is a breeze! You’ll typically need about 15 to 20 minutes to gather ingredients and slice your apples. Make sure to take the time to prep everything so that once you start, it flows smoothly.
Cooking time
Once you’ve got your apples arranged on that lovely puff pastry, it’s time to bake! Expect about 25 to 30 minutes in the oven, where the magic happens. The aroma will fill your kitchen, making your mouth water in anticipation.
Total time
In total, you’re looking at around 45 to 50 minutes from start to finish. Perfect for a casual weekend dessert or a quick treat for guests. This puff pastry apple tart can also serve as a lovely centerpiece for your dinner table.
If you want to dive deeper into perfecting your pastry skills, check out this guide for some expert tips!
Nutritional facts for Puff Pastry Apple Tart
When you’re about to indulge in a puff pastry apple tart, it’s good to know what’s in it and how it can fit into your meal. Here’s a breakdown of its nutritional profile to help you enjoy the treat mindfully.
Calories
A typical slice of puff pastry apple tart contains approximately 250-300 calories. This means you can enjoy a slice without straying too far from your daily caloric goals.
Sugar Content
Expect to find about 12-15 grams of sugar per slice. While this may seem high, it’s mostly derived from the apples and any added sugar needed to enhance their natural sweetness.
Serving Size
A standard serving size for this delightful dessert is around one slice, often allowing you to savor the flavors without overindulging. Sharing is also a great way to enjoy it with friends!
For further insights on calories in desserts, you may refer to resources like the USDA FoodData Central. Understanding the nutrition in treats can aid in maintaining a balanced diet—something we all strive for!
FAQs about Puff Pastry Apple Tart
Can I use frozen apples?
Absolutely! Using frozen apples in your puff pastry apple tart is a convenient alternative, especially if fresh apples aren’t available. Just be sure to thaw them completely and drain any excess moisture before adding them to your tart. This will help keep your pastry crisp and prevent it from getting soggy. If you want to enhance the flavor, consider tossing the thawed apples with a sprinkle of cinnamon and sugar before placing them on the pastry.
What if I don’t have puff pastry?
No puff pastry? No problem! You can make your own using flour, butter, and a few essential ingredients. Alternatively, consider using phyllo dough for a flaky finish. Though the texture may be different, it can create a delightful crispness that pairs well with the apple filling. For a sweeter touch, even a simple homemade biscuit dough can work in a pinch. Check out this homemade puff pastry recipe for guidance.
How to store leftover tarts?
If you find yourself with leftover puff pastry apple tart, store it in an airtight container at room temperature for up to two days. If you want to enjoy it beyond that, wrap it tightly in plastic wrap and place it in the fridge for up to four days. For longer storage, you can freeze slices, and when you’re ready to indulge, just reheat them in the oven to restore that crispiness. Remember, nothing beats the fresh-baked taste, so enjoy it while it lasts!
Conclusion on Puff Pastry Apple Tart
Creating a delightful puff pastry apple tart is not just about following a recipe; it’s an experience that marries simplicity and elegance. As you savor each bite, you’ll appreciate how the flaky pastry complements the sweet, spiced apples. This dessert is perfect for any occasion, from a casual dinner to a festive gathering.
Consider enhancing your tart with a scoop of vanilla ice cream or a drizzle of caramel sauce for an unforgettable presentation. Remember, the key to a successful tart lies in using fresh ingredients and allowing your creativity to shine—don’t hesitate to experiment with different spices or toppings. For more tips on baking and presentations, check out The Spruce Eats for inspiration. Happy baking!
Print
Puff Pastry Apple Tart: The Easy Indulgence Everyone Loves
- Total Time: 45 minutes
- Yield: 8 servings
- Diet: vegetarian
Description
A delicious and simple dessert, this Puff Pastry Apple Tart is perfect for any occasion.
Ingredients
- 1 sheet puff pastry
- 3 medium apples, cored and sliced
- 1/4 cup sugar
- 1 teaspoon cinnamon
- 1 tablespoon lemon juice
- 1 egg (beaten, for egg wash)
- 1 tablespoon butter, cut into small pieces
Instructions
- Preheat the oven to 400°F (200°C).
- Roll out the puff pastry on a floured surface and place it on a baking sheet.
- Arrange the sliced apples on top of the pastry.
- In a bowl, mix sugar, cinnamon, and lemon juice. Sprinkle over the apples.
- Dot with butter pieces.
- Brush the edges of the pastry with the beaten egg.
- Bake for 25-30 minutes or until the pastry is golden brown.
- Let cool slightly before serving.
Notes
- Serve warm with ice cream for an extra treat.
- You can add nuts or raisins for added flavor.
- Prep Time: 15 minutes
- Cook Time: 30 minutes
- Category: dessert
- Method: baking
- Cuisine: American
Nutrition
- Serving Size: 1 slice
- Calories: 250
- Sugar: 12g
- Sodium: 150mg
- Fat: 14g
- Saturated Fat: 8g
- Unsaturated Fat: 5g
- Trans Fat: 0g
- Carbohydrates: 30g
- Fiber: 2g
- Protein: 3g
- Cholesterol: 30mg