Introduction to Homemade Crunch Bars
When you think of a quick treat that satisfies your sweet tooth, crunch bars can quickly come to mind. But have you ever considered making your own? Homemade crunch bars aren’t just a fun kitchen project; they can also be more satisfying than grabbing a candy bar from the store. Let’s dive into why you might want to whip up a batch in your own kitchen!
Why Choose Homemade Crunch Bars Over Store-Bought?
-
Quality Control: One of the best parts about making homemade crunch bars is that you control every ingredient. You can choose high-quality chocolate, opt for organic cereals, or even select healthier sweeteners. By making them at home, you avoid the long list of preservatives and artificial ingredients often found in package treats.
-
Customizable to Your Taste: Store-bought varieties come with a standard taste and texture, but homemade allows for delightful creativity! Consider adding your favorite nuts, dried fruits, or even a pinch of sea salt for that perfect balance of sweet and salty. Want a vegan option? Just swap out butter for coconut oil or use plant-based chocolate!
-
Cost-Effective: Most crunch bars you find in stores can be surprisingly pricey, especially if you’re looking for the premium versions. With simple ingredients, homemade crunch bars can often be made for a fraction of the cost—plus, you can make a large batch to enjoy throughout the week.
-
Fun Activity: Cooking can serve as a fantastic stress-reliever. Imagine spending a leisurely afternoon in your kitchen, perhaps with some tunes playing, mixing ingredients, and bonding with friends or family. There’s something wonderfully satisfying about the whole process.
-
Nutrition Boost: By making your own, you can pack in the goodness. Adding ingredients like nuts boosts protein and fiber content, making your crunch bars not just a treat but also a more nutritious choice than their candy counterparts.
Feeling inspired? With such a compelling list of benefits, why not give these homemade crunch bars a try? You’ll not only enjoy a tasty snack but might also impress your friends with your baking prowess. For more ideas on healthy snacks, check out Healthline for insights into making better choices.
Ingredients for Homemade Crunch Bars
Essential ingredients you’ll need
Creating the perfect homemade crunch bars is simpler than you think! Here’s a straightforward list of the core ingredients you’ll need:
- Crispy rice cereal: This gives your bars that satisfying crunch.
- Chocolate: Milk, dark, or even white chocolate will work beautifully. Just make sure it’s high quality for the best flavor.
- Peanut butter or almond butter: A must for adding creaminess and a delightful nutty taste.
- Sweetener: You can use granulated sugar, honey, or maple syrup for a touch of sweetness.
- Butter: Adds richness and helps bind everything together.
Optional add-ins for extra flavor
If you’re feeling adventurous, here are some optional add-ins that can elevate your homemade crunch bars:
- Nuts: Chopped almonds, walnuts, or pecans can add an extra layer of crunch.
- Dried fruits: Think raisins, cranberries, or apricots for a chewy twist.
- Spices: A pinch of cinnamon or a splash of vanilla extract can enhance the flavor significantly.
Feel free to get creative! For more ingredient ideas, check out sites like Food Network or Bon Appétit for inspiration. Happy cooking!
Step-by-step preparation of Homemade Crunch Bars
Making your own homemade crunch bars can be an incredibly rewarding and delicious experience. With just a few simple ingredients, you can create a sweet treat that’s perfect for sharing (or keeping all to yourself!). So, let’s dive into the step-by-step process of preparing these delightful snacks.
Gather your materials
Before you start whipping up your homemade crunch bars, it’s essential to have all your ingredients and tools ready. Here’s what you’ll need:
-
Ingredients:
-
1 cup of chocolate chips (milk, dark, or a mix)
-
1 cup of creamy peanut butter (or your preferred nut butter)
-
3 cups of crispy rice cereal
-
Optional toppings: chopped nuts, dried fruit, or extra chocolate for drizzling
-
Tools:
-
A medium saucepan
-
A spatula or wooden spoon
-
A baking pan (8×8 inches is ideal) lined with parchment paper
-
A mixing bowl
It’s a good idea to measure out your ingredients first; it makes the process go smoother. Plus, you won’t have to scramble around the kitchen while you’re melting that delicious chocolate.
Melt the chocolate and peanut butter
In a medium saucepan over low heat, combine your chocolate chips with the creamy peanut butter. Stir constantly to ensure everything melts evenly and doesn’t scorch.
Pro tip: If you have a microwave, this step can also be done in a microwave-safe bowl. Heat the mixture in 30-second intervals, stirring in between until smooth. The aroma alone is INCREDIBLE! If you want to take this up a notch, consider using dark chocolate for a richer flavor.
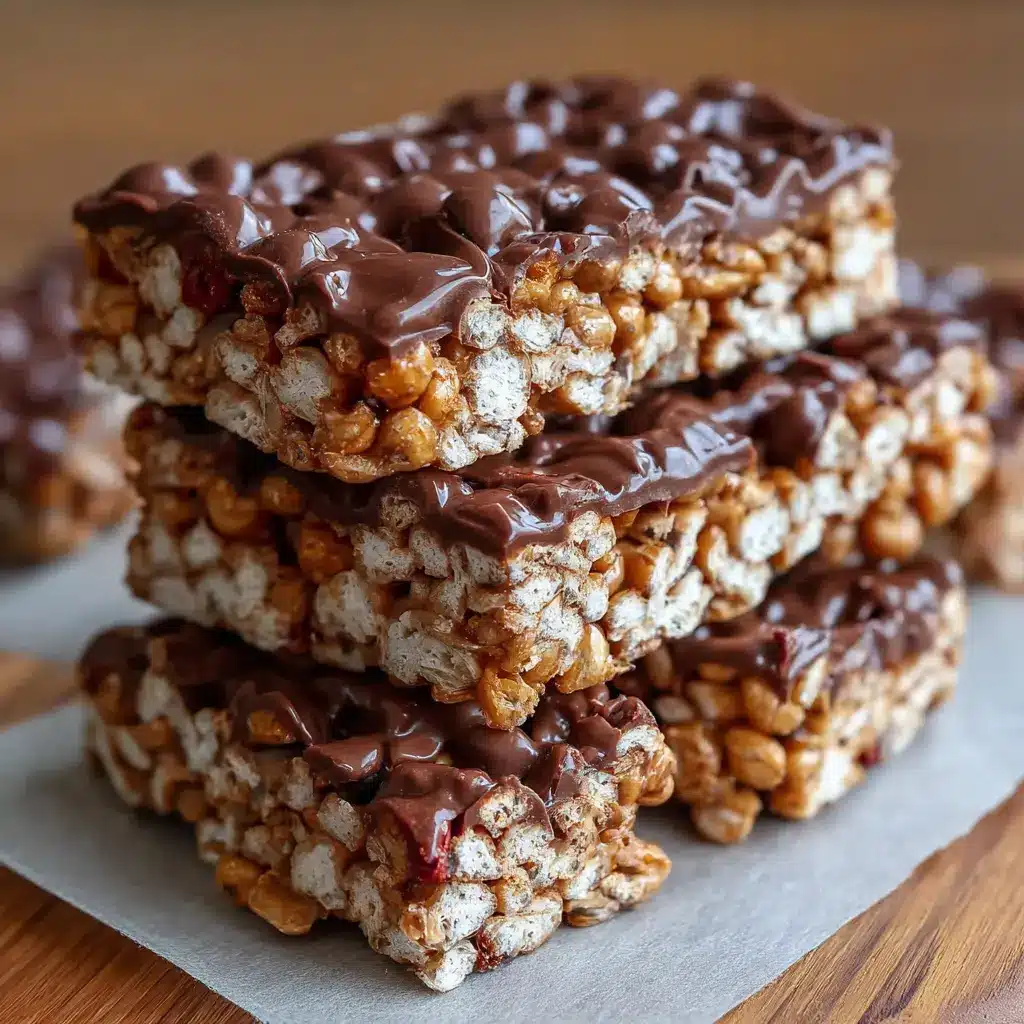
Combine the crispy rice cereal
Once your chocolate and peanut butter mixture is beautifully melted and combined, pour it into a mixing bowl. Now, it’s time for the star of the show: your crispy rice cereal.
Gently fold in the cereal until every piece is coated. It’s essential to do this delicately; you want to keep that delightful crunch! Feel free to throw in some chopped nuts or dried fruit at this stage if you want to add extra texture and flavor.
Pour and press into the baking pan
Now for the fun part—pouring the mixture into your lined baking pan. Use a spatula to spread the mixture evenly. Press down firmly so it sticks together, but try not to crush the cereal too much. The firmer you pack it now, the better your homemade crunch bars will hold together later.
Chill the mixture
This step calls for a little patience, but it’s totally worth it! Place your baking pan in the fridge and let it chill for at least 1-2 hours. This is an excellent time to tidy the kitchen or plan which shows you’re going to binge while you wait! The chilling helps the bars set properly, making them easier to slice later.
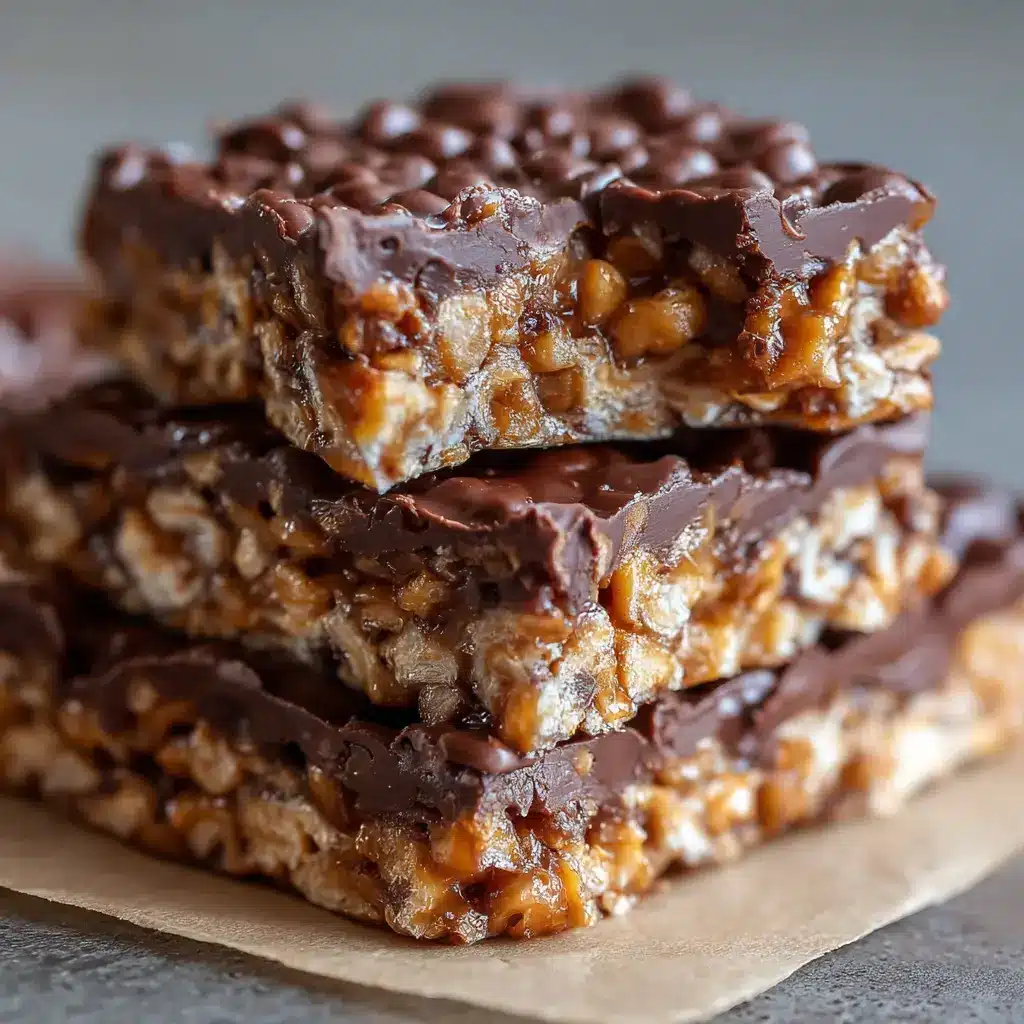
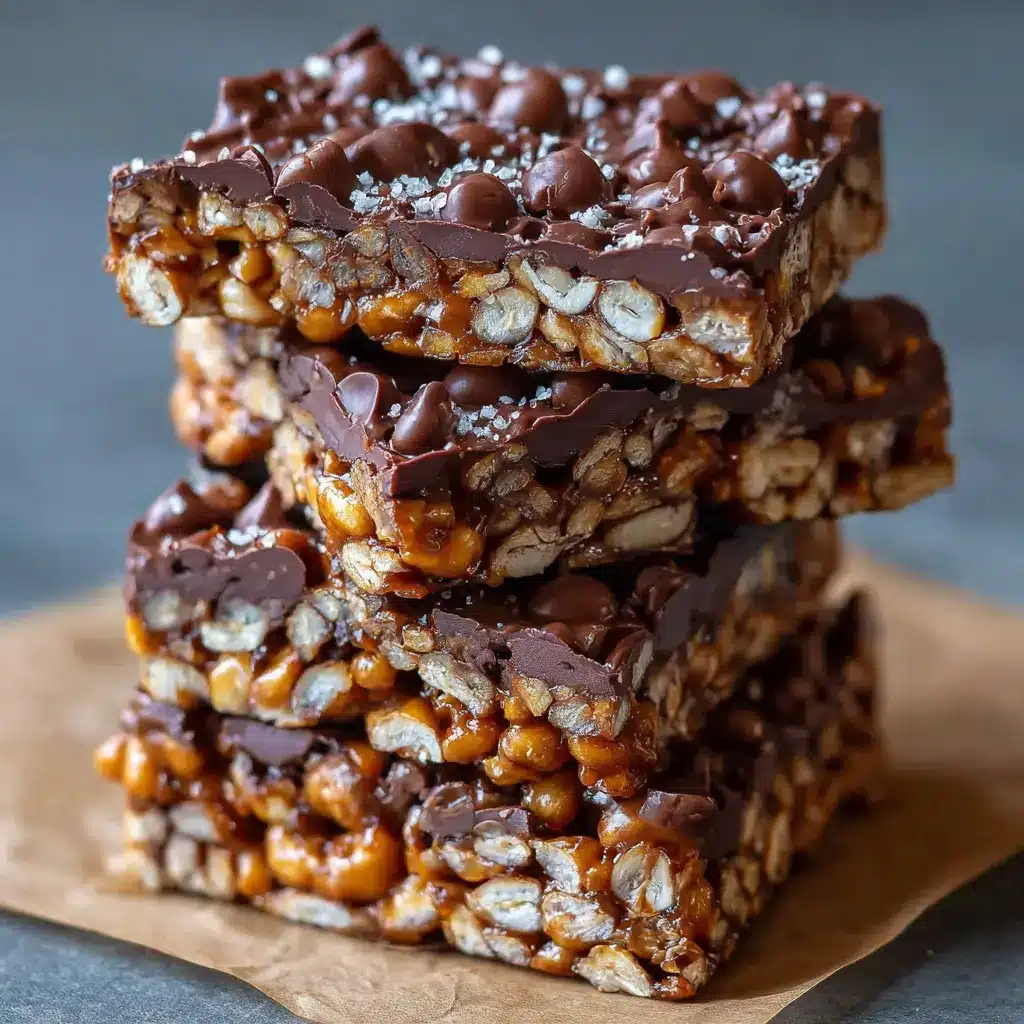
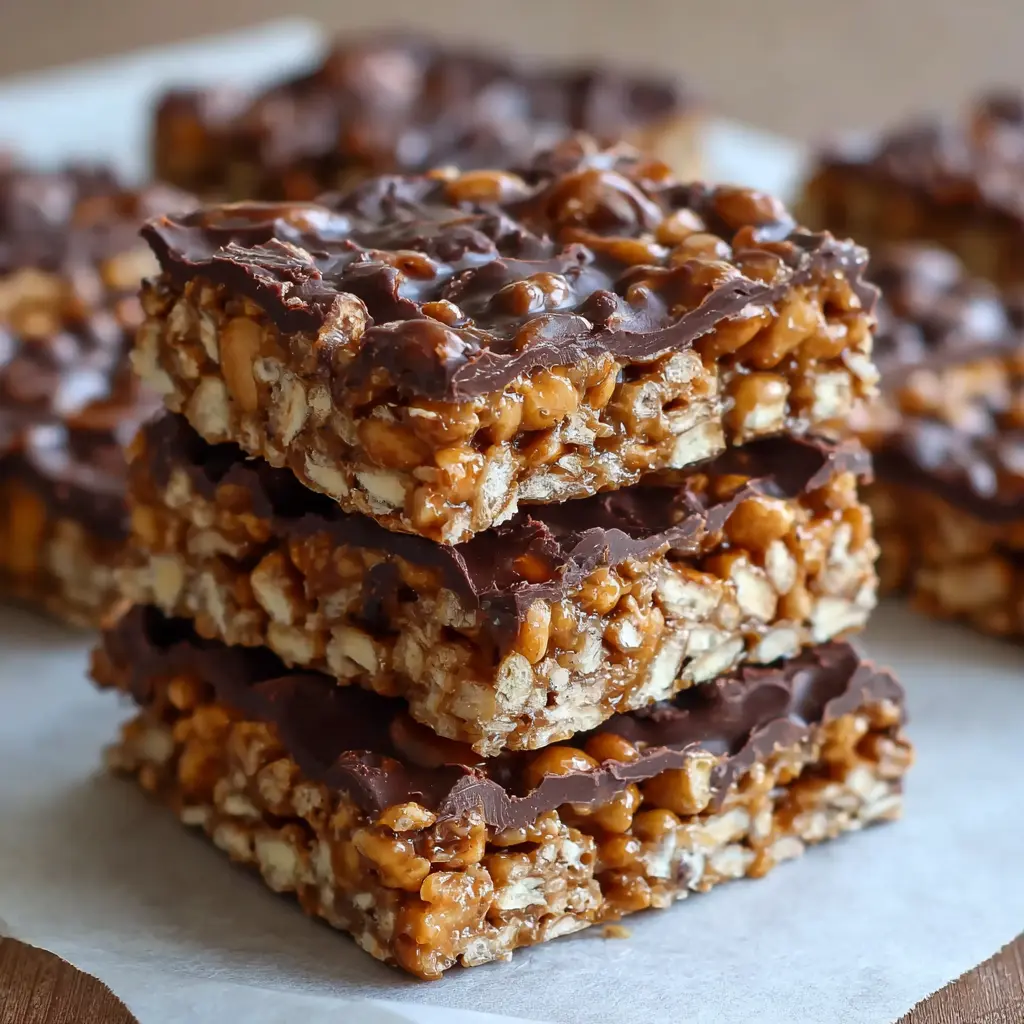
Slice and enjoy
Once your homemade crunch bars have chilled and set, remove the baking pan from the fridge. Use the parchment paper to lift the entire block out and place it on a cutting board. With a knife, cut into squares or rectangles, depending on your preferred serving size.
Store the bars in an airtight container in the fridge, and they should last for about a week. But let’s be honest—you’ll probably devour them long before then!
If you want to elevate your crunch bars a bit more, try drizzling some melted chocolate on top or sprinkling a pinch of sea salt. These simple tweaks can turn an already delicious treat into a true gourmet snack.
Incorporate these steps into your cooking routine, and soon you’ll find yourself making batch after batch of these delightful homemade crunch bars. Happy crunching!
Variations on Homemade Crunch Bars
When it comes to homemade crunch bars, the possibilities are endless! Whether you’re craving something nutty or fruity, these variations will undoubtedly satisfy your sweet tooth.
Chocolate Almond Crunch Bars
If you’re a chocolate lover, these chocolate almond crunch bars are a heavenly option. Start with your base recipe for crunch bars, then fold in some chopped almonds and drizzle melted dark chocolate on top. The rich chocolate pairs perfectly with the nutty crunch of almonds for a decadent treat. You can easily customize this by adding a sprinkle of sea salt or a dash of espresso powder for extra depth. Looking for health benefits? Almonds are a great source of vitamin E and magnesium, making these bars a smart choice! For more nutty goodness, check out this detailed guide on the benefits of nuts from Healthline.
Peanut Butter Banana Crunch Bars
For a fruity twist, how about peanut butter banana crunch bars? Simply mash ripe bananas and mix them into your homemade crunch bar batter along with creamy peanut butter. This adds a natural sweetness and moisture, ensuring your bars are soft yet crunchy. Top with chopped walnuts or a sprinkle of cinnamon for that extra flavor kick. Bananas are packed with potassium, making these bars not just tasty but also a nutritious pick-me-up!
Experiment with these variations, or mix and match elements for your unique spin! No matter which recipe you choose, your homemade crunch bars are sure to impress friends and family alike. Happy snacking!
Cooking tips and notes for Homemade Crunch Bars
Key tips for smooth melting
When making homemade crunch bars, achieving the perfect melt of chocolate is crucial. Here are some tips:
- Use low heat: Melt chocolate over a double boiler or in the microwave on low power to avoid scorching. Stir often for a smooth consistency.
- Choose quality chocolate: A higher cocoa content creates a rich flavor and better melting properties. Brands like Ghirardelli or Callebaut are fantastic options.
How to prevent sticking
Nobody wants their homemade crunch bars stuck to the pan. To keep them intact, consider these methods:
- Use parchment paper: Line your pan with parchment to ensure easy removal once cooled. This acts as a non-stick barrier.
- Grease the pan: If parchment paper isn’t available, lightly grease the pan with coconut oil or cooking spray for effortless extraction.
Remember, patience is key when letting your bars set! If you’re looking for more tips, check out resources like the Spruce Eats for insights on chocolate tempering or general candy-making techniques. Happy cooking!
Serving Suggestions for Homemade Crunch Bars
Pairing with Beverages
When it comes to pairing homemade crunch bars, consider beverages that complement their sweet, crunchy goodness. A warm cup of chai tea with its spiced notes beautifully balances the richness of the bars. Alternatively, a refreshing glass of cold brew coffee brings out the chocolatey flavors without overpowering them. For a non-caffeinated option, try serving them with almond milk or a homemade smoothie featuring banana and spinach. You could even whip up a batch of homemade hot chocolate for that cozy vibe—a truly irresistible treat!
Ideal Occasions for Serving
Homemade crunch bars are incredibly versatile, making them perfect for various occasions. Whether it’s a casual movie night, a birthday celebration, or an office snack swap, these bars are sure to delight. They also make a fantastic addition to potlucks or picnics since they’re easy to transport and share. Want to impress your friends at a brunch? Cut them into small squares and serve on a charming platter for an indulgent touch.
By creatively pairing homemade crunch bars with suitable beverages and enjoying them during special moments, you’ll elevate both the flavors and the experience. Want more tips and ideas? Check out resources like Food Network or Serious Eats for creative serving suggestions!
Time Breakdown for Homemade Crunch Bars
Preparation Time
Making these homemade crunch bars doesn’t take long—just about 15 minutes to gather your ingredients and prep your workspace. This is a great time to lay out everything you’ll need, from the chocolate to the crispy rice cereal.
Cooking Time
You’ll spend roughly 10 minutes in the kitchen melting the chocolate and mixing everything together. Keep your eye on the stove! Melting chocolate can be tricky, so stirring consistently can help you avoid any mishaps.
Total Time
In under 30 minutes, you can have delicious homemade crunch bars ready to go. That includes time for cooling them in the fridge before diving in!
Making these bars is quick, fun, and perfect for a sweet snack or dessert. Interested in customizing your own version? Check out these suggestions for add-ins or swaps to elevate your bars even more!
Nutritional Facts for Homemade Crunch Bars
Calories per serving
When indulging in homemade crunch bars, it’s essential to know what you’re munching on. Each serving of these delightful treats typically contains around 200 calories. This makes them a satisfying snack without going overboard on your daily caloric intake.
Protein and other macros
In addition to being delicious, these bars provide a balanced mix of nutrients. Here’s a closer look at the macros you can expect:
- Protein: About 5 grams per serving, helping to keep you fuller for longer.
- Carbohydrates: Roughly 25 grams, primarily from oats, which offer great energy.
- Fats: Around 10 grams, mainly from nut butter and optional toppings.
If you’re aiming for a nutritious boost, consider adding protein powder or seeds! You can explore more about healthy eating habits on sites like the Academy of Nutrition and Dietetics and Healthline. So, the next time you’re reaching for that snack, remember: homemade crunch bars aren’t just tasty; they can also fit into your lifestyle beautifully!
FAQs about Homemade Crunch Bars
Getting the most out of your homemade crunch bars is all about understanding how to customize, store, and enjoy them. Below are some frequently asked questions that can help you make the best of this delightful treat.
Can I use different types of nut butter?
Absolutely! One of the best parts of creating homemade crunch bars is the flexibility in choosing nut butter. While peanut butter is a classic choice, feel free to experiment with almond butter, cashew butter, or even sunflower seed butter for a nut-free option. Each type of nut butter will lend a unique flavor and texture to your bars, allowing you to cater to your personal taste preferences. For a creamy finish, stick with the natural varieties—skip those with added sugar or hydrogenated oils for the healthiest results.
What’s the best way to store my crunch bars?
To keep your homemade crunch bars fresh, store them in an airtight container at room temperature, away from direct sunlight. If you plan on keeping them longer, consider wrapping each bar individually in foil or parchment paper before placing them in the container. This helps to maintain their texture and prevents them from sticking together. If you live in a particularly humid climate, you might want to refrigerate them to avoid any unwanted moisture.
How long do homemade crunch bars last?
Properly stored, your homemade crunch bars can last for about a week at room temperature. Storing them in the refrigerator can extend their shelf life to about two weeks. It’s great to have a healthy snack on hand, so why not whip up a double batch? Just be sure to label and date your containers!
For more about nut butters, check out resources like Wholesome Yum to explore their nutritional benefits!
Conclusion on Homemade Crunch Bars
Making homemade crunch bars is a delightful experience that combines simplicity with scrumptiousness. Whether you’re preparing them for a snack, a party treat, or just to satisfy your sweet tooth, the process is straightforward and fun.
- You’ll find that experimenting with ingredients allows for endless variations, catering to your personal taste.
- Plus, there’s something incredibly satisfying about crafting your own snacks in the kitchen, knowing exactly what goes into them.
Ready to whip up a batch? Check out more recipe inspiration from Food Network or dive into the world of DIY snacks with Serious Eats. Enjoy the crunch!
Print
Homemade Crunch Bars: The Best Indulgent Treat You’ll Love
- Total Time: 1 hour 15 minutes
- Yield: 16 bars
- Diet: Vegetarian
Description
Indulge in these delicious homemade crunch bars that are sure to satisfy your sweet tooth.
Ingredients
- 2 cups puffed rice cereal
- 1 cup semi-sweet chocolate chips
- 1/2 cup creamy peanut butter
- 1/4 cup honey
- 1/2 teaspoon vanilla extract
Instructions
- In a large bowl, combine puffed rice cereal and set aside.
- In a saucepan, melt chocolate chips, peanut butter, and honey over low heat, stirring until smooth.
- Remove from heat and stir in vanilla extract.
- Pour the chocolate mixture over the puffed rice cereal and stir until well coated.
- Spread the mixture into a greased 9×9 inch baking pan and press down firmly.
- Refrigerate for at least 1 hour until set, then cut into bars.
Notes
- For extra crunch, consider adding crushed nuts or dried fruit.
- Store bars in an airtight container for up to a week.
- Prep Time: 10 minutes
- Cook Time: 5 minutes
- Category: Dessert
- Method: No-Bake
- Cuisine: American
Nutrition
- Serving Size: 1 bar
- Calories: 150
- Sugar: 10g
- Sodium: 50mg
- Fat: 8g
- Saturated Fat: 2.5g
- Unsaturated Fat: 4g
- Trans Fat: 0g
- Carbohydrates: 18g
- Fiber: 1g
- Protein: 3g
- Cholesterol: 0mg
")