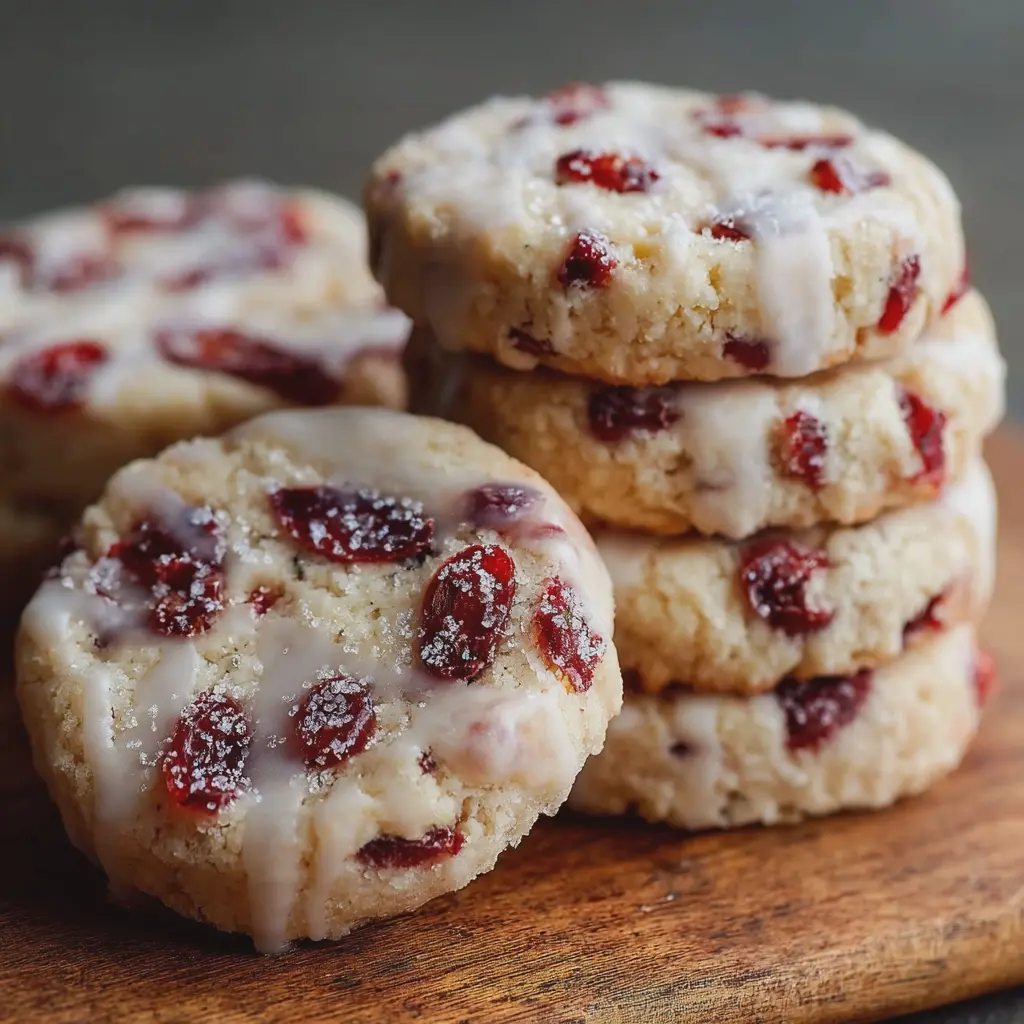
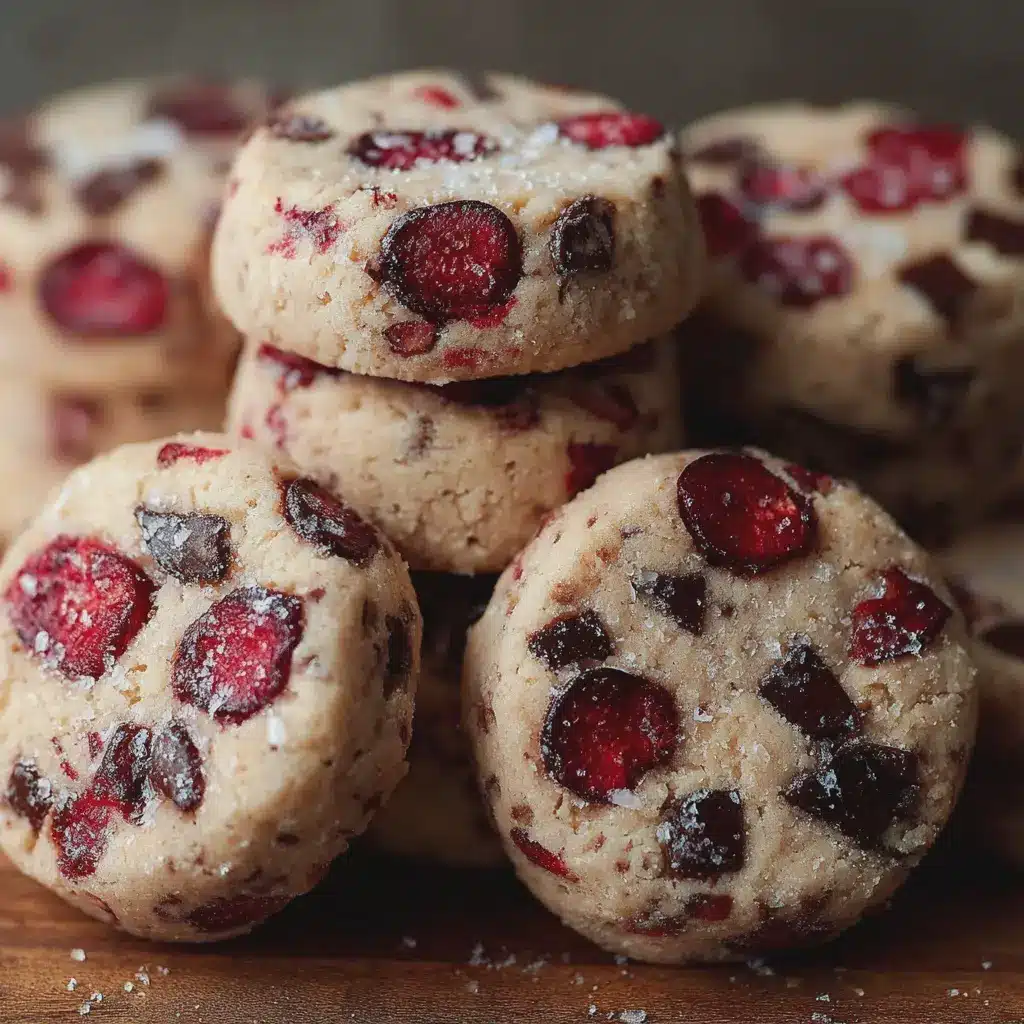
Introduction to Cherry Icebox Cookies
When it comes to sweet indulgences, few treats can match the charm of Cherry Icebox Cookies. These delightfully chewy morsels are perfect for any occasion, whether you’re hosting a weekend gathering or simply craving a little something sweet after a long day. But what is it about these cookies that makes them a must-try?
What makes Cherry Icebox Cookies a delightful treat?
First off, Cherry Icebox Cookies stand out because they are incredibly easy to prepare. The primary method involves chilling the dough, which means you can make them ahead of time and simply slice off pieces as you need them. This convenience is a game-changer for busy professionals who enjoy home-baked flavors without spending hours in the kitchen.
Another reason these cookies are so delightful is the balance of sweet and tart flavors from the cherries. Whether you use fresh cherries, dried cherries, or even a cherry jam, the fruit lends a vibrant splash of color and taste. The contrast between the buttery cookie base and the juicy fruit creates an indulgent experience that your taste buds will thank you for.
Here’s a fun fact: cherries are not only delicious but also packed with health benefits. Rich in antioxidants and vitamins, cherries can boost your overall health while satisfying your sweet tooth. You can read more about the health benefits of cherries on Healthline.
Plus, Cherry Icebox Cookies are incredibly versatile. You can mix in chocolate chips, nuts, or even spices like cinnamon to create your own signature treat. Imagine the fun of experimenting in the kitchen, tailoring each batch to suit your flavor preferences!
In conclusion, Cherry Icebox Cookies are more than just a dessert—they are a canvas for creativity and a testament to the joy of baking. So, if you’re ready to impress friends and family (or simply treat yourself), get excited about whipping up a batch of these delightful cookies that you can enjoy any time!
Ingredients for Cherry Icebox Cookies
Creating delightful Cherry Icebox Cookies starts with gathering the right ingredients. This list helps ensure your cookies are bursting with flavor and texture. Here’s what you’ll need:
- 1 cup unsalted butter (softened at room temperature)
- 1 cup granulated sugar
- 2 large eggs
- 2 teaspoons vanilla extract
- 3 cups all-purpose flour
- 1/2 teaspoon baking soda
- 1 teaspoon salt
- 1 cup dried cherries (chopped for a burst of flavor)
- 1/2 cup chopped nuts (walnuts or pecans work great)
You can find rich varieties of dried cherries online from reputable sources like DriedFruit.com or explore your local grocery store’s baking aisle. These ingredients team up to create a treat that’s perfect for any gathering or as a simple snack at home.
Feel free to personalize your Cherry Icebox Cookies with different mix-ins like chocolate chips or coconut for added flair and texture. Have you ever experimented with flavor combinations? It can be a fun way to make the recipe uniquely yours!
Preparing Cherry Icebox Cookies
Creating Cherry Icebox Cookies is a delightful experience that promises to fill your kitchen with a comforting aroma and make your taste buds dance. With every step, from gathering ingredients to slicing and baking, you’ll be one step closer to enjoying these sweet treats. Here’s how to prepare them to perfection!
Gather and Measure Your Ingredients
Every great recipe starts with preparation. It’s crucial to have all your ingredients ready before diving in. For our Cherry Icebox Cookies, you’ll need:
- All-purpose flour
- Baking soda
- Salt
- Unsalted butter (softened)
- Granulated sugar
- Brown sugar
- Eggs
- Vanilla extract
- Chopped cherries (fresh or frozen)
- Chopped nuts (like walnuts or pecans)
Ensure everything is measured accurately. Miscalculating can lead to a different texture or flavor, and we want your cookies to be just right!
Cream the Butter and Sugars
Now, let’s get mixing! In a large bowl, beat together the softened butter, granulated sugar, and brown sugar until creamy and light. This process should take about 2-3 minutes. It’s crucial because it incorporates air into the butter, which helps your cookies have that lovely texture.
Using an electric mixer can save you time, but mixing by hand can also be a fun workout! Just remember to be patient. The mixture should turn light and fluffy.
Add the Wet Ingredients
Once your butter and sugars are well combined, it’s time to bring in the wet ingredients. Add in the eggs one at a time, mixing well after each addition, and then stir in the vanilla extract. This step is where the cookies start to come alive with flavor!
Do you know why vanilla is such a beloved ingredient in baking? It not only enhances other flavors but also adds a natural sweetness that complements the tartness of the cherries.
Combine the Dry Ingredients
In another bowl, whisk together the all-purpose flour, baking soda, and salt. This is a simple but essential step that ensures your Cherry Icebox Cookies rise perfectly. Gradually add this dry mixture to the wet ingredients, stirring until just combined. Don’t overmix; we’re looking for a cohesive dough, not a workout for your gluten!
Fold in Cherries and Nuts
The moment you’ve been waiting for is finally here: the fun part! Gently fold in the chopped cherries and nuts. Feel free to use your favorite nut variety or even skip them altogether if preferred. The cherries should be evenly dispersed throughout the dough for that delicious burst of flavor in every bite.
Shape and Chill the Dough
Now, we need to shape the dough into logs. Divide it into two equal portions and roll each into a log about 2 inches in diameter. Wrap these logs tightly in plastic wrap and place them in the refrigerator for at least 2-4 hours. Chilling the dough firms it up, making slicing a breeze and ensuring the cookies maintain their shape while baking.
Slice and Bake the Cookies
Preheat your oven to 350°F (175°C). While the oven warms up, take your chilled dough out of the refrigerator and slice it into 1/4-inch thick rounds. Place these slices onto a parchment-lined baking sheet. Bake for 10-12 minutes, or until the edges are lightly golden. The inviting scent will beckon everyone into the kitchen!
Once done, let the cookies cool on the baking sheet for a few minutes before transferring them to wire racks to cool completely.
With these steps, you’ll have delightful Cherry Icebox Cookies ready to enjoy or share with friends! Happy baking, and be sure to check out other delicious recipes that complement these treats well, like homemade ice cream or a refreshing fruit salad!
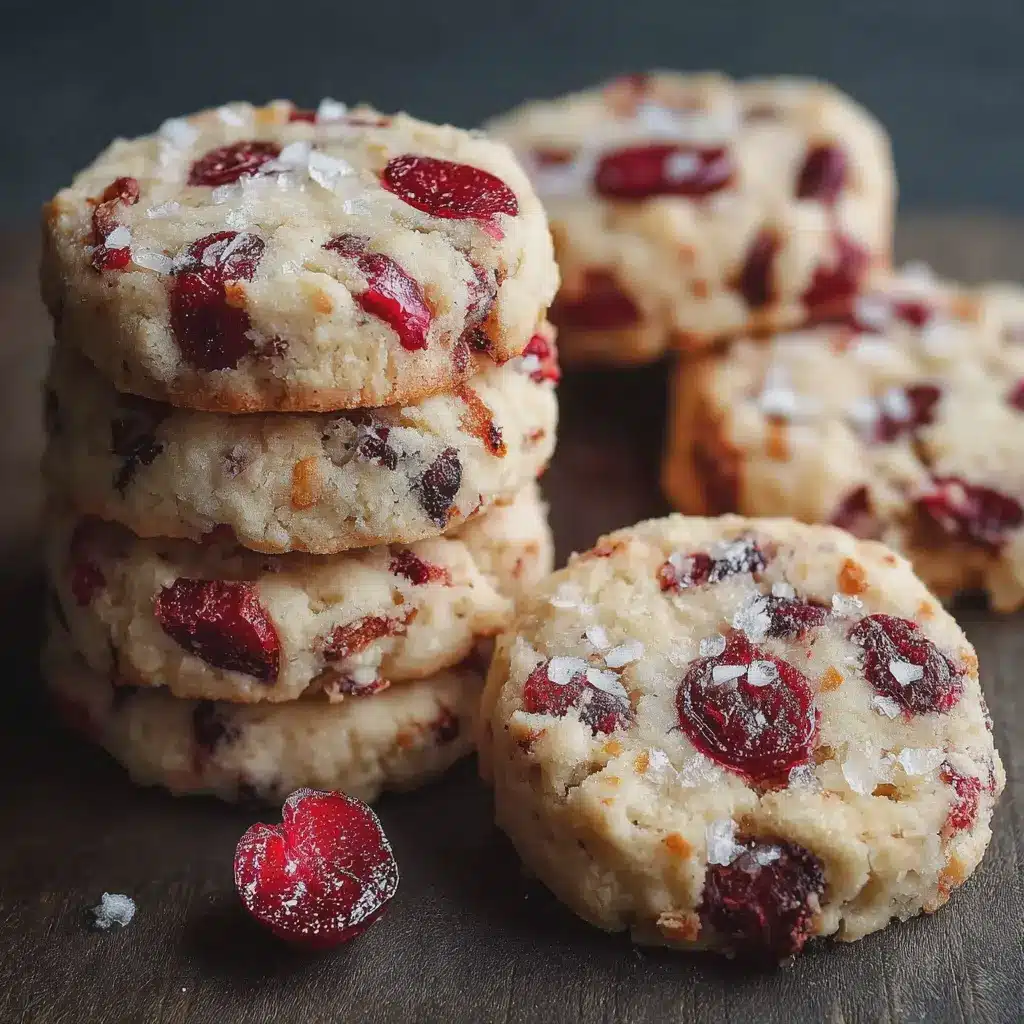
Variations on Cherry Icebox Cookies
When it comes to Cherry Icebox Cookies, the possibilities are endless! These delightful treats can be modified to suit various tastes and preferences. Let’s explore a couple of enticing variations that elevate the classic recipe to new heights.
Cherry Almond Icebox Cookies
If you’re a fan of the nutty aroma that almond extract brings, these cookies are for you! To create Cherry Almond Icebox Cookies, simply add 1 tablespoon of almond extract to the dough. The combination of tart cherries and rich almond flavors is nothing short of heavenly.
To enhance the texture, consider folding in half a cup of chopped almonds or almond meal, which adds a delightful crunch. Bake them as usual, and watch as your kitchen fills with a wonderful scent. These cookies not only taste great but also make a fabulous gift for friends. If you’re looking for more exotic twists, check out this almond recipe that complements your icebox cookies beautifully!
Chocolate Cherry Icebox Cookies
Why stop at a singular flavor? Chocolate Cherry Icebox Cookies are an indulgent upgrade for chocolate lovers. Start with your basic cherry cookie dough, and then mix in three-quarters of a cup of chocolate chips or chunks. For an extra kick, you might consider adding a tablespoon of cocoa powder for a richer taste.
Imagine biting into a cookie and experiencing the burst of tart cherries against the smooth chocolate—divine! These cookies pair wonderfully with a warm cup of coffee or a refreshing glass of milk. For more dessert ideas, check out this chocolate dessert guide.
Each variation of Cherry Icebox Cookies offers a unique flavor experience, making them perfect for any occasion or simply for a cozy night in!
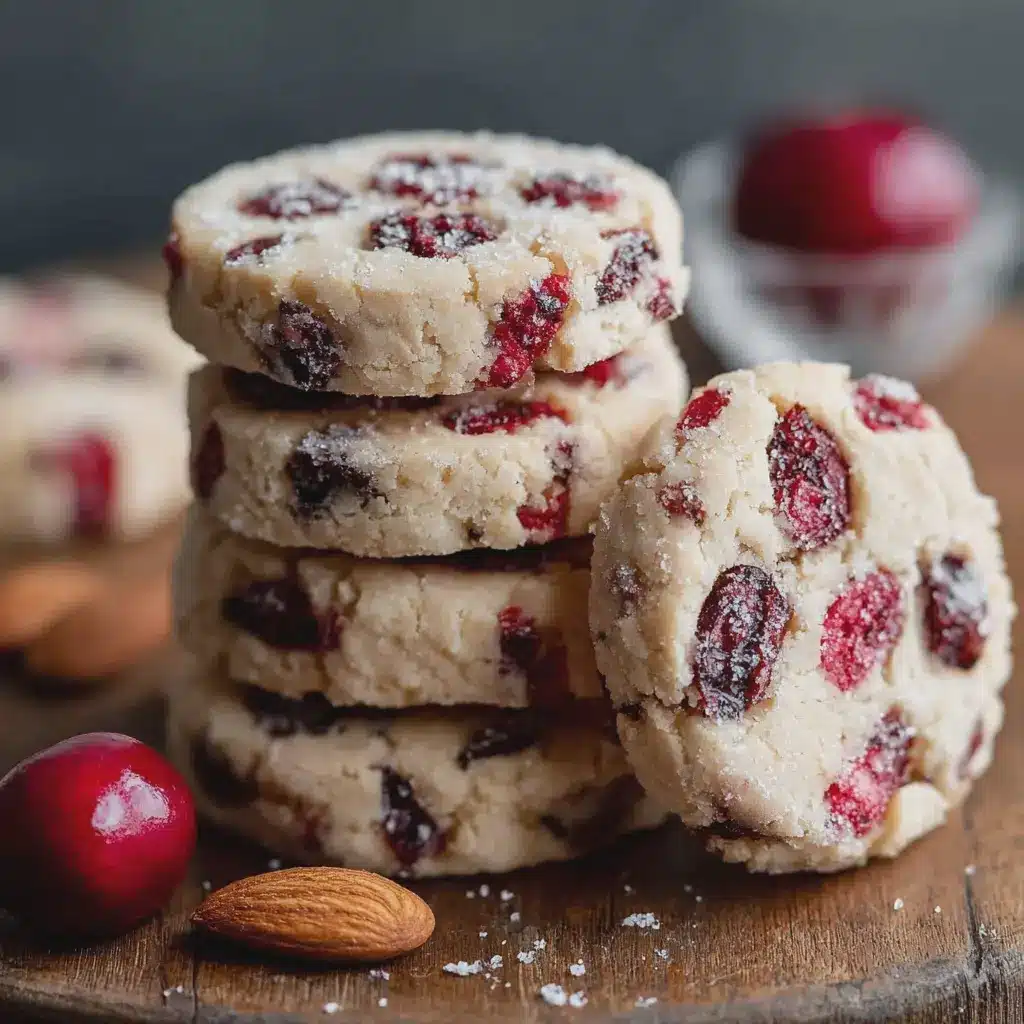
Baking notes for Cherry Icebox Cookies
Why chilling is important
Chilling the dough for your Cherry Icebox Cookies is crucial for achieving the perfect texture. When you refrigerate the dough, the fats solidify, leading to less spreading during baking. This results in beautifully shaped cookies with a delightful chewy center and a slightly crisp edge. Aim for at least two hours of chilling, but if you’re in a hurry, even 30 minutes can make a difference!
Tips for achieving the right texture
To ensure your Cherry Icebox Cookies come out with the ideal consistency, consider these handy tips:
- Ingredient Temperature: Use ingredients at room temperature for easier mixing—this allows for adequate air to be incorporated.
- Don’t Overmix: Mix just until combined to keep your cookies tender; overmixing can lead to a dense texture.
- Use Quality Cherries: Fresh or good-quality frozen cherries will elevate the flavor of your cookies, making them even more enjoyable.
For an in-depth look at baking tips, check out sites like King Arthur Baking to sharpen your skills even more!
Serving Suggestions for Cherry Icebox Cookies
Perfect Pairings for a Coffee Break
When you’re enjoying your Cherry Icebox Cookies, nothing elevates the moment quite like a warm cup of coffee or tea. The tartness of the cherries beautifully complements a rich espresso or a smooth herbal tea, creating a delightful balance. Consider these options for your coffee break:
- Cold Brew: Its smooth profile contrasts nicely with the sweetness of your cookies.
- Chai Latte: The spicy notes cut through the sweetness and play well with the cherry flavors.
For those looking to spice up their coffee routine, try adding a sprinkle of cinnamon or nutmeg. You’ll be surprised by how it enhances the overall taste!
Creative Ways to Serve at Gatherings
Hosting friends? Your Cherry Icebox Cookies can shine as both a sweet treat and a charming centerpiece. Here are some fun ideas:
- Dessert Platter: Arrange them on a colorful platter with a mix of other cookies or small desserts. This variety will catch the eye and tantalize the taste buds.
- Ice Cream Sandwiches: Sandwich cherry icebox cookies around a scoop of vanilla or almond ice cream for a refreshing twist.
Remember, first impressions matter. An attractive presentation can make these cookies not just a delicious treat but a talking point among your guests. Explore more serving ideas on sites like BBC Good Food or Food Network. Your gatherings will never be the same!
Tips for making perfect Cherry Icebox Cookies
Ensuring even baking
To achieve perfectly baked Cherry Icebox Cookies, it’s essential to ensure even baking. One of the most effective ways to accomplish this is by rotating your baking sheet halfway through the baking time. Ovens can have hot spots, meaning some cookies might brown quicker than others. Use a cookie scoop to ensure uniform cookie size, which helps in achieving similar baking times for each cookie. For added consistency, consider chilling your dough in the fridge for at least an hour before baking. This also helps the flavors meld beautifully.
Storage tips for freshness
After you’ve baked your delicious Cherry Icebox Cookies, proper storage is key to maintaining their freshness. Use an airtight container to keep them soft and scrumptious. If you’re not devouring them right away, consider freezing some for later enjoyment – they freeze beautifully and can last for up to three months. Just wrap them tightly in plastic wrap and place them in a freezer bag. When you’re ready to indulge again, simply take them out and let them come to room temperature or pop them in the oven for a quick warm-up.
For more expert baking tips, check out King Arthur Baking. Happy baking!
Time details for Cherry Icebox Cookies
When you’re craving something sweet but want to keep your prep time minimal, these Cherry Icebox Cookies are the perfect solution. Let’s break down the timing to help you plan your baking session:
Preparation time
Getting started on these cookies is quick and easy—generally, you’re looking at about 15 minutes to mix your ingredients. This includes gathering your supplies and incorporating everything into a delightful dough.
Chilling time
The chilling stage is essential for the best flavor and texture. You’ll want to refrigerate the dough for at least 2 hours. If you can spare the time, letting it chill overnight is even better!
Baking time
When it’s time to bake, preheat your oven and pop in those cookies for about 10-12 minutes. Keep an eye on them to ensure they achieve that perfect golden brown.
Total time
Altogether, you’re looking at around 2.5 to 3 hours from start to finish. This includes preparation, chilling, and baking. But remember, most of that time is just waiting, giving you the chance to relax or tackle another task!
Ready to make your Cherry Icebox Cookies? Grab your ingredients and let’s get baking! For more tips on baking cookies, consider checking out resources from Food Network.
Enjoy the process!
Nutritional information for Cherry Icebox Cookies
Calories per cookie
Each Cherry Icebox Cookie packs a delightful flavor with around 100-120 calories. This makes them a sweet treat that doesn’t derail your daily nutrition goals! Perfect for an afternoon snack or a dessert at dinner, these cookies balance indulgence and moderation.
Ingredients breakdown
Let’s dive into what makes these cookies special:
- Flour: Provides the base and texture.
- Butter: Adds richness and flavor.
- Sugar: For that irresistible sweetness.
- Cherries: The star ingredient, bursting with antioxidants and flavor.
- Eggs: Bind everything together and add moisture.
- Vanilla Extract: Enhances the overall taste profile.
Each ingredient serves a unique purpose, contributing not only to the flavor but also to the nutritional content of your Cherry Icebox Cookies. For more insight into the health benefits of cherries, check out sources like the American Cherry Marketing Institute.
This thoughtful combination makes these cookies not just delicious, but also a fun way to enjoy the natural goodness of fruits in your snacks!
FAQs about Cherry Icebox Cookies
Can I use fresh cherries instead of maraschino cherries?
Absolutely! Using fresh cherries in your Cherry Icebox Cookies can add a delightful tartness. Just be sure to pit and chop them finely, as fresh cherries have a higher moisture content which can alter the cookie’s texture. You might want to reduce other liquids in the recipe slightly to compensate. If you prefer a bold cherry flavor without the bright hue of maraschino cherries, fresh ones are a great choice!
What if I don’t have almond extract?
No worries if you’re out of almond extract! You can simply substitute it with vanilla extract for a different yet delicious flavor. While almond extract gives the cookies a unique taste, vanilla will still provide that lovely sweetness. If you have access to other flavors like hazelnut or even lemon zest, consider experimenting a little. Baking is all about creativity!
How do I store Cherry Icebox Cookies?
Storing your Cherry Icebox Cookies correctly ensures they stay fresh and delicious. Here are some tips:
- Room Temperature: Place them in an airtight container and store them at room temperature for up to a week.
- Refrigeration: For longer storage, you can refrigerate them. They last about two weeks this way.
- Freezing: To keep them even longer, freeze your cookies. Just make sure they’re completely cool, then store in a freezer-safe bag for up to three months. You can enjoy a taste of summer any time!
For more tips on cookie storage, check out this guide from a reputable baking resource.
Remember, the key to great cookies is in the details, so have fun with your Cherry Icebox Cookies!
Conclusion on Cherry Icebox Cookies
Why You Should Try Making These Cookies at Home
Making Cherry Icebox Cookies is not just about baking; it’s about creating memories and indulging in delightful flavors. These cookies are incredibly easy to whip up and store, perfect for spontaneous get-togethers or cozy nights in. The lovely sweetness of cherries combined with a buttery base makes for an irresistible treat that can impress family and friends.
Plus, there’s something special about homemade goodies—you control the ingredients! You can even swap in healthier options like whole grain flour for a guilt-free indulgence. Check out this source for more tips on healthier baking.
So, why settle for store-bought when you can enjoy freshly made Cherry Icebox Cookies? Give it a try; you won’t regret it!
Print
Cherry Icebox Cookies: The Best Easy Treat for Your Summer Days
- Total Time: 4 hours 32 minutes
- Yield: 24 cookies
- Diet: Vegetarian
Description
Enjoy the taste of summer with these delightful Cherry Icebox Cookies. They’re easy to make and perfect for any occasion!
Ingredients
- 1 cup unsalted butter, softened
- 1 cup granulated sugar
- 1 cup packed brown sugar
- 3 large eggs
- 1 teaspoon vanilla extract
- 3 cups all-purpose flour
- 1 teaspoon baking soda
- 1/2 teaspoon salt
- 1 cup dried cherries, chopped
- 1/2 cup chopped nuts (optional)
Instructions
- In a large bowl, cream together the butter, granulated sugar, and brown sugar until smooth.
- Beat in the eggs one at a time, then stir in the vanilla.
- Combine the flour, baking soda, and salt; gradually add to the creamed mixture.
- Fold in the chopped cherries and nuts if using.
- Divide dough into two logs and wrap in plastic wrap. Chill for at least 4 hours.
- Preheat the oven to 350°F (175°C).
- Slice the chilled dough into 1/4 inch rounds and place on ungreased baking sheets.
- Bake for 10-12 minutes or until golden. Let cool before serving.
Notes
- For best results, chill the dough overnight.
- Experiment with different nuts or chocolate chips for varied flavors.
- Prep Time: 20 minutes
- Cook Time: 12 minutes
- Category: Desserts
- Method: Baking
- Cuisine: American
Nutrition
- Serving Size: 1 cookie
- Calories: 120
- Sugar: 10g
- Sodium: 50mg
- Fat: 7g
- Saturated Fat: 4g
- Unsaturated Fat: 2g
- Trans Fat: 0g
- Carbohydrates: 15g
- Fiber: 1g
- Protein: 1g
- Cholesterol: 30mg
")