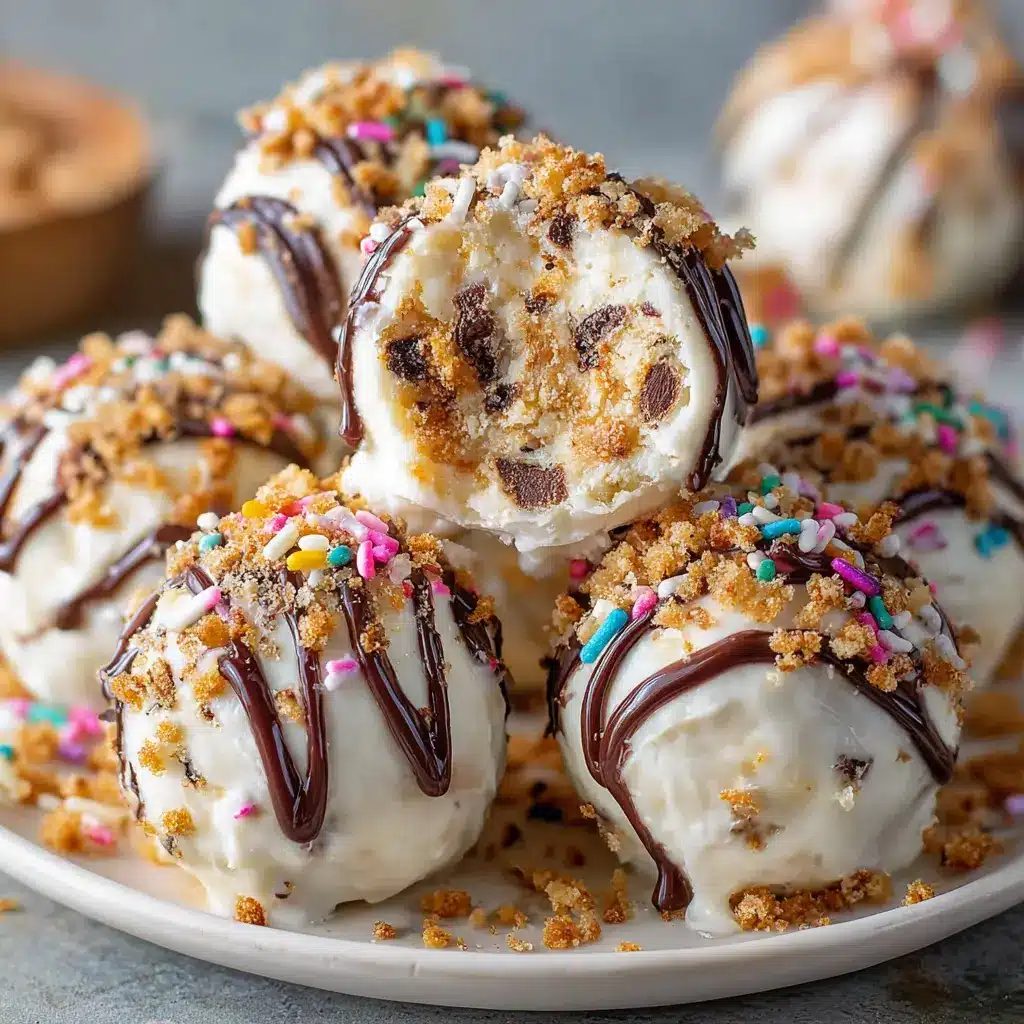
Introduction to Cheesecake in a Jar
Who doesn’t love a decadent dessert that’s easy to make and even easier to enjoy? Enter cheesecake in a jar, a delightful treat that’s perfect for any occasion, be it a casual gathering with friends or a cozy night in. This innovative spin on a classic dessert brings the indulgent flavors of cheesecake into an adorable, portable package.
What makes cheesecake in a jar a delightful treat?
The appeal of cheesecake in a jar lies in its combination of convenience and creativity. Here are a few reasons you’ll love this dessert:
-
Portion Control: Each jar holds a perfectly portioned serving. This means you can satisfy your sweet tooth without overindulging (although it’s tough to resist a second helping!).
-
Customization: One of the best aspects is the adaptability! You control everything from the crust to the toppings. Want a chocolate crust or perhaps some fresh berries? Go for it! Check out Food Network’s guide for fun flavor combos.
-
Presentation: There’s something about desserts in jars that adds a rustic charm. They make excellent gifts for friends or impressive centerpieces for events. Imagine treating guests with these beautiful little creations filled with creamy layers of deliciousness.
-
No Baking Required: This is huge! Many recipes require little more than mixing ingredients and layering them in a jar. If you’re short on time (or bakeware), this is a game-changer.
-
Easy Storage: Simply pop the lids on and keep them in the fridge. They stay fresh for days, making them perfect for meal prepping a treat that’ll last.
Whether you’re hosting a gathering or just want a sweet pick-me-up, cheesecake in a jar is versatile enough to suit any occasion. So, roll up your sleeves, grab your favorite ingredients, and let’s dive into creating the most delightful jars of creamy goodness! With a little imagination, you can turn this simple dessert into a delightful experience that your friends and family will adore.
For more insights into dessert trends, feel free to explore resources like Serious Eats to keep your taste buds tantalized!
Ingredients for Cheesecake in a Jar
Creating the perfect cheesecake in a jar is all about choosing the right ingredients. Each layer contributes to that irresistible combination of creamy richness and delightful flavors. Here’s what you’ll need:
Key ingredients for a delicious cheesecake
- Cream Cheese: The star of the show! Go for full-fat for that rich, creamy texture.
- Sour Cream: This adds a tangy flavor that balances the sweetness perfectly.
- Granulated Sugar: Sweeten the mix to your preference; you’d typically need about half a cup.
- Vanilla Extract: Just a teaspoon of pure vanilla extract enhances all the flavors.
- Digestive Biscuits or Graham Crackers: For the crust, crumble these biscuits to add crunch at the bottom.
- Butter: A tablespoon of melted butter combines with the crumbled biscuits to form your crust.
- Fruit Toppings: Be it fresh berries or your favorite fruit jam, this is where you can get creative!
Want a deeper dive into cheese types? Check out Serious Eats for expert advice. Ready to layer up your cheesecake in a jar? Let’s whip it up!
Preparing Cheesecake in a Jar
Creating a decadent dessert like cheesecake in a jar is both an art and a joy. It’s perfect for gatherings, picnics, or simply treating yourself after a long day. What’s great about this recipe is that it offers all the creamy, tangy goodness of classic cheesecake but in a delightful, portable format. Let’s dive into the steps and get you started on this sweet adventure.
Gather your ingredients
The first step is to round up all the necessary ingredients. Here’s what you’ll need:
-
For the graham cracker crust:
-
1 cup graham cracker crumbs
-
1/4 cup unsalted butter, melted
-
1 tablespoon sugar
-
For the cheesecake filling:
-
8 oz cream cheese, softened
-
1/2 cup sugar
-
1 teaspoon vanilla extract
-
1 cup sour cream
-
For the whipped cream topping:
-
1 cup heavy cream
-
2 tablespoons powdered sugar
Having everything on hand makes the process smoother and more enjoyable. Plus, if you’re interested in ingredient variations, check out this helpful site for alternative options.
Create the graham cracker crust
Now, let’s create that delicious graham cracker crust. It’s super easy!
- In a medium bowl, mix the graham cracker crumbs, melted butter, and sugar together until well combined.
- Once the mixture is sandy and clumps together, press it firmly into the bottom of your jars. This layer serves as the solid foundation for your cheesecake in a jar.
- Use a spoon or your fingers to compact it, as a firmer crust holds up better when layered with the filling.
Make the cheesecake filling
Next, it’s time to whip up the cheesecake filling, which is where the magic happens.
- In a large mixing bowl, combine the softened cream cheese, sugar, and vanilla extract. Beat them together using an electric mixer until smooth (about 2-3 minutes). Ensure there are no lumps.
- Add the sour cream to the mixture and blend until it’s fully incorporated. This step gives your cheesecake that creamy, tangy flavor that everyone loves.
Whip the heavy cream
Fluffy whipped cream adds the perfect touch to our cheesecake in a jar. Here’s how to do it:
- In a separate bowl (make sure it’s chilled for best results), pour in the heavy cream.
- Using a handheld mixer, whip the cream until soft peaks form, then gradually add the powdered sugar. Continue whipping until you achieve stiff peaks.
- This light and airy whipped cream will complement the dense cheesecake filling beautifully.
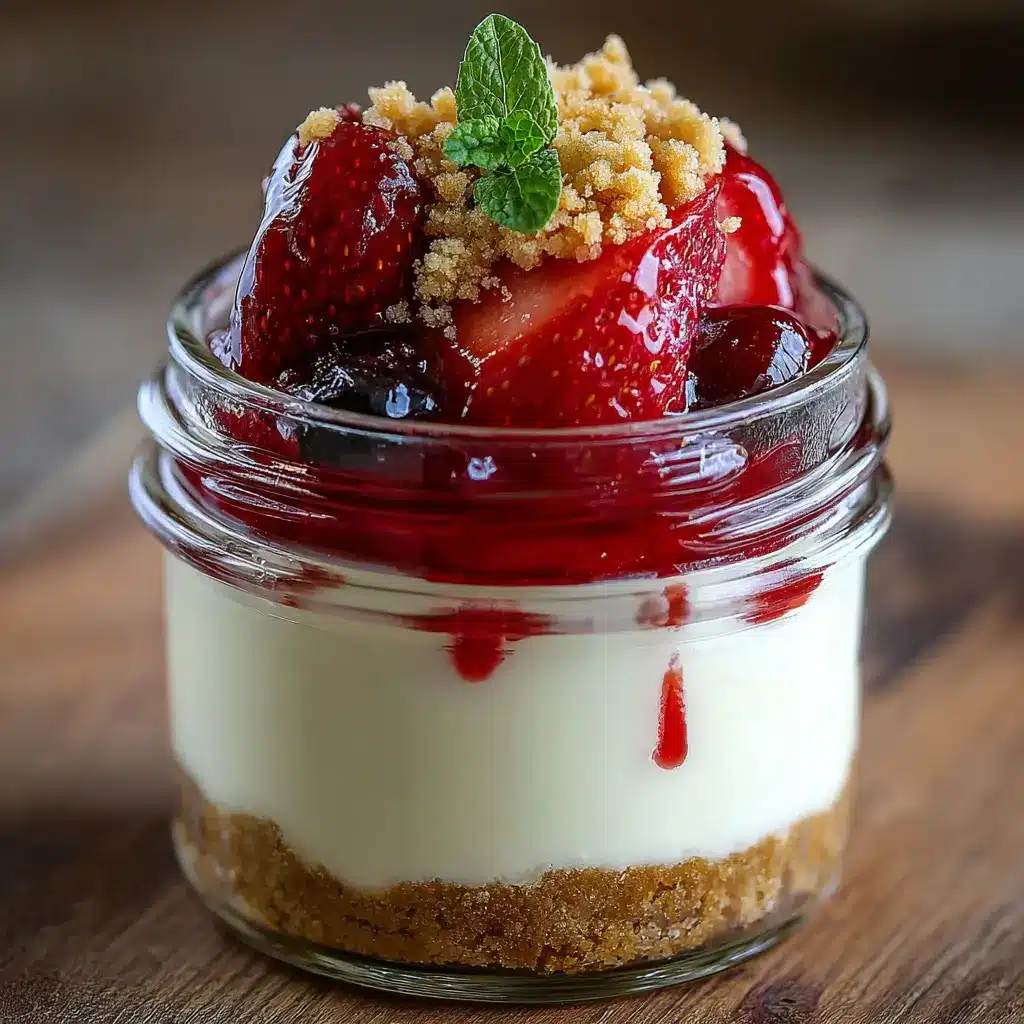
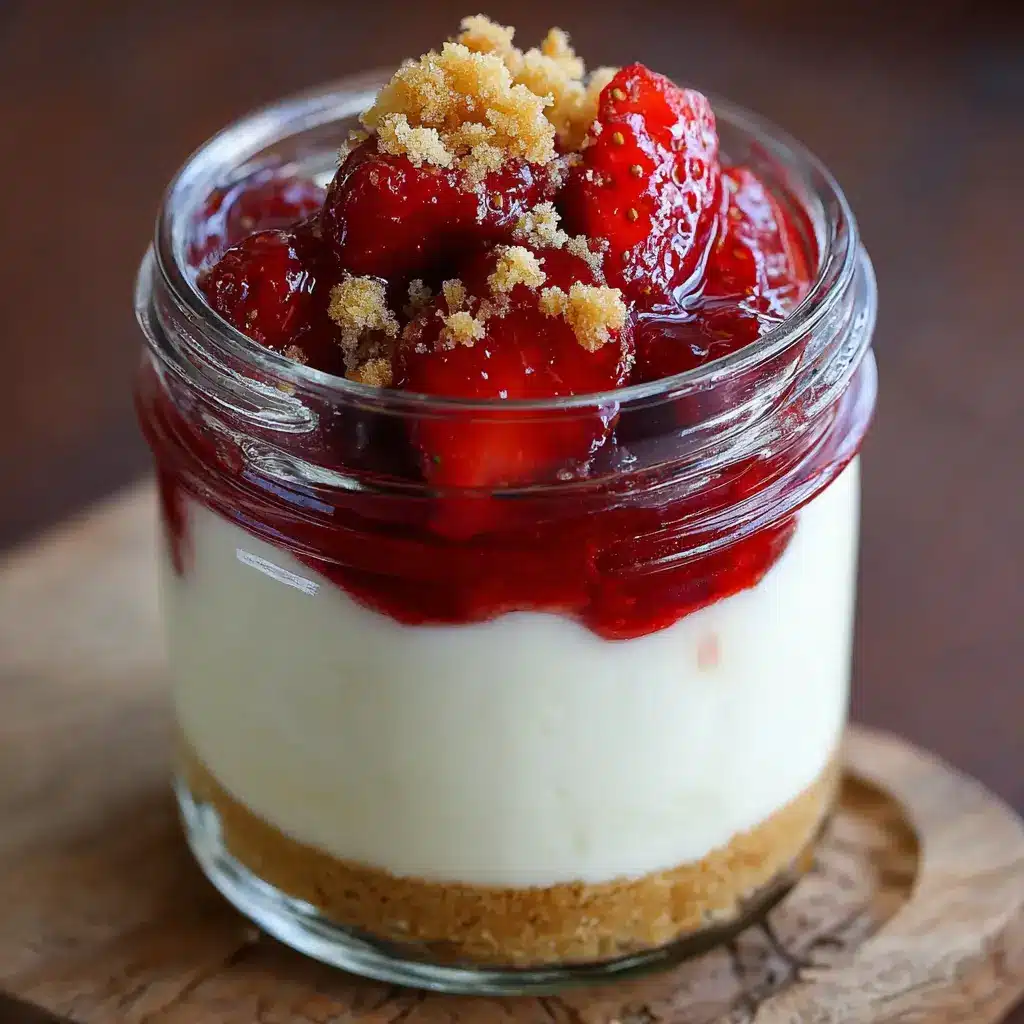
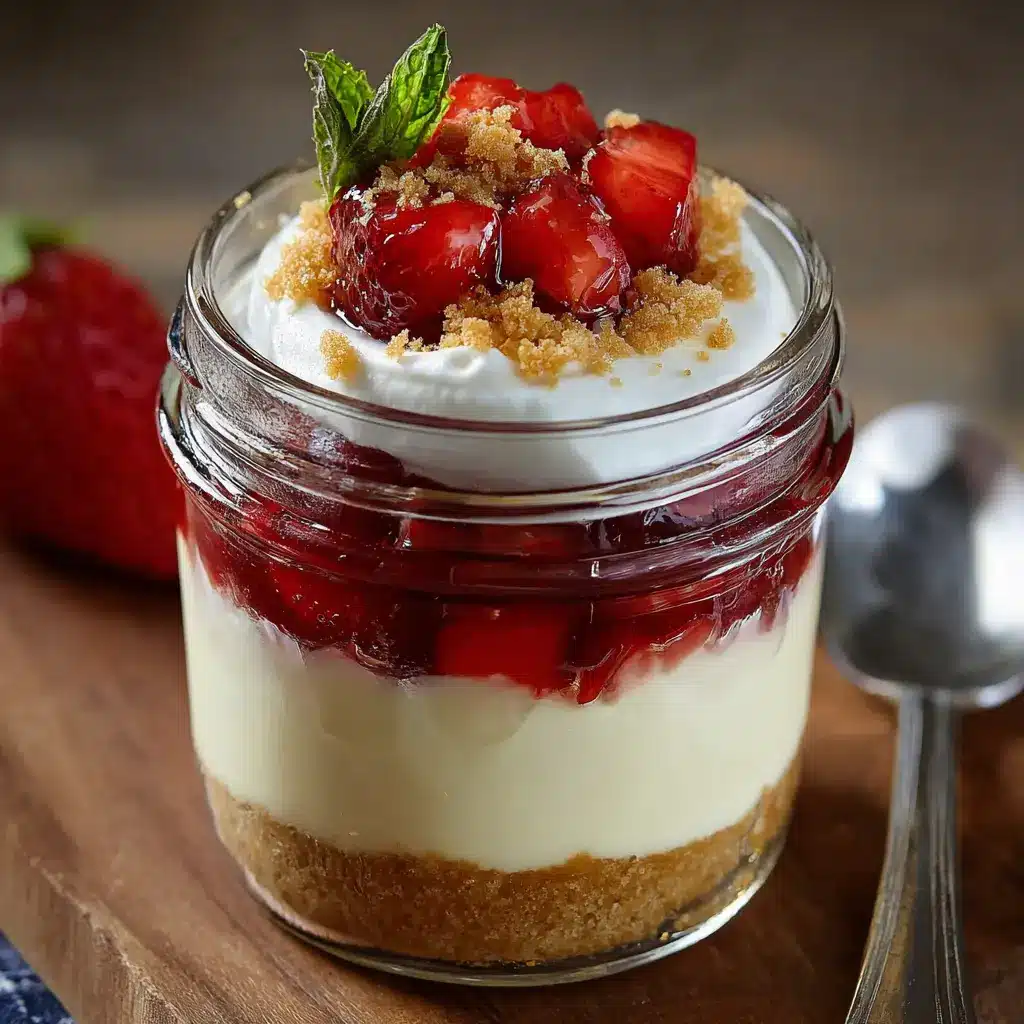
Assemble the jars
Now comes the fun part—assembly!
- Start by layering the graham cracker crust at the bottom of each jar.
- Next, spoon in the cheesecake filling until you reach about two-thirds full.
- Add a layer of whipped cream on top. You can create fun designs by using a piping bag if you want to get fancy!
Chill the jars
Your delicious cheesecake in a jar is almost ready, but it needs a little time to set.
- Cover each jar with a lid or plastic wrap and chill in the refrigerator for at least 4 hours or overnight if possible. This chilling time allows the flavors to meld beautifully and sets everything perfectly.
And there you have it: a simple yet delightful recipe for cheesecake in a jar! Perfect for sharing or hiding away for a personal treat, this dessert is a guaranteed crowd-pleaser. Don’t be surprised if your friends ask for seconds—or even for the recipe! Enjoy your culinary creation and explore the world of jar desserts.
Variations on Cheesecake in a Jar
Cheesecake in a jar is a delightful treat that allows you to experiment with flavors and textures all year long. By using seasonal ingredients or favorite flavor combinations, you can create a unique dessert experience that delights your taste buds. Let’s dive into some creative variations!
Seasonal Fruit Cheesecake Variations
One of the best aspects of cheesecake in a jar is how easily it adapts to seasonal fruit. Think about using summer berries like strawberries or blueberries. Layer these juicy fruits with a classic vanilla cheesecake filling for a refreshing treat. In the fall, pumpkin puree mixed with cream cheese creates a rich, spiced layer that pairs perfectly with crushed graham crackers on the bottom.
Using seasonal fruit not only enhances flavor but also supports local farmers, making this dessert a sustainable choice. For more inspiration on seasonal fruit, you could check out Seasonal Food Guide for ideas on what’s fresh around you.
Chocolate Cheesecake in a Jar
For all the chocolate lovers out there, chocolate cheesecake in a jar will surely be your go-to. Start by mixing melted chocolate into your cream cheese filling for a rich texture. You can also create a layered effect by adding chocolate cookie crumbs at the bottom and a drizzle of chocolate sauce on top.
Imagine sharing these jars with friends during a cozy movie night. Not only do they look adorable, but they’re also easy to personalize by letting everyone add their favorite toppings. Whether it’s whipped cream, chocolate shavings, or nuts, the possibilities are limitless!
Cheesecake in a jar is versatile, inviting creativity in the kitchen. Try out these variations today, and you might just discover your next favorite dessert!
Cooking tips and notes for Cheesecake in a Jar
How to get the perfect texture
Achieving that creamy, velvety texture in your cheesecake in a jar is all about the ingredients and preparation. Start with room temperature cream cheese; this helps avoid lumps. For added richness, consider using a mix of sour cream and heavy cream, which yields a luxurious consistency. Make sure to blend your ingredients thoroughly, scraping the sides of your mixing bowl for an even mix.
Tips for making it ahead of time
One of the best parts about this dessert is its make-ahead potential! You can prepare your cheesecake in a jar a day or two in advance, which actually enhances the flavors. Just keep them refrigerated and seal tightly to maintain freshness. On the day you plan to serve, don’t forget to layer fresh toppings, such as fruit or a drizzle of caramel, for that finishing touch.
For more details on how to prep in advance, check out sources like Bon Appétit for inspiration.
Serving suggestions for Cheesecake in a Jar
Creative ways to present your cheesecake
When it comes to cheesecake in a jar, presentation is key! Consider layering your cheesecake with various toppings to create visual appeal. Here are some ideas:
- Layered Delights: Alternate layers of cheesecake, fresh fruit, and crushed cookies for texture.
- Garnish Elegance: Top with whipped cream and a sprinkle of finely grated chocolate or nuts.
- Themed Jars: Use festive jars for holidays—red and green for Christmas, pastel for Easter.
You can even label the jars with cute tags detailing each flavor or serving suggestion, adding personal touches for guests.
Ideal occasions for serving cheesecake in a jar
Cheesecake in a jar isn’t just a treat; it’s perfect for various occasions! Consider these moments:
- Picnics and Outdoor Gatherings: They’re portable and easy to share without the mess.
- Weddings and Showers: Serve as charming table favors or unique dessert options.
- Cozy Movie Nights: Pair with a hot cup of tea or freshly made coffee for a comforting experience.
Next time you’re planning an event, remember how cheesecake in a jar can elevate your dessert game. For more inspiration, check out Food Network for creative serving ideas and recipes that could pair well with your treats!
Time Breakdown for Cheesecake in a Jar
If you’re diving into the delicious world of cheesecake in a jar, knowing the timeline can make the process smoother and even more enjoyable. Here’s a quick overview to keep your culinary adventure on track!
Preparation Time
Getting started on your cheesecake in a jar takes about 20–30 minutes. This includes mixing the cream cheese, sugar, and vanilla, and layering it with your favorite crust.
Chilling Time
Once assembled, your jars will need around 3-4 hours to chill in the fridge. This step is crucial for achieving that creamy, dreamy texture we all crave.
Total Time
In total, you’re looking at about 4-5 hours from start to finish. Consider this a perfect opportunity to catch up on your favorite series or prep dinner!
For tips on similar dessert recipes, check out BBC Good Food or Food Network for inspiration!
Nutritional Facts for Cheesecake in a Jar
When you indulge in a delightful cheesecake in a jar, it’s natural to wonder about its nutritional profile. Here’s a quick rundown to keep you informed while you enjoy this sweet treat.
Calories per Serving
On average, a single serving of cheesecake in a jar contains around 300 calories. This can vary based on ingredients, but it’s perfect for satisfying your sweet tooth without derailing your day.
Sugar Content
Typically, you’ll find about 20-25 grams of sugar in one serving. While that’s something to be mindful of, remember, moderation is key, and using natural sweeteners can help ease the sugar load.
Protein Information
A serving of cheesecake in a jar generally packs in about 6 grams of protein. Adding Greek yogurt instead of cream cheese can further boost the protein content, making it a more satisfying snack.
Curious about more health tips related to desserts? Check out the USDA’s nutritional database for in-depth insights on your favorite treats. Being informed is all part of the delicious journey!
FAQs about Cheesecake in a Jar
Can I use low-fat cream cheese?
Absolutely! You can certainly use low-fat cream cheese in your cheesecake in a jar. It’s a great way to reduce calories while still enjoying that creamy texture. Just keep in mind that the overall flavor and consistency may be slightly different. You might need to add a little extra sweetness with sugar or a sugar substitute if you want to maintain that indulgent taste.
How long can I keep cheesecake in a jar?
If stored properly in an airtight container, your cheesecake in a jar can last in the refrigerator for about 4 to 7 days. To ensure maximum freshness, enjoy them within the first few days if you can! If you’re stocking up for an event or party, they can also be frozen for up to 3 months. Just remember to let them thaw in the fridge overnight before serving.
What are some topping ideas for cheesecake?
The fun part of making cheesecake in a jar is experimenting with toppings! Here are some tasty ideas:
- Fresh fruit: Berries like strawberries, blueberries, and raspberries add a refreshing touch.
- Chocolate sauce or ganache: Drizzle over the top for a rich and decadent twist.
- Caramel sauce: Nothing beats a classic caramel topping for that sweet finish.
- Crushed nuts: Almonds or pecans can add a nice crunch.
- Whipped cream: A dollop brings a light, fluffy texture to balance the cheesecake’s creaminess.
Feel free to get creative! You can even explore seasonal toppings or try integrating flavors like pumpkin spice if you’re feeling adventurous.
If you’re looking for some inspiration, check out more about ways to enhance your dessert experience at Food Network and Serious Eats.
Remember, enjoying your cheesecake in a jar is all about personal taste—experiment and have fun with it!
Conclusion on Cheesecake in a Jar
Why You Should Try Making Cheesecake in a Jar!
Making cheesecake in a jar is not just about a fun dessert; it’s about creating an experience. Picture this: a sweet treat layered into a cute, portable container that you can enjoy anywhere! This dessert is perfect for gatherings, making it a hit among friends and family.
You’ll contribute to a delightful atmosphere with minimal effort. Plus, experimenting with flavors like chocolate, berries, or even coffee can ignite your culinary imagination. Did you know that individual servings also help control portions, making it easier for those mindful of their diet?
So why not channel your inner chef? Discover delicious inspirations on sites like Food Network or Bon Appétit. Dive into the world of cheesecake in a jar — you might just find your new favorite dessert!
Print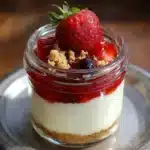
Cheesecake in a Jar: Easy Indulgence for Sweet Tooth Lovers
- Total Time: 2 hours 20 minutes
- Yield: 4 servings
- Diet: Vegetarian
Description
Indulge your sweet tooth with this easy cheesecake in a jar recipe that is perfect for any occasion.
Ingredients
- 8 ounces cream cheese
- 1 cup powdered sugar
- 1 teaspoon vanilla extract
- 1 cup heavy whipping cream
- 1 cup graham cracker crumbs
- 2 tablespoons melted butter
- 1 cup fruit topping (optional)
Instructions
- In a mixing bowl, beat the cream cheese until smooth.
- Add powdered sugar and vanilla extract, mixing until well combined.
- In a separate bowl, whip the heavy cream until stiff peaks form.
- Fold the whipped cream into the cream cheese mixture until fully incorporated.
- In another bowl, combine graham cracker crumbs and melted butter.
- In jars, layer the graham cracker mixture, followed by the cheesecake filling. Repeat layers.
- Top with fruit topping if desired.
- Chill in the refrigerator for at least 2 hours before serving.
Notes
- For a different flavor, try adding lemon zest to the cheesecake mixture.
- Consider using chocolate or caramel sauce for additional flavor.
- Prep Time: 20 minutes
- Category: Dessert
- Method: No Bake
- Cuisine: American
Nutrition
- Serving Size: 1 jar
- Calories: 350
- Sugar: 30g
- Sodium: 150mg
- Fat: 25g
- Saturated Fat: 15g
- Unsaturated Fat: 8g
- Trans Fat: 0g
- Carbohydrates: 30g
- Fiber: 1g
- Protein: 3g
- Cholesterol: 80mg
")