Introduction to Butterfinger Pie
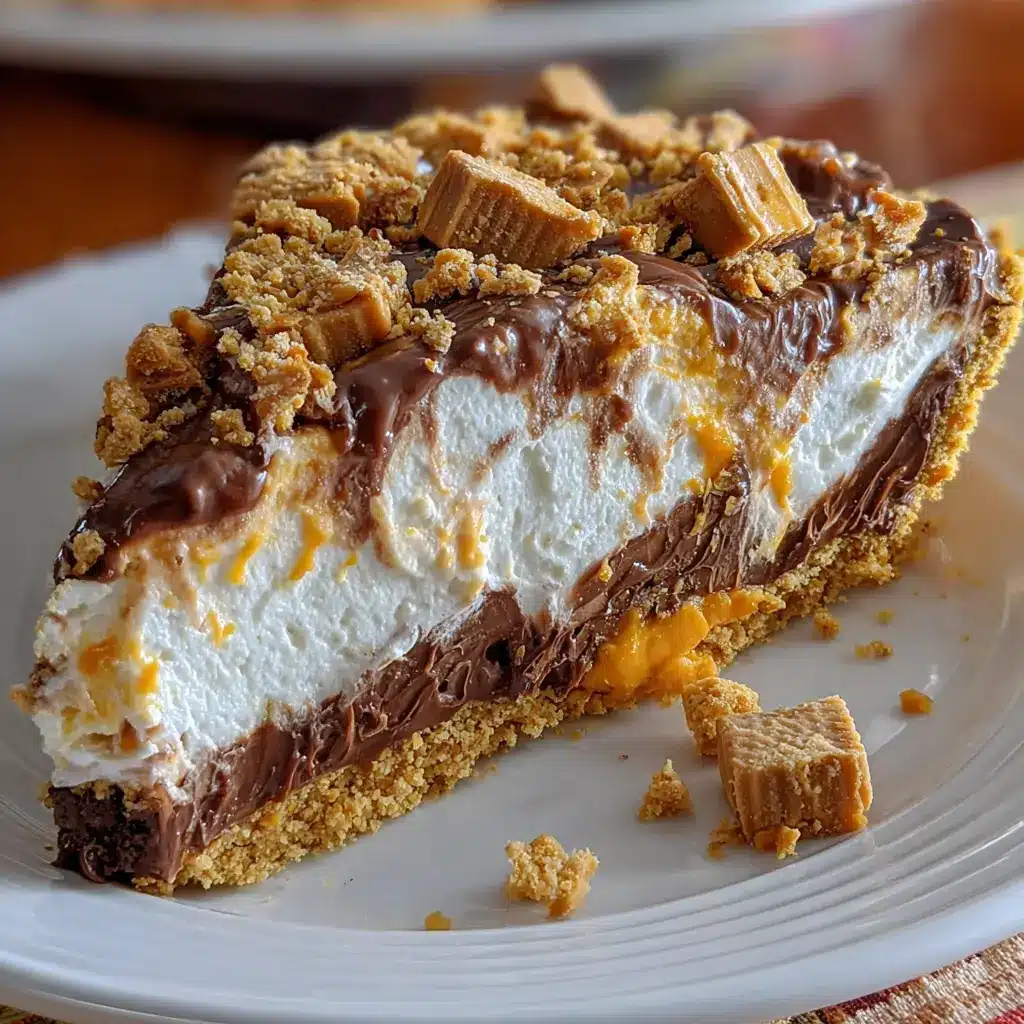
Butterfinger Pie is not just a dessert; it’s a delightful experience that resonates perfectly with the busy lifestyles of young professionals. Imagine coming home after a long day at work, craving something sweet yet easy to make. This indulgent treat combines creamy goodness with the nostalgic crunch of Butterfinger candy bars, creating a dessert that’s sure to please your palate without demanding too much of your time.
Why Butterfinger Pie is the ultimate dessert for young professionals
So why is Butterfinger Pie the go-to choice for those aged 25 to 35? There are several reasons:
-
Quick and Easy: This pie requires minimal prep time (about 15 minutes!) and no baking, making it ideal for those hectic weeknights or impromptu gatherings with friends. You can whip it up in no time, allowing you to enjoy quality relaxation or catch up on your favorite shows.
-
Indulgent Flavor: The unique combination of creamy filling and crunchy Butterfinger topping creates a symphony of textures and flavors that will impress your taste buds. It’s a dessert that feels luxurious but is incredibly simple to make.
-
Flexibility: This versatile pie can easily be tailored to fit various dietary needs. You can substitute the chocolate whipped topping for a non-dairy option or even use gluten-free graham crackers for the crust.
-
Social Treat: With a no-fuss serving style, Butterfinger Pie is perfect for potlucks or office parties. Simply bring it along, slice it up, and watch as smiles emerge all around. It’s a conversation starter and a crowd-pleaser, making it your secret weapon for social gatherings.
Did you know that dessert can actually improve your mood? According to a study published by the National Institutes of Health, enjoying sweet treats can release endorphins, enhancing your overall happiness. So why not treat yourself to a slice of Butterfinger Pie and brighten your day?
If you’re ready to dive into creating this delicious dessert, click here for more information on ingredient variations and preparation methods.
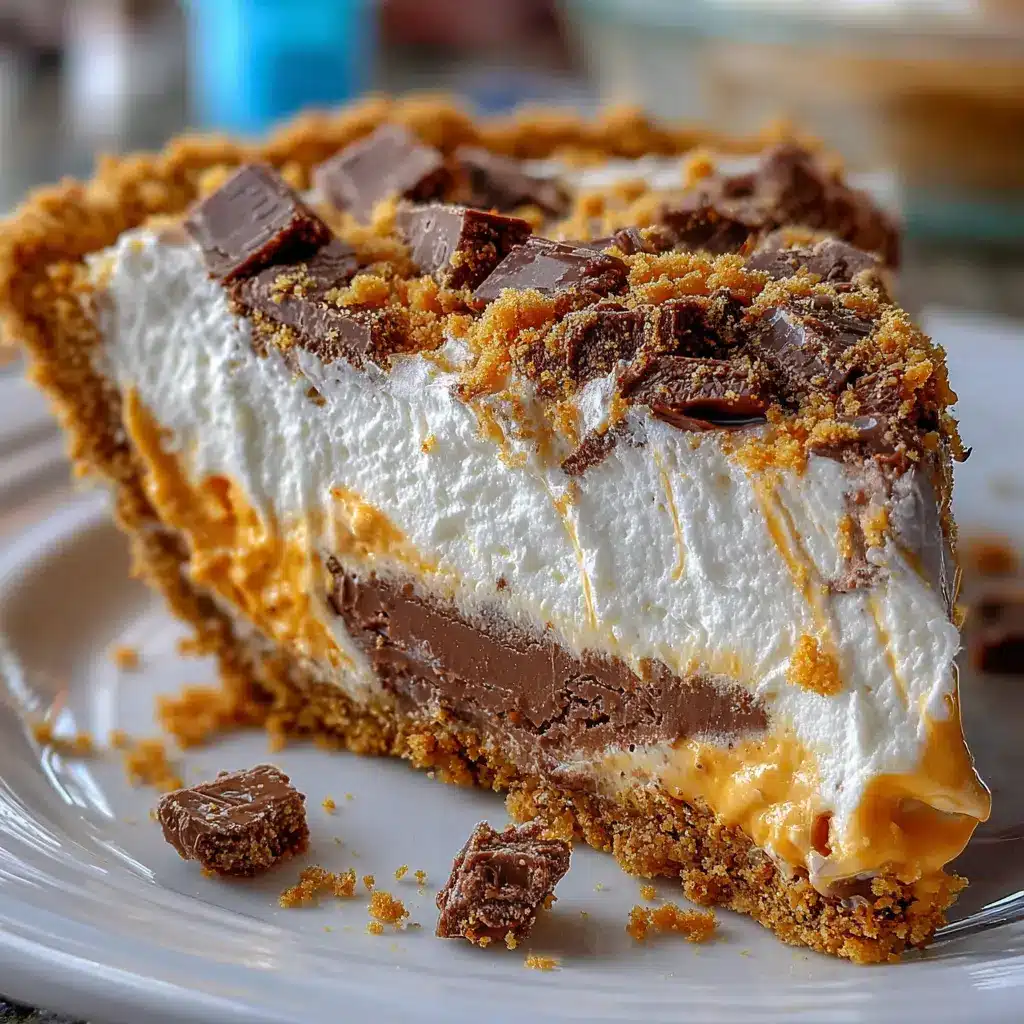
Ingredients for Butterfinger Pie
Creating a delightful Butterfinger Pie doesn’t have to be complicated! Here’s a breakdown of what you’ll need to whip up this irresistible dessert.
Essential ingredients you’ll need
For the base of a classic Butterfinger Pie, gather these core ingredients:
- Cream cheese: This provides a rich, creamy texture.
- Cool Whip: A light, fluffy element that makes the pie airy.
- Powdered sugar: Sweetness is key; this adds just the right amount.
- Butterfinger candy bars: The star of the show! Chopped into delicious pieces, they add that signature crunch and flavor.
- Graham cracker crust: The perfect foundation with a hint of sweetness.
For a deeper dive into pie-making, you might want to check out resources on pie crust techniques from Serious Eats.
Optional garnish ingredients
To elevate your Butterfinger Pie, consider adding these garnishes:
- Chocolate syrup: A drizzle on top not only enhances presentation but adds decadence.
- Chopped peanuts: For added crunch and a touch of saltiness.
- Extra Butterfinger pieces: Because who doesn’t want even more of that signature flavor?
By incorporating these ingredients and garnishes, you’ll create a Butterfinger Pie that not only looks impressive but tastes absolutely divine! Happy baking!
Step-by-step Preparation of Butterfinger Pie
Butterfinger Pie is one delightful dessert that brings together creamy peanut butter, rich cream cheese, and, of course, those iconic Butterfinger candy bars. This no-bake pie comes together easily and is sure to impress your friends and family. Let’s dive into the preparation steps so you can make your own delicious Butterfinger Pie!
Gather and prepare your ingredients
Before you start mixing and folding, it’s crucial to gather all your ingredients. Here’s what you’ll need for your Butterfinger Pie:
- 8 oz cream cheese (softened)
- 1 cup peanut butter (smooth or crunchy, based on your preference)
- 1 cup powdered sugar
- 1 tsp vanilla extract
- 8 oz whipped topping (thawed)
- 4-6 Butterfinger bars (roughly crushed)
- 1 pre-made graham cracker crust
Make sure to set out your cream cheese ahead of time so it has time to soften. Working with room-temperature cream cheese ensures a smooth and creamy filling.
Mix the cream cheese and peanut butter
In a large mixing bowl, combine the softened cream cheese with the peanut butter. Use an electric mixer on medium speed for about 2-3 minutes until the mixture is smooth and well-combined. The creaminess of the cream cheese complements the nutty flavor of the peanut butter perfectly.
This step not only sets the base for your pie but also infuses a wonderful flavor that will make your Butterfinger Pie memorable. If you don’t have an electric mixer, a good old-fashioned whisk will do the job too—just be prepared for a bit of a workout!
Incorporate the powdered sugar for sweetness
Next, it’s time to add a cup of powdered sugar to the bowl with your cream cheese and peanut butter blend. Gradually mix it in on low speed to avoid a cloud of sugar dust. Once combined, crank up the speed for an additional minute.
This simple addition transforms your filling into a rich, luscious texture that melts in your mouth. Plus, the sweetness balances nicely with the salty peanut butter.
Add vanilla extract for flavor
Now that you have your creamy filling, it’s time to elevate the flavor. Add 1 teaspoon of vanilla extract to the mixture and mix everything together until it’s well incorporated. Vanilla adds a depth of flavor that enhances every bite of your Butterfinger Pie.
Did you know that vanilla extract can also have antioxidant properties? It’s a little-known fact that can add some healthy cred to your dessert!
Fold in the whipped topping gently
Now comes the fun part! Take your prepared whipped topping and fold it gently into the peanut butter mixture using a spatula. The goal here is to maintain the light and airy texture of the whipped topping while fully incorporating it into the cream cheese mix.
Be mindful not to overmix; you want that lovely lightness that whipped topping brings. The combination of flavors makes this pie feel incredibly airy and indulgent—a true treat for any occasion!
Add those delicious crushed Butterfinger pieces
Time to give your Butterfinger Pie some texture! Roughly crush 4 to 6 Butterfinger bars and gently fold them into the mixture. The crispy, crunchy bits will add that unmistakable Butterfinger flavor while providing a satisfying crunch with every bite.
How much of the Butterfinger pieces you add is totally up to you! If you’re a chocolate-peanut butter lover, feel free to be generous.
Spoon the mixture into the graham cracker crust
Once everything is mixed together beautifully, spoon your delicious filling into the pre-made graham cracker crust. Smooth the top with a spatula to make it look nice and even.
If you’re feeling extra adventurous, consider drizzling some chocolate sauce on top before chilling. A bit of drizzled glucose syrup can heighten the dessert appeal and add another layer of indulgence.
Chill the pie until it’s set
Refrigerate your Butterfinger Pie for at least 4 hours, or even better, overnight. This step is essential for allowing the flavors to meld and the filling to set up properly.
While your pie is chilling, you might find yourself dreaming of all that creamy, crunchy goodness that awaits. Trust me, the wait will be worth it!
Once your pie is set, slice it up and serve it for a delightful dessert that’s always a hit. Whether you’re at a barbecue, a birthday party, or just indulging on a regular Tuesday, this Butterfinger Pie will become a quick favorite. Enjoy!

Variations on Butterfinger Pie
Twisted Versions with Different Candy Bars
While the classic Butterfinger Pie is undeniably a hit, why not shake things up a bit? You can easily switch out Butterfingers for other candy bars, allowing you to customize the flavor to your liking. Here are a few tasty alternatives to consider:
- Reese’s Peanut Butter Cups: For an irresistible peanut butter twist, try using chopped Reese’s—it’s a match made in dessert heaven.
- Snickers: Munch on caramel and nougat with Snickers for a fun blend of textures; just chop them up and fold them into the filling.
- Milky Way: The chocolate caramel combination offers a decadent twist that elevates the pie to a whole new level of indulgence.
Feel inspired? Get more ideas from The Kitchn.
Gluten-Free Alternatives for the Crust
If gluten is a concern for you or your guests, making a gluten-free Butterfinger Pie is easier than you might think! Here are a couple of options you can explore:
- Almond Flour Crust: Combine almond flour with melted butter and a pinch of salt for a nutty flavor that complements the creamy filling beautifully.
- Graham Cracker Crust: Look for gluten-free graham crackers! Crush them up with some melted butter to create a classic crust that doesn’t skimp on flavor.
These alternatives ensure everyone can join in on this delightful dessert. If you’re looking for more gluten-free recipes or ideas, check out Gluten-Free Living.
Experimenting with these variations on Butterfinger Pie can bring a delightful twist to your dessert table, so don’t hesitate to get creative! Whether you stick with the classic or try something new, one thing’s for certain—everyone will love whatever version you whip up!
Cooking Tips and Notes for Butterfinger Pie
How to Ensure a Smooth Filling
Achieving a smooth filling for your Butterfinger Pie can make all the difference in the final texture. To start, make sure your cream cheese is at room temperature. This allows for easier blending and reduces the risk of lumps. Whip the cream cheese alone first before incorporating the other ingredients.
When you add powdered sugar, do it gradually while mixing to avoid clumps. If you’re looking for a silky texture, try using a food processor instead of a hand mixer—it works wonders for creating that perfect consistency.
Additionally, high-quality peanut butter can enhance both flavor and texture, so don’t shy away from indulging a bit here. A reputable brand, such as Jif or Skippy, is often recommended.
Tips for Perfect Whipping of the Topping
The topping is the crowning glory of any Butterfinger Pie, so let’s get it right. Start by chilling your mixing bowl and beaters for about 15 minutes in the freezer. Cold equipment helps the cream whip better and creates those lovely peak formations.
Use heavy whipping cream, as it contains the fat necessary for stability. When whipping, start at a low speed to avoid splattering, gradually increasing to medium-high until soft peaks form. After adding powdered sugar, stop mixing as soon as stiff peaks appear. Over-whipping can lead to a grainy texture, which is something we definitely want to avoid.
For extra fluffiness, consider incorporating a splash of vanilla extract for added flavor.
These little tips can elevate your Butterfinger Pie from delicious to unforgettable. For more insights on pie making, check out Serious Eats for expert baking techniques!
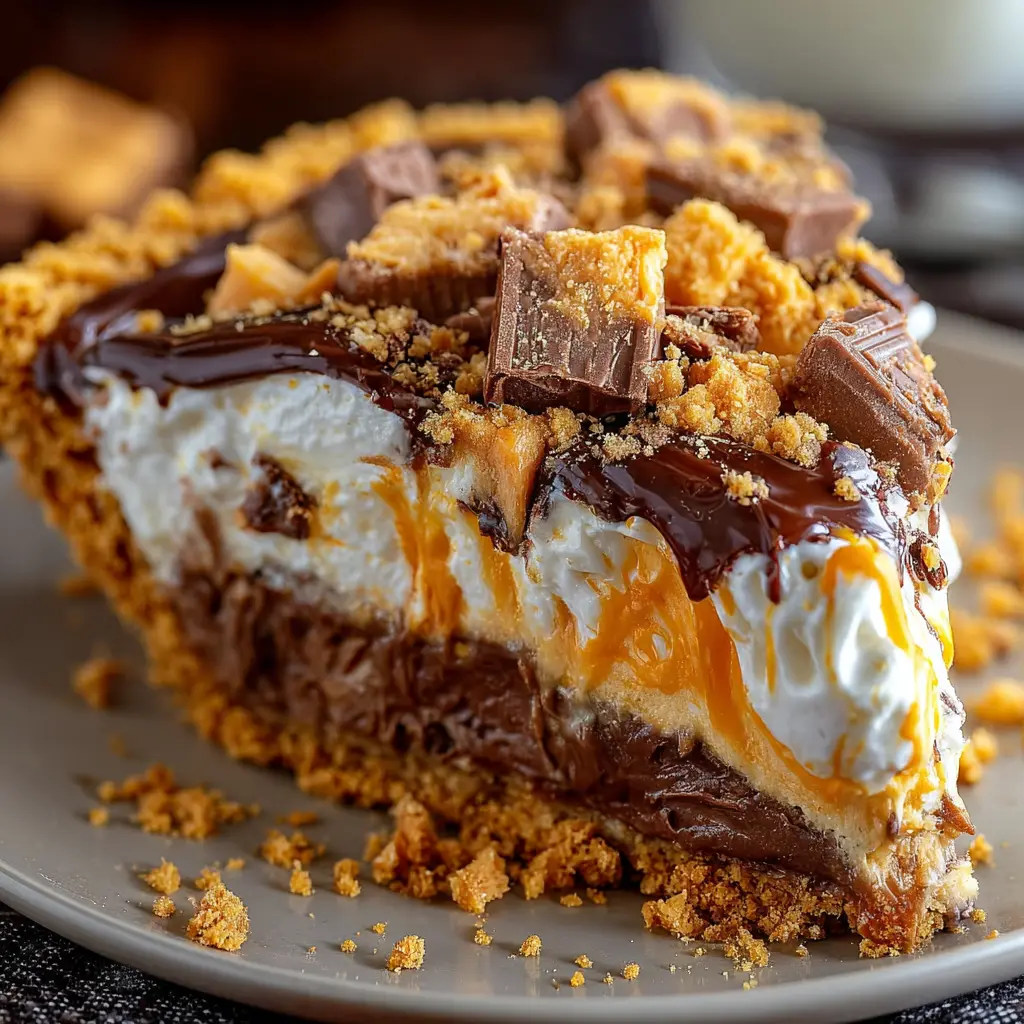
Serving Suggestions for Butterfinger Pie
Accompaniments that enhance the experience
When it comes to Butterfinger Pie, the right accompaniments can elevate your dessert to the next level. Consider pairing your pie with a scoop of vanilla or chocolate ice cream for a delightful contrast in texture and temperature. The creaminess of the ice cream balances the rich flavors of the pie beautifully.
Additionally, a drizzle of chocolate or caramel sauce adds an extra layer of indulgence that your guests will love. Want to add a hint of freshness? A side of sliced strawberries or a berry compote can cut through the sweetness, offering a refreshing bite. Don’t forget about whipped cream—it’s a classic for a reason and adds a lightness that complements the pie’s density.
How to present for special occasions
Presentation is key when serving your Butterfinger Pie, especially at gatherings or celebrations. Consider using a beautiful pie dish or even individual dessert cups for a more sophisticated touch. Garnish with crushed Butterfinger candies on top or alongside the pie for that extra visual appeal.
For a festive look, add seasonal decorations like edible flowers or themed toppings that match your gathering. And remember, lighting can change everything; setting your dessert in a well-lit area will make those chocolate and peanut butter hues pop more vibrantly. Guests will appreciate not just the taste but the beautiful presentation, making your event all the more memorable.
For more tips on dessert presentations, you can check out resources like The Kitchn and Epicurious for inspiration.
Time Breakdown for Butterfinger Pie
When it comes to indulging in a delightful dessert, Butterfinger Pie is a showstopper. Let’s break down the time commitment for making this incredible treat!
Preparation Time
Getting started with your Butterfinger Pie requires about 15-20 minutes of prep time. This includes gathering your ingredients and whipping up that creamy filling. Trust me when I say, this time flies when you’re dipping into those delicious Butterfinger bars!
Chilling Time
The real magic happens during the chilling phase, which takes about 4 hours. This step is crucial for allowing the flavors to meld and the pie to set perfectly. You’ll love the anticipation as you wait for it to come together!
Total Time
In total, you’re looking at around 4 hours and 20 minutes from start to finish. It may seem like a wait, but the end result is more than worth it. You’ll have a stunning Butterfinger Pie that’s ready to impress at any gathering! For more tips on pie-making techniques, be sure to check out resources like The Kitchn.
With a little patience and some sweet cravings, you’ll have a dessert that’s sure to be the highlight of your day!
Nutritional Facts for Butterfinger Pie
Calories per slice
When indulging in a slice of Butterfinger Pie, it’s important to be mindful of the calories you’re consuming. Each slice of this decadent dessert typically contains around 300–350 calories. While that may seem high, it’s all about enjoying in moderation. Pair it with a light meal or share a slice with a friend to balance out your treat!
Key nutritional components
This delightful pie not only satisfies your sweet tooth but also packs in some essential nutrients. Here’s a quick breakdown of what you’ll find:
- Fats: Approximately 20 grams per slice, primarily from whipped cream and butter.
- Carbohydrates: Around 30-35 grams, largely contributed by the crust and the Butterfinger pieces.
- Sugars: Expect about 20 grams, a mix of natural sugars and added sweeteners.
While this pie isn’t a nutritional powerhouse, it does provide a fun treat for special occasions. Just be sure to balance it with healthier meals throughout your day! For more insights on enjoying desserts responsibly, check out the Harvard Health Blog.
FAQ about Butterfinger Pie
How can I make Butterfinger Pie ahead of time?
If you’re planning a gathering or simply want to enjoy a slice of Butterfinger Pie without the last-minute rush, you’re in luck! This pie can be made a day or even two ahead of time. Simply prepare the pie according to the recipe, cover it with plastic wrap or aluminum foil, and store it in the refrigerator. The flavors meld beautifully when allowed to sit, enhancing the experience of every luscious bite.
Can I use crunchy peanut butter instead of creamy?
Absolutely! While the traditional recipe calls for creamy peanut butter for a silky texture, using crunchy peanut butter can add a delightful twist. You’ll get those satisfying little crunches that complement the creaminess of the pie. Just keep in mind that it may slightly alter the pie’s texture, but many find this to be a delicious variation. For more variations on pies, check out this chef’s guide to pie variations.
What’s the best way to store leftovers?
If you somehow have leftovers after enjoying your Butterfinger Pie, first, consider yourself lucky! To keep it fresh, slice the pie into portions and store them in an airtight container in the fridge. You can also wrap the whole pie tightly in plastic wrap. This helps prevent any freezer burn and keeps it delicious for up to a week. You can even freeze slices! When ready to indulge again, simply thaw them in the refrigerator overnight for a quick and sweet treat.
Whether it’s a planned dessert for a special occasion or a spontaneous indulgence, these tips will help you make the most of your Butterfinger Pie!
Conclusion on Butterfinger Pie
Final thoughts on indulging in homemade desserts
Creating a homemade Butterfinger Pie is not just about satisfying your sweet tooth; it’s also a wonderful way to express your creativity in the kitchen. There’s something incredibly rewarding about crafting a dessert from scratch, knowing you’re sharing it with family and friends.
When you indulge in desserts like this, consider the joy of each bite, filled with creamy goodness and that irresistible crunch of Butterfinger. Think about the memories made around the table, with laughter over shared slices and conversations flowing. Plus, homemade desserts often come with a little less guilt and a lot more love, as you control the ingredients and portions.
So next time you crave something sweet, don’t hesitate to whip up this delightful Butterfinger Pie. You might just find your new favorite treat! For more sweet inspiration, check out the American Pie Council’s insights on classic dessert recipes.
Print
Butterfinger Pie: Easy, Indulgent Dessert for Home Chefs
- Total Time: 4 hours 20 minutes
- Yield: 8 servings
- Diet: Vegetarian
Description
This Butterfinger Pie is an easy and indulgent dessert that will satisfy any sweet tooth.
Ingredients
- 1 pre-made graham cracker crust
- 8 ounces cream cheese, softened
- 1 cup powdered sugar
- 1 cup whipped topping
- 1 cup chopped Butterfinger candy bars
- 1/2 cup chocolate syrup
Instructions
- In a mixing bowl, beat the softened cream cheese until smooth.
- Add powdered sugar and mix until combined.
- Fold in the whipped topping and chopped Butterfinger candy.
- Pour the mixture into the pre-made graham cracker crust.
- Drizzle chocolate syrup on top.
- Chill in the refrigerator for at least 4 hours before serving.
Notes
- For a more intense Butterfinger flavor, add more chopped candy bars.
- You can use a chocolate crust instead of a graham cracker crust for a different taste.
- Prep Time: 20 minutes
- Category: Dessert
- Method: No-Bake
- Cuisine: American
Nutrition
- Serving Size: 1 slice
- Calories: 300
- Sugar: 25g
- Sodium: 150mg
- Fat: 15g
- Saturated Fat: 7g
- Unsaturated Fat: 6g
- Trans Fat: 0g
- Carbohydrates: 36g
- Fiber: 1g
- Protein: 3g
- Cholesterol: 30mg