Introduction
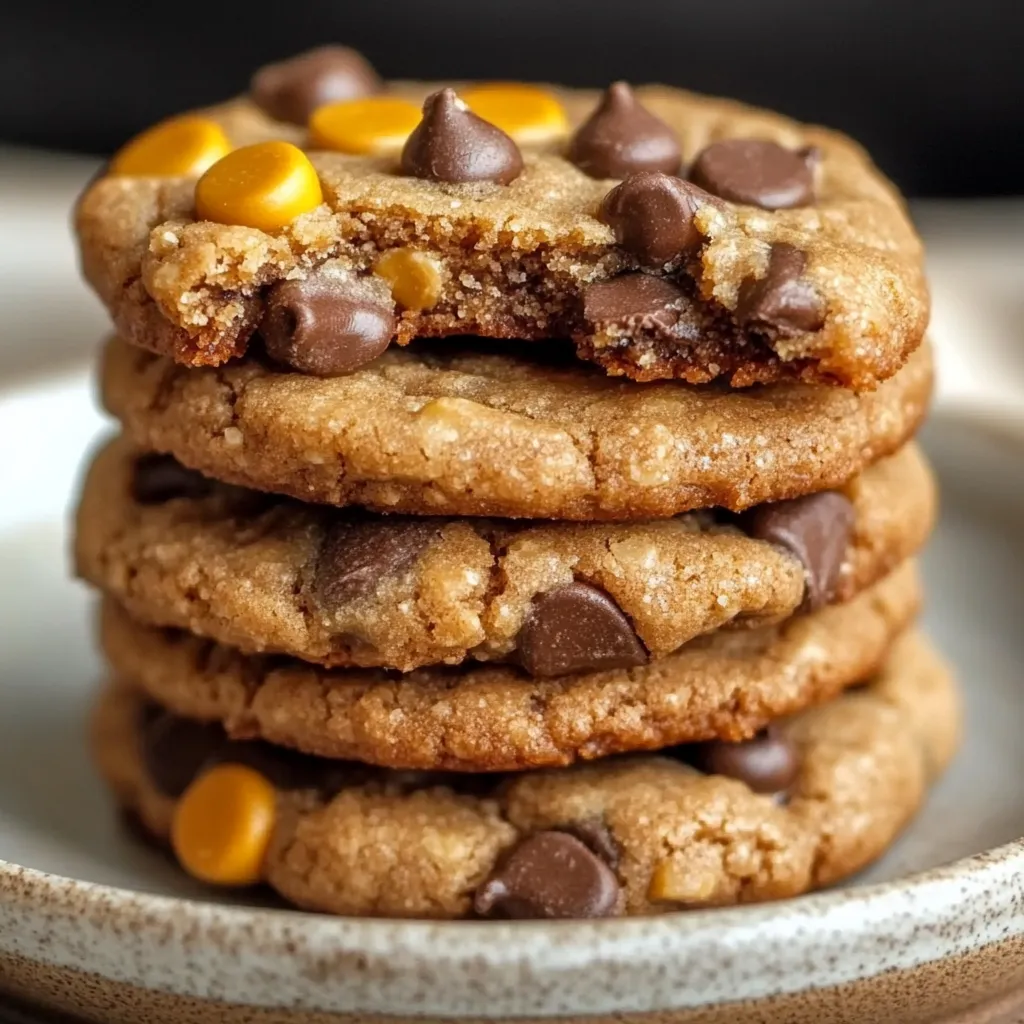
Protein cookies are the perfect fusion of indulgence and nutrition. Imagine biting into a soft, chewy cookie that not only satisfies your sweet tooth but also fuels your body with energy and protein—how amazing does that sound? Whether you’re a gym-goer looking for a post-workout snack, a busy parent trying to provide healthy treats for your kids, or simply someone who loves a delicious cookie with a twist, protein cookies are your answer.
The beauty of this recipe lies in its versatility. You can easily customize the flavors, ingredients, and nutritional profile to suit your preferences. Plus, it’s so easy to make that even beginners can nail it on their first try. Ready to dive in? Let’s explore why protein cookies deserve a spot in your snack lineup!
Why You’ll Love This Recipe
Protein cookies are more than just a healthier alternative—they’re downright irresistible. Here’s why you’ll fall in love with them:
Key Benefits
- Easy to Make: You don’t need fancy equipment or complicated techniques. With just a bowl, a spatula, and a baking sheet, you’re all set!
- Packed with Protein: Thanks to ingredients like protein powder and nut butter, each cookie is loaded with the nutrients your body craves.
- Customizable: Whether you’re gluten-free, vegan, or simply want to mix things up, this recipe has endless possibilities.
- Perfect for Any Time of Day: They work as a quick breakfast, a midday pick-me-up, or even a guilt-free dessert.
Suitable For
- Athletes and Gym-Goers: These cookies are a fantastic post-workout snack to replenish energy and aid muscle recovery.
- Busy Professionals: No time for a sit-down meal? Grab one of these cookies and keep moving without compromising on nutrition.
- Families: Kids love the taste, and parents love the wholesome ingredients—everyone wins!
Ingredients for Protein Cookies
Every great recipe starts with quality ingredients. Here’s a breakdown of what you’ll need for these protein-packed treats:
Core Ingredients
- Rolled Oats: These are a great source of complex carbs and fiber, giving the cookies a hearty texture and helping you feel full longer.
- Protein Powder: Choose between vanilla or chocolate depending on your flavor preference. This is the powerhouse ingredient that makes these cookies protein-rich.
- Nut Butter: Peanut butter or almond butter adds healthy fats, creaminess, and that irresistible nutty flavor.
- Honey or Maple Syrup: A natural sweetener that balances the flavors while keeping things wholesome.
- Unsweetened Applesauce: Not only does this add moisture, but it also acts as a natural binder, reducing the need for additional fat.
Substitutions and Tips
- Flour Alternatives: If you don’t have almond flour, oat or coconut flour are excellent substitutes. Just adjust the moisture levels slightly.
- Sweetener Swaps: Prefer a sugar-free option? Try stevia or monk fruit sweetener instead of honey or maple syrup.
- Dietary Adjustments: To make these cookies vegan, swap honey for maple syrup and use a plant-based protein powder.
Pro Tip: If you want a lower-carb version, reduce the oats and increase the nut butter slightly.
Kitchen Tools You’ll Need
Before you get started, make sure you have the right tools to make the process smooth and enjoyable.
Must-Have Tools
- Mixing Bowls: You’ll need one for the dry ingredients and another for the wet ingredients.
- Spatula: Perfect for mixing and folding the dough.
- Baking Sheet and Parchment Paper: Keeps your cookies from sticking and ensures easy cleanup.
Nice-to-Have Tools
- Cookie Scoop: For perfectly sized cookies every time. This also helps them bake evenly.
- Cooling Rack: Essential for letting the cookies cool properly without becoming soggy on the bottom.
Pro Tip: Invest in a silicone baking mat—it’s reusable, eco-friendly, and helps cookies bake evenly.
How to Make Protein Cookies
Making protein cookies is easier than you think, and the process is as enjoyable as the final product. With these step-by-step instructions, you’ll be biting into a batch of warm, nutritious cookies in no time.

Step 1: Preheat and Prepare
First things first: let’s get your oven ready. Preheat it to 350°F (175°C) to ensure the cookies bake evenly. While your oven heats up, grab a baking sheet and line it with parchment paper. This little step not only prevents sticking but also makes cleanup a breeze.
Pro Tip: If you have a silicone baking mat, it’s a fantastic reusable alternative to parchment paper.
Step 2: Combine Dry Ingredients
In a large mixing bowl, combine the following:
- 1 cup rolled oats.
- ½ cup almond flour (or oat flour if you prefer).
- ½ cup vanilla or chocolate protein powder.
- ¼ teaspoon baking soda.
- ¼ teaspoon salt.
Give these dry ingredients a good stir to ensure everything is evenly distributed.
Pro Tip: Use a whisk to break up any clumps in the protein powder or flour—it makes mixing easier and prevents uneven texture in the cookies.
Step 3: Add Wet Ingredients
Now for the fun part! Add these to your dry mix:
- ½ cup natural peanut butter (or almond butter for a lighter flavor).
- ¼ cup honey or maple syrup for sweetness.
- ¼ cup unsweetened applesauce for moisture.
- 1 teaspoon vanilla extract for that delicious aroma.
Grab your spatula and mix until everything comes together into a thick dough. If it feels too dry, add a tiny splash of water or milk (just a teaspoon at a time). The dough should be slightly sticky but easy to handle.
Pro Tip: For the best texture, ensure your peanut butter is room temperature—it blends more easily with the other ingredients.
Step 4: Add Mix-Ins (Optional)
Here’s where you can get creative! If you love a little extra crunch or sweetness, fold in:
- ¼ cup dark chocolate chips.
- 2 tablespoons chopped nuts or seeds (like almonds, walnuts, or sunflower seeds).
This step is completely optional, but these mix-ins add texture and flavor that take your cookies to the next level.
Step 5: Scoop and Bake
Using a tablespoon or cookie scoop, portion out the dough onto your prepared baking sheet. Flatten each scoop slightly with the back of a spoon to give it a cookie shape.
Bake in your preheated oven for 8–10 minutes, or until the edges are just lightly golden. Remember, these cookies are best when they’re soft, so don’t overbake them!
Pro Tip: Every oven is slightly different. Keep an eye on your cookies around the 8-minute mark to ensure they don’t dry out.
Step 6: Cool and Serve
Once baked, let the cookies cool on the tray for about 5 minutes. This helps them set and prevents them from falling apart when you transfer them. Afterward, move them to a cooling rack to cool completely.
Now, grab one (or two!) and enjoy the fruits of your labor. These cookies are perfect on their own or paired with a cup of coffee or milk.
Tips for Success
Want to make sure your protein cookies turn out perfectly every time? Here are a few tips:
- Avoid Overbaking: Protein cookies can go from soft and chewy to dry very quickly. Stick to the suggested bake time for the best results.
- Use High-Quality Protein Powder: The flavor and texture of your cookies largely depend on the protein powder you choose. Opt for a trusted brand with a smooth consistency.
- Experiment with Mix-Ins: Don’t hesitate to get creative! Try adding dried fruits like cranberries or raisins, or sprinkle in some warming spices like cinnamon or nutmeg for a cozy twist.
Pro Tip: If you want extra-soft cookies, slightly underbake them and let them cool on the tray longer—they’ll stay chewy for days!
How to Store Protein Cookies
Proper storage is the key to ensuring your protein cookies stay fresh, soft, and delicious for days (or even weeks!). Here’s how to store them depending on how long you’d like to keep them.

At Room Temperature
If you plan to enjoy your protein cookies within a few days, storing them at room temperature works perfectly. Place the cookies in an airtight container to prevent them from drying out. They’ll stay fresh and chewy for up to 3 days.
Pro Tip: Add a small piece of bread to the container to maintain moisture—the cookies will absorb just the right amount to stay soft.
In the Refrigerator
To keep your cookies fresher for longer, store them in the fridge. Transfer the cookies to a sealed container and refrigerate for up to 1 week. Refrigeration helps retain their texture while preventing spoilage.
Pro Tip: Let refrigerated cookies sit at room temperature for a few minutes before eating for the best flavor and texture.
Freezing Tips
Protein cookies freeze beautifully, making them a great make-ahead option for busy days. Here’s how to do it:
- Place the cookies in a single layer on a baking sheet and freeze until firm (about an hour).
- Transfer them to a freezer-safe bag or container, separating layers with parchment paper.
- Label the container with the date to keep track of freshness.
You can store them in the freezer for up to 3 months. When you’re ready to enjoy, simply thaw at room temperature or pop one in the microwave for 10–15 seconds for a warm treat.
Frequently Asked Questions (FAQs)
Can I make these cookies vegan?
Absolutely! Swap the honey for maple syrup or agave nectar and use a plant-based protein powder. With these simple adjustments, you’ll have a vegan-friendly batch that’s just as delicious.
Can I use other flours?
Yes, you can substitute almond flour with coconut flour, oat flour, or even whole wheat flour. Keep in mind that different flours absorb moisture differently, so you might need to adjust the amount of liquid ingredients. For example, coconut flour requires more wet ingredients due to its high absorbency.
How many calories are in each cookie?
Each cookie typically contains between 120–150 calories, depending on the ingredients and mix-ins you choose. For a more accurate count, plug your specific ingredient quantities into a calorie calculator.
What’s the best way to make the cookies chewier?
For irresistibly chewy cookies:
- Add a touch more applesauce to boost moisture.
- Slightly underbake them—remove the cookies from the oven when they’re just starting to turn golden. They’ll firm up as they cool while staying soft and gooey inside.
Related Recipes
- Oatmeal Chocolate Chip Banana Muffins – A protein-rich breakfast treat with a fruity twist.
- Pumpkin Spice Pancakes Recipe – Perfect for a cozy fall morning with a boost of flavor.
- Creamy Peanut Butter Energy Balls – A no-bake alternative packed with protein and healthy fats.
- Rice Krispie Chocolate Chip Cookies – A crunchy, sweet treat that pairs well with protein snacks.
- Homemade Cinnamon Rolls (No Yeast) – A decadent option for when you want to indulge.
Conclusion
Protein cookies aren’t just a healthier alternative—they’re a delicious treat that you’ll find yourself making again and again. With simple ingredients, easy steps, and endless customization options, this recipe is one you’ll want to save for every occasion.
So, what are you waiting for? Grab your mixing bowl, preheat the oven, and bake up a batch of these guilt-free goodies. Don’t forget to experiment with your favorite flavors and mix-ins—this recipe is all about making it your own!
Call-to-Action: If you try this recipe, we’d love to hear from you! Share your experience, post photos of your creations, or let us know your favorite mix-ins in the comments below. Happy baking!
Print
The Ultimate Guide to Protein Cookies
- Total Time: 20 minutes
- Yield: 12 cookies
Description
These protein cookies are a perfect combination of taste and nutrition. Soft, chewy, and packed with protein, they make for an ideal snack or post-workout treat.
Ingredients
- 1 cup rolled oats
- ½ cup almond flour or oat flour
- ½ cup protein powder (vanilla or chocolate)
- ½ cup natural peanut butter or almond butter
- ¼ cup honey or maple syrup
- ¼ cup unsweetened applesauce
- 1 teaspoon vanilla extract
- Optional: ¼ cup dark chocolate chips, 2 tablespoons chopped nuts/seeds
Instructions
- Preheat the oven to 350°F (175°C) and line a baking sheet with parchment paper.
- Mix dry ingredients in a bowl: oats, almond flour, protein powder, baking soda, and salt.
- Add wet ingredients: peanut butter, honey, applesauce, and vanilla. Mix until a dough forms.
- Fold in optional mix-ins like chocolate chips or nuts.
- Scoop dough into tablespoon-sized portions and flatten slightly.
- Bake for 8–10 minutes. Let cool on a rack before serving.
Notes
- Adjust sweetness or flavor by using flavored protein powder.
- For vegan cookies, swap honey with maple syrup and use plant-based protein powder.
- Prep Time: 10 minutes
- Cook Time: 10 minutes
- Category: Healthy Snacks
- Method: Baking
- Cuisine: American
Nutrition
- Calories: 130
- Sugar: 6g
- Fat: 6g
- Carbohydrates: 14g
- Fiber: 2g
- Protein: 7g

