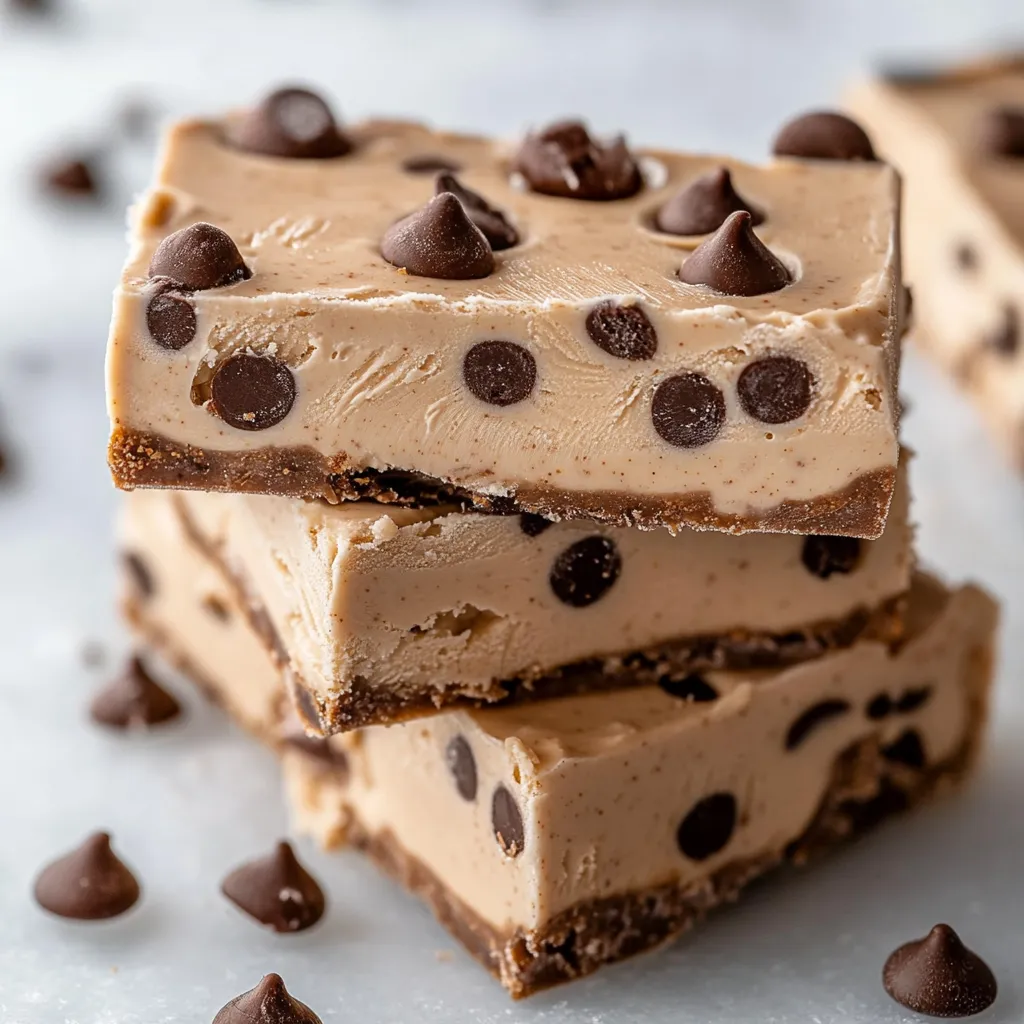
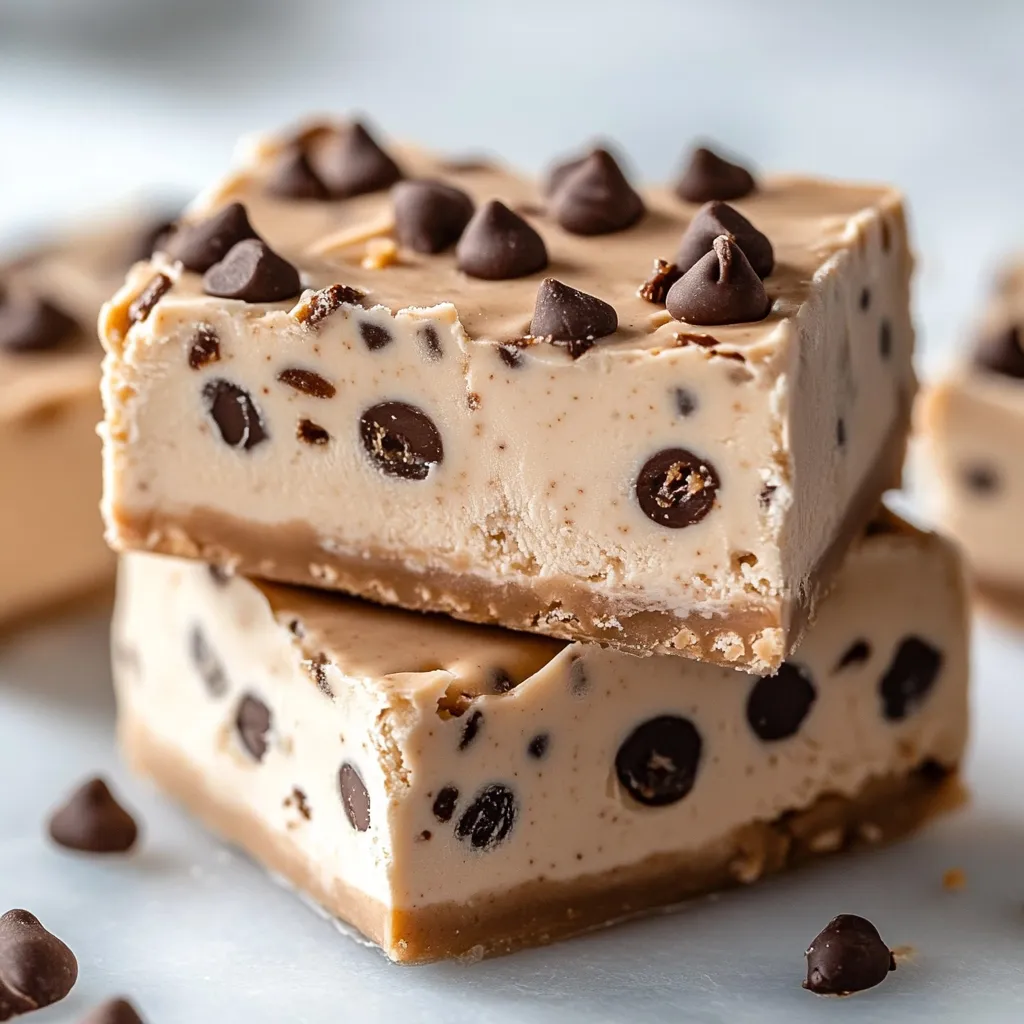
Imagine biting into a dessert that’s creamy, nutty, and just sweet enough to satisfy your cravings, all without the guilt. That’s exactly what these Peanut Butter Frozen Yogurt Bars bring to the table. They’re a delightful mix of indulgence and nutrition, perfect for families, busy schedules, or anyone looking for a no-fuss treat. The best part? You don’t need to be a pro in the kitchen to whip these up.
This recipe is simple, versatile, and a healthier alternative to traditional frozen desserts. It combines protein-rich Greek yogurt with the natural sweetness of honey or maple syrup and the irresistible richness of peanut butter. With a crunchy granola topping (and optional chocolate chips for extra flair), these bars are bound to become your new go-to snack or dessert.
Whether you’re making these as an after-school treat for the kids, a post-workout snack, or a little something to stash in your freezer for when the sweet tooth strikes, these bars have got you covered. They’re quick to prepare, freezer-friendly, and endlessly customizable to suit your tastes.
Why You’ll Love This Recipe
Key Benefits
- Easy to Make: This recipe comes together in minutes with just a handful of ingredients you probably already have in your kitchen.
- Healthier Dessert Option: Packed with protein from Greek yogurt and natural sweeteners like honey or maple syrup, these bars are a guilt-free indulgence.
- Customizable: Swap out ingredients to make it your own. Whether you’re gluten-free, dairy-free, or nut-free, there’s a way to adapt this recipe to your preferences.
Suitable For
- Family Treats: Kids and adults alike will love these frozen bars, especially with the optional chocolate chip topping.
- Quick Desserts: Ideal for busy days when you need something sweet but don’t have time to bake.
- Healthy Snacking: Perfect for those looking for a high-protein, low-sugar snack.
Ingredients for Peanut Butter Frozen Yogurt Bars

Here’s a breakdown of everything you’ll need to make these creamy bars, with a few tips to make sure they turn out perfectly every time.
Core Ingredients
- ½ cup creamy peanut butter: The star ingredient, giving these bars their rich, nutty flavor. Opt for natural peanut butter for a healthier option, but regular works just as well.
- ¼ cup honey or maple syrup: A natural sweetener that balances the tanginess of Greek yogurt and adds just the right amount of sweetness.
- 1 teaspoon vanilla extract: A small touch that elevates all the other flavors.
- ½ cup granola (for topping): Adds crunch and texture. Look for your favorite granola or make your own for a personal touch.
- 2 cups Greek yogurt (plain or vanilla): The creamy base of the recipe. Plain Greek yogurt is great if you like a tangy flavor, while vanilla adds a hint of sweetness.
- ¼ cup mini chocolate chips (optional): Perfect if you’re looking to add a little extra indulgence to the mix.
Substitutions and Tips
- Nut Butters: Swap peanut butter for almond butter, cashew butter, or sunflower seed butter for a different flavor or to make the recipe nut-free.
- Sweeteners: Maple syrup works beautifully in place of honey, especially if you prefer a vegan option.
- Granola Alternatives: Not a fan of granola? Crushed nuts, seeds, or even shredded coconut can be used as a topping.
- Yogurt Options: Use dairy-free Greek-style yogurt to make this recipe completely plant-based.
This combination of simple, wholesome ingredients ensures that these bars come out deliciously creamy with just the right amount of sweetness and crunch. Plus, the recipe is forgiving—making it a fantastic choice for experimenting with your favorite add-ins and flavors.
By now, your mouth is probably watering just thinking about these Peanut Butter Frozen Yogurt Bars. Trust me, they’re worth every second of prep time. Let’s dive into the step-by-step process to bring these bars to life!
Kitchen Tools You’ll Need
Before you get started, make sure you have everything you need. The good news? This recipe requires minimal equipment.
Must-Have Tools
- Mixing bowl: A medium-sized bowl works perfectly for combining your ingredients.
- Spatula or spoon: For mixing and spreading the yogurt mixture evenly.
- 8×8-inch baking dish: The perfect size for this recipe, ensuring the bars set at just the right thickness.
- Parchment paper: Makes removing the bars from the dish a breeze.
Nice-to-Have Tools
- Electric whisk: If you want an extra-smooth yogurt mixture, this tool can save you some elbow grease.
- Offset spatula: While not essential, it’s great for creating an even, polished surface.
Step-by-Step Instructions
Step 1: Prepare the Mixture
Start by combining your core ingredients in a mixing bowl: Greek yogurt, peanut butter, honey or maple syrup, and vanilla extract. Use a spoon or spatula to stir everything together until the mixture is smooth and creamy. If the peanut butter is a bit stiff, you can microwave it for a few seconds to soften it up—this makes mixing a lot easier.
Tip: Take your time with this step. A well-mixed base ensures every bite of your bars is full of flavor.
Step 2: Line the Pan
Line your 8×8-inch baking dish with parchment paper. Make sure the paper extends over the edges of the pan—this will act as handles to help you lift the bars out once they’re frozen.
Pro Tip: Lightly grease the pan before adding the parchment paper. This will help keep the paper in place while you spread the mixture.
Step 3: Spread Evenly
Pour the prepared yogurt mixture into the lined dish. Using a spatula, spread it out evenly, making sure to reach all the corners. The smoother the surface, the more uniform your bars will look when they’re finished.
Encouragement: Don’t worry if it’s not perfectly level—this is a homemade treat, and a little imperfection adds charm!
Step 4: Add Toppings
Now comes the fun part. Sprinkle granola evenly across the top of the yogurt mixture. If you’re using mini chocolate chips, scatter those as well. To make sure the toppings stick, gently press them down with the back of a spoon or your hands.
Tip: Want to get creative? This is your chance to add extras like chopped nuts, shredded coconut, or even a drizzle of melted chocolate.
Step 5: Freeze
Place the pan in the freezer and let it sit for at least 3-4 hours, or until the yogurt mixture is fully set.
Reminder: Resist the urge to check on the bars too early—they need time to freeze solid. Patience is key here!
Step 6: Cut into Bars
Once the mixture is frozen, lift it out of the pan using the parchment paper handles. Place it on a cutting board and use a sharp knife to cut it into bars or squares.
Pro Tip: Run your knife under hot water and dry it off before slicing. This will help you get clean, smooth cuts.
Tips for Success
Here are a few extra pointers to make sure your bars turn out perfectly:
- Freeze for Long Enough: Don’t rush the freezing process. If the bars aren’t fully set, they’ll be difficult to cut and handle.
- Room Temperature Softening: Let the bars sit at room temperature for 2-3 minutes before eating. This softens the texture just enough to make them even creamier.
- Sharp Knife is a Must: A dull knife can make slicing messy, so take the time to sharpen yours beforehand.
By following these steps and tips, you’ll create bars that are not only delicious but also look impressive enough to serve to friends and family. This is one recipe you’ll find yourself making again and again!
How to Store Peanut Butter Frozen Yogurt Bars
To make the most of your hard work, proper storage is essential. These bars are frozen treats, so keeping them fresh and ready to grab whenever you need is key.
At Room Temperature
Unfortunately, these bars don’t hold up well at room temperature. They’re meant to be enjoyed frozen, so leaving them out for more than a few minutes will cause them to melt.
In the Refrigerator
If you plan to serve them soon, you can store the bars in the fridge for an hour or two. They’ll soften to a creamy consistency, but be aware that they won’t hold their shape as well.
Freezing Tips
For the best results, store your bars in the freezer.
- Airtight Container: Place them in a freezer-safe airtight container to prevent freezer burn.
- Individually Wrapped: For grab-and-go convenience, wrap each bar in parchment paper or plastic wrap before placing them in the container.
- Storage Duration: These bars will stay fresh in the freezer for up to two weeks.
When you’re ready to enjoy one, simply take it out and let it sit at room temperature for 2-3 minutes to soften slightly.
Frequently Asked Questions
Here are some of the most common questions people have about making and storing these bars.
Can I use non-dairy yogurt?
Absolutely! Non-dairy options like almond, coconut, or soy yogurt work beautifully in this recipe. Just be sure to choose a thick, Greek-style yogurt to maintain the creamy texture.
What other toppings can I add?
The possibilities are endless. Try fresh fruit, chopped nuts, shredded coconut, or a drizzle of caramel or melted chocolate. You can even sprinkle a pinch of sea salt for a sweet-and-salty twist.
How can I make this recipe gluten-free?
It’s simple! Just make sure to use certified gluten-free granola or replace it with a topping like crushed nuts or seeds.
Can I make this ahead of time?
Yes, these bars are perfect for meal prepping. You can make them up to two weeks in advance, store them in the freezer, and enjoy them whenever you like.
Recipe Variations
One of the best things about this recipe is how easy it is to customize. Here are a few ideas to switch things up and keep your dessert game exciting:
Fruit-Layered Bars
Add a layer of fruit puree or jam between the yogurt mixture and the toppings for an extra burst of flavor. Strawberry, raspberry, or blueberry work especially well.
Chocolate-Lovers Bars
Mix a tablespoon of cocoa powder into the yogurt mixture for a chocolatey twist. You can even top with chocolate shavings for a more decadent dessert.
Nut-Free Option
If you’re avoiding nuts, replace the peanut butter with sunflower seed butter and use nut-free granola for the topping.
Tropical Treat
Add shredded coconut to the yogurt mixture and top with crushed pineapple or mango for a summery vibe.
High-Protein Boost
Stir in a scoop of your favorite protein powder to the yogurt mixture for a post-workout snack that’s as delicious as it is nutritious.
Related Recipes
If you loved these Peanut Butter Frozen Yogurt Bars, you might enjoy these sweet and easy recipes:
- Chocolate Peanut Butter Cake: A rich and decadent dessert for peanut butter lovers.
- Creamy Ice Cream Bars: Another frozen treat, perfect for hot summer days.
- Peanut Butter Rice Krispie Treats: A chewy, crunchy peanut butter snack option.
Final Thoughts
Peanut Butter Frozen Yogurt Bars are the perfect blend of creamy, crunchy, and just the right amount of sweet. They’re easy to make, fun to customize, and a guaranteed crowd-pleaser. Whether you’re looking for a healthier dessert option or a refreshing snack to enjoy on a warm day, this recipe checks all the boxes.
So why not give these a try? Once you see how easy and delicious they are, you’ll want to make them a permanent fixture in your freezer. And don’t forget to share your variations and creations—I’d love to hear how you make this recipe your own!
Print
Peanut Butter Frozen Yogurt Bars
- Total Time: 10 minutes (plus freezing)
- Yield: 8-10 bars
Description
These Peanut Butter Frozen Yogurt Bars are a creamy, healthy frozen treat combining the tangy richness of Greek yogurt with the nutty flavor of peanut butter, topped with crunchy granola and optional chocolate chips. Easy to make and perfect for a snack or dessert!
Ingredients
- ½ cup creamy peanut butter
- ¼ cup honey or maple syrup
- 1 teaspoon vanilla extract
- 2 cups Greek yogurt (plain or vanilla)
- ½ cup granola (for topping)
- ¼ cup mini chocolate chips (optional)
Instructions
- In a bowl, mix Greek yogurt, peanut butter, honey, and vanilla extract until smooth.
- Line an 8×8-inch baking dish with parchment paper.
- Spread the yogurt mixture evenly in the dish.
- Sprinkle granola and mini chocolate chips on top, pressing lightly to adhere.
- Freeze for 3-4 hours or until solid.
- Remove from the dish, cut into bars, and serve.
Notes
- For softer bars, let them sit at room temperature for 2-3 minutes before eating.
- These bars can be stored in the freezer for up to 2 weeks in an airtight container.
- Prep Time: 10 minutes
- Cook Time: 0 minutes
Nutrition
- Calories: 150
- Sugar: 9g
- Fat: 7g
- Carbohydrates: 15g
- Fiber: 1g
- Protein: 6g
")