Introduction to Peanut Butter Balls
The love for homemade treats: Why Peanut Butter Balls?
Have you ever found yourself craving a sweet yet healthy snack? Enter peanut butter balls—the ultimate homemade treat that not only satisfies your sweet tooth but also packs a punch of nutrition. These little bites of bliss are perfect for young professionals who are always on the go, providing a quick energy boost without the guilt.
So, why should you fall in love with peanut butter balls? First, they’re incredibly easy to make. With just a handful of ingredients—most of which you likely already have in your pantry—it doesn’t take much time to whip up a batch. Think about it: who can resist the creamy goodness of peanut butter mixed with oats, honey, and a sprinkle of chocolate chips? It’s like having a mini dessert that you can feel good about consuming!
Moreover, homemade treats like these allow you to control what goes into your snacks. In a world where processed foods are everywhere, it’s refreshing to create something from scratch. You can customize your peanut butter balls in countless ways: add a scoop of protein powder for an extra kick, mix in shredded coconut for a tropical flair, or toss in some nuts for an added crunch. The possibilities are endless!
Speaking of options, did you know that peanut butter can be a great source of plant-based protein? According to a study by Healthline, peanut butter is not only delicious but also rich in vitamins, minerals, and healthy fats that keep you feeling full longer. This makes it a fantastic choice for your busy lifestyle.
As you dive into making your own peanut butter balls, think about the joy of sharing these treats with friends or enjoying them after a workout. You’ll find they not only taste fantastic, but they can also elevate your snacking game to a whole new level. So, gather your ingredients, and let’s start making those delightful peanut butter balls that will surely become a staple in your kitchen!
For a deeper look into the health benefits of peanut butter, check out Nutritional Insights.

Ingredients for Peanut Butter Balls
Essential ingredients for a perfect batch
Creating these delightful peanut butter balls is all about using quality ingredients. For a smooth, rich flavor, you’ll need:
- Peanut Butter: Opt for creamy or crunchy based on your preference. Natural peanut butter is a fantastic choice as it has no added sugars.
- Rolled Oats: Whole oats add texture and fiber, making your snack heartier.
- Honey or Maple Syrup: These natural sweeteners help bind the mixture while adding sweetness.
- Chocoe Chips: A must for chocolate lovers! Use dark or semi-sweet, depending on your taste.
These essentials will set the foundation for your peanut butter balls.
Optional ingredients for enhanced flavor
Want to elevate those peanut butter balls? Consider adding some of these delicious alternatives:
- Chopped Nuts: Almonds or walnuts add a satisfying crunch.
- Coconut Flakes: Shredded coconut will bring a tropical twist to your mixture.
- Protein Powder: Boost the nutritional value for a post-workout snack.
- Flaxseed or Chia Seeds: For a nutritional kick, these seeds offer healthy fats and fiber.
Mix and match based on your mood to create a personalized batch of peanut butter balls! If you’re looking for more inspiration, check out NutritionData for more insights on ingredient benefits.
Step-by-step preparation of Peanut Butter Balls
Making peanut butter balls is a delightful experience, and the results are a treat everyone will love. Let’s dive into how you can whip up this delicious snack in just a few simple steps.
Gather your ingredients
Before you get started, it’s essential to have all your ingredients ready. This not only streamlines the preparation process but also makes it a whole lot more enjoyable. For classic peanut butter balls, you’ll need:
- 1 cup creamy or crunchy peanut butter (your choice!)
- 1/4 cup unsalted butter, softened
- 1 cup powdered sugar
- 1 cup graham cracker crumbs
- Pinch of salt
- 1-2 cups semi-sweet chocolate chips (depending on how chocolaty you want them)
Having everything at hand will prevent any last-minute scrambles—trust me, I’ve been there! You can even check out this guide on the best brands of peanut butter for some inspiration.
Mix the peanut butter and butter
In a mixing bowl, take your creamy or crunchy peanut butter and softened butter and combine them well using a hand mixer or a spoon. The goal here is to create a smooth mixture that blends the flavors together perfectly. If you love the nutty taste of peanut butter, this step is especially important as it forms the base of your balls.
If you’re pondering ways to switch things up, consider experimenting with flavored peanut butters, like honey or chocolate versions. They can add a fun twist to your peanut butter balls.
Add in the dry ingredients
Next, sift in the powdered sugar and graham cracker crumbs. Add a pinch of salt for taste and mix everything until it’s well incorporated. The dough should be firm but not too dry. If it feels off, don’t hesitate to adjust the ratios slightly. Mix until you see no more dry ingredients, and embrace any little lumps for character!
Shape the perfect peanut butter balls
Now comes the fun part—shaping your peanut butter balls! Take about a tablespoon of the mixture and roll it into a smooth ball with your hands. Try to keep them uniform in size, as this will help with even chocolate coating later. If you prefer smaller bites, go for it. Just remember, they might be a little easier to eat but can disappear quicker than you think!
Chill to set the shape
Once you have rolled all the balls, it’s time to chill them. Place them on a parchment-lined baking sheet and pop them into the freezer for about 30 minutes. This step is crucial for helping the peanut butter balls maintain their shape when coated with chocolate later on. Plus, who doesn’t love a little bit of icy goodness?
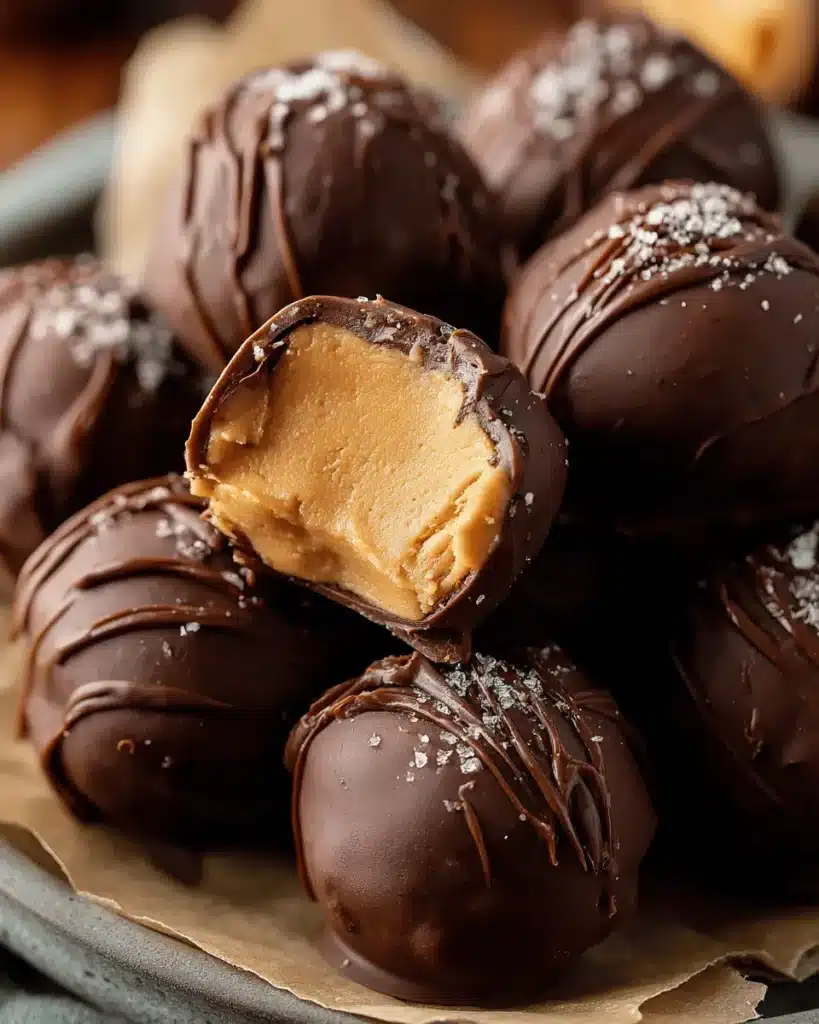
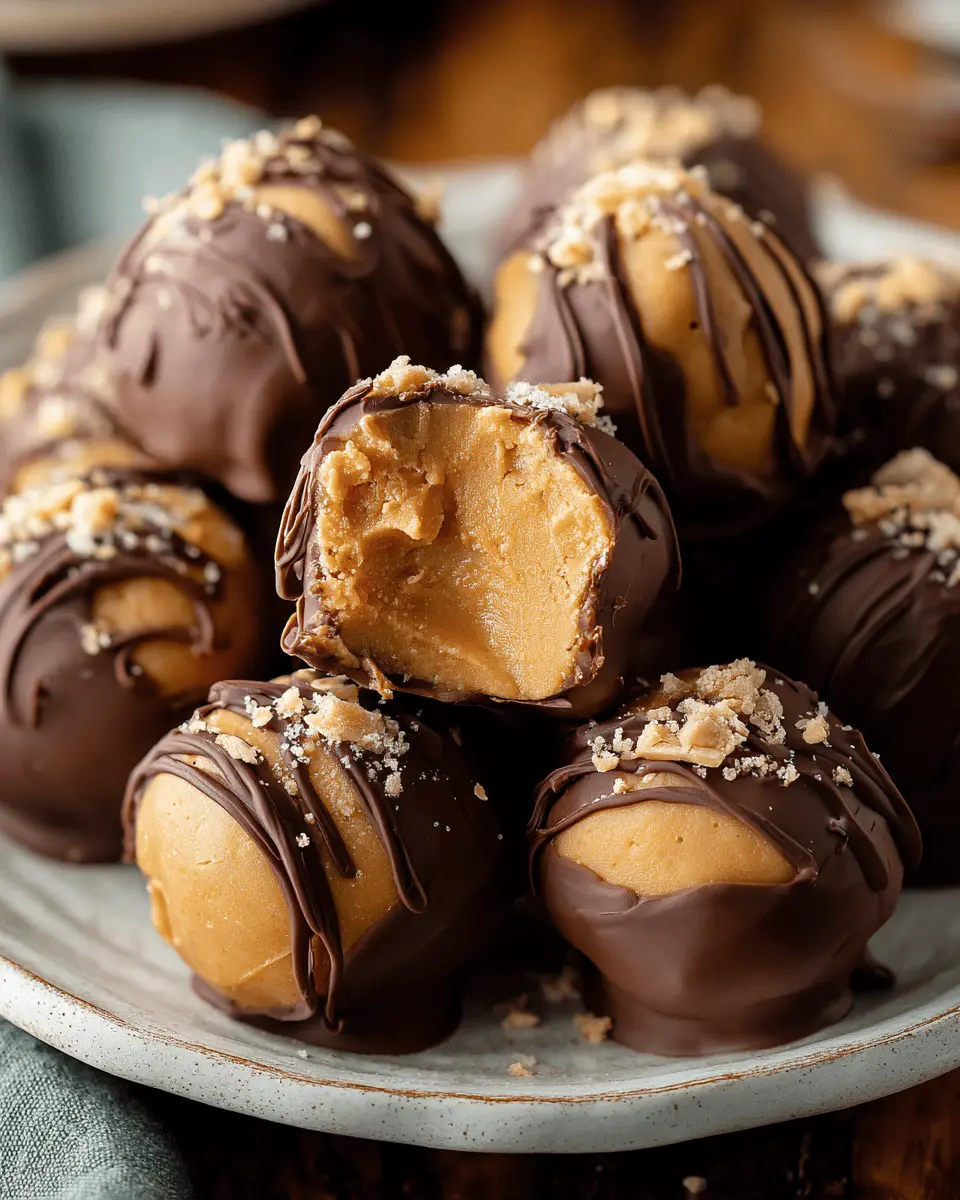
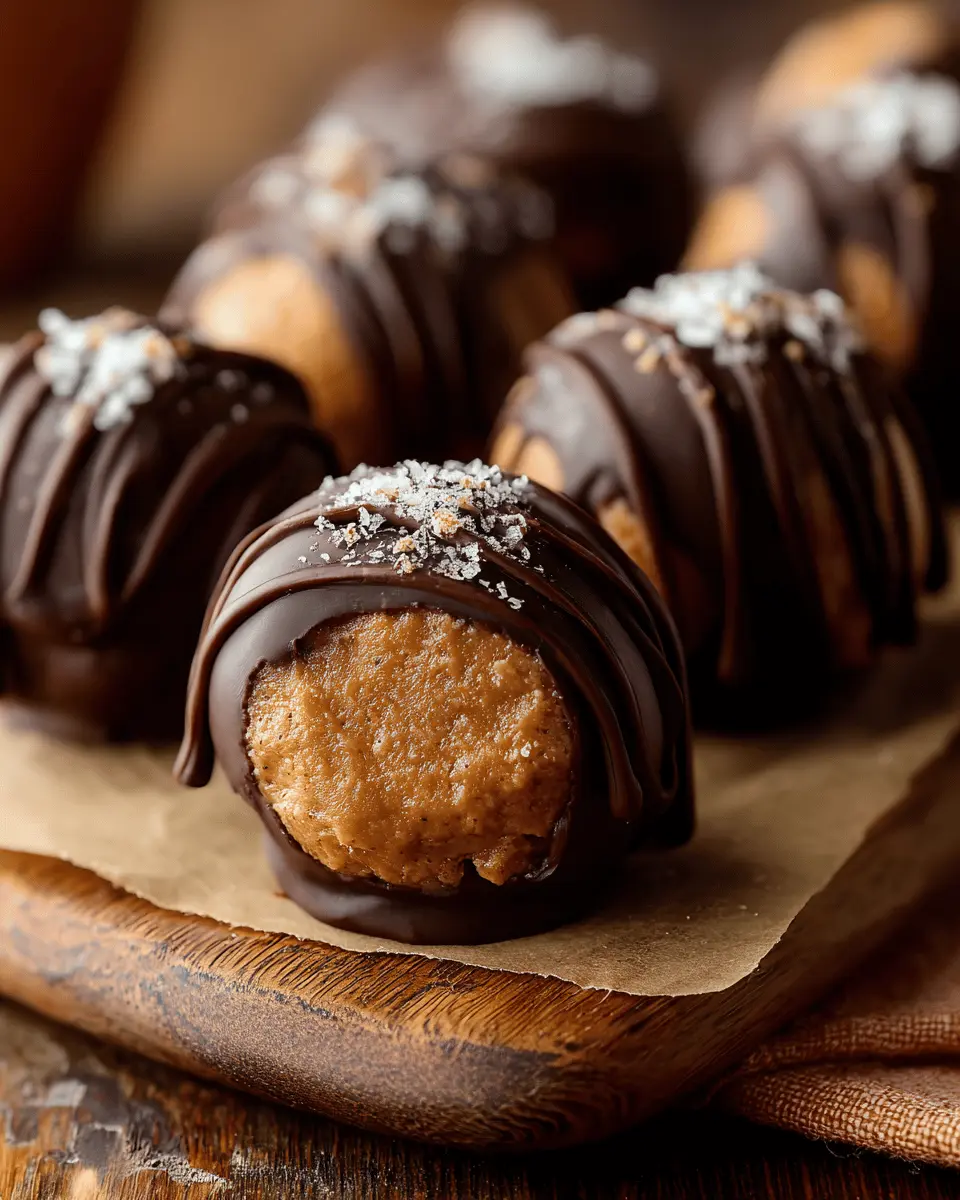
Melt the chocolate and coat the balls
While the balls are chilling, melt your chocolate chips in a microwave-safe bowl. Heat them in 20-30 second increments, stirring in between until smooth. This is a great time to ponder over whether you want to add any flavorings—a bit of coconut oil can help give a silky finish, or a sprinkle of sea salt can enhance the chocolate’s flavor.
Once melted, use a fork or toothpick to dip each peanut butter ball into the chocolate, coating it fully. Let the excess chocolate drip off before placing them back on the parchment.
Let the chocolate set
Finally, allow the chocolate-coated peanut butter balls to cool and set at room temperature or in the fridge. You’ll want to wait until they are firm to the touch before diving in, which usually takes about 30 minutes.
And there you have it—your own homemade peanut butter balls! These little bites are not just delicious; they make fantastic snacks or gifts. Try personalizing the recipe with different toppings or flavors, and make it your own. Enjoy your sweet endeavor!
Variations on Peanut Butter Balls
When it comes to peanut butter balls, the classic version is undoubtedly delicious, but why stop there? You can easily customize these treats to suit your taste buds or impress your friends at a gathering. Let’s explore two delightful variations that take this simple snack to the next level.
Peanut Butter Balls with Coconut Flakes
For a tropical twist, try adding coconut flakes to your peanut butter balls. The creamy texture of the peanut butter paired with the chewy coconut creates a perfect balance. Here’s how to incorporate them:
- In the mixture, fold in ½ cup of unsweetened coconut flakes before rolling into balls.
- Once formed, consider rolling them again in extra coconut for that extra flair.
These balls are not only tasty but also give you a touch of indulgence reminiscent of a beach vacation. If you’re interested in the health benefits, check out this article on coconut to learn why it’s a great addition!
Chocolate-Dipped Peanut Butter Balls with Sprinkles
Who doesn’t love a little chocolate? Transform your peanut butter balls into decadent treats by dipping them in melted chocolate. Here’s how:
- Melt your favorite chocolate (dark, milk, or even white) using a double boiler.
- Dip each peanut butter ball, letting the excess chocolate drip off.
- Before the chocolate sets, sprinkle with colorful sprinkles for that festive touch!
This version not only looks impressive but also incorporates delightful texture and visual appeal. Plus, you can customize the sprinkles for different occasions or holidays. Can’t choose a chocolate? This guide on chocolate has some great insights!
Whether you go with the tropical coconut variation or the rich chocolate-dipped treat, your peanut butter balls are sure to be a hit! Get creative and enjoy the process!
Cooking tips and notes for Peanut Butter Balls
Tips for a smoother chocolate coating
Achieving a velvety chocolate coating for your peanut butter balls can elevate your treat from good to utterly divine. Here are a few tips to ensure your chocolate is perfectly smooth:
- Use high-quality chocolate: Whether you opt for dark, milk, or even white chocolate, go for brands with minimal additives for the best flavor and texture.
- Melt properly: Gently melt your chocolate using a double boiler or microwave. If using a microwave, heat in 30-second intervals, stirring in between. This prevents burning and keeps the chocolate silky.
- Add a splash of coconut oil: Mixing in a teaspoon of coconut oil can thin out the chocolate, making it easier to coat your peanut butter balls evenly.
Notes on peanut butter selection
The type of peanut butter you choose can significantly affect your peanut butter balls. Natural peanut butter, with just peanuts and salt, is often the best choice as it offers a rich and creamy texture. Avoid brands with added sugars or hydrogenated oils, as these can change the consistency of your mixture. For a nutty twist, consider experimenting with crunchy peanut butter—it can add delightful texture and flavor!
For more tips on choosing the best peanut butter, check out The Kitchn’s guide. Happy cooking!
Serving suggestions for Peanut Butter Balls
When it comes to enjoying your peanut butter balls, the possibilities are endless! Here are some delightful ways to elevate your treat game.
Pairing with fruit and nuts
Why not take the classic combo of peanut butter and fruit to the next level? Consider serving your peanut butter balls alongside:
- Sliced apples or pears for a crunchy, juicy contrast.
- A bowl of mixed berries like strawberries, blueberries, and raspberries that bring freshness and a pop of color.
- Chopped nuts such as almonds or walnuts, which add extra crunchiness to your snack plate.
This approach not only enhances the flavor but also boosts nutritional benefits, offering a balance of protein and fiber that is perfect for a mid-day snack.
Creative serving ideas for gatherings
Hosting a gathering? Yummy peanut butter balls can be a hit! Try these ideas:
- Create a peanut butter dessert platter, combining your balls with chocolate-dipped fruits or other bites.
- Serve them in mini dessert cups, drizzling with honey or melted dark chocolate for a touch of elegance.
- Offer a flavor station with toppings like shredded coconut or crushed graham crackers, inviting guests to customize their treats.
By being innovative in your serving approach, you’re sure to impress your guests and make snacking a fun, interactive experience! For more creative snack ideas, check out resources from the American Peanut Council.
With just a little creativity, your peanut butter balls can be the star of the show!
Time Breakdown for Peanut Butter Balls
Preparation Time
Preparing your peanut butter balls is a breeze and only takes about 15 minutes. Just gather your ingredients—creamy peanut butter, oats, honey, and chocolate chips, for example—and get ready to roll!
Chilling Time
Once you’ve shaped your delightful little balls, pop them in the fridge for at least 30 minutes. This makes them firmer and helps all those yummy flavors meld together. Honestly, the wait is worth it!
Total Time
In total, you’ll spend about 45 minutes from start to finish. That’s not much time for a delicious snack that you can whip up in a flash! Whether you’re prepping for a busy week or need something quick for a gathering, these peanut butter balls are perfect.
For more ideas on healthy snacks, check out Healthline’s snack recipes to complement your creations!
Nutritional Facts for Peanut Butter Balls
Calories per Serving
When indulging in these delicious peanut butter balls, you’ll find that each serving packs around 100 calories. This makes them an excellent snack option for anyone trying to manage their caloric intake while satisfying their sweet tooth.
Nutritional Breakdown
These tasty treats aren’t just about the calories; they also deliver a wealth of nutrition:
- Protein: Approximately 4 grams per serving, making them great for those needing a post-workout boost.
- Fats: Around 6 grams, primarily from healthy fats found in peanut butter, which can help promote heart health.
- Carbohydrates: Roughly 9 grams, providing a quick energy source.
- Fiber: About 1 gram, aiding in digestion and keeping you feeling full.
Incorporating peanut butter balls into your diet can be a smart way to snack healthily. For more detailed nutritional insights, consider checking out resources from the USDA or the Academy of Nutrition and Dietetics for deeper dives into food health.
FAQ about Peanut Butter Balls
Can I make these gluten-free?
Absolutely! Making gluten-free peanut butter balls is a breeze. Simply substitute regular oats with certified gluten-free oats, as oats can often be contaminated during processing. You can also opt for gluten-free protein powder if you’re adding that for a nutritional boost. Your peanut butter balls will still taste delicious and be safe for anyone avoiding gluten.
How do I store leftover peanut butter balls?
To keep your peanut butter balls tasting fresh, store them in an airtight container at room temperature for about a week, or in the fridge for up to two weeks. If you find yourself with extra, going the extra mile to freeze them is a great option! Just ensure they are in a single layer until fully frozen, and then transfer them to a freezer-safe bag or container. They can last in the freezer for up to three months—perfect for those snack cravings later!
Can I freeze peanut butter balls?
Yes, you can definitely freeze peanut butter balls! This makes them a fantastic make-ahead snack. Once frozen, you can pop them into your lunch bag for a nutritious pick-me-up during the day. Just remember to let them thaw slightly at room temperature before enjoying, as this will bring them back to their delightful, creamy texture.
For more information on snack prep and storage tips, check out The Nutrition Source for expert advice. Happy snacking!
Conclusion on Peanut Butter Balls
Final thoughts on making these delectable treats
In conclusion, making peanut butter balls is not only simple but also an enjoyable experience that can bring a smile to anyone’s face. These treats offer a delightful combination of flavors and textures, perfect for satisfying your sweet tooth without excessive guilt.
Consider experimenting with different coatings like dark chocolate or coconut flakes to elevate your snack game. Plus, they make an ideal grab-and-go option for busy days. Have fun with the recipe—after all, the best part is sharing your creations with friends and family. If you’re seeking more inspiration, check out resources like Food Network for additional ideas on how to personalize your delicious peanut butter balls.
So why not whip up a batch tonight? Happy snacking!
Print
Peanut Butter Balls: Easy Indulgence for a Homemade Treat
- Total Time: 40 minutes
- Yield: 24 balls
- Diet: Vegetarian
Description
These Peanut Butter Balls are a quick and delicious treat, perfect for satisfying your sweet tooth with minimal effort.
Ingredients
- 1 cup peanut butter
- 1/2 cup honey
- 2 cups rolled oats
- 1 cup chocolate chips
- 1/2 cup powdered sugar
Instructions
- In a large mixing bowl, combine the peanut butter and honey, mixing until smooth.
- Stir in the rolled oats, chocolate chips, and powdered sugar until well combined.
- Using your hands, form the mixture into small balls and place on a baking sheet lined with parchment paper.
- Refrigerate for at least 30 minutes to set before serving.
Notes
- These can be stored in the fridge for up to a week.
- Add protein powder for an extra nutritional boost!
Nutrition
- Serving Size: 2 balls
- Calories: 120
- Sugar: 8g
- Sodium: 50mg
- Fat: 7g
- Saturated Fat: 2g
- Unsaturated Fat: 5g
- Trans Fat: 0g
- Carbohydrates: 13g
- Fiber: 2g
- Protein: 3g
- Cholesterol: 0mg
")