Introduction to Ooey Gooey Bars
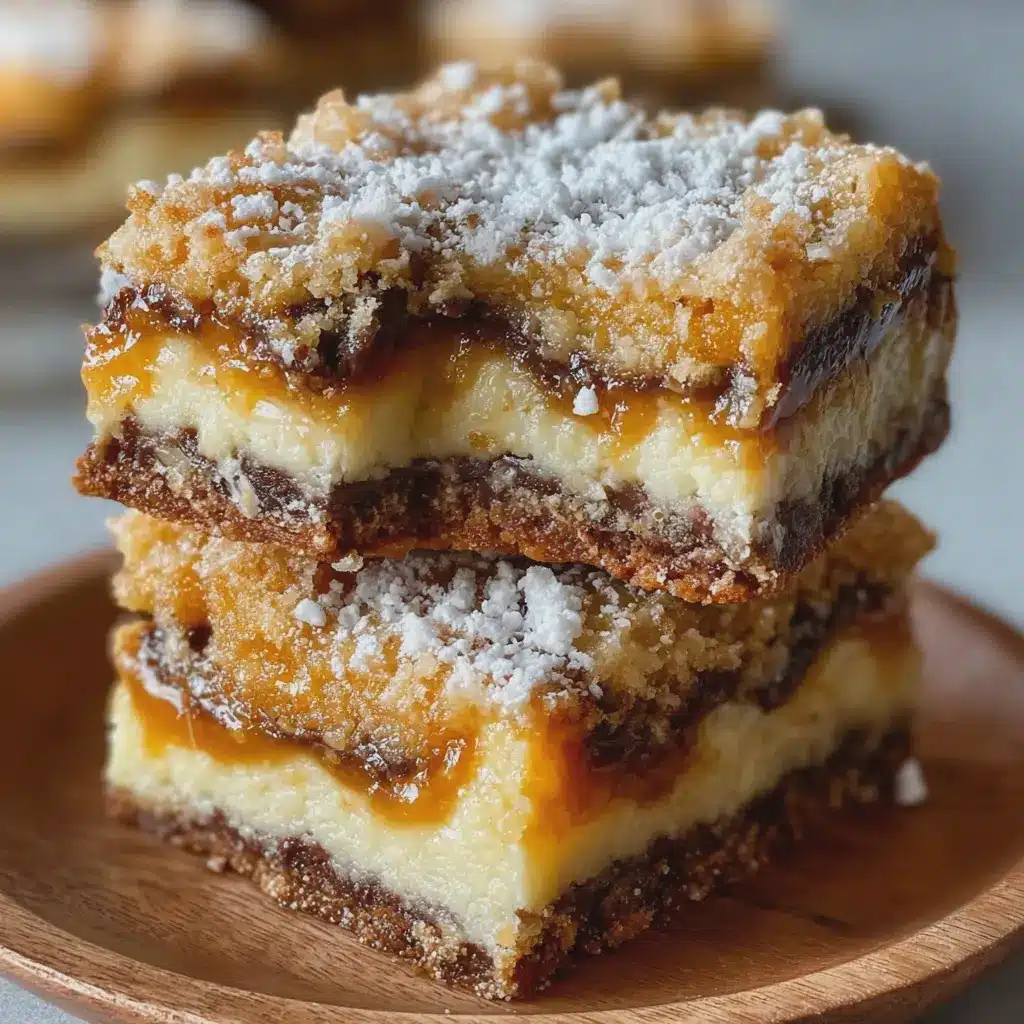
If you haven’t yet experienced the delight of ooey gooey bars, you’re in for a treat! These delectable bars hold a special place in the hearts of dessert lovers everywhere. Imagine a sweet, chewy base that’s rich and buttery, topped with an irresistible, sticky layer of gooey goodness. It’s like a flavor explosion wrapped in a convenient, handheld treat. You might be wondering why these bars are so important in the baking world. Well, they not only satisfy your sweet tooth but also bring a sense of nostalgia. Many of us associate them with family gatherings, celebrations, or just cozy weekends spent baking.
What Makes Ooey Gooey Bars Special?
The beauty of ooey gooey bars lies in their versatility. You can customize them in endless ways—add chocolate chips, nuts, or even your favorite fruits. Recipes often call for simple ingredients readily available in your pantry, making them a go-to option for spontaneous baking sessions. Plus, their flexibility allows you to experiment without fear of failure. That’s the joy of crafting these delightful bars!
For instance, a classic ooey gooey bar often features a base layer made from flour, brown sugar, and butter, yielding that rich taste we all love. The magic happens as you layer on a filling—be it caramel, marshmallow, or a chocolate ganache—that melds into the base, creating a warm, gooey center that’s hard to resist.
Why Should You Try Making Them?
Besides the mouthwatering taste, ooey gooey bars are a hit because they’re simple to make. Three main steps—mixing, layering, and baking—are all it takes to create a delightful dessert. According to a study by The Food Institute, home baking has seen a resurgence, particularly among young professionals looking for both comfort and creativity in their cooking. So why not hop on board this trend?
For those intrigued by the idea, check out The Kitchn’s guide to caramel techniques to elevate your ooey gooey bar game, or explore a community on AllRecipes for personal twists others have made.
In the spirit of easy indulgence and tasty memories, let’s dive into the recipe where all this ooey gooey magic begins!
Ingredients for Ooey Gooey Bars
When it comes to creating irresistibly tasty ooey gooey bars, having the right ingredients makes all the difference. Let’s break down what you’ll need to whip up this delectable treat.
Essential Ingredients for the Crust
The foundation of your ooey gooey bars is a rich, buttery crust that provides the perfect balance to the gooey filling.
- Butter: Use unsalted butter for a rich flavor.
- Brown Sugar: This adds a deep, caramel-like sweetness that’s simply divine.
- Flour: All-purpose flour works best for texture.
- Salt: A pinch enhances the sweet flavors.
- Egg: Binding the crust together, this ingredient is crucial.
Key Ingredients for the Filling
Now, onto the filling—the true star of your ooey gooey bars! This is where the magic happens.
- Condensed Milk: This creamy base brings the gooeyness we all crave.
- Chocolate Chips: Choose semi-sweet or milk chocolate for that dreamy texture.
- Vanilla Extract: A splash of pure vanilla adds an aromatic sweetness.
- Chopped Nuts: Optional, but adds a delightful crunch—try pecans or walnuts!
By using these simple yet essential ingredients, you’re on your way to impressing friends and family with your homemade ooey gooey bars. For more baking tips, check out King Arthur Baking or Food Network and elevate your dessert game!
Step-by-step preparation of Ooey Gooey Bars
Making ooey gooey bars can feel like an adventure in baking, but trust me, it’s a delightful experience that will have your friends begging for the recipe. These bars are incredibly versatile, packed with flavor, and make for a fantastic dessert for any occasion. So, put on your apron, and let’s dive into the step-by-step preparation!
Preheat the oven and prepare your baking dish
Before you get your hands dirty, start by preheating your oven to 350°F (175°C). This ensures your ooey gooey bars bake evenly and achieve that perfect gooey center with a crisp crust. While the oven is heating, grab a 9×13-inch baking dish and lightly grease it with butter or non-stick spray. If you want to take it a step further, line the bottom with parchment paper for easy removal later. Trust me, this small step will save you a lot of hassle when it’s time to cut the bars. Looking for more tips on oven safety? Check out this Oven Safety Guide.
Make the buttery crust
Now that your dish is ready, it’s time to whip up the buttery crust, which forms the base of your ooey gooey bars. In a medium bowl, combine:
- 1 cup of all-purpose flour
- 1/2 cup of unsalted butter, softened
- 1/4 cup of granulated sugar
- 1/4 teaspoon of salt
Using a fork or your hands, mix until the mixture resembles coarse crumbs. Press the mixture evenly into the bottom of your prepared baking dish, making sure to compact it well. This step is crucial; a sturdy crust provides the necessary support for the luscious filling above. Pop the crust into the oven for about 10 minutes or until it’s lightly golden.
Mix the creamy filling
While the crust is baking, let’s get the filling ready! You’ll want a smooth, creamy mixture to create that classic ooey-gooey effect. In a large bowl, beat together:
- 2 large eggs
- 1 cup of light brown sugar
- 1/2 cup of granulated sugar
- 1/4 cup of all-purpose flour
- 1 teaspoon of vanilla extract
Whisk these ingredients together until everything is well combined and the mixture is smooth. This is the magic potion that gives your ooey gooey bars their signature texture! You might find that the smell alone will have you salivating. If you’re interested in variations, consider adding chocolate chips or nuts for an extra crunch—just be mindful of your audience’s preferences.
Assemble the layers
With the crust ready and the filling mixed, it’s time to bring your delicious creation together. Once the crust is done baking, take it out of the oven and pour the creamy filling over the warm crust. Use a spatula to spread the filling evenly across the surface. For an extra touch, you can sprinkle some chocolate chips on top. The melted chocolate will add another level of gooey goodness!
Bake to perfection
Return the assembled ooey gooey bars to the oven and bake for an additional 25-30 minutes. As they bake, keep an eye on the edges; they’ll firm up while the center remains beautifully soft. When you notice a slight jiggle in the center but the edges are set, you’re in the sweet spot! Make sure to let them cool completely before cutting into generous squares. The wait is hard, but this step ensures a clean cut and the best presentation.
In summary, making ooey gooey bars is a straight-forward yet rewarding endeavor. Whether you’re treating yourself, hosting a gathering, or looking to impress a special someone, these bars are sure to steal the show. Ready to dig in? Enjoy every bite!

Variations on Ooey Gooey Bars
When it comes to ooey gooey bars, the possibilities are nearly endless. These sweet treats are versatile enough to cater to a variety of tastes and occasions. Here are two delicious variations to inspire your next baking adventure.
Chocolate Chip Ooey Gooey Bars
The classic ooey gooey bars are hard to resist, but when you add chocolate chips into the mix, you elevate them to a whole new level! The rich, creamy texture combined with the melt-in-your-mouth chocolate creates an irresistible combination.
To make these bars:
- Ingredients: Use your favorite ooey gooey base, then fold in 1 to 1 ½ cups of semi-sweet or dark chocolate chips.
- Tips: For an extra kick, sprinkle some sea salt on top before baking. It contrasts perfectly with the sweetness and enhances the overall flavor.
Seasonal Fruit Ooey Gooey Bars
Incorporating seasonal fruits not only adds visual appeal but also introduces fresh flavors that can brighten up your dessert table. Think ripe strawberries in summer or apple slices in autumn.
Here’s how you can create this variation:
-
Ingredients: Replace some of the original filling with 1 to 2 cups of chopped fruit such as strawberries, blueberries, or diced apples.
-
Tips: Consider a drizzle of honey or a sprinkle of cinnamon for an extra layer of flavor. The natural sweetness of the fruit pairs beautifully with the gooey texture.
Both variations are perfect for gatherings or just a cozy night in. Want more baking inspiration? Check out this resource on seasonal fruits. Happy baking!
Cooking Tips and Notes for Ooey Gooey Bars
Tips for Achieving the Perfect Gooey Texture
Creating the ideal ooey gooey bars is all about balancing moisture and structure. Here are some helpful pointers:
- Monitor Baking Time: Keep an eye on your bars during the final minutes. They should be set around the edges but can look underbaked in the center. This is key to that luscious gooeyness!
- Allow Cooling: Resist the temptation to cut into the bars right away. Letting them cool for at least 30 minutes allows the filling to set, ensuring that delightful stretch in every bite.
Notes on Ingredient Substitutes
If you’re missing some ingredients, don’t panic! Here are common substitutes that work well:
- Butter: Can be substituted with coconut oil or vegan butter for a lighter alternative.
- Sugar: Feel free to swap in brown sugar for a richer flavor.
- Chocolate Chips: Try using white chocolate or even peanut butter chips for a unique twist.
For more tips on ingredient swaps, check out Epicurious and explore their extensive guides! With these tips in hand, you’re set up for success with your ooey gooey bars. Happy baking!
Serving Suggestions for Ooey Gooey Bars
How to Plate and Present Them
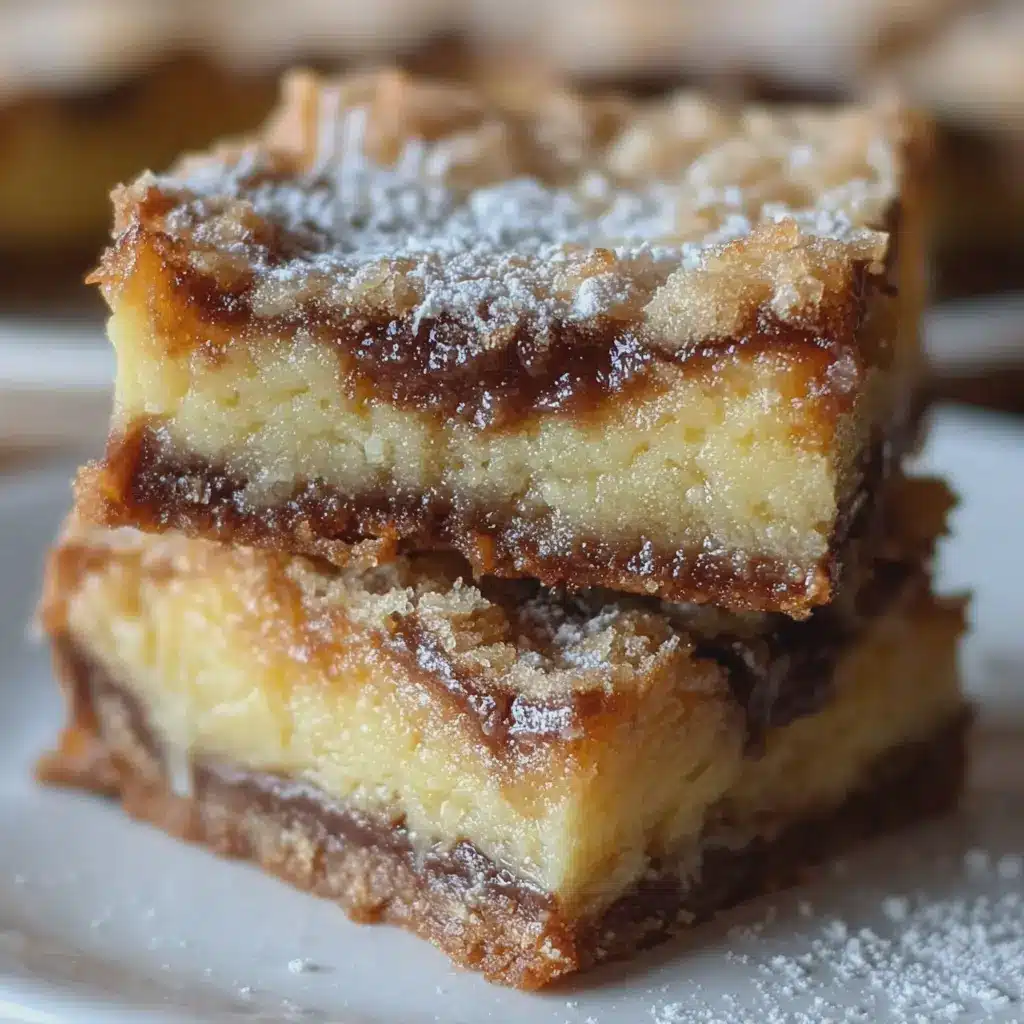
When it comes to serving ooey gooey bars, presentation can elevate the entire experience. Start by cutting the bars into uniform squares for a clean look. Place them on a simple white plate to let their rich, golden color shine. A dusting of powdered sugar on top adds an elegant touch and a hint of sweetness. For a pop of color, garnish with fresh berries or mint leaves. If you want to create a dessert table, stack them on a tiered stand for a visually appealing display that will have your guests reaching for more.
Best Pairings for a Snack or Dessert
These luscious bars can be enjoyed solo, but they shine even brighter with the right companions. Consider pairing your ooey gooey bars with:
- A scoop of vanilla ice cream or a dollop of whipped cream to balance their sweetness.
- A hot cup of freshly brewed coffee or a chilled glass of almond milk for a delightful contrast.
- Fresh fruit like strawberries and raspberries, which add a tart note to complement the richness.
For more inspiration on dessert pairings, websites like Epicurious offer a plethora of ideas that can spark your creativity.
Keep in mind, the versatility of ooey gooey bars makes them a fantastic addition to any gathering. Whether it’s a casual get-together or a festive celebration, they’re sure to be a hit!
Time breakdown for Ooey Gooey Bars
Preparation time
Making ooey gooey bars is a breeze! You’ll only need about 15 minutes to gather your ingredients and prep your pan. It’s as simple as mixing your base and getting everything ready for the oven.
Baking time
Once prepped, these delectable ooey gooey bars will take approximately 25-30 minutes to bake. Keep an eye on them during the last few minutes to achieve that perfect golden hue – you want them gooey but set!
Total time
In total, you’re looking at around 45-50 minutes from start to finish. Perfect for a quick dessert after a bustling workday! For tips on enhancing flavors, check out this baking guide for inspiration. Happy baking!
Nutritional Facts for Ooey Gooey Bars
When indulging in ooey gooey bars, knowing their nutritional profile can help you savor them even more! Here’s a quick overview to keep you in the loop:
Calories Per Bar
Each ooey gooey bar packs around 250 calories. While they’re rich in flavor, it’s wise to enjoy them in moderation, especially if you’re watching your calorie intake.
Sugar Content
These delightful treats typically contain about 15 grams of sugar per bar. The sweetness is part of their charm, but keeping an eye on sugar consumption is essential, especially for those managing their sugar levels.
Protein Content
With approximately 3 grams of protein, these bars aren’t a primary protein source but can still offer a little energy boost in your day. For a protein-packed pairing, consider enjoying them alongside a serving of Greek yogurt or a handful of nuts for a balanced snack!
For more insights into healthy snacking, check out resources from Healthline and WebMD.
FAQ about Ooey Gooey Bars
Can I make these bars ahead of time?
Absolutely! Ooey gooey bars are perfect for making in advance. You can prepare the bars up to two days ahead of time and store them in an airtight container at room temperature. Just be sure to let them cool completely before covering them to prevent excess moisture from building up. This allows the flavors to meld nicely, making them even tastier when you are ready to serve!
What should I do if the center doesn’t set properly?
If you find that the center of your ooey gooey bars hasn’t set properly, don’t worry—it’s a common issue! Here are a few tips to salvage them:
- Bake a little longer: Pop them back in the oven for an extra 5-10 minutes. Just keep an eye on the edges to ensure they don’t overcook.
- Chill in the fridge: Sometimes, all they need is a little time in the fridge to firm up. Just let them cool on the counter first before transferring them to the refrigerator.
- Serve as a dessert dip: If things don’t work out as planned, scoop the mixture into bowls with some graham crackers or fresh fruit for dipping; it becomes a fun, gooey dessert option!
How do I store leftover bars?
To keep your ooey gooey bars fresh, store any leftovers in an airtight container at room temperature for up to 3 days. If you want to extend their life, consider freezing them. Wrap individual pieces in plastic wrap, then place them in a freezer-safe bag—this will allow you to enjoy them later without losing their mouth-watering texture! For more tips on food storage, check out this informative guide from the USDA on safe food handling practices.
Conclusion on Ooey Gooey Bars
Why these bars are a must-try for young professionals
As a young professional constantly on the go, you deserve a sweet treat that brings joy and comfort without demanding too much of your time. Ooey gooey bars offer just that—quick to prepare and even faster to devour, these bars will quickly become your go-to dessert for late-night cravings or weekday gatherings.
Imagine your colleagues’ faces lighting up when you bring these delicious squares to the office. They’re not just tasty; they’re a slice of happiness that can boost your mood during those hectic workweeks. Plus, pair them with a freshly brewed coffee or herbal tea, and you’ve crafted the perfect snack combo.
So why wait? Dive into making these delightful ooey gooey bars, and don’t forget to share your creations on social media. You just might inspire a fellow friend or coworker to whip up their own batch! For an even deeper dive into dessert recipes, check out this great baking resource for more inspirations.
Print
Ooey Gooey Bars: The Best Indulgent Treat for Any Occasion
- Total Time: 45 minutes
- Yield: 12 servings
- Diet: Vegetarian
Description
Delve into the deliciousness of Ooey Gooey Bars, the perfect blend of sweetness and texture that satisfies every dessert craving.
Ingredients
- 1 cup butter
- 2 cups granulated sugar
- 4 large eggs
- 2 teaspoons vanilla extract
- 2 cups all-purpose flour
- 1 teaspoon baking powder
- 1/2 teaspoon salt
- 1 cup chocolate chips
Instructions
- Preheat the oven to 350°F (175°C).
- In a large bowl, cream together the butter and sugar until light and fluffy.
- Add the eggs one at a time, mixing well after each addition.
- Stir in the vanilla extract.
- In a separate bowl, whisk together the flour, baking powder, and salt.
- Gradually add the dry ingredients to the wet mixture, stirring until just combined.
- Fold in the chocolate chips.
- Spread the batter into a greased 9×13 inch baking dish.
- Bake for 25-30 minutes, or until a toothpick inserted comes out clean.
- Allow to cool before cutting into squares.
Notes
- For an extra touch, sprinkle sea salt on top before baking.
- Serve warm with a scoop of ice cream for a decadent dessert.
- Prep Time: 15 minutes
- Cook Time: 30 minutes
- Category: Dessert
- Method: Baking
- Cuisine: American
Nutrition
- Serving Size: 1 bar
- Calories: 350
- Sugar: 25g
- Sodium: 150mg
- Fat: 20g
- Saturated Fat: 10g
- Unsaturated Fat: 8g
- Trans Fat: 0g
- Carbohydrates: 40g
- Fiber: 1g
- Protein: 3g
- Cholesterol: 70mg
")