Introduction to Homemade Milky Way Bars
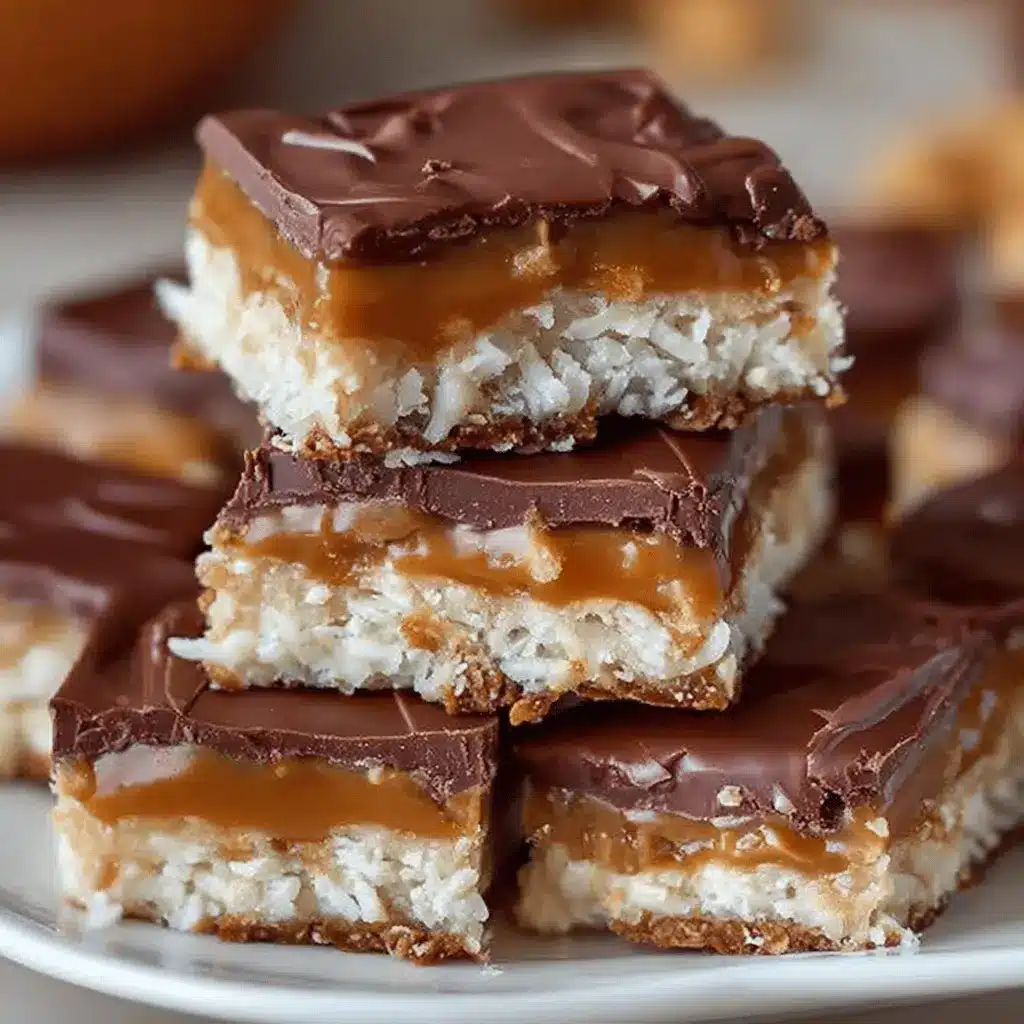
Creating your own Homemade Milky Way Bars is a delightful way to indulge your sweet tooth while honing your culinary skills. Have you ever wondered how those delectable layers of chocolate, caramel, and nougat come together? Making them at home allows you to control every ingredient, ensuring a richer and more satisfying treat.
Why Choose Homemade Over Store-Bought?
When it comes to satisfaction, nothing beats the experience of crafting your own candy bars. Here’s why making Homemade Milky Way Bars might be the best choice for your next treat:
-
Quality Control: You know exactly what goes into your bars. There are no artificial flavors or preservatives lurking in your kitchen. You can even swap out certain ingredients if you have allergies or specific dietary preferences.
-
Flavor Customization: This is your chance to get creative! Want a more intense chocolate flavor or an extra kick of sea salt in the caramel? You have the artistic license to adjust recipes to your taste. Perhaps a dash of vanilla extract could elevate the flavor profile?
-
Cost-Effectiveness: Making your own candy can save you money, especially if you’re preparing for a party or event. Bulk buying ingredients can significantly lower the cost per bar.
-
Fun & Creativity: There’s joy in the process of baking. Engaging with friends or family in the kitchen can make the task even more enjoyable. Think of it as a baking party where everyone gets to express their creativity.
As you start your adventure into the world of homemade candy, you’re not just making Homemade Milky Way Bars; you’re making memories. Perhaps you’ll even introduce your friends to this fun activity.
If you’re eager to dive into some creative chocolate-making, be sure to check out this guide on chocolate tempering for more tips. You’ll not only impress your friends but also delight in a truly delicious treat that’s made with heart. So grab your apron and let’s get started on this sweet journey!
Ingredients for Homemade Milky Way Bars
Creating your own Homemade Milky Way Bars is an exciting adventure in the kitchen! Here’s what you’ll need for each delightful layer.
Essential ingredients for nougat layer
For that fluffy nougat layer, gather the following staples:
- 1 cup granulated sugar
- ¼ cup corn syrup
- ¼ cup water
- 1 large egg white, or a vegan egg substitute
- 1 teaspoon vanilla extract
- ½ cup chopped nuts (optional)
These ingredients set the foundation for your Homemade Milky Way Bars. The egg white provides that light, airy texture that complements the rich caramel and chocolate.
Ingredients for caramel layer
Next, let’s move on to the luscious caramel. You’ll need:
- ½ cup brown sugar
- ¼ cup heavy cream
- ¼ cup unsalted butter
- 1 teaspoon vanilla extract
- A pinch of salt
This combination creates that gooey, sweet layer you crave in a classic Milky Way.
Ingredients for chocolate coating
Finally, what’s a Milky Way without the chocolate? For the coating, grab:
- 2 cups milk chocolate chips
- 1 teaspoon shortening or coconut oil (for a smoother melt)
These ingredients ensure that your Homemade Milky Way Bars have that irresistible chocolate outer layer. Now that you’ve gathered these, you’re just a few steps away from enjoying a delightful treat!
Looking for other recipes to satisfy your sweet tooth? Check out this dessert blog for inspiration that matches your culinary cravings!
Step-by-step Preparation of Homemade Milky Way Bars
Making Homemade Milky Way Bars can be a delightful adventure in your kitchen. Not only do they satisfy your sweet tooth, but they also allow you to impress friends and family with your baking prowess. Let’s get right into the preparation!
Prepare the nougat layer
The first step to achieving that iconic Milky Way taste is creating the nougat layer. This is where you blend your sweet and nutty flavors together.
- Ingredients needed:
- 1 cup granulated sugar
- 1/3 cup corn syrup
- 1/4 cup water
- 1 egg white (or 1/4 cup egg white powder mixed with water)
- 1/4 cup peanut butter
- A pinch of salt
- In a small saucepan, combine the granulated sugar, corn syrup, and water. Heat on medium, stirring until the sugar dissolves.
- Once it bubbles, allow it to cook without stirring until it reaches a soft-ball stage (about 240°F or 115°C), which you can check with a candy thermometer.
- Meanwhile, in a separate bowl, beat the egg white until soft peaks form.
- Slowly pour the hot sugar mixture into the egg whites while whisking. Add the peanut butter and salt, mixing until smooth.
- Press this mixture into a greased 8×8 inch pan and let it set while you prepare the caramel layer.
Add the caramel layer
Next up is the caramel layer, one that many find irresistible. The sweetness of this layer beautifully contrasts with the nougat.
- Ingredients needed:
- 1 cup granulated sugar
- 1/4 cup butter
- 1/2 cup heavy cream
- 1/4 teaspoon salt
- In a saucepan, combine the granulated sugar and butter on medium heat. Stir until melted and caramel-colored.
- Carefully add the heavy cream and salt (your mixture will bubble up, so be cautious!).
- Increase the heat and bring to a gentle boil, then reduce to low, allowing it to thicken for about 5-7 minutes.
- Pour the caramel directly over the nougat layer and let it cool completely.
Prepare the chocolate coating
Now for the finishing touch—the chocolate coating, which envelops everything in that rich, dreamy chocolate taste.
- Ingredients needed:
- 2 cups chocolate chips (or chopped chocolate)
- 1 tablespoon vegetable oil (to help with smoothness)
- In a double boiler, melt the chocolate chips with vegetable oil, stirring until it’s completely smooth. Alternatively, you can melt them in the microwave in 30-second intervals.
- Remove from heat and let cool slightly before coating.
Chill & slice the bars
After adding the chocolate coating, it’s essential to let everything chill and firm up.
- Pour the melted chocolate over the set caramel layer, spreading it evenly.
- Place the pan in the refrigerator for at least 30 minutes to let it cool and harden.
- Once firm, use a sharp knife to slice them into bars.
Serve and enjoy!
Now comes the moment of truth—serving and enjoying your Homemade Milky Way Bars.
- Serve them fresh from the fridge for that nice, firm bite.
- For a fun twist, consider adding toppings like sea salt or crushed nuts.
- Don’t forget to share! Homemade treats always taste better with good company.
Making your own Homemade Milky Way Bars isn’t just about the end product; it’s about the joy of creating. The love and care you pour into these bars is what will make them stand out. For more exciting dessert recipes, check out The Spruce Eats or Serious Eats to elevate your baking game! Enjoy every bite and happy baking!

Variations on Homemade Milky Way Bars
Creating your own Homemade Milky Way Bars opens up a world of delicious possibilities! Once you’ve mastered the classic version, why not experiment with a few delightful twists? Here are two fun variations that are sure to impress your friends and satisfy your sweet tooth.
Nutty Nougat Version
If you love the idea of adding a little crunch to your Homemade Milky Way Bars, consider incorporating nuts into your nougat layer. Chopped almonds or hazelnuts can add a fantastic texture and flavor profile. Here’s how to do it:
- Choose your nuts: Almonds provide a lovely crunch, while hazelnuts add a rich creaminess.
- Mix them in: Simply fold your chopped nuts into the nougat mixture before spreading it into the pan. This small addition elevates the flavor and provides that delightful crunch.
If you want to dive deeper into nutty confections, check out this resource for tips on selecting the best nuts for baking.
Sweet-Salty Twist with Sea Salt
For those who enjoy a contrast of flavors, adding a sprinkle of sea salt to your Homemade Milky Way Bars can create an irresistible sweet-and-salty combination.
- Finish with flair: Once you have layered your chocolate and caramel, lightly sprinkle sea salt on top before letting it set. This little touch can really enhance the chocolate experience.
- Experiment with flavors: If you’re feeling adventurous, try using flavored sea salts like smoked or garlic-infused to take these bars to the next level.
A flavor profile that balances sweet and salty is not only trendy but can also impress your guests.
By trying out these variations, you’ll discover the magic of customizing your Homemade Milky Way Bars. Enjoy experimenting!
Cooking Tips and Notes for Homemade Milky Way Bars
Ingredient Quality Matters
When making your Homemade Milky Way Bars, the ingredients you choose can really make a difference. Opt for high-quality chocolate and fresh cream when possible. Many people don’t realize that the flavor of your bars hinges on these small details. For instance, using premium chocolate can enhance the richness and overall taste of your bars. Not sure where to find good chocolate? Check out specialty shops or local farmers’ markets for artisanal selections that promise real flavor.
Storage Tips for Freshness
Once you’ve crafted your delicious Homemade Milky Way Bars, proper storage will maximize their freshness. Try these tips:
- Wrap bars individually in wax paper or foil to keep them from sticking together.
- Store them in an airtight container at room temperature for up to a week.
- For longer storage, consider freezing them. Just be sure to seal them tightly to prevent freezer burn.
Keeping your homemade treats fresh not only preserves their taste but also ensures you can indulge whenever the craving strikes. Happy cooking!
Serving Suggestions for Homemade Milky Way Bars
Pairing with Milk Alternatives
When indulging in your Homemade Milky Way Bars, consider pairing them with your favorite milk alternatives! Almond milk, oat milk, or even coconut milk create a delicious contrast to the rich chocolate and caramel flavors. Almond milk, with its slightly nutty taste, can really enhance the overall experience, making your snack feel gourmet. If you’re feeling adventurous, try a smoothie made with a milk alternative, banana, and a few frozen berries for that perfect balance of sweetness and nutrition.
Creative Ways to Enjoy the Bars
Don’t limit your enjoyment of Homemade Milky Way Bars to snacking alone! Here are some fun ideas to make the most of every bite:
- Ice Cream Topping: Chop up your bars and sprinkle them over a scoop of vanilla or chocolate ice cream for a decadent sundae.
- S’mores Twist: Use the bars in place of chocolate in your s’mores for that chewy caramel kick.
- Dessert Board: Incorporate these bars into a dessert platter alongside fresh fruit and nuts for a visually appealing treat during gatherings.
So, when those cravings hit, let your imagination run wild with these delicious serving suggestions! For more inspiration, check out this guide on delicious dessert pairings that could take your homemade bars to the next level.
Time Breakdown for Homemade Milky Way Bars
Preparation Time
Creating these delightful Homemade Milky Way Bars starts with a straightforward preparation phase that takes about 20-25 minutes. Gather your ingredients, which will include chocolate, caramel, and nougat, and ensure you have your baking equipment ready. It’s like setting the scene for a sweet adventure!
Chilling Time
After combining the flavors to make those delicious layers, it’s essential to chill them in the fridge. This process usually takes around 1-2 hours. It’s during this time that all those gooey and rich flavors meld into pure bliss.
Total Time
All in all, you’re looking at a total time of approximately 1.5 to 2.5 hours from start to finish. The result? Homemade Milky Way Bars that are not just satisfying but also a fun project to tackle on a weekend! Want to make your bars extra special? Consider adding some sea salt on top for that perfect sweet-salty contrast. Check out The Kitchn for tips on sweetening your homemade desserts.
If you’re curious about how to store them or get creative with variations, don’t hesitate to explore other dessert blogs for inspiration. Enjoy the journey to making these treats!
Nutritional Facts for Homemade Milky Way Bars
When you whip up a batch of homemade Milky Way bars, it’s essential to know what you’re indulging in. Let’s break down the nutritional facts to keep your cravings in check.
Calories per bar
Each bar packs around 200-250 calories, making them a sweet treat that balances well with a light meal or a post-workout snack.
Sugar content
These delightful bars contain approximately 25-30 grams of sugar. While indulging occasionally is part of a balanced diet, keep this in mind if you’re monitoring your sugar intake.
Protein breakdown
On the protein front, you can expect about 2-3 grams per bar. If you’re looking to enhance the protein level, consider pairing your bars with a protein shake or a handful of nuts.
For more insights on nutrition, feel free to check out resources like NutritionData and the USDA FoodData Central. Enjoy your treats responsibly, and don’t hesitate to share your homemade creations!
FAQs about Homemade Milky Way Bars
Making your own Homemade Milky Way Bars can be a delightful adventure, but you might have a few questions. Let’s tackle some of the most common ones!
Can I make these bars vegan?
Absolutely! To create a vegan version of your Homemade Milky Way Bars, substitute dairy ingredients with plant-based alternatives. Use almond or coconut milk for the nougat, and opt for a vegan chocolate that is dairy-free. You can also find marshmallow fluff made from plant-based ingredients or try making your own with aquafaba, which is the liquid from cooked chickpeas. With a few modifications, your sweet treats can be enjoyed by everyone, regardless of dietary preferences.
How long do the bars last?
If stored properly, your Homemade Milky Way Bars can last up to two weeks at room temperature. For longer freshness, consider refrigeration. Just be sure to wrap them tightly in plastic wrap or store them in an airtight container. If you’re looking to keep them even longer, you can freeze them. Just be aware that the texture might change slightly once thawed.
What if I don’t have marshmallow fluff?
No marshmallow fluff? No problem! You can make a homemade alternative by whipping together powdered sugar, corn syrup, and a bit of water until it reaches a fluffy consistency. Alternatively, you can use whipped cream or a plant-based whipped topping for a similar texture.
These easy substitutes can save you a trip to the store while ensuring your Homemade Milky Way Bars remain delicious. If you want more tips for pantry swaps, check out resources like Serious Eats for creative cooking advice.
Feel free to reach out with more questions, and happy baking!
Conclusion on Homemade Milky Way Bars
Recap the Joy of Homemade Treats
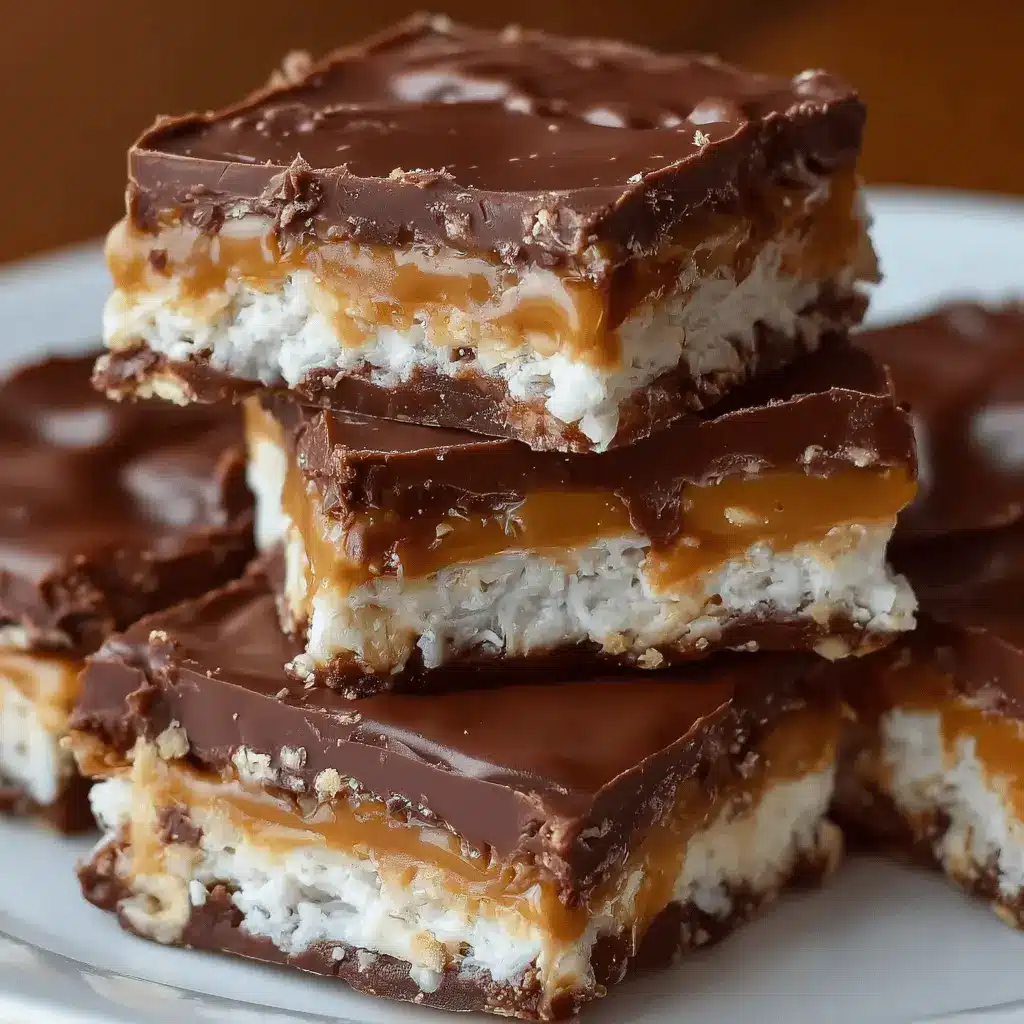
There’s something truly special about creating Homemade Milky Way Bars. As you whip up the silky nougat and rich chocolate coating, the satisfaction of crafting a beloved treat from scratch is hard to beat. Not only do they taste heavenly, but making these bars can also become a cherished activity, whether you’re sharing the experience with friends or indulging on your own.
Think about it—there’s a certain thrill in treating yourself or surprising a loved one with something so personal. Plus, you’ll know exactly what’s in your bars, making them not just enjoyable but also a bit healthier than store-bought options. For tips on elevating your homemade confections, check out this expert source for some creative ideas! So, why not give it a try? Your sweet tooth will thank you!
Print
Homemade Milky Way Bars: Indulgent Treats You Can Make Today
- Total Time: 30 minutes
- Yield: 12 bars
Description
Enjoy the rich flavors of homemade Milky Way bars with this easy recipe that anyone can follow!
Ingredients
- 1 cup chocolate chips
- 1/2 cup sweetened condensed milk
- 1/4 cup unsweetened cocoa powder
- 1 cup marshmallow fluff
- 1/2 cup peanut butter
- 1/2 cup granulated sugar
- 1/2 teaspoon vanilla extract
- 1/4 teaspoon salt
Instructions
- In a saucepan, melt chocolate chips and sweetened condensed milk over low heat. Stir until smooth.
- Remove from heat and mix in cocoa powder until well combined.
- In a separate bowl, combine marshmallow fluff, peanut butter, sugar, vanilla extract, and salt. Mix until fully incorporated.
- Layer the chocolate mixture into a lined baking pan, followed by the marshmallow mixture.
- Chill in the refrigerator until set, then cut into bars and enjoy!
Notes
- For a richer flavor, use dark chocolate chips.
- Store extras in an airtight container.
- Prep Time: 20 minutes
- Cook Time: 10 minutes
Nutrition
- Serving Size: 1 bar
- Calories: 150
- Sugar: 12g
- Sodium: 50mg
- Fat: 8g
- Saturated Fat: 4g
- Unsaturated Fat: 3g
- Trans Fat: 0g
- Carbohydrates: 18g
- Fiber: 1g
- Protein: 2g
- Cholesterol: 5mg
")