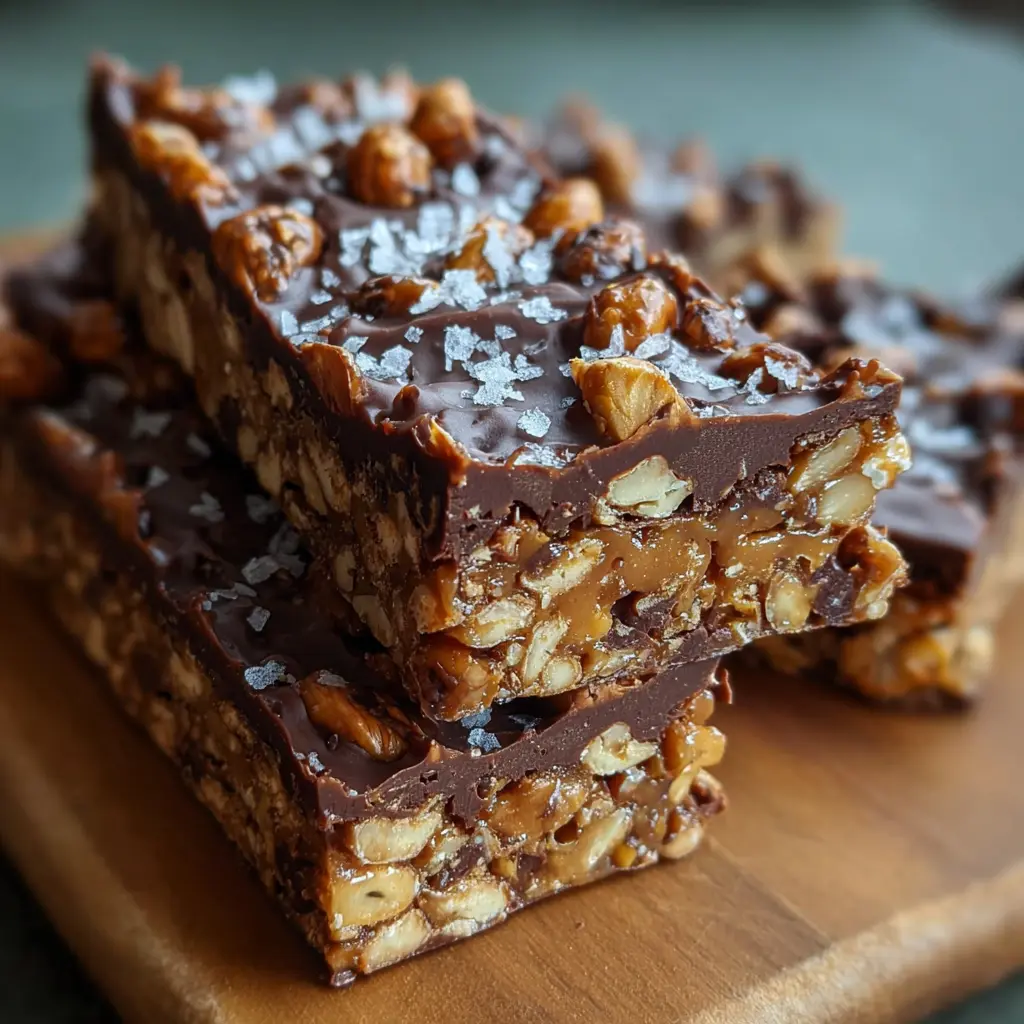
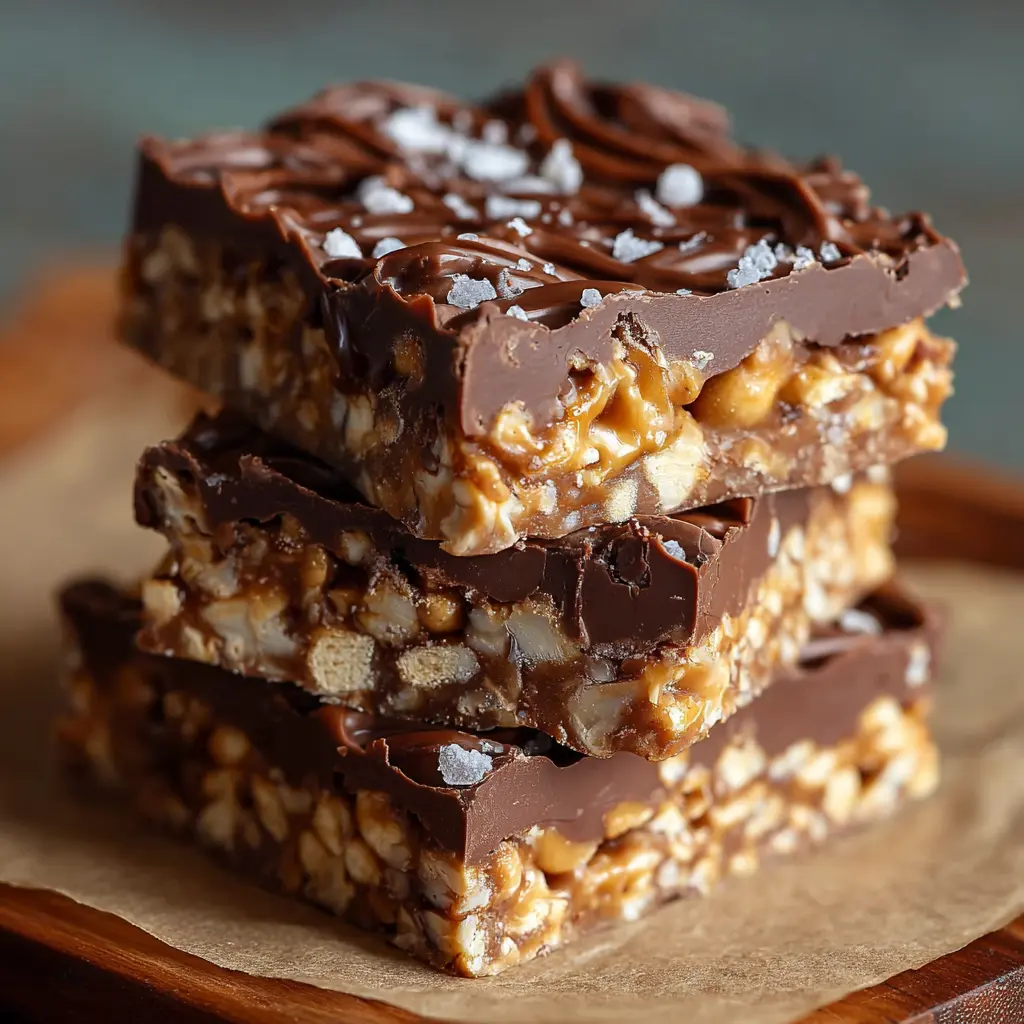
Introduction to Homemade Crunch Bars
Why Homemade Crunch Bars Are a Game Changer
If you’ve ever found yourself craving a sweet treat that hits all the right notes—crunchy, sweet, and utterly satisfying—you know how tempting those store-bought bars can be. But what if I told you that making your own homemade crunch bars can elevate your snack game to a whole new level? Not only are they easy to whip up, but they also allow you to customize flavors and ingredients to fit your lifestyle.
Let’s face it, the last thing you want is to be unsure about what’s in your snacks. When you make homemade crunch bars, you’re in control. You can use high-quality ingredients and avoid artificial additives, preservatives, and excess sugar. The good news? You don’t need to be a culinary expert to succeed here! A few basic ingredients—think chocolate, rice cereal, and nut butter—are all you need to create your masterpiece.
One of the great joys of this recipe is the ability to experiment! Feel free to swap in your favorite nut butters or explore different types of chocolate. For instance, using dark chocolate can elevate the health benefits compared to its milkier counterparts, and exciting add-ins like dried fruits or seeds could offer a nutritional boost while keeping your sweet tooth satisfied. Resources like Healthline and WebMD offer insights on ingredient benefits, which can help you tailor your bars just right.
Ever had a craving for a sweet and salty treat? Toss in a sprinkle of sea salt to contrast the sweetness. Or perhaps you want to channel your inner chef and make a batch featuring Turkey Bacon for a whiff of savory goodness. The options are boundless!
So, why not treat yourself and your taste buds to a fun and fulfilling home-cooking experience? With homemade crunch bars, you’ll satisfy cravings guilt-free, and each bite will be a reminder that you can have control over your nutrition while indulging your sweet side. Plus, these bars make perfect gifts or snacks for friends, proving that sharing is indeed caring!
Ingredients for Homemade Crunch Bars
Creating your own homemade crunch bars is not only easy but also a delightful way to satisfy your sweet tooth healthily. Here’s what you need to make these irresistible treats:
Essential Ingredients
- Chocolate: Choose high-quality chocolate chips, whether dark or milk, to coat your bars. About 1 cup should do!
- Crispy Rice Cereal: 3 cups will give your bars that satisfying crunch.
- Nut Butter: Peanut or almond butter works well—about ½ cup for a rich flavor.
- Sweetener: Use honey or maple syrup (¼ cup) to bind everything together while adding sweetness.
- Salt: Just a pinch enhances the flavors beautifully.
- Optional Add-Ins: Feel free to throw in your favorite nuts, dried fruits, or seeds. This is your chance to customize!
With these simple ingredients, you can whip up a batch of homemade crunch bars that not only taste great but are perfect for on-the-go snacking. Want to read more about the health benefits of the ingredients? Check out this resource on nut butters and their benefits for inspiration.
Ready to dive into creating your own crunchy delights? Let’s get started!
Step-by-Step Preparation of Homemade Crunch Bars
Creating homemade crunch bars is not only a delightful adventure in your kitchen, but it’s also a straightforward process that results in a tasty treat that’s perfect for snacking or sharing. Let’s break it down step by step!
Gather Your Ingredients
Before diving into the fun of making homemade crunch bars, it’s essential to gather all your ingredients. Here’s what you’ll need:
- 1 cup unsalted butter
- 1 cup peanut butter (creamy or crunchy, your choice!)
- 1 cup brown sugar
- 4 cups rice cereal
- 2 cups chocolate chips (semi-sweet or milk chocolate)
- Optional: sea salt or chopped nuts for toppings
Having everything ready to go makes the process smoother, and trust me, it will save you from any last-minute grocery runs!
Prepare the Baking Pan
Select a suitable baking pan for the task—an 8×8 or 9×9 inch pan works wonderfully. Line the bottom and sides with parchment paper to make removing the crunch bars easier later on. This also helps when you’re ready to cut them into neat squares. Plus, it saves you time on cleanup!
Melt the Butter and Peanut Butter
In a large saucepan over medium heat, combine the unsalted butter and peanut butter. Stir them together until the mixture is beautifully smooth and fully melted, creating a lovely, creamy base. This process usually takes about 3-5 minutes.
As you melt the butters, think about how delicious these bars will taste. Are you imagining their crunchiness mixed with chocolatey goodness? I definitely am!
Combine with Rice Cereal
Once your butter and peanut butter mixture is melted, remove the saucepan from the heat. Stir in the brown sugar until it’s well combined, and then gently fold in the rice cereal. The goal here is to make sure all the cereal is evenly coated in that luscious peanut butter concoction. You’ll want to do this quickly but gently, as you want to preserve the cereal’s crunch.
Press the Mixture into the Pan
After mixing everything together, it’s time to press the mixture into your prepared pan. Use a spatula or the back of a measuring cup to evenly distribute the mixture, making sure to pack it down firmly. This helps your bars hold their shape when cut. Here’s a tip: wet your hands slightly for easier pressing—no sticky messes here!
Melt the Chocolate
While your rice cereal mixture cools, melt the chocolate chips. You can do this in a microwave-safe bowl in 30-second increments or over a double boiler on the stovetop. Stir often until it’s completely melted and smooth.
A little secret: if you’re not a fan of chocolate chips, try using chocolate melts for an even silkier finish!
Pour and Spread the Chocolate
Once the chocolate is melted, pour it over the pressed mixture in the pan. Use a spatula to spread it evenly, ensuring every corner gets a taste of that sweet goodness. This creates a delectable topping that will make your bars even more irresistible.
Optional Toppings
Get creative! You can sprinkle some sea salt over the chocolate for that perfect sweet-salty combo, or even add chopped nuts for an extra crunch. If you’re feeling adventurous, consider adding some shredded coconut or mini marshmallows. The world is your oyster!
Chill and Cut the Bars
Now comes the most challenging part: waiting! Place your pan in the refrigerator for at least one hour, or until the chocolate is set. Once it’s firm, remove it from the pan using the parchment paper and cut into squares or rectangles.
There you have it! Your delicious homemade crunch bars are ready to be enjoyed. Feel free to store any leftovers (if there are any!) in an airtight container at room temperature or in the fridge, though I bet they won’t last long!
And there you go—an easy-to-follow guide to making your own scrumptious crunch bars. Get ready to impress your friends with your kitchen prowess! If you’re looking for more delicious snack ideas, check out sites like Food Network or Serious Eats for inspiration. Happy baking!
Variations on Homemade Crunch Bars
When it comes to homemade crunch bars, the joy is in the potential for endless creativity! Here are two variations that will keep your taste buds excited and your reward system engaged.
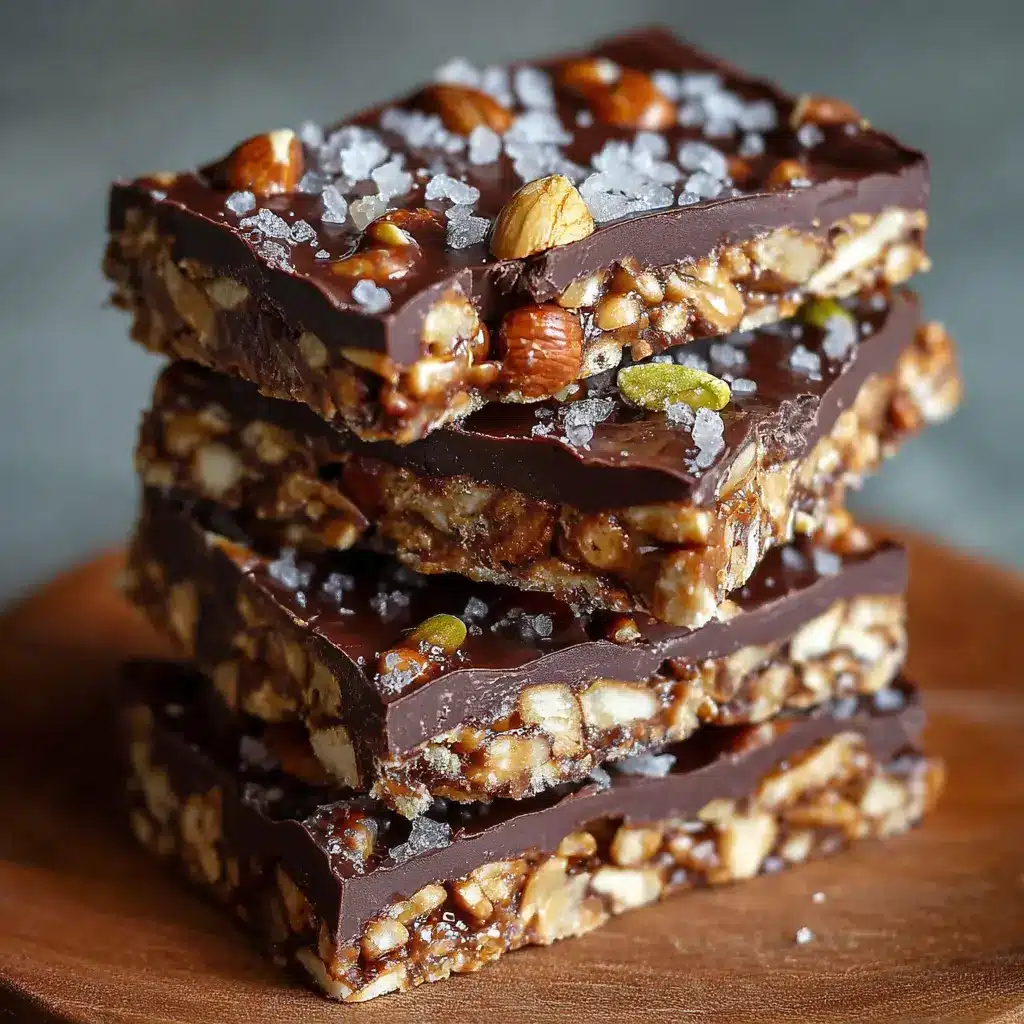
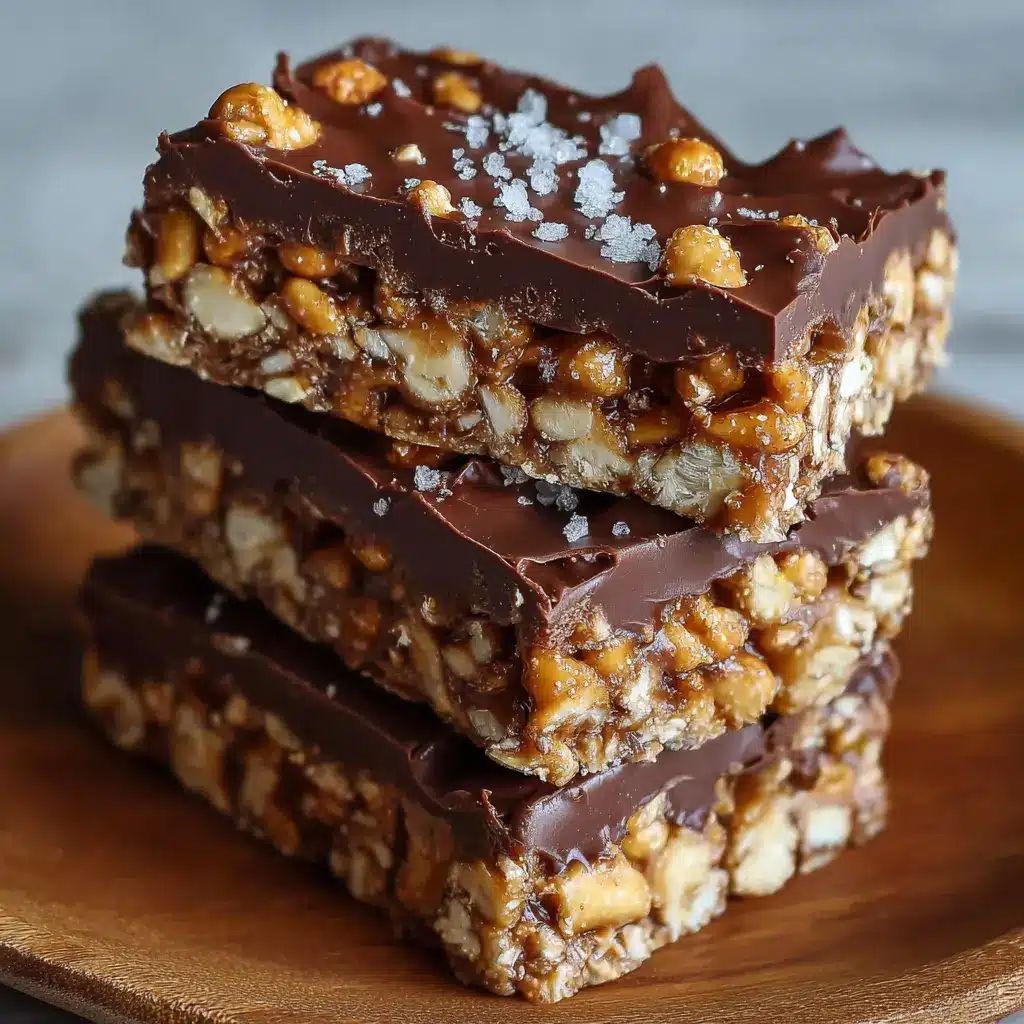
Chocolate Nut Crunch Bars
Craving a sweet, nutty treat? Try these decadent Chocolate Nut Crunch Bars! These bars are perfect for those post-workout cravings or as a delightful afternoon snack.
Ingredients you’ll need:
- Your choice of nuts (almonds, cashews, or pecans work wonderfully)
- Dark chocolate chips
- Rice cereal or puffed quinoa for that crunch factor
- A drizzle of honey or maple syrup for sweetness
Instructions:
- Melt the dark chocolate in a microwave-safe bowl in short bursts until smooth.
- Stir in the nuts and cereal until everything is evenly coated.
- Pour the mixture into a lined baking dish and refrigerate until set, then cut into bars.
This variation not only satisfies your sweet tooth but is also packed with protein and healthy fats. For more healthy snack ideas, check out Healthline’s nutritious snack guide.
Peanut Butter Banana Crunch Bars
For a twist that combines the delight of peanut butter and banana, these Peanut Butter Banana Crunch Bars are a must-try. They’re not just delicious; they also give you a quick energy boost!
What you’ll need:
- Creamy peanut butter
- Ripe bananas, mashed
- A sprinkle of cinnamon
- Your favorite crispy cereal
How to prepare:
- In a bowl, mix the mashed bananas with peanut butter and cinnamon until smooth.
- Fold in the crispy cereal until it’s all well combined.
- Press the mixture into a baking dish and let it chill in the fridge before slicing.
These bars make for a perfect on-the-go breakfast or a post-lunch pick-me-up. Want more recipes? Explore Epicurious for bites that excite.
Remember, the beauty of homemade crunch bars lies in their versatility. So, feel free to experiment with flavors – your taste buds will thank you!
Cooking Tips and Notes for Homemade Crunch Bars
When crafting your own homemade crunch bars, a few handy tips can elevate your treat from good to amazing!
Choose Quality Ingredients
Opt for high-quality chocolate; it truly makes a difference in flavor and texture. Rich dark chocolate adds a delightful complexity, while creamy milk chocolate can keep things sweet and nostalgic.
Get Creative with Add-ins
Don’t hesitate to personalize your crunch bars! Adding nuts, dried fruit, or even a sprinkle of sea salt can enhance the texture and flavor profile. According to Nutritiondata, incorporating nuts can boost the bars’ protein content.
Ensure Proper Cooling
After mixing in your ingredients, let the mixture cool slightly before pouring into your mold. This not only helps in setting the bars more firmly but also prevents any sticking. As an extra tip, line your mold with parchment paper for easy removal.
Storage Matters
Store your homemade crunch bars in an airtight container at room temperature for up to a week, or in the refrigerator for extended freshness. Remember, sharing is caring — but these are oh-so-easy to keep for yourself!
For more ideas on add-ins and variations, you might enjoy checking out The Kitchn or Serious Eats. Happy cooking!
Serving Suggestions for Homemade Crunch Bars
When it comes to enjoying your homemade crunch bars, the serving options are as versatile as they are delicious. Whether you’re hosting a gathering or just treating yourself, here are some delightful suggestions to elevate your experience.
Perfect Pairings
-
Beverage Companions: Sip on a rich hot chocolate or a smooth coffee to balance the sweetness of the bars. The creamy textures and chocolatey notes complement the crunch beautifully.
-
Tasty Toppings: Consider drizzling your bars with melted dark chocolate or a sprinkle of sea salt for an enticing flavor contrast. For a fun twist, add a sprinkle of toasted coconut or nuts for an extra crunch.
Creative Presentations
-
Gourmet Packaging: If you’re sharing these homemade crunch bars, why not wrap them up in colorful tissue paper? A simple ribbon can turn them into an irresistible gift that’s sure to impress.
-
Dessert Platters: Arrange your bars alongside fresh fruits like strawberries or bananas. The combination not only looks appealing but also adds freshness that balances the sweetness.
Experiment with these ideas and make your homemade crunch bars the star of your next gathering. For general tips on hosting, you might find this guide on entertaining helpful!
Time Breakdown for Homemade Crunch Bars
When you’re whipping up homemade crunch bars, understanding the time investment can help you plan your day better. Here’s a quick breakdown of what to expect:
Preparation Time
Getting everything ready takes about 15-20 minutes. You’ll want to measure out your ingredients, melt your chocolate, and mix in those irresistible crispy rice cereal bits. It’s a simple process, perfect for a quick unwind after work.
Chilling Time
After mixing, patience is key! Allow your homemade crunch bars to chill in the fridge for about 1 hour. This step lets the chocolate set, ensuring each bite is perfectly crisp and chewy.
Total Time
In total, you’re looking at roughly 1 hour and 20 minutes from start to finish. This makes it an ideal weekend treat or a fun activity for a cozy evening at home. For more tips about timing in the kitchen, check out this article from Food Network.
Your scrumptious crunch bars will be worth every minute!
Nutritional Facts for Homemade Crunch Bars
When it comes to homemade crunch bars, it’s essential to understand their nutritional profile so you can enjoy them mindfully. Here’s a breakdown of what these delightful treats offer:
Calories
A typical serving of homemade crunch bars usually contains around 150-200 calories, depending on the ingredients and portion size. This makes them a great option for a snack without straying too far from your daily caloric goals.
Protein
You’ll find that homemade crunch bars offer about 3-5 grams of protein per bar, especially if you include ingredients like nuts or protein powder. This boost can help satisfy your hunger and provide energy for your busy day.
Sugar
Depending on the sweetness level, these bars can contain around 8-12 grams of sugar. Opt for natural sweeteners like honey or maple syrup to keep the sugar content a bit lower and healthier while maintaining that delightful crunch.
For more insights on nutrition, check out Harvard Health or Nutrition.gov for resources that can enhance your understanding of healthy snacking.
FAQ about Homemade Crunch Bars
If you’re curious about homemade crunch bars, you’re not alone! Here’s a friendly FAQ to help you whip up the best version of these delightful snacks.
Can I use other types of cereal?
Absolutely! While classic recipes typically call for crispy rice cereal, feel free to experiment with other options. You can try:
- Cornflakes for a different texture.
- Granola for added flavor and nutrients.
- Cheerios for a whole-grain twist.
Just remember, not all cereals will yield the same crunchiness, so choose based on your desired outcome!
How long do these bars last?
Homemade crunch bars are best enjoyed fresh but can last up to two weeks when stored properly. Keep them in an airtight container at room temperature to maintain their crunch. For even longer storage, consider freezing them; they hold up well in the freezer for about three months. Just let them thaw at room temperature before indulging.
What can I substitute for peanut butter?
If you’re looking for alternatives to peanut butter due to allergies or just personal preference, here are some tasty options:
- Almond butter provides a similar creamy texture with a unique flavor.
- Sunflower seed butter is a great nut-free choice that’s delightful and nutritious.
- Cashew butter also works well, offering a milder taste.
Feel free to experiment with these substitutions to find your perfect match!
If you want more creative ways to customize your homemade crunch bars, consider visiting EatingWell for additional inspiration. Happy snacking!
Conclusion on Homemade Crunch Bars
In wrapping up our journey into the delicious world of homemade crunch bars, it’s clear that crafting these treats in your own kitchen brings not only delight but also a sense of accomplishment. Whether you enjoy them as a quick snack or a sweet indulgence, making your own gives you the freedom to customize flavors and ingredients.
Why Homemade Matters
Choosing to create your own treats can lead to healthier choices, as you control what goes in and can avoid artificial additives. You might even prefer using ingredients like Turkey Bacon or Chicken Ham for a unique twist!
Creative Variations
Feel free to experiment with flavors! Consider adding nuts, dried fruits, or even a dash of honey to elevate your bars. Have you tried infusing them with your favorite nut butter? The possibilities are endless!
So, gather your ingredients and get started. Your taste buds will thank you! For more ideas on healthy snacks, you might find resources from Healthline and EatingWell incredibly helpful. Happy snacking!
Print
Homemade Crunch Bars: Easy, Indulgent Treats for Everyone
- Total Time: 15 minutes
- Yield: 16 bars
- Diet: Vegetarian
Description
Discover the joy of making your own Homemade Crunch Bars, a delightful treat that’s easy to prepare and perfect for sharing.
Ingredients
- 1 cup chocolate chips
- 3 cups puffed rice cereal
- 1/2 cup peanut butter
- 1/4 cup honey
- 1 teaspoon vanilla extract
- 1/4 teaspoon salt
Instructions
- In a saucepan, combine the peanut butter, honey, vanilla extract, and salt, and heat over medium until melted.
- Remove from heat and stir in the chocolate chips until smooth.
- Fold in the puffed rice cereal until well coated.
- Spread the mixture into a greased 9×9 inch pan and press firmly.
- Let it cool before cutting into bars.
Notes
- For a crunchier texture, let the bars chill in the fridge.
- Consider adding nuts or dried fruit for extra flavor.
- Prep Time: 10 minutes
- Cook Time: 5 minutes
- Category: Dessert
- Method: No-bake
- Cuisine: American
Nutrition
- Serving Size: 1 bar
- Calories: 150
- Sugar: 8g
- Sodium: 50mg
- Fat: 7g
- Saturated Fat: 2g
- Unsaturated Fat: 5g
- Trans Fat: 0g
- Carbohydrates: 18g
- Fiber: 1g
- Protein: 3g
- Cholesterol: 0mg
")