Introduction
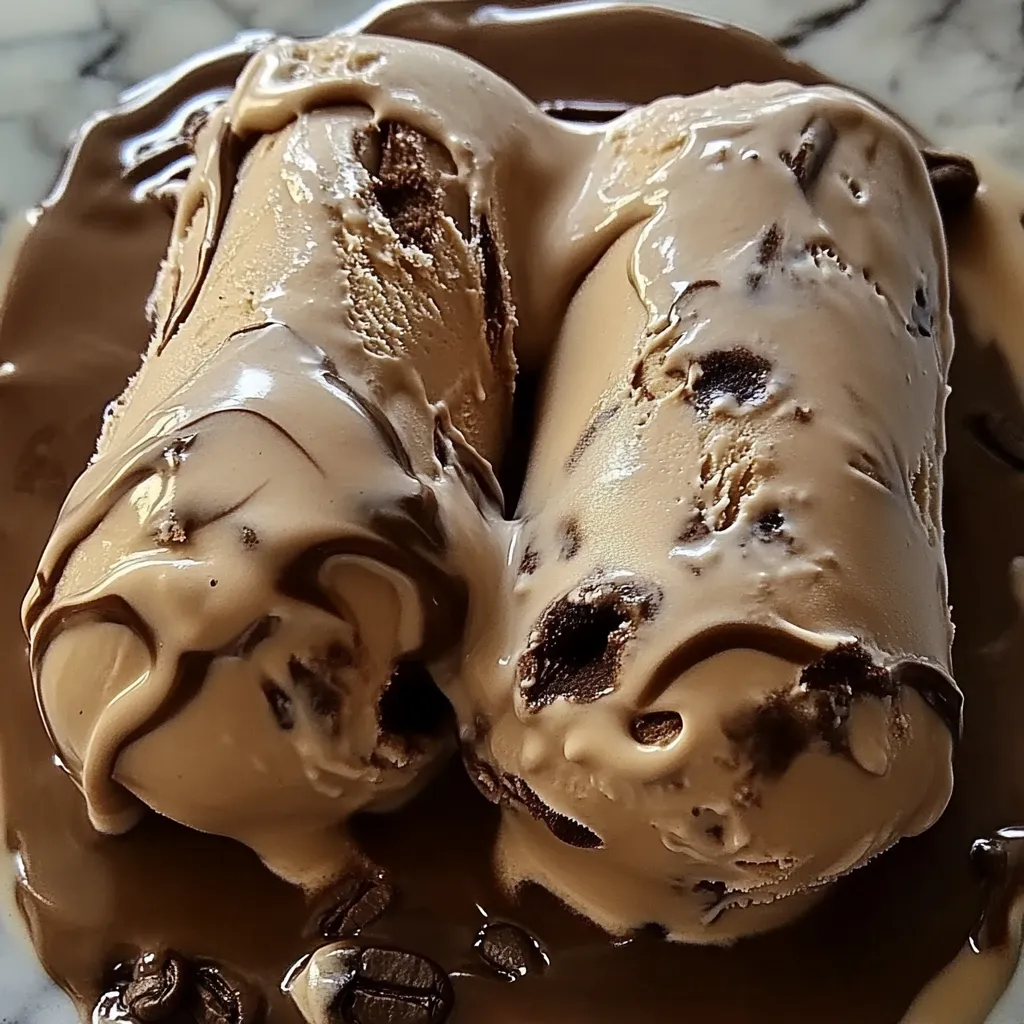
There’s something magical about the combination of cream and coffee—smooth, bold, and just the right amount of indulgent. If you’ve ever wished your morning brew could double as dessert, this homemade coffee ice cream is the answer to that dream. Made with just a handful of simple ingredients, this treat is surprisingly easy to make and far more satisfying than anything you’ll find in the freezer aisle.
Homemade coffee ice cream is not only rich and creamy—it’s also a perfect blend of bold coffee flavor and smooth custard base. Whether you’re looking to impress guests or just want to treat yourself on a warm day, this recipe delivers every time.
Why You’ll Love This Homemade Coffee Ice Cream
Making your own ice cream might sound like a project, but trust me—it’s easier (and more fun) than you think. This recipe strikes the perfect balance between indulgence and approachability. Here’s why it’s a must-try.
Key Benefits
-
Bold coffee flavor: This isn’t one of those barely-there coffee-flavored desserts. You’ll taste the real thing in every bite.
-
Creamy, scoopable texture: Thanks to the custard base, this ice cream churns into something silky and luxurious.
-
Simple ingredients: No fancy stabilizers or preservatives—just real food you already have in your kitchen.
-
Better than store-bought: Once you’ve tasted it, there’s no going back to the grocery store pint.
-
Make-ahead friendly: Prepare it the day before a dinner party and have dessert ready to go.
Suitable For
-
Coffee lovers: Naturally, this is a no-brainer if you live for your daily cup.
-
Entertaining guests: It’s impressive without being fussy. Serve it with a drizzle of caramel or a few chocolate shavings.
-
Beginner cooks: The recipe walks you through each step so there’s nothing to feel unsure about.
-
Summer treats: When the temperature climbs, this cool and creamy dessert is a lifesaver.
Ingredients for Homemade Coffee Ice Cream
Let’s talk about what goes into this dreamy dessert. You don’t need a lot—just a few staples that, when combined, create something truly special.
Core Ingredients
-
Heavy Cream (2 cups): This is what gives the ice cream its rich, creamy base. Don’t swap this out—it’s essential.
-
Whole Milk (1 cup): Balances the cream without making the texture too heavy.
-
Granulated Sugar (3/4 cup): Sweetens the mix and helps give the ice cream its smooth consistency.
-
Instant Coffee or Brewed Coffee (2 tbsp or 1/2 cup): Instant gives a strong flavor, while brewed adds depth. Use what you love to drink.
-
Egg Yolks (4 large): These create the custard base, making the final product creamy and scoopable.
-
Vanilla Extract (1 tsp): Adds warmth and rounds out the coffee flavor.
-
Salt (a pinch): Just enough to make all the flavors pop.
Substitutions and Tips
-
Dairy-free? Try using full-fat coconut milk and a dairy-free creamer. The flavor will be slightly different, but still delicious.
-
No instant coffee? Brew strong espresso or use cold brew concentrate for a smoother finish.
-
Prefer a sweeter dessert? You can bump the sugar up to 1 cup, or stir in caramel sauce after churning.
-
Want a crunch? Add chopped chocolate or crushed toffee at the very end of the churn.
-
Use fresh ingredients: Especially the eggs and cream—freshness really affects the final flavor.
Best Coffee for Coffee Ice Cream
Coffee is the star here, so choosing the right one matters. You want bold, rich flavor without bitterness.
-
Instant Coffee: A convenient option that packs a punch. Look for high-quality freeze-dried versions.
-
Strong Brewed Coffee: Make it ahead of time and let it cool completely. Cold brew works great too—just make sure it’s concentrated.
-
Espresso Powder: For an extra intense flavor, this is an excellent addition, especially if you want that café-style depth.
If you’re worried about caffeine, feel free to use decaf—it won’t change the flavor much. And remember: the better your coffee tastes on its own, the better it will be in the ice cream.
Kitchen Tools You’ll Need
Before we dive into the cooking process, let’s make sure you have everything ready to go. There’s nothing worse than realizing you’re missing a key tool halfway through a recipe. Luckily, you don’t need a ton of fancy gadgets to make homemade coffee ice cream—just a few trusty basics.
Must-Have Tools
-
Medium Saucepan: You’ll use this to heat the cream and milk, and later to cook the custard.
-
Mixing Bowls: At least two—one for whisking the egg yolks and one for chilling the custard.
-
Whisk: Essential for mixing the yolks and keeping the custard smooth.
-
Fine-Mesh Sieve: Helps strain out any curdled egg bits for a silky final texture.
-
Ice Cream Maker: The real star here. It turns your custard into smooth, churned ice cream.
Nice-to-Have Tools
-
Digital Thermometer: Not required, but helpful if you’re nervous about overcooking the custard. Aim for around 170–175°F.
-
Rubber Spatula: Great for stirring the custard gently without scratching your pan.
-
Ice Cream Storage Container: A shallow, airtight container helps the ice cream freeze evenly and makes scooping easier.
If you don’t have an ice cream maker, don’t worry—I’ll cover a workaround in the FAQ section later. But if you do have one, now’s the time to pull it out and dust it off.
How to Make Homemade Coffee Ice Cream
Now for the fun part—bringing everything together. Making coffee ice cream from scratch is a process, but it’s a rewarding one. Take your time with each step, and before you know it, you’ll have a freezer full of rich, creamy goodness.
Step 1: Heat the Cream Base
Start by combining your heavy cream, whole milk, and sugar in a medium saucepan. Place it over medium heat and stir gently until the sugar dissolves completely. You don’t want it to boil—just warm it enough so it’s steamy and smooth. If you’re using instant coffee, go ahead and stir it in here too so it has time to melt fully into the mixture.
Tip: Stir constantly and don’t walk away. You’re not cooking anything just yet—you’re just warming and dissolving.
Step 2: Dissolve the Coffee
If you’re using brewed coffee instead of instant, now’s your moment. Slowly stir the cooled, strong brewed coffee into the warm cream base. Mix it in well so the coffee flavor is evenly distributed.
Flavor boost: Want a stronger coffee punch? Use espresso or cold brew concentrate for deeper flavor.
Step 3: Temper the Egg Yolks
This step sounds fancy but it’s really not hard. Whisk your egg yolks in a bowl until smooth. Now, very slowly, pour in a bit of the hot cream mixture while whisking constantly. This warms the yolks gently so they don’t scramble. Once the eggs are warm, you can add them back into the saucepan with the rest of the cream.
Reassurance: Take it slow here. If you rush, you’ll end up with bits of cooked egg—nobody wants that in their ice cream.
Step 4: Thicken the Custard
Return the saucepan to low heat. Stir the mixture constantly with a wooden spoon or spatula, scraping the bottom as you go. After 5 to 7 minutes, the custard will thicken slightly and coat the back of the spoon. You’ll know it’s ready when you run your finger along the spoon and the line stays clean.
Don’t let it boil. If you see bubbles forming, remove it from the heat right away to avoid curdling.
Step 5: Strain and Chill
Pour the custard through a fine-mesh sieve into a clean bowl to catch any cooked bits. Stir in the vanilla extract and a pinch of salt to round out the flavor. Cover the bowl with plastic wrap, pressing it directly against the surface of the custard to prevent a skin from forming.
Refrigerate for at least 4 hours—or even better, overnight. Cold custard makes for creamier ice cream.
Pro tip: Pop your ice cream maker bowl into the freezer the night before too if it requires pre-freezing.
Step 6: Churn the Ice Cream
Once your custard is fully chilled, it’s time to churn. Pour the mixture into your ice cream maker and churn according to the manufacturer’s instructions—usually about 20 to 25 minutes. You’re looking for a soft-serve consistency here.
Note: Don’t overfill your machine. It needs room to whip in air and give your ice cream that fluffy texture.
Step 7: Freeze and Enjoy
Transfer your churned ice cream into an airtight container. If you want to add mix-ins (like chocolate chunks or crushed cookies), now’s the time. Smooth the top, press parchment paper against the surface, and freeze for at least 2 hours to firm it up.
The reward: After all that stirring and waiting, you’ll have a tub of homemade coffee ice cream that’s rich, creamy, and absolutely bursting with flavor.
Tips for Success
Let’s make sure your first batch turns out perfect. Here are a few extra pointers:
-
Don’t skip the chilling time. A cold base churns faster and results in smoother ice cream.
-
Use quality ingredients. With so few items in the mix, each one really shines through—especially the coffee.
-
Take your time with the custard. Rushing here can lead to curdling. Gentle heat and constant stirring are your best friends.
-
Add mix-ins at the end. If you’re adding chocolate chips, toffee, or nuts, do it during the last minute of churning.
You’re now well on your way to creating a batch of dreamy, café-style coffee ice cream. In the final part, we’ll talk about how to store your masterpiece, answer common questions, and suggest a few fun variations to try next time.
How to Store Homemade Coffee Ice Cream
Now that your coffee ice cream is ready, let’s talk about keeping it fresh and delicious. Proper storage is key to preserving that luxurious texture and bold flavor.
At Room Temperature
While it might be tempting to leave a bowl out, remember that ice cream is best enjoyed frozen. Allow it to sit out for just a few minutes before serving to soften slightly, but avoid leaving it out too long to prevent it from melting.
In the Refrigerator
For short-term storage, place the ice cream in a tightly sealed container in the refrigerator. This is perfect if you plan to enjoy it within a day. Just be aware that the texture might soften a bit more than when it’s frozen.
Freezing Tips
For longer storage, transfer your churned ice cream into an airtight container. Lay a piece of parchment paper directly on the surface before sealing to help prevent ice crystals from forming. Your homemade treat should keep well in the freezer for up to two weeks. When you’re ready to enjoy it again, let it sit at room temperature for about 5 minutes to get the perfect scoopable consistency.
Frequently Asked Questions (FAQs)
Cooking can sometimes raise questions, so here are a few answers to common queries about making this coffee ice cream.
Can I make this without an ice cream maker?
Absolutely. If you don’t have an ice cream maker, you can pour the custard into a shallow pan and freeze it. Every 30 minutes, take it out and stir vigorously to break up any ice crystals until it reaches a smooth, creamy consistency.
Can I use decaf coffee?
Yes, decaf works just fine if you prefer to keep the caffeine content lower. The flavor will remain robust and satisfying, just as with regular coffee.
Why might my ice cream turn out icy instead of creamy?
This often happens if the custard isn’t chilled thoroughly or if it’s over-churned. Make sure you chill the base completely and follow the ice cream maker’s instructions closely. Using quality ingredients and stirring during the freezing process (if not using a machine) can also help maintain a smooth texture.
Can I add mix-ins like chocolate chips or caramel swirls?
Definitely. For added texture and flavor, you can fold in your favorite mix-ins during the last minute of churning. This is a great way to customize your ice cream and make it truly your own.
Related Recipes
If you loved this Homemade Coffee Ice Cream, you might also enjoy:
-
Peach Dump Cake: A warm, fruity dessert that pairs beautifully with a scoop of coffee ice cream.
-
Lemon Raspberry Cupcakes: Light, tangy, and a lovely complement to this creamy frozen treat.
-
Chocolate Peanut Butter Cake: A rich, decadent dessert that coffee lovers will adore.
-
Pineapple Upside Down Cupcakes: Sweet, tart, and perfect for tropical summer vibes alongside a coffee-flavored scoop.
-
Creamy Ice Cream Bars: Another homemade frozen delight you’ll want to try next.
Conclusion
There you have it—a complete guide to making your very own homemade coffee ice cream. From gathering the right ingredients and tools to mastering the churning process and storage tips, every step is designed to help you create a dessert that’s rich, creamy, and full of bold coffee flavor. Enjoy every scoop, and don’t hesitate to experiment with your favorite mix-ins to make this recipe uniquely yours.
Print
Homemade Coffee Ice Cream – A Dreamy Treat
- Total Time: 5 hours (including chilling and freezing)
- Yield: 1 quart (about 6 servings)
Description
This homemade coffee ice cream is a creamy, bold-flavored frozen dessert made from a custard base infused with real coffee. It’s smooth, rich, and surprisingly easy to make. Perfect for coffee lovers and a crowd-pleasing treat on warm days.
Ingredients
-
2 cups heavy cream
-
1 cup whole milk
-
3/4 cup granulated sugar
-
2 tbsp instant coffee or 1/2 cup strong brewed coffee (cooled)
-
1 tsp vanilla extract
-
4 large egg yolks
-
A pinch of salt
Instructions
-
Heat cream, milk, and sugar until warm.
-
Stir in coffee (instant or brewed).
-
Temper egg yolks and combine with cream mixture.
-
Cook until thickened (about 5–7 minutes).
-
Strain, add vanilla and salt, and chill at least 4 hours.
-
Churn in an ice cream maker for 20–25 minutes.
-
Freeze until firm (2+ hours) and serve.
Notes
-
Use high-quality coffee for the best flavor.
-
Add chocolate chips, crushed cookies, or caramel swirls after churning.
-
Chill your custard thoroughly before churning for the best texture.
- Prep Time: 15 minutes
- Cook Time: 10 minutes
- Category: Dessert
- Method: Churned, Custard-Based
- Cuisine: American
Nutrition
- Calories: 320
- Sugar: 20g
- Sodium: 60mg
- Fat: 25g
- Saturated Fat: 15g
- Carbohydrates: 22g
- Protein: 4g
- Cholesterol: 160mg
")