Introduction to Homemade Apple Crisp
When it comes to comfort food, nothing quite hits the spot like a warm, homemade apple crisp. Imagine biting into tender, spiced apples nestled beneath a thick, buttery crumble — it’s the kind of dessert that not only tastes amazing but also feels like a warm hug on chilly days.
Why Homemade Apple Crisp is the Perfect Comfort Food
So, what makes homemade apple crisp such a beloved choice? First off, the use of fresh, seasonal apples can elevate your dish beyond anything store-bought. Apples provide a delightful sweetness and tartness, and when baked, they give off a comforting aroma that fills your home. Did you know that according to the USDA, there are over 7,500 varieties of apples grown in the United States? That means you can experiment with different kinds to find your perfect flavor combination!
As you dig into a piping hot serving of apple crisp, the crunchy topping made from oats, flour, and brown sugar adds that satisfying texture that so many of us crave. And let’s not forget, it’s incredibly easy to make from scratch with just a few pantry staples! You can even customize the topping with nuts or spices to suit your taste.
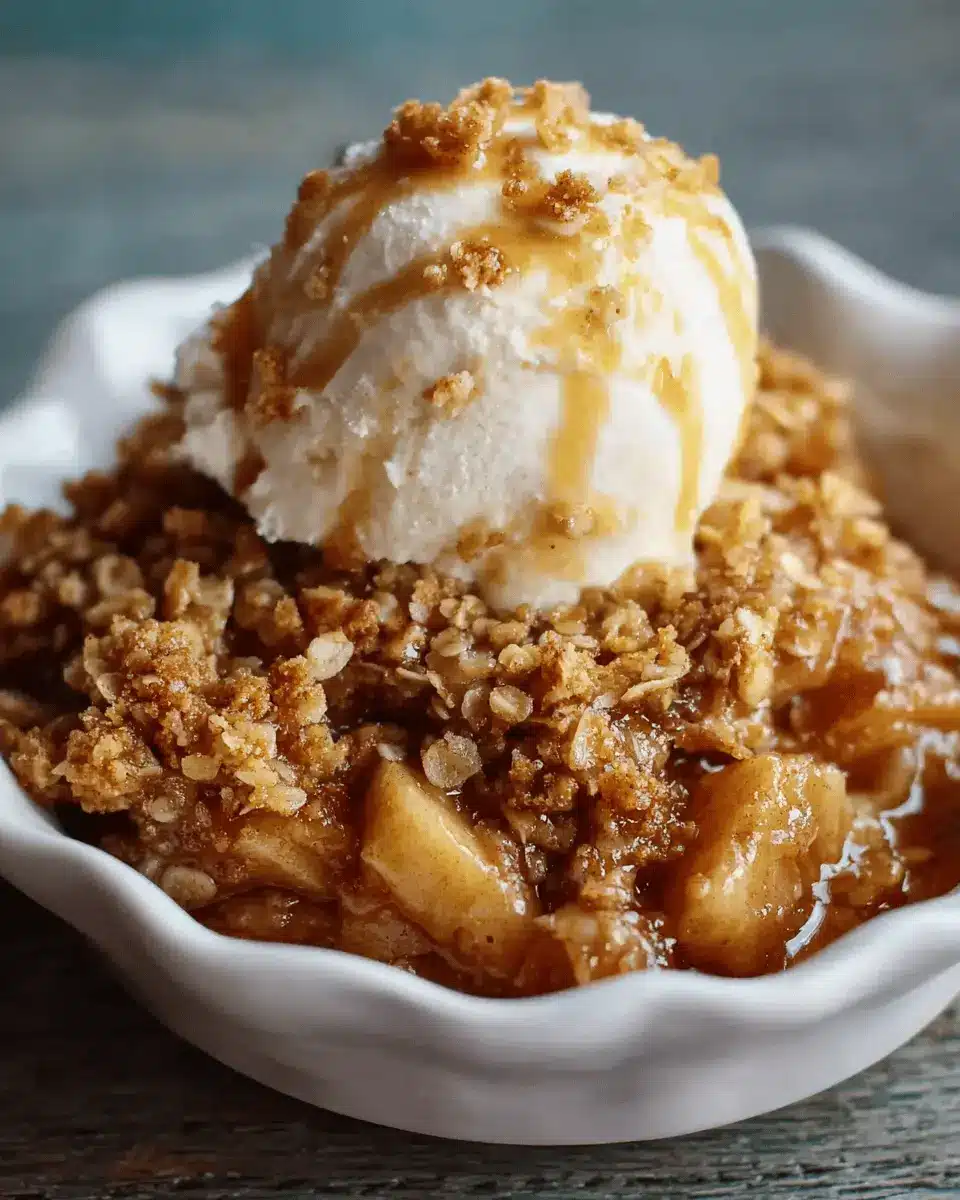
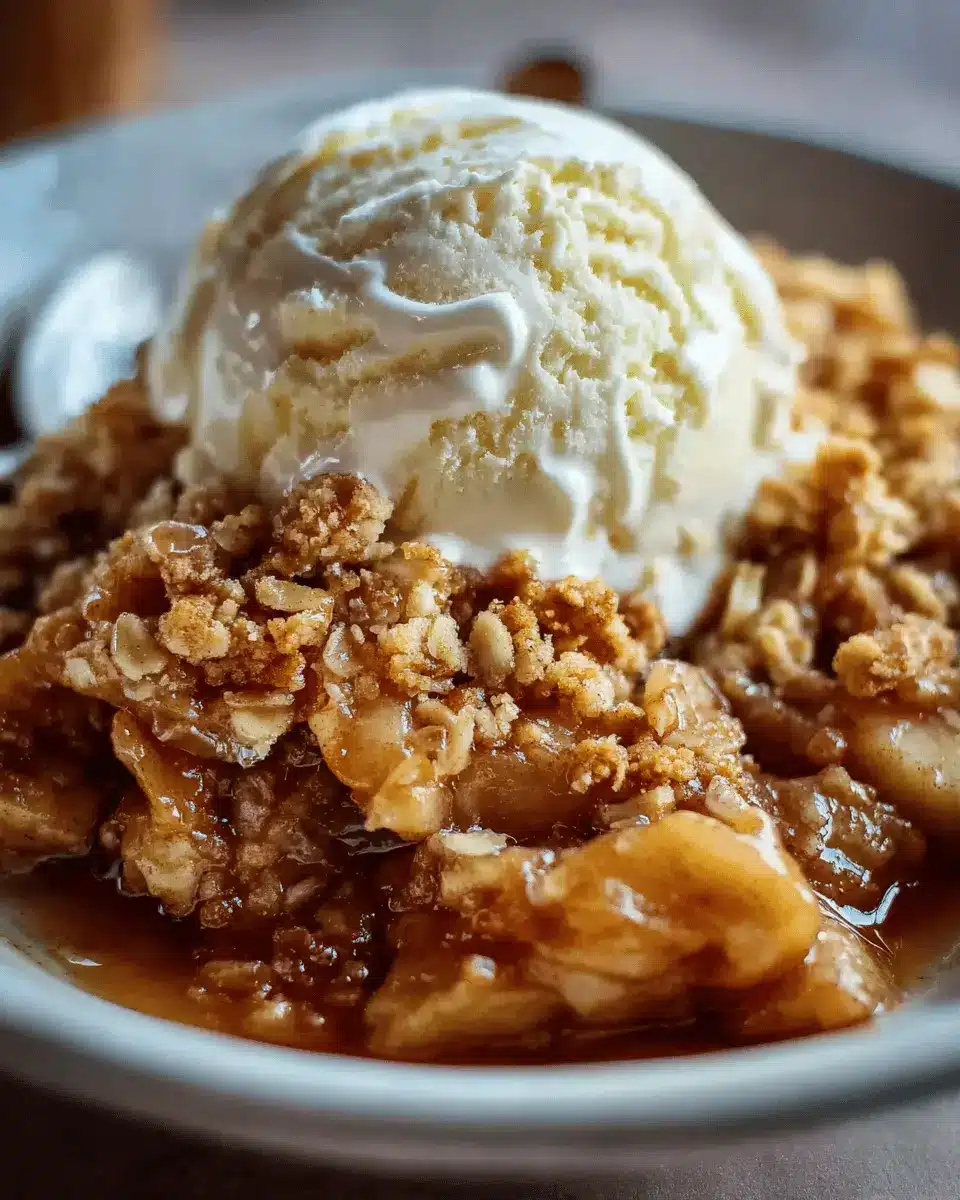
The best part? Homemade apple crisp is versatile. Serve it warm with a scoop of vanilla ice cream for a classic treat, or consider dolloping whipped cream on top for a lighter twist. Not only is it perfect for family gatherings and holiday meals, but it’s also an excellent way to impress dinner guests.
If you’re looking for tips on selecting the right apples for your crisp, check out this guide from the Washington Apple Commission to discover great varieties and their uses.
Serving this comforting dish can also spark conversations and create cherished memories in the kitchen. So why not roll up your sleeves and start baking? A cozy evening filled with the enticing aroma of homemade apple crisp is just a recipe away.
Ingredients for Homemade Apple Crisp
Creating a delightful homemade apple crisp begins with quality ingredients. Here’s a breakdown of what you’ll need!
Essential ingredients for the apple filling
The magic of your apple crisp starts with the filling. For an irresistible taste, you’ll need:
- Fresh apples: Go for a blend of tart and sweet varieties, such as Granny Smith and Honeycrisp. This mix brings depth to your dish.
- Sugar: Just a touch of granulated sugar will enhance the apples’ natural sweetness.
- Cinnamon: This warm spice adds that cozy flavor we love in desserts.
- Lemon juice: A splash helps balance the sweetness and keeps the apples from browning.
Feel free to explore this source on apple varieties for more tips on selecting the best apples!
Key ingredients for the crispy topping
Now, let’s talk about that crunchy topping that takes your homemade apple crisp over the top:
- Old-fashioned oats: A must for a hearty, chewy texture.
- Brown sugar: It adds a lovely caramelized flavor that pairs wonderfully with the apples.
- Flour: All-purpose flour helps bind the topping.
- Butter: Use cold, unsalted butter for achieving that sought-after crispiness. Alternatively, feel free to use coconut oil for a dairy-free option.
With these simple but essential ingredients, you’re on your way to baking a homemade apple crisp that will impress your friends and family!
Step-by-step Preparation of Homemade Apple Crisp
Making a homemade apple crisp is not just about enjoying a delicious dessert; it’s about the warmth, nostalgia, and comfort that comes with the aroma of baking apples mingling with cinnamon. Let’s dive into the step-by-step process of preparing this delightful dish, perfect for impressing friends or just treating yourself after a long day.
Preheat your oven
Before getting into the nitty-gritty of preparation, it’s essential to set up your kitchen. Start by preheating your oven to 350°F (175°C). This ensures that your oven is hot and ready when it’s time to bake the homemade apple crisp, leading to an even and perfectly cooked dessert. Plus, who doesn’t love that subtle anticipation that comes from the waft of warm air?
Prepare the apple filling
Next, it’s all about the apples, the star of your homemade apple crisp. For this dish, you’ll need about 6 to 8 medium-sized apples. Varieties such as Granny Smith, Honeycrisp, or Golden Delicious are ideal due to their crisp texture and balanced sweetness.
- Peel and Slice: Start by peeling the apples and slicing them into thin wedges. Aim for about ¼-inch thick slices; this helps them cook evenly.
- Season the Apples: In a large bowl, combine your apple slices with:
- ¾ cup of granulated sugar (you can adjust this based on your apple sweetness)
- 1 tablespoon of lemon juice (this adds a lovely zing)
- 1 teaspoon of cinnamon (feel free to add more if you’re a spice lover)
- ¼ teaspoon of nutmeg (optional, but it adds a great depth of flavor)
Mix everything until the apples are well-coated, and let them sit while you prepare the topping. The sugars will draw out the juices, creating a natural syrup that will enhance the flavor.
Mix the topping ingredients
For the crispy topping, you’ll want a perfect balance of sweetness and crunch. Here’s how to achieve that:
- In a separate bowl, combine:
- 1 cup of old-fashioned rolled oats
- 1 cup of all-purpose flour
- ½ cup of brown sugar (light or dark works here)
- ½ cup of softened butter (you can substitute with coconut oil for a vegan option)
- ½ teaspoon of salt
- ½ teaspoon of cinnamon
- Combine: Use your hands or a fork to mix these ingredients until the mixture resembles coarse crumbs. This texture is crucial for that delightful crunch you want to achieve.
Assemble the apple crisp
Now comes the fun part—assembling your homemade apple crisp. Grab a baking dish (a 9×13-inch works well) and:
- Layer the Apples: Spread the apple filling evenly across the bottom of the dish, making sure it’s well-distributed. Feel free to layer the apples a bit higher for a more delightful, overflowing look.
- Top it Off: Evenly sprinkle the topping mixture over the apples. Make sure to cover all the apples; you want every bite to have that crunchy goodness!
Adding a sprinkle of chopped nuts—like pecans or walnuts—can enhance the texture and flavor, but they’re completely optional.
Bake to perfection
Finally, it’s time to let the magic happen in the oven. Place your assembled apple crisp in the preheated oven and bake for 35-45 minutes, or until the topping is golden brown and the apples are bubbling. The edges should be slightly caramelized, and you’ll be greeted with an irresistible aroma wafting through your kitchen.
As a tip, let it cool for at least 10 minutes before serving. This allows the juices to set a bit, making it easier to portion out. Pair it with a scoop of vanilla ice cream or whipped cream for an extra indulgence!
And there you have it! By following these straightforward steps, you’ll create a homemade apple crisp that’s sure to evoke smiles and second helpings. Enjoy the process and the delightful results that come from your hard work! For more apple-inspired recipes or tips on how to choose the best apples, check out reputable sources like the USDA’s site or Fruit & Veggies More Matters.

Variations on Homemade Apple Crisp
Creative fruit combinations for unique flavors
While a classic homemade apple crisp is undeniably delicious, have you ever considered mixing in other fruits? Adding a twist can elevate your dish and surprise your palate. Here are a few tasty combinations to experiment with:
- Apple and Pear: The juicy sweetness of pears enhances the tartness of apples, creating a lovely balance.
- Apple and Cranberry: For a tart punch, toss in some fresh or dried cranberries, which pair beautifully with the cinnamon and sugar.
- Apple and Berries: Consider combining apples with blueberries or raspberries for a pop of color and flavor.
- Apple and Peach: The sweetness of peaches melds perfectly with apples, especially during late summer!
These variations not only add excitement to your dish but also provide a chance to showcase seasonal fruits. Feel free to try your own combination, and let your creativity shine!
Nutty topping variations for added crunch
Craving some extra texture in your homemade apple crisp? Switching up the topping can be a game-changer. Here are a few nutty ideas that bring a delightful crunch:
- Pecans: Their buttery flavor complements the sweetness of the apples wonderfully.
- Almonds: Sliced or crushed almonds can add a subtle nuttiness that enhances the overall profile.
- Walnuts: Chopped walnuts offer a rich, earthy flavor and a satisfying crunch.
- Pumpkin seeds: For a gluten-free option, consider using pumpkin seeds, which add both protein and a delightful crunch.
By mixing in different nuts or seeds, you not only enhance the flavor but also introduce new textures. Looking for more inspiration? Check out Bon Appétit for a wonderful take on fruit crisps!
Exploring these variations may just turn your next family gathering into an unforgettable feast! Happy baking!
Cooking Tips and Notes for Homemade Apple Crisp
Make-ahead strategies for busy schedules
If you’re juggling a busy schedule but still craving that delicious homemade apple crisp, consider prepping elements in advance. You can slice your apples the night before and toss them with lemon juice to prevent browning. The topping can be mixed and stored in the fridge for up to a day or even frozen for a couple of weeks. This way, when you’re ready to bake, you only need to combine the apples with the topping and pop it in the oven—easy peasy!
Proper storage to keep your apple crisp fresh
When it comes to storing your homemade apple crisp, allow it to cool completely before covering it tightly with plastic wrap or transferring it to an airtight container. It can stay fresh in the fridge for about 3-4 days. If you want to savor it longer, consider freezing portions. Just reheat in the oven at 350°F for about 15-20 minutes, and you’ll have a warm dessert ready to enjoy. For more storage tips, check out articles from reputable sites like Food Storage Guidelines.
By keeping these tips in mind, your homemade apple crisp can be the perfect sweet treat, even on the busiest days!
Serving Suggestions for Homemade Apple Crisp
Pairing with Ice Cream or Whipped Cream
One of the best ways to elevate your homemade apple crisp is by serving it with a scoop of vanilla ice cream or a dollop of whipped cream. The contrast of warm, spiced apples with the cold creaminess creates a delightful experience for your taste buds. Consider using gelato for a richer texture, or try a cinnamon-flavored ice cream to complement the flavors of the crisp even more. Want something healthier? A swirled yogurt topping can provide a yummy alternative without sacrificing flavor!
Serving Ideas for Special Occasions
When you’re planning a gathering or a celebration, your homemade apple crisp can take center stage. Here are some creative ideas:
- Individual Servings: Bake the crisp in ramekins for a charming presentation. This makes it easy for guests to grab their own portion and makes it feel special.
- Autumn Gatherings: During fall, serve your apple crisp alongside spiced cider or warm chai tea to enhance the seasonal vibe.
- Potluck Treat: Consider a large dish to share, accompanied by a recipe card for guests to take home. They’ll appreciate the gesture!
For further inspiration, check out Food Network and discover ways to impress your guests with this warm and comforting dessert. Your apple crisp will surely be a hit!
Time Breakdown for Homemade Apple Crisp
Navigating the timeline for your homemade apple crisp can set you up for success! Here’s a handy breakdown:
Preparation Time
Getting everything ready takes about 15 to 20 minutes. You’ll want to peel and slice those apples while your oven heats up. Don’t worry; it’s a therapeutic process—think of it as a mini workout!
Baking Time
Once your crisp is assembled, pop it in the oven and let it bake for 30 to 35 minutes. This is when the magic happens: the aroma of cinnamon and caramelizing apples fills your kitchen, making it the perfect time to grab some friends for a little taste-test.
Total Time
In total, you’re looking at roughly 50 to 55 minutes from start to finish. Not too shabby for a dessert that will impress everyone! For more details on prepping like a pro, check out Bon Appétit’s guide to dessert timing.
Now, get those apples and let the cooking fun begin!
Nutritional Facts for Homemade Apple Crisp
When you indulge in homemade apple crisp, it’s important to know what you’re savoring. Here’s a breakdown:
Calories
A serving of homemade apple crisp typically contains around 200-300 calories, depending on the ingredients used. Opting for less sugar or using oats can help dial down those numbers a bit.
Protein
While fruit desserts aren’t usually protein powerhouses, a serving can deliver about 2-4 grams of protein. To boost this, consider adding some nuts or seeds to your topping for added crunch and nourishment.
Sugar Content
You’ll generally find about 15-20 grams of natural sugars in each serving, mostly from the apples. If you’re looking to enjoy your crisp without excessive sweetness, reducing added sugar can really help balance flavor while keeping it delicious.
For more nutritional insights, check out resources like NutritionData or visit the USDA FoodData Central for comprehensive breakdowns.
FAQs about Homemade Apple Crisp
Can I use other fruits besides apples?
Absolutely! While traditional homemade apple crisp features apples, you can experiment with various fruits to create your perfect dessert. Pears, peaches, or even berries work wonderfully. For a mixed fruit crisp, combine your favorites—just be mindful of the moisture content. A good rule of thumb is to add a tablespoon of cornstarch to help absorb excess juices. Curious about fruit substitutions? Check out this guide on substituting fruits in baking for more ideas!
How do I know when my apple crisp is done?
The key to a perfect homemade apple crisp lies in its texture and color. You’ll know it’s ready when the topping is golden brown and the filling is bubbling around the edges. Typically, this takes about 30 to 40 minutes in a preheated oven at 350°F (175°C). If you’re unsure, use a fork to check the apples; they should be tender but not mushy. Visual cues are essential, but you can also set a timer to ensure you don’t lose track of baking time!
What’s the best way to reheat leftover apple crisp?
To enjoy leftovers at their best, reheat your homemade apple crisp in the oven. Preheat it to 350°F (175°C) and warm the crisp for about 15 to 20 minutes until heated through. This method helps maintain the delicious texture of the topping. If you’re short on time, you can microwave directly in bowls for a minute or two, but it might lose some of its delightful crunch. For a creative twist, serve it with a scoop of ice cream or a drizzle of milk for that ultimate comfort food experience.
By incorporating these tips, you’ll ensure your homemade treats are always a hit! If you have more questions or need guidance, feel free to reach out to your fellow baking enthusiasts in the comments below. Happy baking!
Conclusion on Homemade Apple Crisp
Creating your own homemade apple crisp is not just a cooking task; it’s a delightful experience that fills your kitchen with warmth and tantalizing aromas. The process is simple yet rewarding, as you transform fresh apples into a comforting dessert that pairs beautifully with a scoop of ice cream.
Take a moment to savor this simple pleasure—there’s something magical about the combination of crunchy toppings and sweet, tender apples. Whether you’re enjoying it solo or sharing with friends, each bite will remind you of the joy of homemade creations.
For more tips on baking delicious treats, check out The Spruce Eats or Food Network. Happy baking!
Print
Homemade Apple Crisp: The Best Comfort Dessert You’ll Love
- Total Time: 55 minutes
- Yield: 8 servings
- Diet: Vegetarian
Description
Indulge in the warmth and comfort of homemade apple crisp, a classic dessert that combines sweet, tender apples with a crumbly topping. Perfect for any occasion!
Ingredients
- 6 cups sliced apples
- 1 cup brown sugar
- 1 cup rolled oats
- 1 cup all-purpose flour
- 1 tsp cinnamon
- 1/2 cup unsalted butter, melted
Instructions
- Preheat the oven to 350°F (175°C).
- In a large bowl, mix sliced apples with brown sugar and cinnamon.
- Place the apple mixture in a greased baking dish.
- In another bowl, combine oats, flour, and melted butter until crumbly.
- Spread the oat mixture over the apples.
- Bake for 35-40 minutes or until bubbly and golden brown.
Notes
- Serve warm with vanilla ice cream for an extra treat.
- Use a mix of tart and sweet apples for a more complex flavor.
Nutrition
- Serving Size: 1 serving
- Calories: 250
- Sugar: 20g
- Sodium: 150mg
- Fat: 10g
- Saturated Fat: 5g
- Unsaturated Fat: 3g
- Trans Fat: 0g
- Carbohydrates: 38g
- Fiber: 3g
- Protein: 2g
- Cholesterol: 15mg
")