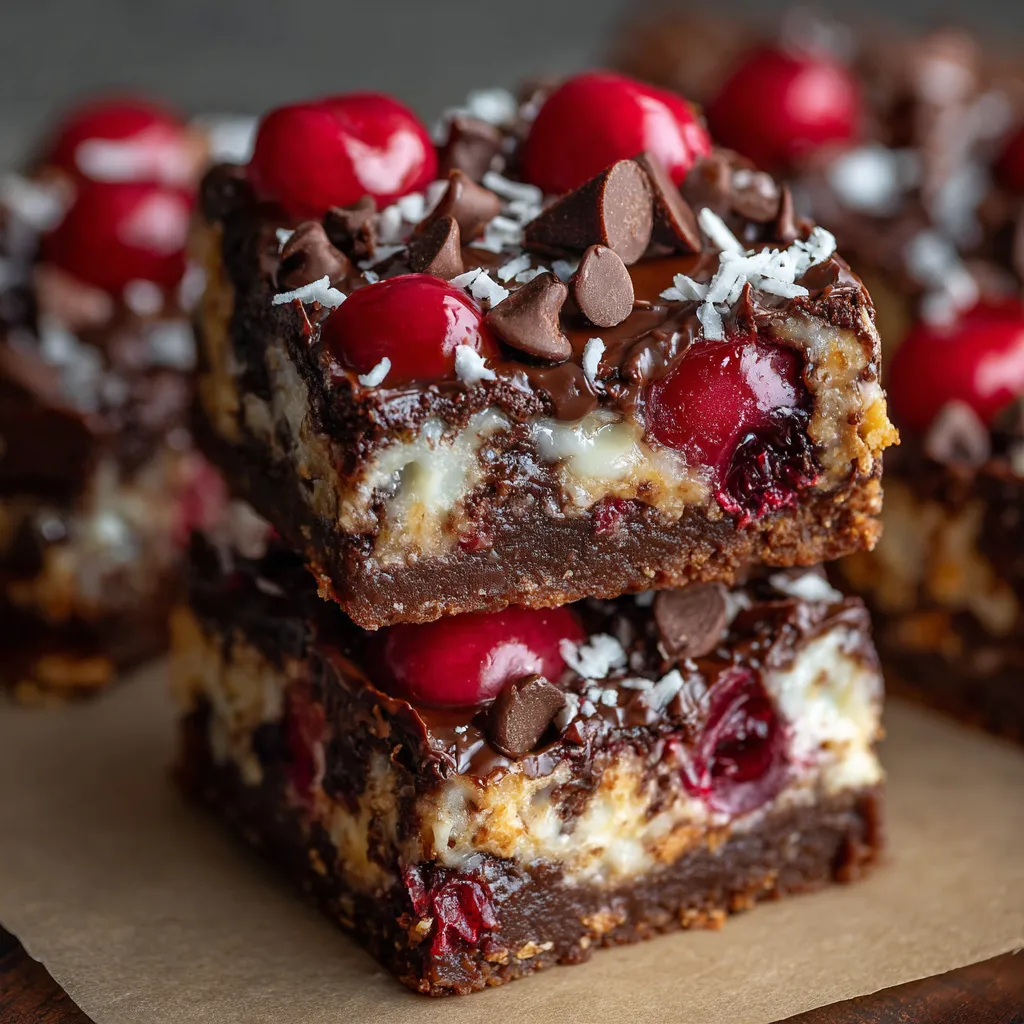
If you’ve been searching for a dessert that’s equal parts decadent, nostalgic, and ridiculously easy to make, you’re about to meet your new go-to recipe: Chocolate Covered Cherry Magic Bars.
These bars are the kind of treat that disappear from the plate in minutes. They have everything you want in a dessert—layers of buttery graham cracker crust, chewy coconut, gooey sweetened condensed milk, crunchy nuts, sweet cherries, and of course, melty chocolate chips. It’s like every texture and flavor you love all in one bite.
Whether you’re baking for a holiday cookie exchange, a potluck at work, or just because the weather calls for something cozy, these bars fit the bill. You don’t need any fancy equipment or advanced baking skills—just a few pantry staples and a little patience while your kitchen fills with the irresistible smell of chocolate and cherries baking together.
Why You’ll Love This Recipe
Key Benefits
-
Effortless to Make: No creaming butter, no complicated steps—just layer and bake.
-
Crowd-Pleasing Flavor: The cherry and chocolate pairing feels indulgent yet familiar.
-
Flexible Ingredients: Easy to swap or adjust based on your taste and dietary needs.
-
Perfect for Any Occasion: From Valentine’s Day to a rainy Sunday afternoon, they work every time.
Suitable For
-
Beginner Bakers: If you can melt butter, you can make these.
-
Holiday Gatherings: Their festive look and rich flavor make them a seasonal star.
-
Make-Ahead Desserts: These bars store well, so you can bake ahead without stress.
Ingredients for Chocolate Covered Cherry Magic Bars
Core Ingredients
Let’s start with the essentials. These are the building blocks of your bars:
-
1 ½ cups semi-sweet chocolate chips – For rich, melty pockets of chocolate in every bite.
-
1 cup chopped walnuts or pecans – Adds a satisfying crunch; pick your favorite.
-
½ cup unsalted butter, melted – Holds the crust together and adds buttery flavor.
-
1 ½ cups graham cracker crumbs – The foundation of your crust; about 12 full sheets crushed.
-
1 (14 oz) can sweetened condensed milk – The magic glue that binds it all.
-
1 ½ cups shredded coconut – Sweetened or unsweetened, depending on how sweet you like it.
-
1 cup maraschino cherries, drained and halved – Or dried cherries for a tangier bite.
Substitutions and Tips
-
Nuts: Swap walnuts or pecans for almonds, hazelnuts, or skip entirely for a nut-free version.
-
Chocolate: Try white or dark chocolate chips for a different flavor profile.
-
Cherries: Fresh or frozen (thawed) cherries bring a natural fruitiness; just drain well.
-
Crust: Use gluten-free graham crackers for a celiac-friendly treat.
The Best Cherries for Chocolate Covered Cherry Magic Bars
Choosing the right cherry makes all the difference in flavor and texture.
-
Maraschino Cherries: Bright, sweet, and visually striking—perfect if you want a classic look.
-
Fresh Cherries: Offer a more natural sweetness and a juicier bite, but need pitting and thorough draining.
-
Dried Cherries: Intensely flavored and slightly tart, balancing the richness of the chocolate and condensed milk.
Tip: No matter which cherry you choose, make sure to blot them dry with paper towels to prevent excess moisture from seeping into the bars.
Kitchen Tools You’ll Need
Must-Have Tools
-
9×13-inch baking pan – The perfect size for even baking and easy slicing.
-
Mixing bowls – One medium for the crust, one for layering ingredients.
-
Measuring cups and spoons – Accuracy matters here for the right balance of flavors.
-
Rubber spatula – Helps spread layers evenly without breaking them apart.
Nice-to-Have Tools
-
Parchment paper – Makes removing and slicing bars much easier.
-
Offset spatula – For spreading the condensed milk evenly across the crust.
-
Cherry pitter – If you’re using fresh cherries, this will save time and mess.
How to Make Chocolate Covered Cherry Magic Bars

These bars come together in layers, and once you’ve done it once, you’ll see just how forgiving and flexible this recipe is. Here’s your step-by-step guide.
Step 1: Preheat Oven and Prep the Pan
Set your oven to 350°F (175°C) so it’s ready when you are. While it preheats, line a 9×13-inch baking pan with parchment paper, leaving a bit of overhang on the sides. This makes it so much easier to lift the bars out later. If you prefer, you can lightly grease the pan with butter or nonstick spray.
Tip: Parchment isn’t just about easy cleanup—it also keeps the crust from sticking, so you get perfect slices every time.
Step 2: Make the Crust
In a medium mixing bowl, stir together 1 ½ cups graham cracker crumbs with ½ cup melted unsalted butter until the crumbs are evenly coated and resemble wet sand. Press this mixture firmly and evenly into the bottom of your prepared pan.
Why this matters: A firmly packed crust holds everything together when you slice the bars. If the crumbs are too loose, your layers will slide apart.
Step 3: Layer the Ingredients
This is where the “magic” happens—no mixing bowls needed after the crust is done.
-
Pour the sweetened condensed milk evenly over the crust. Use the back of a spoon or an offset spatula to spread it right to the edges.
-
Sprinkle the shredded coconut evenly across the condensed milk layer.
-
Add the chopped nuts in an even layer, pressing them in lightly so they stick.
-
Scatter the cherries evenly over the nuts.
-
Top with the chocolate chips, making sure no corner is left behind.
Tip: If your chocolate chips are rolling away, press them in gently with the back of a spatula.
Step 4: Bake
Slide the pan into your preheated oven and bake for 25–30 minutes, or until the edges are golden brown and the center looks set.
Don’t overbake: These bars continue to set as they cool, so if they look slightly soft in the middle, that’s fine.
Step 5: Cool and Slice
Place the pan on a cooling rack and let the bars cool completely before slicing. For the cleanest cuts, refrigerate the pan for at least an hour, then lift the whole slab out using the parchment paper and slice with a sharp knife.
Tips for Success
-
Drain cherries well: Excess moisture can cause the bars to be soggy. Blot them dry with paper towels.
-
Pack the crust firmly: This prevents crumbling when slicing.
-
Don’t rush cooling: Cutting while warm will cause the layers to slide apart.
-
Customize the sweetness: Use unsweetened coconut and darker chocolate if you prefer a less sweet bar.
How to Store Chocolate Covered Cherry Magic Bars
At Room Temperature
If your kitchen is cool, you can store the bars in an airtight container for up to 3 days.
In the Refrigerator
For longer freshness, store in an airtight container in the fridge for up to 5 days. They’ll be slightly firmer but still delicious.
Freezing Tips
Wrap individual bars tightly in plastic wrap, then place them in a freezer-safe bag or container. Freeze for up to 3 months. To serve, thaw in the refrigerator overnight or at room temperature for an hour.
Frequently Asked Questions (FAQs)
Can I use white chocolate instead of semi-sweet?
Absolutely. Swap the chocolate chips 1:1 with white chocolate for a creamier, sweeter flavor.
Can I make these nut-free?
Yes. You can simply leave the nuts out or replace them with sunflower seeds or pumpkin seeds for a similar crunch.
Why are my bars crumbly?
This usually happens when the crust wasn’t pressed firmly enough or if the bars were sliced before fully cooling.
Can I double the recipe?
Yes, but use two separate pans for even baking. A single oversized batch may bake unevenly.
Related Recipes
If you loved these Chocolate Covered Cherry Magic Bars, you might enjoy these other sweet treats:
-
Maraschino Cherry Chocolate Chip Cookies Recipe – Soft cookies packed with cherries and chocolate chips.
-
Coconut Toffee Chocolate Chip Cookie Bars Recipe – A chewy coconut and chocolate treat with buttery toffee.
-
Sweetened Condensed Milk Snowballs Recipe – No-bake coconut balls rolled in powdered sugar.
Conclusion
Chocolate Covered Cherry Magic Bars are the kind of dessert you make once and then keep coming back to. They’re easy, reliable, and full of flavor—ideal for everything from holiday parties to casual weekend baking. With simple ingredients and straightforward steps, you can make them ahead of time, customize them to your taste, and trust they’ll disappear from the plate in no time.
So go ahead—preheat the oven and let your kitchen fill with the smell of chocolate, coconut, and cherries mingling together.
Print
Chocolate Covered Cherry Magic Bars
- Total Time: 45 minutes
- Yield: 24 bars
Description
Chocolate Covered Cherry Magic Bars are a rich, layered dessert with buttery graham cracker crust, coconut, sweet cherries, crunchy nuts, and melty chocolate chips—perfect for holidays or anytime baking.
Ingredients
- 1 ½ cups semi-sweet chocolate chips
- 1 cup chopped walnuts or pecans
- ½ cup unsalted butter, melted
- 1 ½ cups graham cracker crumbs (about 12 full sheets)
- 1 (14 oz) can sweetened condensed milk
- 1 ½ cups shredded coconut (sweetened or unsweetened)
- 1 cup maraschino cherries, drained and halved (or dried cherries)
Instructions
- Preheat oven to 350°F (175°C). Line a 9×13-inch pan with parchment paper or grease lightly.
- In a bowl, combine graham cracker crumbs and melted butter. Press evenly into the prepared pan.
- Pour sweetened condensed milk over the crust and spread evenly.
- Layer coconut, chopped nuts, cherries, and chocolate chips in order.
- Bake for 25–30 minutes until edges are golden and center is set.
- Cool completely before slicing; refrigerate for cleaner cuts.
Notes
- Use almonds or pecans instead of walnuts if preferred.
- Substitute white chocolate chips for a sweeter twist.
- Drain cherries well to prevent sogginess.
- Prep Time: 15 minutes
- Cook Time: 30 minutes
Nutrition
- Serving Size: 1 bar
- Calories: 210
- Sugar: 18g
- Sodium: 65mg
- Fat: 12g
- Saturated Fat: 7g
- Unsaturated Fat: 4g
- Trans Fat: 0g
- Carbohydrates: 24g
- Fiber: 2g
- Protein: 3g
- Cholesterol: 10mg
")