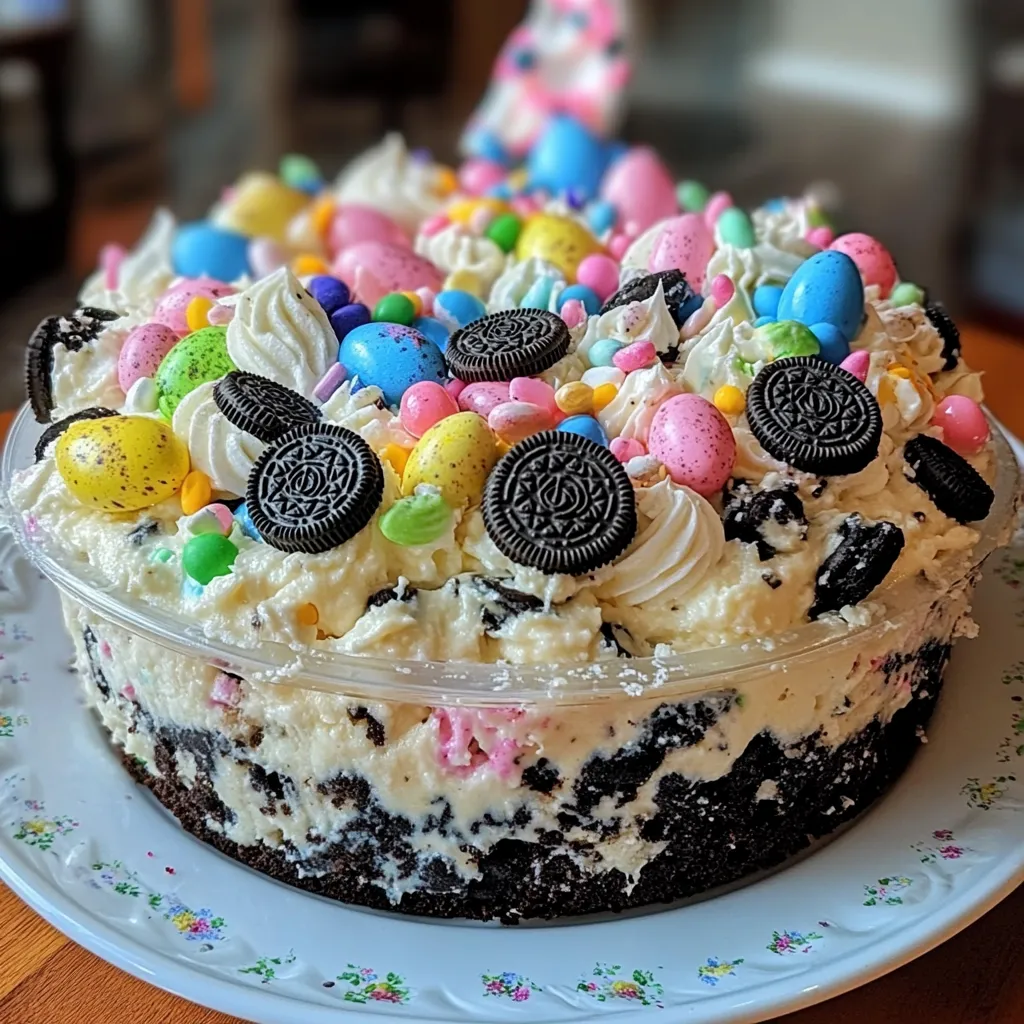
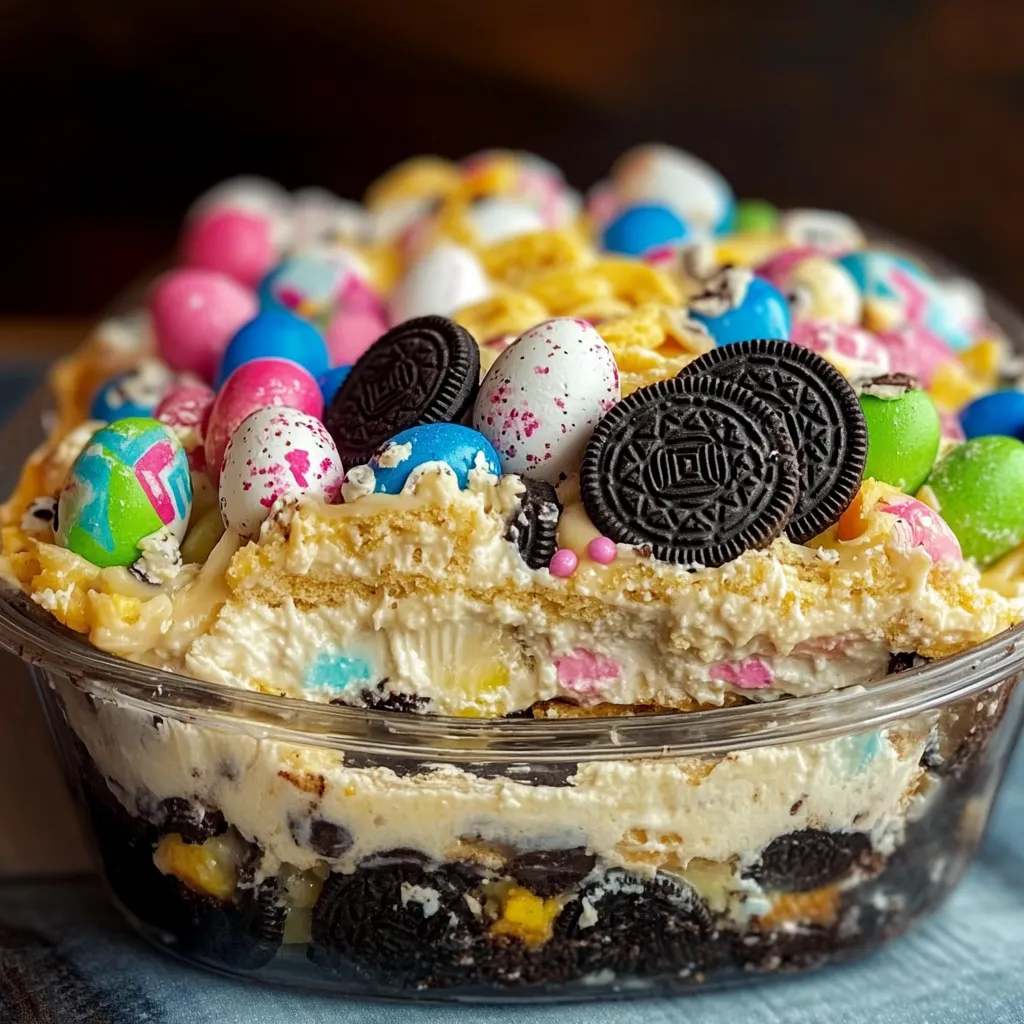
If you’re looking for the kind of dessert that brings instant smiles and a whole lot of “Can I get that recipe?” moments, this Easter Oreo Cookie Casserole recipe is it. It’s colorful, creamy, and completely irresistible. And the best part? You don’t even need to turn on the oven.
This layered no-bake dessert is made with pastel Oreo cookies, fluffy whipped topping, velvety cream cheese, and a smooth pudding layer. It’s a perfect make-ahead treat that’s just as fun to make as it is to eat. Whether you’re hosting Easter brunch, attending a spring potluck, or just want to make something festive with the kids, this casserole checks every box.
It’s approachable, beginner-friendly, and totally adaptable, making it the kind of recipe you’ll come back to again and again—every spring and maybe even beyond.
Why You’ll Love This Easter Oreo Cookie Casserole Recipe
Key Benefits
There’s something about a layered dessert that just feels like a celebration. This Easter Oreo Cookie Casserole is no exception. Here’s why it’s a must-make:
-
No-bake and stress-free – It comes together without needing to heat up the kitchen.
-
Fun and festive – Thanks to those pastel Oreos and colorful toppings, it brings instant spring vibes.
-
Make-ahead friendly – Prepare it the night before your gathering and let it chill while you handle everything else.
-
Crowd-pleasing flavor – It’s creamy, sweet, and perfectly balanced. Everyone from kids to grandparents will love it.
Suitable For
This dessert is wonderfully versatile. Whether you’re planning something formal or just a relaxed family gathering, this casserole fits right in. It’s ideal for:
-
Easter dessert tables – The pastel colors and layered look make it a festive centerpiece.
-
Springtime potlucks and parties – It’s easy to transport and serve.
-
Kid-friendly kitchen fun – Let little hands crush cookies and sprinkle toppings.
-
Beginner bakers – If you’re new to desserts, this is a fantastic place to start.
Ingredients for Easter Oreo Cookie Casserole
Core Ingredients
Let’s talk ingredients. You won’t need anything complicated—just some pantry staples and a few fun extras.
-
1½ cups cold milk – Helps set the pudding to that perfect creamy texture.
-
8 oz cream cheese, softened – Adds richness and tang to the middle layer.
-
1 cup powdered sugar – Sweetens the cream cheese layer just right.
-
1 package (15.25 oz) Easter or pastel Oreo cookies – These form the crust and topping. The seasonal colors add a festive touch.
-
½ cup unsalted butter, melted – Binds the cookie crust.
-
1 package (3.4 oz) instant vanilla or cheesecake pudding mix – Brings a silky smooth texture and flavor.
-
8 oz Cool Whip or whipped topping – Adds that signature light, fluffy finish.
-
Pastel sprinkles or mini candy eggs – Optional, but highly recommended for a festive garnish.
Substitutions and Tips
Want to customize this dessert a little? Here are some ideas that still deliver big flavor and beautiful results.
-
No pastel Oreos? Use regular or Golden Oreos and load up on pastel sprinkles for that Easter vibe.
-
Trying a different pudding? Lemon or white chocolate pudding gives a fresh spring twist.
-
Cool Whip alternatives? Homemade whipped cream (stabilized) works great if you prefer from-scratch.
-
Need it gluten-free? Use gluten-free sandwich cookies and double-check that your pudding mix is also gluten-free.
-
Going dairy-free? Swap in dairy-free cream cheese, almond milk, and coconut whipped topping for a delicious alternative.
This recipe is incredibly forgiving, so don’t stress—just have fun with it.
Best Oreos for Easter Oreo Cookie Casserole
The beauty of this recipe is that it’s as fun to look at as it is to eat—and the Oreos play a big role in that. For the best visual and festive effect, go for pastel-colored or Easter-themed Oreos. They’re usually available in stores from early March through mid-April.
If you can’t find the exact seasonal version, don’t worry. Golden Oreos, Spring Oreos with yellow creme, or even mint Oreos can work beautifully with a few colorful toppings like sprinkles or mini eggs to brighten things up. The key is to use cookies with a sturdy texture and enough sweetness to balance the creamy layers.
Look for varieties that complement vanilla and cream cheese flavors, and you really can’t go wrong.
Kitchen Tools You’ll Need
You don’t need a fancy kitchen setup to make this Easter Oreo Cookie Casserole shine. In fact, with just a few basic tools, you’re well on your way to a beautifully layered, creamy dessert that looks like it took more effort than it actually did.
Must-Have Tools
Here’s what you’ll want to have on hand before you start:
-
9×9-inch or 9×13-inch baking dish – Either size works. The 9×13 will give you thinner layers, while the 9×9 offers a thicker, more decadent bite.
-
Mixing bowls – You’ll need at least two medium-sized bowls—one for the pudding and one for the cream cheese mixture.
-
Electric hand mixer or stand mixer – This will make whipping the cream cheese layer much easier and smoother.
-
Rubber spatula – Great for spreading layers evenly without breaking them.
-
Measuring cups and spoons – Accuracy is key for the perfect texture.
Nice-to-Have Tools
While not required, these tools can make the process even smoother:
-
Food processor – Perfect for crushing Oreos into fine crumbs quickly. If you don’t have one, a zip-top bag and a rolling pin work just as well.
-
Offset spatula – Helpful for getting clean, level layers and picture-perfect edges.
-
Glass serving dish – If you want to show off the beautiful layers, this adds a nice presentation touch.
How to Make Easter Oreo Cookie Casserole
This recipe comes together in a few simple layers—and each one brings its own texture and flavor. If you’ve ever made a no-bake dessert before, you’ll feel right at home. If you haven’t, this is a great one to start with.
Step 1: Make the Oreo Crust
Start by crushing about two-thirds of the Oreo cookies. If you’re using a food processor, pulse until you get fine crumbs. If you’re using the rolling pin method, place the cookies in a sturdy zip-top bag and give them a good roll until they resemble coarse sand.
In a bowl, mix the crumbs with melted butter until they’re fully coated and slightly sticky. Press this mixture firmly into the bottom of your dish, creating an even crust layer. A flat-bottomed glass can help with pressing it in evenly.
Once the crust is set in the dish, pop it into the fridge to chill while you prep the other layers. This step helps the base stay firm when you add the creamy layers on top.
Step 2: Prepare the Pudding
In a medium bowl, whisk together the instant pudding mix and cold milk. This should take about 2 minutes of whisking until the mixture thickens. Let it sit while you move on to the next step—this gives it time to set up fully and hold its layer in the final dish.
Want a flavor twist? Try lemon or white chocolate pudding for a fresh, springy flavor that pairs beautifully with the sweet crust.
Step 3: Mix the Cream Cheese Layer
In another mixing bowl, beat the softened cream cheese with powdered sugar until smooth and creamy. This is where your electric mixer really comes in handy—you want this layer to be silky and lump-free.
Once the mixture is smooth, gently fold in half of the Cool Whip. Don’t rush this part—folding keeps the mixture light and fluffy, which is key to a lovely, airy texture.
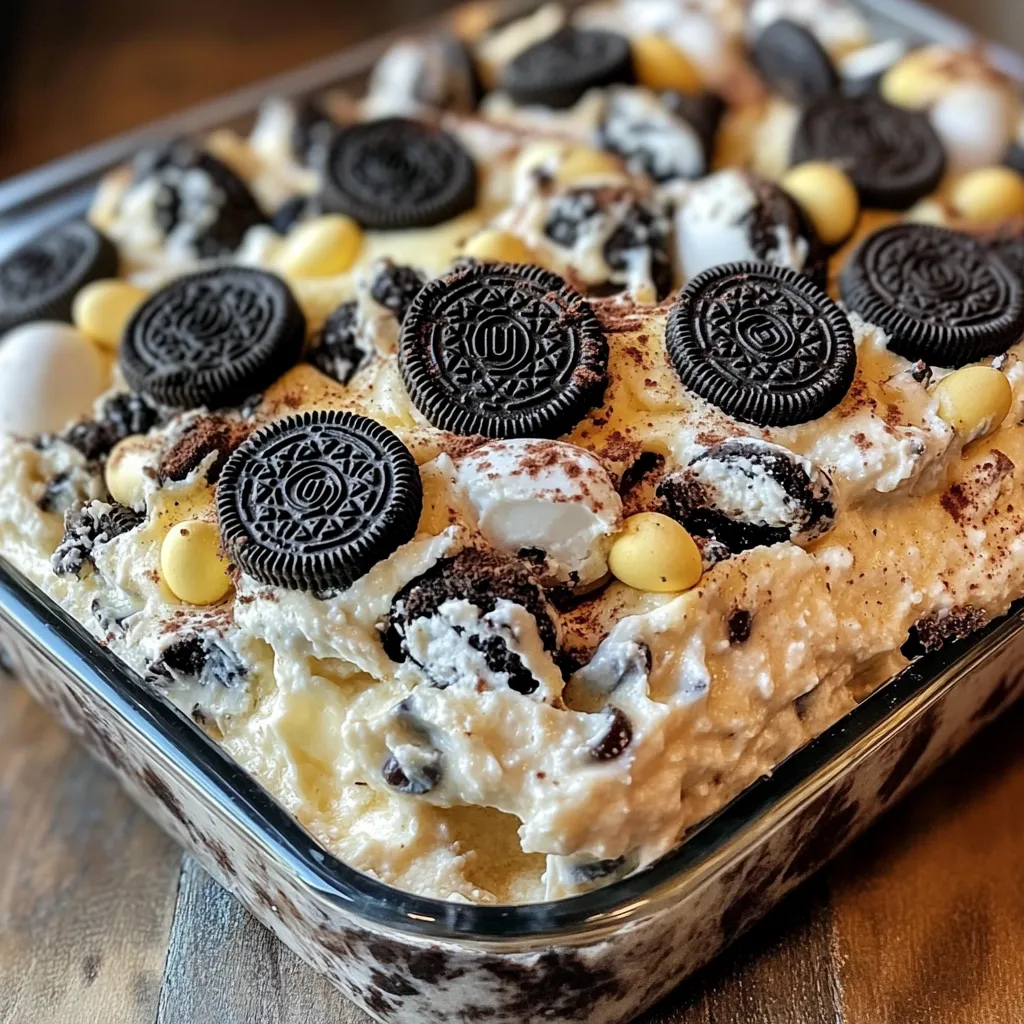
Step 4: Assemble the Layers
Now comes the fun part—building the layers. Grab your chilled crust from the fridge.
First, spread the cream cheese mixture over the Oreo crust. Use a spatula or the back of a spoon to smooth it into an even layer.
Next, gently spoon the pudding layer over the cream cheese. You can use a spatula to guide it so the layers don’t mix.
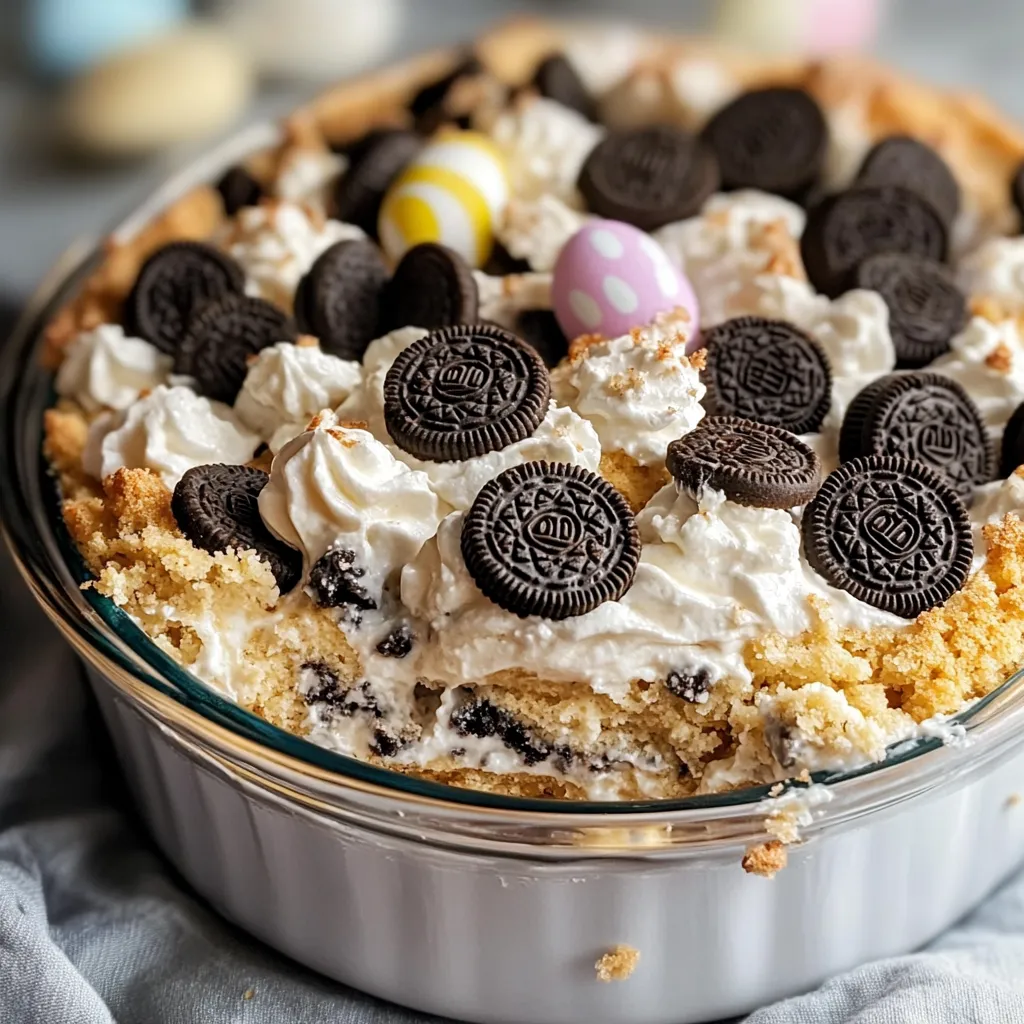
Finally, top everything with the remaining Cool Whip. Spread it out gently and evenly so it looks light and cloud-like on top.
Step 5: Garnish and Chill
Crush the remaining Oreos (you can keep them chunkier this time for texture) and sprinkle them generously over the top. Add pastel sprinkles or mini candy eggs for that final festive touch.
Now, the hardest part—waiting. Refrigerate your casserole for at least 2 to 4 hours. This gives all the layers time to set and makes slicing much easier.
Tips for Success
Even simple recipes have their secrets. Here’s how to make sure yours turns out picture-perfect every time:
-
Soften your cream cheese properly – Cold cream cheese can lead to lumps. Let it sit at room temperature for about 30 minutes before beating.
-
Don’t skip chilling the crust – A cold crust keeps everything stable and makes layering easier.
-
Fold, don’t mix – Folding the Cool Whip into the cream cheese keeps the layer airy and smooth.
-
Use instant pudding only – Cook-and-serve pudding won’t set the same way in this no-bake recipe.
-
Make it a day ahead – This dessert actually tastes better after a night in the fridge, once the layers have had time to meld together.
Whether you’re making this for Easter Sunday, a spring baby shower, or just a fun family night, this dessert is guaranteed to bring big smiles. It’s the kind of recipe you’ll want to print, save, and share with friends—because everyone needs a no-bake beauty like this in their back pocket.
How to Store Easter Oreo Cookie Casserole
One of the best parts of this Easter Oreo Cookie Casserole—besides how pretty and delicious it is—is that it stores beautifully. Whether you’re prepping ahead or saving leftovers (if there are any), you’ve got plenty of options to keep it fresh and tasty.
At Room Temperature
Because this dessert contains cream cheese and whipped topping, it’s not one that should be left out for long. You’ll want to keep it chilled until just before serving. If it’s sitting out at a party or gathering, aim for no more than two hours on the table. After that, pop it back in the fridge.
In the Refrigerator
The fridge is definitely where this casserole belongs. Cover the dish tightly with plastic wrap or a lid, and it will stay fresh for up to 4 days. In fact, the flavors and textures often get even better after a day in the fridge—the crust firms up, and the layers settle beautifully. Just be sure to store it on a flat surface so the layers don’t shift.
Freezing Tips
If you want to make this dessert well in advance, you can absolutely freeze it—just skip the toppings until you’re ready to serve. Wrap the whole dish tightly with plastic wrap, then a layer of foil, and freeze for up to one month. When you’re ready to serve, let it thaw overnight in the fridge. Add your crushed cookies, sprinkles, or candy eggs just before serving so they stay crisp and colorful.
Freezing smaller portions? Individual containers work well and make it easy to grab a quick treat from the freezer whenever you need a little sweetness.
Frequently Asked Questions (FAQs)
Can I make this dessert ahead of time?
Absolutely, and it’s actually recommended. This casserole is best when it has time to chill and set. You can make it the night before your event and simply keep it refrigerated until you’re ready to serve. It’s a great way to take one thing off your plate on a busy holiday morning.
Can I use regular Oreos instead of Easter-themed ones?
Yes, regular Oreos work perfectly. The pastel colors just add that extra springtime charm. If you’re using classic Oreos, feel free to jazz up the top with colorful sprinkles or a mix of Easter candy to bring in the seasonal feel.
How do I make this gluten-free?
The good news is that it’s easy to make this dessert gluten-free. Just swap the regular Oreos with a gluten-free sandwich cookie (there are several on the market now), and double-check your pudding mix to ensure it’s gluten-free too. Everything else can stay the same.
What can I use instead of Cool Whip?
If you prefer to skip the Cool Whip, you can use homemade whipped cream instead. Just make sure it’s stabilized so it holds up well in the fridge. You can do this by adding a little powdered sugar and vanilla to heavy cream and whipping it until stiff peaks form. It gives a lovely, homemade touch.
Related Recipes
If you loved this Easter Oreo Cookie Casserole, you might enjoy these other spring-inspired and no-bake desserts:
-
Lemon Raspberry Cupcakes – A bright, tangy cupcake that screams spring.
-
Easter Cake Mix Cookie Bars – Fun and festive, just like the casserole.
-
No-Bake Coconut Cream Balls – Bite-sized creamy treats with a tropical twist.
-
Easter Jell-O Pie – A light and fruity option for your Easter table.
-
Pink Velvet Cupcakes – Sweet, colorful, and perfect for spring occasions.
Conclusion
This Easter Oreo Cookie Casserole is the kind of recipe that’s easy enough for beginners, fun enough to make with kids, and impressive enough for your holiday table. It’s creamy, crunchy, sweet, and full of festive flair—and best of all, it comes together with no baking required.
Whether you stick with the classic version or put your own spin on it, this dessert is bound to become a new springtime favorite. Save the recipe, print it out, and be ready to pass it along—because once you make it, people will ask for it.
Try it once, and it just might become your go-to Easter tradition.
Print
The Ultimate Easter Oreo Cookie Casserole Recipe
- Total Time: 2 hours 20 minutes
- Yield: 12 servings
Description
This Easter Oreo Cookie Casserole is a no-bake, layered dessert made with pastel Oreos, creamy pudding, whipped topping, and a sweetened cream cheese filling. It’s the perfect make-ahead treat for spring holidays, parties, or family gatherings.
Ingredients
- 1½ cups cold milk
- 8 oz cream cheese, softened
- 1 cup powdered sugar
- 1 package (15.25 oz) Easter or pastel Oreo cookies
- ½ cup unsalted butter, melted
- 1 package (3.4 oz) instant vanilla or cheesecake pudding mix
- 8 oz Cool Whip or whipped topping
- Pastel sprinkles or mini candy eggs (for garnish)
Instructions
- Crush ⅔ of the Oreo cookies into fine crumbs using a food processor or zip-top bag with a rolling pin.
- Mix cookie crumbs with melted butter and press into the bottom of a 9×9 or 9×13-inch dish. Chill in the refrigerator.
- In a mixing bowl, whisk together the pudding mix and cold milk for about 2 minutes until thickened. Set aside.
- In another bowl, beat softened cream cheese and powdered sugar until smooth. Fold in half of the Cool Whip until combined.
- Spread the cream cheese mixture evenly over the Oreo crust.
- Carefully layer the pudding mixture over the cream cheese layer.
- Top with the remaining Cool Whip, smoothing it over the top.
- Crush the remaining Oreos and sprinkle over the top. Garnish with pastel sprinkles or mini candy eggs.
- Refrigerate for at least 2 to 4 hours before serving.
Notes
- Use any seasonal or pastel-colored Oreo variety for a festive twist.
- For a gluten-free version, substitute with gluten-free sandwich cookies and ensure the pudding mix is gluten-free.
- Try lemon or white chocolate pudding for a flavor variation.
- Homemade whipped cream can be used instead of Cool Whip—make sure it’s stabilized.
- Prep Time: 20 minutes
- Cook Time: 0 minutes
Nutrition
- Serving Size: 1 square (approx. 1/12 of recipe)
- Calories: 310
- Sugar: 22g
- Sodium: 210mg
- Fat: 18g
- Saturated Fat: 9g
- Unsaturated Fat: 6g
- Trans Fat: 0g
- Carbohydrates: 35g
- Fiber: 1g
- Protein: 3g
- Cholesterol: 30mg
")