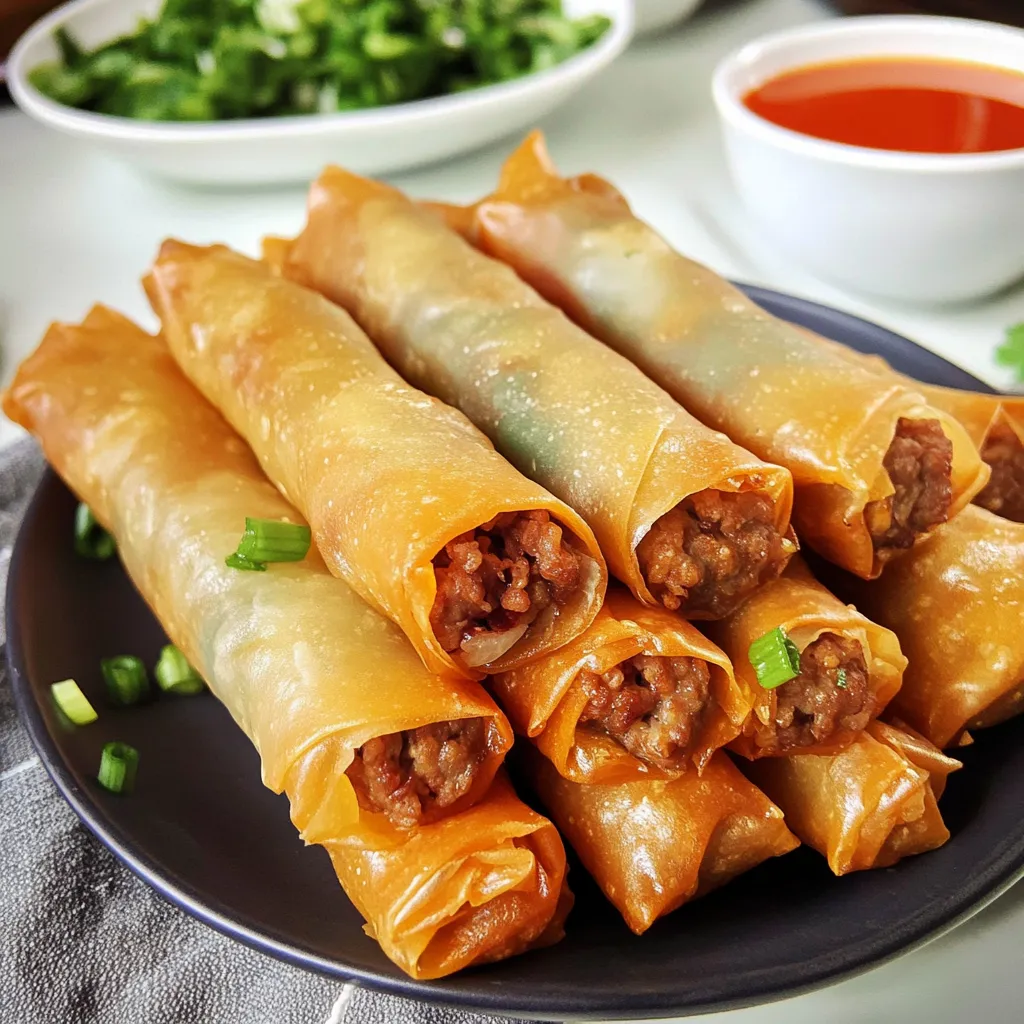
Filipino Lumpia is one of those recipes that feels like a warm hug—crispy on the outside, savory and flavorful on the inside, and absolutely perfect for sharing. If you’ve ever had lumpia at a Filipino gathering, you know it’s usually the first thing to disappear from the table. And if you haven’t made it at home yet, don’t worry—you’re in the right place.
This Filipino Lumpia recipe is everything you want in a party appetizer: crunchy, deeply satisfying, and easy to prepare ahead of time. Whether you’re hosting a holiday celebration, prepping for a potluck, or just craving something delicious and homemade, this guide walks you through each step with confidence and clarity. Trust me—it’s easier than it looks, and once you start rolling, you’ll find your rhythm in no time.
Why You’ll Love This Recipe
Key Benefits
Filipino Lumpia stands out not just for its irresistible taste but for how approachable and versatile it is. Here’s why it deserves a spot in your kitchen:
-
Crispy perfection: The golden-brown shell has that iconic crunch that makes lumpia so addictive.
-
Prep-friendly: You can make a big batch and freeze them for later—great for busy weeks or surprise guests.
-
Customizable: Switch up the filling based on what you have. Ground pork is traditional, but chicken, beef, or even tofu works beautifully.
This is the kind of recipe that fits into your life, not the other way around.
Suitable For
This recipe is as flexible as it is delicious. It’s perfect for:
-
Beginner cooks looking to try a traditional Filipino dish with straightforward steps
-
Families wanting to get the kids involved in the kitchen (rolling lumpia is a fun group activity)
-
Party planners who need a reliable crowd-pleaser
-
Anyone exploring Filipino flavors or reconnecting with childhood favorites
Whether it’s your first time making lumpia or your hundredth, this recipe is here to guide and inspire.
Ingredients for Filipino Lumpia

Core Ingredients
-
1 lb ground chicken or ground beef – Lean ground meat keeps the filling hearty and flavorful.
-
1 cup carrots, finely chopped or grated – Adds sweetness and texture.
-
1 cup green beans, finely chopped – For a pop of color and crisp bite.
-
1 small onion, finely chopped – Adds depth and aroma.
-
3 cloves garlic, minced – A savory base note.
-
2 tablespoons soy sauce – Brings saltiness and umami.
-
1 tablespoon oyster sauce (optional) – Enhances the savoriness, especially with chicken.
-
1 teaspoon salt and 1/2 teaspoon ground black pepper – Season to taste.
-
20–25 lumpia wrappers – For rolling.
-
1 egg, beaten – Used to seal the wrappers.
-
Vegetable oil for frying – Any neutral oil works well.
Substitutions and Tips (Chicken or Beef Edition)
-
Beef tip: Use lean ground beef to avoid overly greasy filling.
-
Chicken tip: If using ground chicken, add a bit more oyster sauce or a pinch of sugar to enhance flavor.
-
Meatless option: Want a vegetarian version? Use tofu and mushrooms as a base.
-
Low-fat alternative: Drain excess fat from beef, or opt for extra-lean ground chicken.
Instructions
Follow the same steps as detailed in the original recipe:
-
Mix the chicken or beef with the chopped vegetables and seasonings.
-
Roll the filling tightly in lumpia wrappers.
-
Fry in batches at 350°F until golden brown.
-
Serve with sweet chili sauce, vinegar-garlic dip, or banana ketchup.
For baking: Brush with oil and bake at 400°F for 20 minutes, flipping halfway.
Best Wrappers for Filipino Lumpia
The wrapper is what makes lumpia so uniquely crispy and light. Lumpia wrappers are thinner than egg roll wrappers and fry up beautifully. Look for them in the freezer section of Asian grocery stores. Brands like Simex or Menlo are reliable and authentic.
If you can’t find lumpia wrappers, spring roll wrappers will work, though they may give you a slightly different texture—still tasty, just not quite the same crisp. To prevent wrappers from drying out while you’re working, cover them with a damp towel and only take out a few at a time.
Tip: Defrost frozen wrappers overnight in the refrigerator, not on the counter, to prevent cracking.
Kitchen Tools You’ll Need
Must-Have Tools
You don’t need any fancy equipment to make lumpia, just a few reliable basics:
-
Mixing bowl: For combining your filling ingredients.
-
Knife and cutting board: For prepping vegetables.
-
Large skillet or deep frying pan: To fry the lumpia until golden and crisp.
-
Tongs or slotted spoon: To safely turn and remove lumpia from hot oil.
-
Paper towels or cooling rack: To drain excess oil and keep the lumpia crisp.
Nice-to-Have Tools
While not essential, these can make the process easier:
-
Food processor: Speeds up chopping, especially for large batches.
-
Thermometer: Helps you maintain the ideal frying temperature of 350°F.
-
Pastry brush: Useful for applying egg wash to seal the wrappers.
Starting with the right tools ensures a smooth, stress-free experience in the kitchen. And once you’ve made lumpia from scratch, it’s hard to go back to store-bought snacks.
How to Make Filipino Lumpia
Now that your ingredients and tools are ready, it’s time to roll—literally. Making lumpia might look intimidating at first, but once you get into the groove, it’s actually quite fun and therapeutic. This step-by-step guide breaks it all down so you can create crisp, golden rolls that taste just like the ones you remember from parties and family gatherings.
Step 1: Prepare the Filling
Start by combining all your filling ingredients in a large mixing bowl: ground pork, finely chopped carrots, green beans, minced garlic, diced onion, soy sauce, oyster sauce (if you’re using it), salt, and pepper.
Use your hands or a sturdy spoon to mix everything thoroughly until the vegetables and meat are evenly distributed. You’re looking for a well-blended mixture where every bite offers a little bit of everything.
Tip: If you’re unsure about seasoning, cook a small spoonful in a pan to taste-test before rolling the entire batch.
Step 2: Separate and Handle Lumpia Wrappers
Lumpia wrappers can dry out quickly, so work with just a few at a time and keep the rest under a damp kitchen towel. Gently peel the wrappers apart—they’re delicate, and you’ll want to avoid tearing them.
Tip: If you’ve defrosted your wrappers overnight in the fridge, they’ll be easier to handle and less prone to cracking.
Step 3: Roll the Lumpia
Here’s where the magic happens. Place one wrapper on a clean surface like a diamond, with a corner pointing toward you. Spoon about 2 tablespoons of filling near the bottom corner.
Fold the bottom corner over the filling, then fold the sides inward like an envelope. Continue rolling tightly but gently until you reach the top. Dip your finger or a small pastry brush in the beaten egg and seal the edge.
It may take a few tries to get it just right, but once you do, you’ll be rolling like a pro. Line them up on a plate or tray, seam side down, as you go.
Tip: Don’t overfill, or the wrapper might split when frying.
Step 4: Fry the Lumpia
Heat a generous amount of vegetable oil in a deep skillet or fryer to about 350°F. You want enough oil so the lumpia can float and cook evenly.
Fry in batches, turning occasionally, until they’re golden brown and crispy on all sides—this usually takes about 3 to 5 minutes. Don’t overcrowd the pan, or the temperature will drop and the lumpia could get soggy.
Once they’re done, remove with tongs and let them drain on a paper towel-lined plate or wire rack.
Tip: If you’re frying a large batch for guests, keep them warm in a low oven while you finish the rest.
Tips for Success
Here are a few extra tips to help you master this recipe with confidence:
-
Keep your wrappers moist while rolling by covering them with a damp towel.
-
Tightly seal each roll to prevent them from opening up during frying.
-
Check oil temperature before frying—too hot and the outside burns before the inside cooks; too cold and they absorb too much oil.
-
Use a wire rack for draining instead of stacking on paper towels, which can make them soggy.
-
Avoid overstuffing. A light hand leads to evenly cooked, crisp rolls every time.
Lumpia is all about balance—crispy outside, savory inside, and a joy to eat from first bite to last.
How to Store Filipino Lumpia
Whether you’re prepping ahead or storing leftovers, lumpia is a dream when it comes to flexibility.
At Room Temperature
Freshly fried lumpia can sit out for about 2 hours at room temperature. This makes them ideal for parties and potlucks. After that, they should be refrigerated to maintain freshness and food safety.
In the Refrigerator
If you’ve got leftovers, store them in an airtight container in the fridge. They’ll stay good for up to 3 days. To reheat, pop them in the oven or toaster oven at 375°F for 5 to 10 minutes to bring back that crisp texture.
Avoid microwaving if you want to keep the crunch—it softens the wrapper.
Freezing Tips
Lumpia freezes beautifully before it’s fried. Once you’ve rolled the uncooked lumpia, place them on a parchment-lined tray and freeze until firm. Then transfer to a freezer bag or airtight container.
When you’re ready to cook, fry straight from frozen—just add an extra minute or two to the frying time. No need to thaw.
Tip: Label the bag with the date and cooking instructions to make life easier later.
Frequently Asked Questions (FAQs)
What’s the difference between Lumpia and Egg Rolls?
While they’re both rolled and fried, lumpia wrappers are thinner and more delicate than egg roll wrappers. Lumpia also tends to be smaller and packed with a finely chopped filling, creating a crispier bite. Egg rolls often use a chunkier filling and thicker wrappers, resulting in a chewier texture.
Can I bake Lumpia instead of frying?
Absolutely. For a lighter version, bake your lumpia at 400°F for about 20 minutes, turning them halfway through. Brush them lightly with oil before baking to get that golden crunch. The texture won’t be exactly the same as frying, but it’s still delicious.
How do I keep Lumpia crispy for parties?
After frying, place them on a wire rack instead of a paper towel-lined plate to avoid steaming the bottoms. You can also keep them warm and crispy in a 200°F oven for up to an hour while finishing the rest of the batch.
Can I make Lumpia ahead of time?
Yes. Lumpia is the ultimate make-ahead snack. You can prepare and freeze them in advance, then fry them straight from the freezer when needed. It’s a lifesaver for parties or family dinners where time is tight.
Related Recipes
If you loved this Filipino Lumpia recipe, you might enjoy these savory dishes too:
-
Easy Nachos: A cheesy and satisfying party snack that pairs well with fried appetizers.
-
Dirty Rice: Hearty and flavorful, this rice dish makes a great main alongside lumpia.
-
Maple Brown Sugar Pork Tenderloin: Sweet and savory, perfect for a Filipino-American fusion meal.
-
Sloppy Joe Casserole with Cornbread: A comfort food favorite that complements lumpia as part of a diverse party spread.
-
Cabbage Fat Burning Soup: A healthy side if you’re aiming to balance your meal.
Conclusion
Filipino Lumpia is more than just a snack—it’s a celebration of flavor, tradition, and the joy of sharing food with the people you love. Whether you’re making it for a holiday, a potluck, or just because you’re craving something crispy and delicious, this recipe has your back.
Try it once, and you’ll see why lumpia has become a beloved favorite across generations. And don’t forget to leave a comment, share your results, or tag your homemade batch—you’re officially part of the lumpia-loving crowd now.
Print
The Best Filipino Lumpia Recipe
- Total Time: 45 minutes
- Yield: 25 lumpia rolls
- Diet: Halal
Description
Authentic Filipino Lumpia made with ground chicken or beef and fresh vegetables, wrapped and fried to golden perfection.
Ingredients
- 1 lb ground chicken or ground beef
- 1 cup carrots, finely chopped or grated
- 1 cup green beans, finely chopped
- 1 small onion, finely chopped
- 3 cloves garlic, minced
- 2 tbsp soy sauce
- 1 tbsp oyster sauce (optional)
- 1 tsp salt
- 1/2 tsp ground black pepper
- 20–25 lumpia wrappers
- 1 egg, beaten
- Vegetable oil for frying
Instructions
- In a bowl, mix ground chicken or beef with vegetables, soy sauce, garlic, oyster sauce, salt, and pepper.
- Separate lumpia wrappers and keep them covered to prevent drying out.
- Scoop 2 tbsp of filling near the bottom corner of each wrapper. Fold and roll tightly. Seal with egg.
- Heat oil to 350°F and fry in batches for 3–5 minutes until golden and crispy.
- Drain on paper towels or a rack and serve hot with dipping sauce.
Notes
- You can substitute with tofu and mushrooms for a vegetarian version.
- Bake at 400°F for 20 minutes for a healthier option.
- Make ahead and freeze uncooked lumpia for later frying.
- Prep Time: 25 minutes
- Cook Time: 20 minutes
- Category: Appetizer
- Method: Frying
- Cuisine: Filipino
Nutrition
- Serving Size: 2 lumpia
- Calories: 180
- Sugar: 1g
- Sodium: 390mg
- Fat: 10g
- Saturated Fat: 2.5g
- Unsaturated Fat: 6g
- Trans Fat: 0g
- Carbohydrates: 13g
- Fiber: 1g
- Protein: 9g
- Cholesterol: 40mg
")