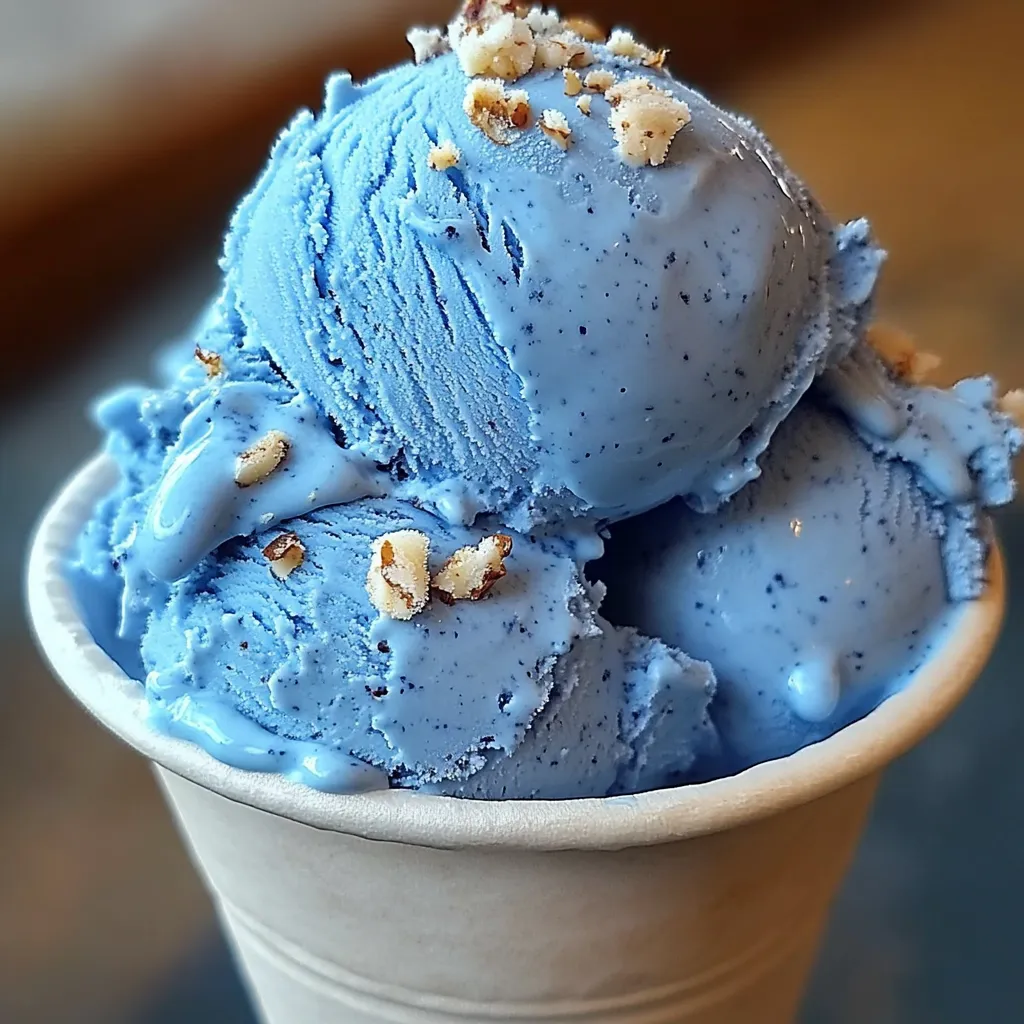
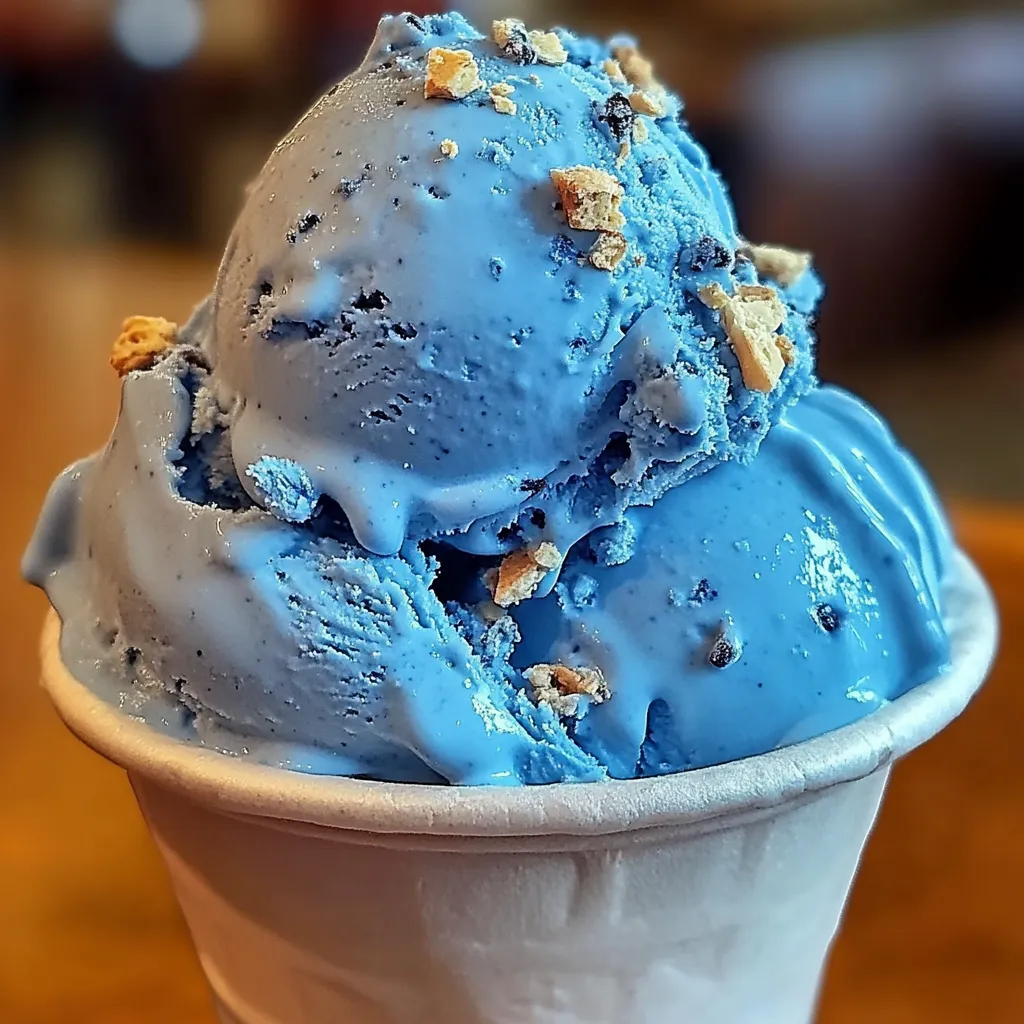
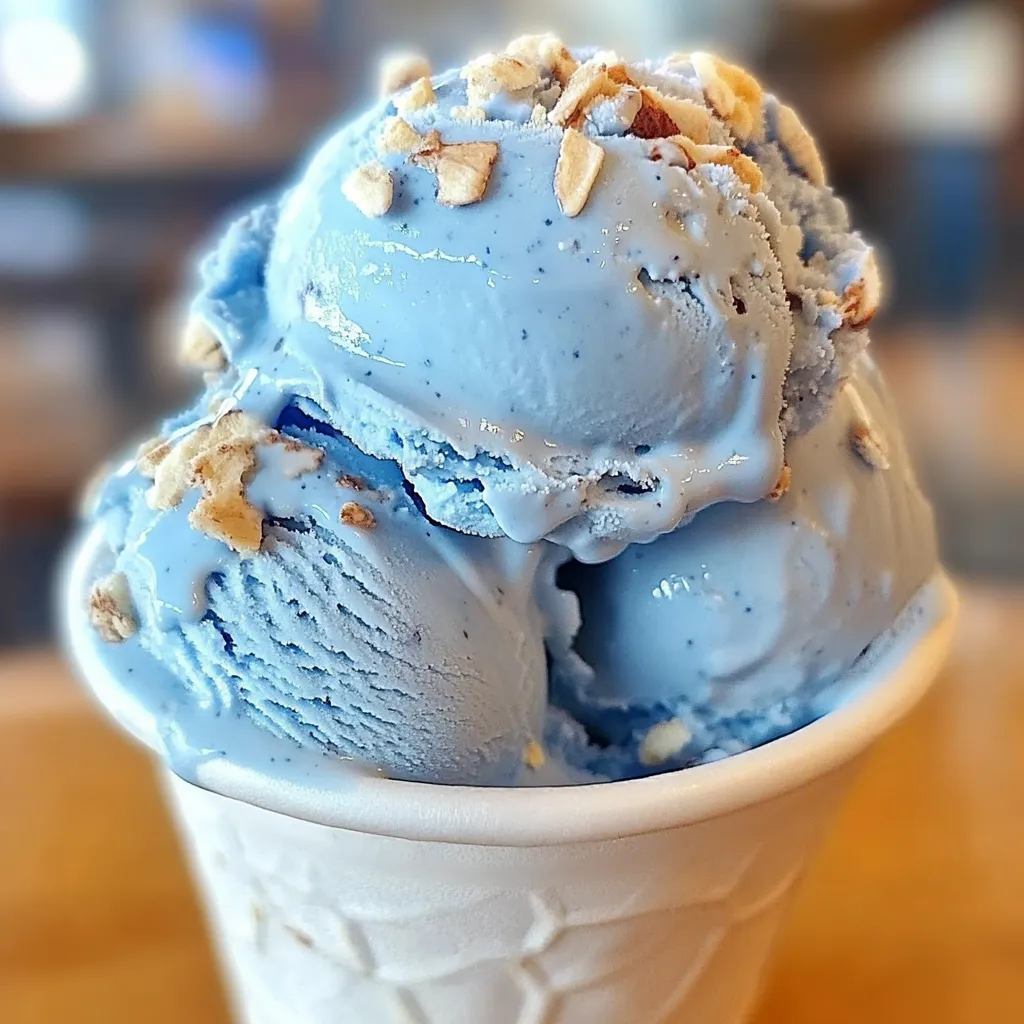
If you’ve ever taken a bite of that bright blue, sweet-as-summer ice cream known as Blue Moon, you know it’s something special. There’s something almost magical about it—the dreamy color, the creamy texture, and the flavor that no one can quite put their finger on. Is it fruity? A little almond-y? Maybe even a hint of marshmallow? No one knows for sure, and that’s part of the charm.
The good news? You don’t need to track down a Midwestern scoop shop to get your fix. This homemade Blue Moon Ice Cream recipe brings all the mystery and nostalgia into your own kitchen. It’s simple to make, fun to customize, and perfect for sharing—whether you’re introducing someone to it for the first time or recreating a childhood favorite.
From the smooth, velvety base to the playful blue hue, this recipe checks all the boxes. You don’t need any fancy ingredients, and it’s totally beginner-friendly. Let’s dive in and make this scoop of summer magic together.
Why You’ll Love This Recipe
Key Benefits
Blue Moon Ice Cream is a showstopper—and not just because of its vibrant color. It’s also incredibly easy to make, even if you’ve never made ice cream before.
-
Simple Ingredients: Everything you need is likely already in your kitchen.
-
Customizable: Adjust the flavor and color to match your mood or taste.
-
Kid-Friendly: The color alone will make it a hit at birthday parties.
-
Nostalgic & Unique: A perfect conversation-starter for summer gatherings.
This isn’t your average vanilla or chocolate—it’s a flavor that invites curiosity and sparks smiles.
Suitable For
This recipe is made for:
-
Summer Parties and Birthdays: That blue color pops in any dessert spread.
-
Families with Curious Taste Buds: Kids and adults alike will love trying to guess the flavor.
-
Beginners in the Kitchen: No ice cream experience required.
-
Midwestern Transplants: Bring back memories of local scoop shops.
Whether you’re creating a fun family dessert night or impressing guests with something a little different, this recipe fits right in.
Ingredients for Blue Moon Ice Cream
Core Ingredients
Here’s everything you’ll need to whip up a batch of this whimsical treat:
-
2 cups heavy cream – This brings that luxurious, rich mouthfeel.
-
1 cup whole milk – For balance and creaminess.
-
3/4 cup granulated sugar – Just the right amount of sweetness.
-
1/2 teaspoon vanilla extract – Adds depth and warmth.
-
1/2 teaspoon almond extract – The key to that signature Blue Moon flavor.
-
1 tablespoon corn syrup (optional) – Helps create a smoother texture.
-
1/4 teaspoon blue food coloring (optional) – Gives it that iconic look.
-
1/4 teaspoon crushed orange zest (optional) – Adds a subtle citrus twist that complements the almond beautifully.
These ingredients come together to form a base that’s creamy, flavorful, and totally scoop-worthy. If you’ve got them on hand, you’re already halfway there.
Substitutions and Tips
Want to make it your own? No problem—there’s plenty of room to play.
-
No almond extract? Try raspberry or bubblegum extract for a fruity twist.
-
Dairy-free? Use full-fat coconut milk or a mix of almond and oat milk for a creamy vegan version.
-
No food coloring? Skip it. The flavor is what matters most.
-
No corn syrup? It’s optional—but it does help with that super-smooth texture.
You can even swirl in a fruity jam, sprinkle in marshmallows, or drop in crushed cookies for an extra touch of fun. This recipe is forgiving, flexible, and ready for your creative spin.
Best Extracts for Blue Moon Flavor
One of the biggest mysteries about Blue Moon Ice Cream is the flavor. Some say it tastes like Froot Loops, others say bubblegum or almond, and a few swear it’s marshmallow or citrus. That’s part of the fun—it’s not supposed to be obvious.
For this recipe, the combination of almond and vanilla extracts gives you that sweet, nostalgic flavor that most closely matches the original. Want to tweak it? Here are a few ways to play:
-
Almond Extract: The most essential ingredient—don’t skip it.
-
Vanilla Extract: Balances and rounds out the almond.
-
Orange Zest: A hint of brightness that adds complexity.
-
Raspberry or Bubblegum Extract: For a fun, fruity variation.
Feel free to experiment. There’s no one “right” way to do Blue Moon—just your favorite way.
Kitchen Tools You’ll Need
Before we jump into mixing and churning, let’s talk tools. The right equipment makes all the difference, and the good news is—you probably already have most of what you need. Making homemade ice cream might sound like a big project, but it’s actually very doable with a few key items.
Must-Have Tools
Here’s your essential lineup:
-
Mixing bowl – A medium-sized one will work just fine for combining your base.
-
Whisk – You’ll use this to dissolve the sugar and mix everything evenly.
-
Measuring cups and spoons – Precision helps the flavor shine through.
-
Ice cream maker – This is the magic machine that turns your base into that creamy, scoopable goodness.
If you don’t have an ice cream maker, don’t worry—I’ve got a backup plan coming later in the recipe.
Nice-to-Have Tools
While not essential, these extras can make the process a little smoother:
-
Silicone spatula – Great for scraping out every last bit of that delicious base.
-
Airtight freezer container – Helps keep your ice cream fresh and free from freezer burn.
-
Microplane or fine zester – Perfect if you’re adding that optional orange zest for a little citrus pop.
Setting yourself up with the right tools not only makes things easier, but it also sets you up for success—because nothing’s more frustrating than realizing you’re missing a whisk halfway through.
How to Make Blue Moon Ice Cream
Making this ice cream from scratch is a fun, satisfying process. It’s part science, part art, and a whole lot of flavor. Let’s walk through it together, step-by-step.
Step 1: Whisk the Base
In a medium mixing bowl, combine the heavy cream, whole milk, and sugar. Whisk until the sugar is completely dissolved. This might take a minute or two, but don’t rush it—you want everything nice and smooth.
Tip: If your cream is too cold, the sugar may take longer to dissolve. Let it sit at room temperature for 5–10 minutes before whisking.
Step 2: Add the Flavor
Now it’s time to build that signature Blue Moon flavor. Stir in the vanilla extract, almond extract, and corn syrup (if using). The almond gives you that nostalgic twist, and the corn syrup helps create a silky texture by minimizing ice crystals.
Optional but delightful: Add the orange zest here if you’re using it. Just a touch can brighten the flavor and add a unique spin.
Step 3: Add the Color
This step is where the fun really begins. Add a few drops of blue food coloring, one at a time, and stir until you reach that perfect dreamy shade. Go light-handed—you can always add more, but you can’t take it out once it’s in.
Prefer to skip the food coloring? Totally fine. The flavor stands strong on its own.
Step 4: Churn the Ice Cream
Pour your beautifully blended base into the ice cream maker, and churn according to the manufacturer’s instructions. Most machines take about 20–25 minutes. You’ll know it’s ready when the mixture thickens and has a soft-serve consistency.
Don’t have an ice cream maker? Here’s an easy no-churn method: Pour the base into a shallow freezer-safe dish, freeze it for 30 minutes, then stir vigorously. Repeat this process every 30 minutes for about 3 hours. It’s a little more hands-on, but it still works beautifully.
Step 5: Freeze It
Once your ice cream has churned to that creamy, cloud-like consistency, scoop it into an airtight container. Smooth out the top and press a layer of parchment paper against the surface to help prevent ice crystals.
Pop it into the freezer for at least 3–4 hours, or until it firms up to traditional ice cream texture.
Step 6: Scoop and Enjoy
When you’re ready to serve, let the ice cream sit at room temperature for a couple of minutes before scooping. That little wait makes it easier to get those perfect round scoops.
Serve in cones, bowls, or get creative—this Blue Moon Ice Cream is dreamy on top of waffles or paired with lemon cookies for a fun flavor contrast.
Tips for Success
Making homemade ice cream might sound fancy, but it’s actually pretty forgiving—especially with a few simple tips in your back pocket. These little details can make the difference between “pretty good” and “absolutely dreamy.”
-
Chill your ingredients: Cold cream and milk whip up faster and freeze better. If you have time, refrigerate your mixed base for 30 minutes before churning.
-
Don’t skip the almond extract: It’s the heart of the Blue Moon flavor. Even if you experiment with other flavors, keep this one in the mix.
-
Add food coloring slowly: A drop at a time is all it takes to hit that signature blue. Too much and it can get a little… Smurf-like.
-
Taste before you freeze: Want more citrus? A bit more almond? Adjust before churning—it’s easier than trying to fix it later.
-
Avoid over-churning: Once your ice cream reaches a soft-serve texture, stop the machine. Over-churning can lead to grainy or icy results.
This recipe invites creativity and experimentation, so don’t stress about perfection. Ice cream is meant to be fun—and homemade ice cream is as fun as it gets.
How to Store Blue Moon Ice Cream
Once you’ve made your delicious batch of Blue Moon Ice Cream, the last thing you want is for it to get icy or lose that creamy texture. Good storage is key to keeping every scoop as dreamy as the first.
In the Freezer
This ice cream is best stored in an airtight container—one that seals well and minimizes air exposure. Pressing a sheet of parchment paper or plastic wrap directly onto the surface of the ice cream before sealing the lid helps prevent freezer burn and keeps the texture silky smooth.
For best results, let the ice cream sit at room temperature for 5–10 minutes before scooping. This softens it just enough to make serving easy without melting too quickly.
Storage time: Homemade ice cream is best enjoyed within 2 weeks. After that, it may start to develop ice crystals or lose some of its fresh flavor.
Frequently Asked Questions (FAQs)
Every recipe has a few “what ifs,” and this one is no different. Here are some of the most common questions people have when making Blue Moon Ice Cream at home—and answers to help guide you through.
What does Blue Moon Ice Cream taste like?
This might be the most asked question about Blue Moon. The answer? It’s hard to pin down—which is exactly what makes it so fun. Most people describe it as a sweet mix of almond, vanilla, and a hint of fruit or citrus. Some say it reminds them of Froot Loops or marshmallow cereal milk. One thing’s for sure—it’s nostalgic, unique, and totally delicious.
Can I make Blue Moon Ice Cream without an ice cream maker?
Absolutely. While an ice cream maker gives the smoothest texture, there’s a simple no-churn method that works beautifully.
Just pour the prepared mixture into a shallow dish and freeze it. Every 30 minutes, stir it vigorously with a fork or hand mixer to break up any ice crystals. Repeat this for 2 to 3 hours. It takes a little more effort, but the result is still creamy and satisfying.
Is this recipe safe for kids?
Yes—this recipe is 100% kid-friendly. The ingredients are all standard pantry staples, and the fun color and flavor are usually a big hit with little ones. If you’re concerned about food coloring, you can skip it entirely or use a natural food dye alternative.
Can I make it vegan?
Yes, you can. Swap out the heavy cream and whole milk for full-fat coconut milk or a combination of almond milk and cashew cream. Use a plant-based sweetener if desired, and choose vegan extracts. You’ll still get a creamy texture and that classic flavor—just without the dairy.
Related Recipes
If you loved this Blue Moon Ice Cream, you might enjoy these sweet and nostalgic desserts too:
-
Lemon Raspberry Cupcakes: A bright, citrusy pairing for your creamy ice cream.
-
Pineapple Upside-Down Cupcakes: A fun, fruity treat that brings tropical flair.
-
Coconut Cupcakes: Rich and tropical—perfect for pairing with a scoop of Blue Moon.
-
Chocolate Strawberry Cupcakes: Add a chocolatey companion to your ice cream dish.
-
Creamy Ice Cream Bars: Another frozen delight for hot days.
Conclusion
Blue Moon Ice Cream is more than just a pretty color—it’s a sweet, creamy throwback to summer days, county fairs, and ice cream cones dripping down your hand faster than you can eat them. And now, it’s something you can make right at home.
With simple ingredients, flexible methods, and plenty of room to experiment, this recipe is perfect whether you’re new to ice cream making or just looking to recreate a classic favorite.
Give it a try, make it your own, and don’t forget to share the scoops with someone you love. After all, the only thing better than making ice cream from scratch is seeing someone’s face light up when they take that first bite.
Print
The Best Blue Moon Ice Cream Recipe
- Total Time: 4 hours (includes freezing)
- Yield: 1.5 quarts
Description
Blue Moon Ice Cream is a nostalgic Midwestern treat known for its bright blue color and mysterious fruity-almond flavor. This homemade version is rich, creamy, and easy to make—perfect for summer parties or a whimsical dessert at home.
Ingredients
- 2 cups heavy cream
- 1 cup whole milk
- 3/4 cup granulated sugar
- 1/2 teaspoon vanilla extract
- 1/2 teaspoon almond extract
- 1 tablespoon corn syrup (optional, for smoother texture)
- 1/4 teaspoon blue food coloring (optional, for color)
- 1/4 teaspoon crushed orange zest (optional, for added flavor)
Instructions
- In a medium bowl, whisk together the heavy cream, whole milk, and sugar until the sugar is fully dissolved.
- Stir in the vanilla extract, almond extract, and corn syrup (if using).
- Add a few drops of blue food coloring and stir until you reach your desired shade of blue.
- Add orange zest if using, for a citrus flavor twist.
- Pour the mixture into an ice cream maker and churn according to the manufacturer’s instructions (about 20–25 minutes).
- Once churned to soft-serve consistency, transfer to an airtight container and freeze for 3–4 hours until firm.
- Scoop and enjoy your homemade Blue Moon Ice Cream!
Notes
- For a no-churn version, freeze in a shallow dish and stir every 30 minutes until set.
- You can adjust the amount of almond extract based on your flavor preference.
- For a natural color, use spirulina or butterfly pea powder instead of food dye.
- Store in an airtight container for up to 2 weeks.
- Prep Time: 10 minutes
- Cook Time: 25 minutes (churning)
Nutrition
- Serving Size: 1/2 cup
- Calories: 230
- Sugar: 17g
- Sodium: 35mg
- Fat: 17g
- Saturated Fat: 11g
- Unsaturated Fat: 5g
- Trans Fat: 0g
- Carbohydrates: 18g
- Fiber: 0g
- Protein: 2g
- Cholesterol: 65mg
")