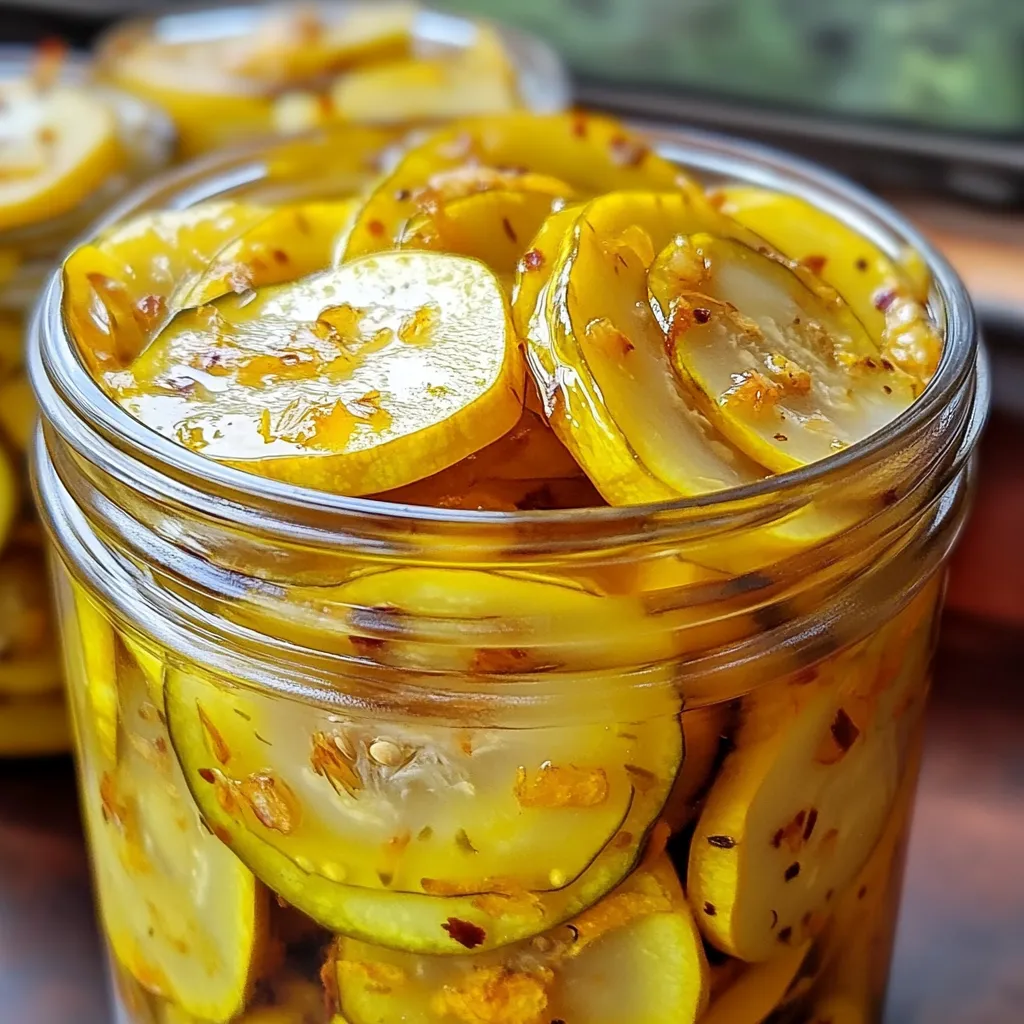
If you’re looking for a bright, sweet, and tangy way to enjoy summer’s bounty, this Sweet Yellow Squash Pickles recipe is a must-try. It’s the kind of old-fashioned recipe that feels like it came straight from grandma’s kitchen—only easier and quicker. Whether you’re new to pickling or a seasoned pro, these refrigerator pickles are simple to make and guaranteed to become a favorite on burgers, cheese boards, or even straight from the jar.
What makes this recipe so special? It balances sweet and sour with just a whisper of spice, making it incredibly versatile. Plus, it’s a perfect way to use up all that yellow squash from your garden or farmer’s market haul. With a handful of pantry ingredients and just a few steps, you’ll have crisp, flavorful pickles ready to enjoy in no time.
Why You’ll Love This Recipe
Key Benefits
-
Ridiculously easy. No fancy equipment, no canning, and no stress—just a few jars and a stovetop.
-
Perfectly balanced flavor. Sweet from the sugar, tangy from the vinegar, and spiced just right with mustard seeds and turmeric.
-
Quick results. You only need to wait 24 hours before digging in, but they taste even better after a few days.
-
Flexible and fun. You can tweak the spice level, play with add-ins like garlic or jalapeño, and make it your own.
Suitable For
This recipe works for just about everyone:
-
Beginner-friendly. You don’t need to be an experienced home cook to nail this.
-
Busy schedules. It’s a quick prep with no water-bath processing required.
-
Summer gatherings. These pickles add a pop of color and flavor to barbecues and picnics.
-
Vegetarian and gluten-free diets. Naturally free from meat and wheat, it fits seamlessly into many dietary preferences.
Ingredients for Sweet Yellow Squash Pickles
Core Ingredients
Let’s walk through what you’ll need to make this pickle magic happen:
-
Yellow squash – Thinly sliced, this is the star. Go for young, tender squash with small seeds for the best texture.
-
Onion – A small white or sweet onion adds a punchy bite and rounds out the flavor.
-
Salt – Helps draw out moisture and keeps the pickles nice and crisp.
-
White vinegar – Classic and clean in flavor, it brings the necessary tang to the brine.
-
Sugar – Yes, we’re going sweet here. It mellows the acidity and makes the squash irresistible.
-
Mustard seeds – They give that subtle “pickle” taste and a slight crunch.
-
Celery seeds – Earthy and aromatic, these are key to that nostalgic pickle flavor.
-
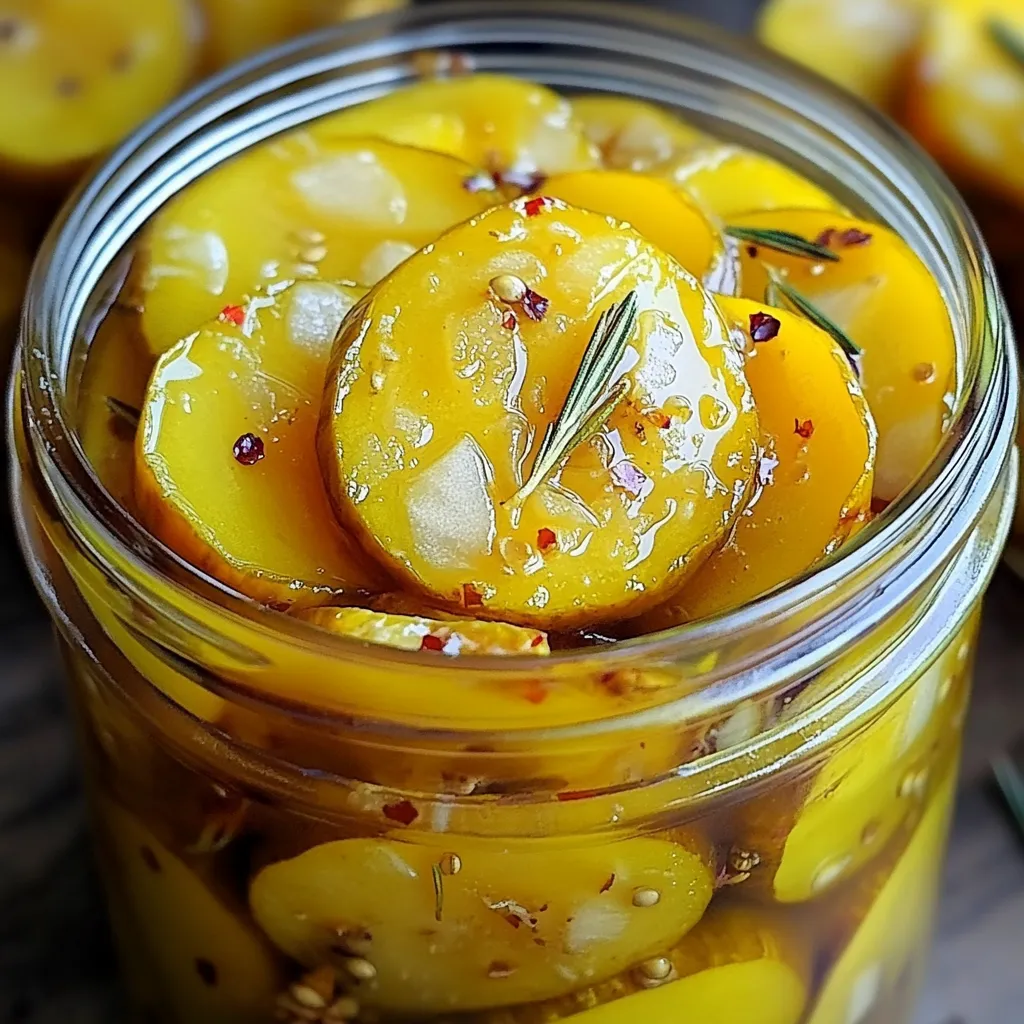
Turmeric – Not just for color—it adds a gentle warmth that ties the whole brine together.
-
Red pepper flakes (optional) – Want a little kick? This is your ticket.
Substitutions and Tips
Don’t worry if you don’t have everything exactly as listed—there’s wiggle room.
-
No yellow squash? Zucchini works just as well. The flavor is mild and texture nearly identical.
-
Swap the vinegar. Apple cider vinegar will give a deeper, fruitier flavor. It’s great if you like a more rustic taste.
-
Adjust the heat. Leave out the red pepper flakes if you prefer a sweeter pickle. Or, for bolder flavor, add sliced jalapeños or a pinch of cayenne.
-
Add-ins to try. A clove of garlic, a few dill sprigs, or some thin strips of red bell pepper can bring extra color and flavor to your jars.
Best Squash for Pickling
Not all squash is created equal—especially when it comes to pickling.
Your best bet is young, tender yellow squash with thin skins and small seeds. These have the perfect crunch and won’t go mushy in the brine. Avoid overgrown or oversized squash, which tend to be watery and fibrous. If you’re unsure, look for ones that feel firm and have a slight gloss to the skin.
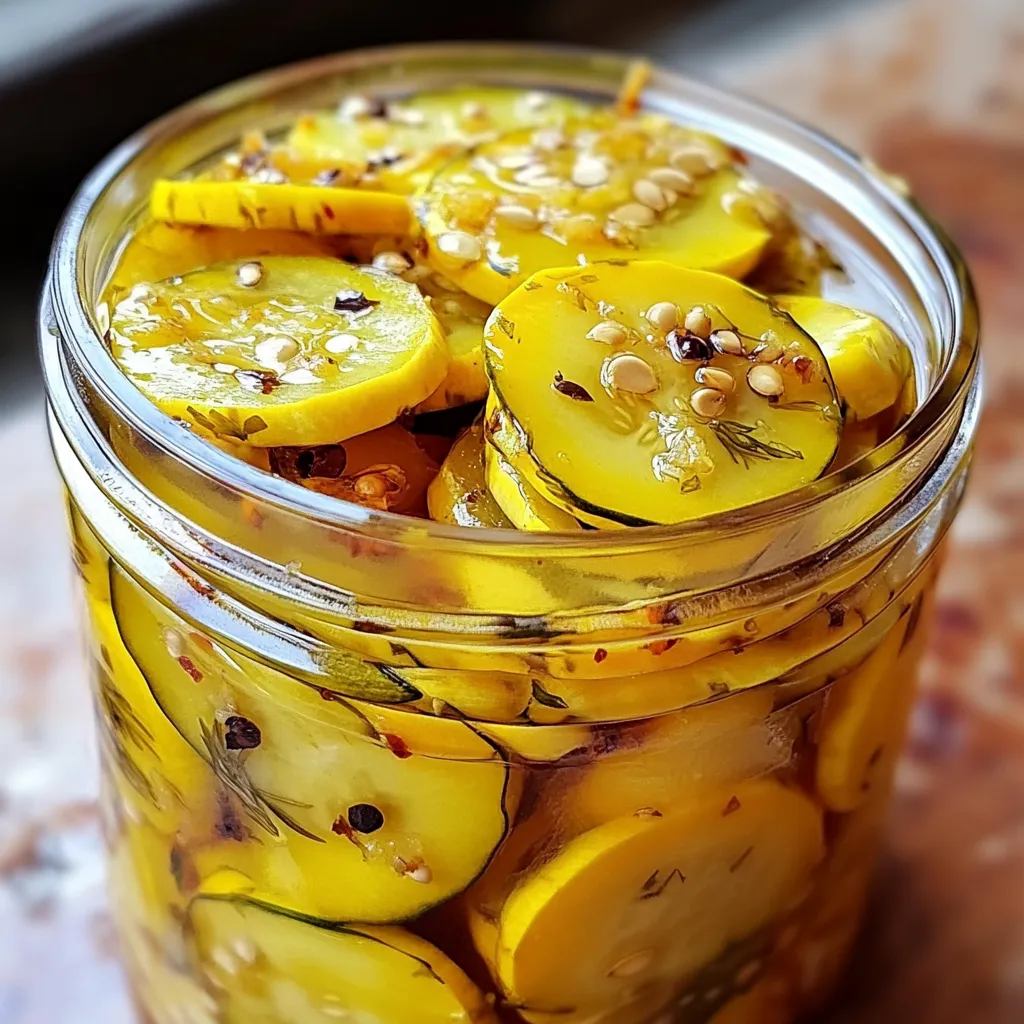
Zucchini is a great runner-up, and even a mix of the two looks lovely in the jar. No matter which you choose, slice the squash uniformly (about ¼ inch thick) to ensure even pickling.
Kitchen Tools You’ll Need
No need to overthink this—if you have a few basics, you’re set.
Must-Have Tools
-
Sharp knife or mandoline. For slicing your squash and onions quickly and evenly.
-
Mixing bowl. You’ll need a large one to toss the vegetables with salt.
-
Medium saucepan. This is for simmering the brine.
-
Measuring cups and spoons. Precision matters when balancing sweet, sour, and spice.
-
Clean jars or containers. Mason jars are classic, but any food-safe container with a tight lid will do.
Nice-to-Have Tools
-
Pickling funnel. This makes pouring hot brine into jars less messy.
-
Jar lifter or tongs. For moving hot jars safely if you’re working with warm brine.
-
Labels and markers. Especially helpful if you’re making batches to gift or store.
How to Make Sweet Yellow Squash Pickles
Now that you’ve got your ingredients and tools ready, it’s time to bring this sweet, tangy, and irresistibly crunchy recipe to life. Don’t worry—this isn’t a complicated canning project. In fact, it’s more like making a flavorful salad that happens to live in a jar. Let’s walk through it together.
Step 1: Prep the Vegetables
First things first, you’ll want to get your squash and onions ready. Slice your yellow squash into ¼-inch thick rounds—this is the sweet spot for crispness. A mandoline makes this fast and easy, but a sharp knife works just fine.
Toss the squash and thinly sliced onion with the tablespoon of salt in a large mixing bowl. Let that sit for about an hour. This step helps draw out moisture, which keeps your pickles crunchy instead of soggy.
After an hour, give the squash and onions a good rinse under cold water to wash off the salt, then drain well. You want them clean and not dripping wet before they meet the brine.
Step 2: Make the Pickling Brine
While the vegetables are resting, you’ll make your brine. This is where the real magic happens.
In a medium saucepan, combine:
-
1 cup white vinegar
-
1 cup sugar
-
½ teaspoon mustard seeds
-
½ teaspoon celery seeds
-
¼ teaspoon ground turmeric
-
¼ teaspoon red pepper flakes (optional, for heat)
Stir everything together and bring the mixture to a gentle simmer over medium heat. You don’t need a full boil—just enough heat to dissolve the sugar and bring out the spices.
The turmeric gives it that beautiful golden hue, and the mustard and celery seeds add classic pickle flavor. You’ll smell it and know: this is going to be good.
Step 3: Combine and Simmer
Now it’s time to bring everything together.
Add the drained squash and onions to the simmering brine. Stir gently and let it all simmer for about 5 minutes. This helps the squash absorb some of the sweet and tangy flavors right away without losing their bite.
They should still be firm, not soft. If you’re tempted to cook them longer, resist—overcooking will make them mushy in the jar.
Step 4: Pack and Chill
As soon as the simmering is done, it’s time to jar them up.
Carefully pack the squash and onions into your clean jars. Pour the hot brine over the top, making sure the vegetables are fully submerged. If you have a funnel, this part is much less messy.
Let the jars cool on the counter to room temperature, then seal them with lids and pop them into the refrigerator.
Now the hard part: waiting. Let the pickles sit for at least 24 hours so the flavors can fully develop. Trust me, it’s worth the wait.
Tips for Success
This recipe is pretty forgiving, but here are a few pointers to make sure your pickles come out perfect every time:
-
Slice evenly. Consistent thickness means even flavor and texture throughout the jar.
-
Don’t skip the salt soak. It’s essential for pulling out excess moisture and creating a crisp pickle.
-
Sterilize your jars. Even though these are refrigerator pickles, using clean, hot jars extends shelf life.
-
Taste and tweak. Like it sweeter? Add more sugar next time. Want more heat? A few extra red pepper flakes or some sliced jalapeños do the trick.
How to Store Sweet Yellow Squash Pickles
These are what’s known as refrigerator pickles—they’re not shelf-stable, but they’ll keep beautifully in the fridge.
At Room Temperature
Because this recipe isn’t processed using traditional canning methods, it should never be stored at room temperature. Keep those jars chilled.
In the Refrigerator
Once cooled, your pickles will keep in the fridge for about two to three weeks. They actually taste better after the first few days as the flavors deepen. Just use a clean fork when serving them to keep the brine from spoiling.
Freezing Tips
Freezing isn’t recommended here. While the flavor will hold up, the texture will turn mushy once thawed. Best to enjoy them fresh from the fridge.
Frequently Asked Questions
Can I use zucchini instead of yellow squash?
Absolutely. Zucchini has a similar texture and mild flavor, so it’s a great swap if that’s what you have on hand. You can even mix the two for a pretty jar of green and yellow slices.
Do I need special canning tools?
Not for this version. These are quick refrigerator pickles, so there’s no need for a water bath or vacuum sealing. Just make sure your jars are clean and well-sealed.
Can I make this sugar-free?
Yes, you can try a sugar substitute like monk fruit, stevia, or erythritol. Keep in mind, though, the taste will change slightly. It may take a couple of tries to get it just right for your palate.
How long before I can eat them?
You can technically taste them once they’re cool, but for best flavor, give them at least 24 hours in the fridge. They only get better after that.
Why are my pickles soft?
It usually comes down to one of two things: overcooked squash or skipping the salt soak. Make sure to use young squash and only simmer briefly. And always let them sit in salt before brining.
Related Recipes You Might Love
If you loved this Sweet Yellow Squash Pickles recipe, you might enjoy these other fresh and vibrant ideas:
-
Quick Pickled Cucumbers and Onions: A simple and crisp refrigerator pickle ready in minutes.
-
Zesty Mediterranean Pickled Veggies with Feta and Oregano: Bold, herb-infused pickled vegetables perfect for mezze platters.
-
The Best Pickled Pepper and Onion Relish: A sweet and spicy condiment that pairs perfectly with grilled meats.
Conclusion
Sweet Yellow Squash Pickles are the kind of recipe that brings summer right to your table. They’re simple to make, packed with flavor, and a great way to enjoy what the garden has to offer. Whether you’re spooning them onto burgers, pairing them with sharp cheddar, or just eating them by the forkful straight from the jar, they’re bound to become a fridge favorite.
If you try this recipe, let me know how it goes. Share it with friends, bring a jar to your next BBQ, or tuck it into a picnic basket. And don’t forget—once you’ve made these once, you’ll be dreaming up your own variations in no time.
Print
Sweet Yellow Squash Pickles Recipe
- Total Time: 1 hour 20 minutes (including 1-hour salt soak)
- Yield: 2 pint jars
- Diet: Vegetarian
Description
These sweet yellow squash pickles are quick to make and packed with tangy-sweet flavor. A perfect summer fridge staple.
Ingredients
- 4 cups thinly sliced yellow squash
- 1 small onion, thinly sliced
- 1 tablespoon salt
- 1 cup white vinegar
- 1 cup sugar
- 1/2 teaspoon mustard seeds
- 1/2 teaspoon celery seeds
- 1/4 teaspoon ground turmeric
- 1/4 teaspoon red pepper flakes (optional)
Instructions
- Toss squash and onions with salt in a large bowl. Let sit for 1 hour, then drain and rinse well.
- In a saucepan, combine vinegar, sugar, mustard seeds, celery seeds, turmeric, and red pepper flakes. Bring to a simmer.
- Add squash and onions to the pot. Simmer for 5 minutes.
- Transfer the mixture into clean jars. Cool to room temperature, then refrigerate for 24 hours before serving.
Notes
- Use young squash for crisp texture.
- Store in refrigerator up to 2 weeks.
- Adjust red pepper for desired heat.
- Perfect on burgers, BBQ, or cheese boards.
- Prep Time: 10 minutes
- Cook Time: 10 minutes
- Category: Pickles
- Method: Refrigerator
- Cuisine: Southern
Nutrition
- Serving Size: 2 tablespoons
- Calories: 35
- Sugar: 7g
- Sodium: 220mg
- Fat: 0g
- Saturated Fat: 0g
- Unsaturated Fat: 0g
- Trans Fat: 0g
- Carbohydrates: 8g
- Fiber: 1g
- Protein: 0g
- Cholesterol: 0mg
")