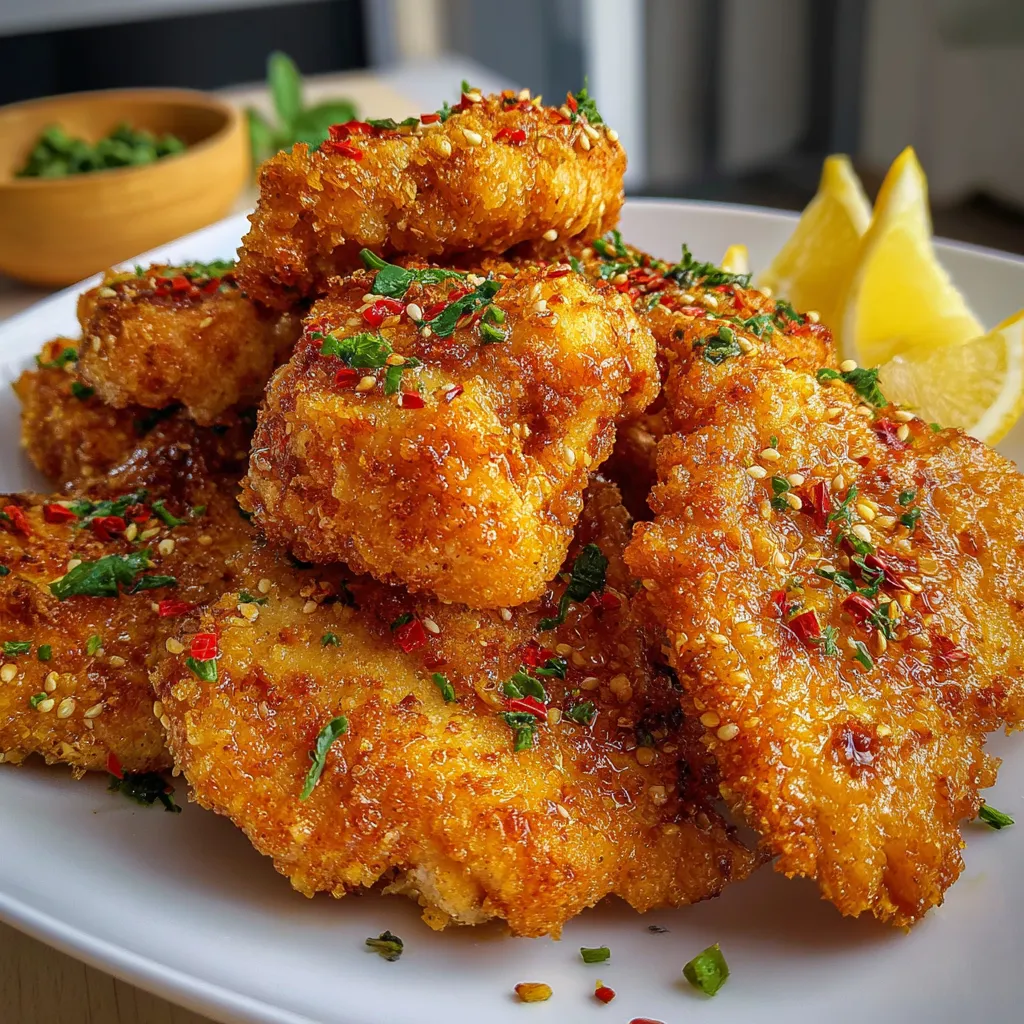
Think you need a vat of oil to get that irresistible crunch? Think again. These Super Crispy Oven-Baked Cutlets deliver everything you love about fried food—minus the frying. Whether you’re prepping a cozy weeknight dinner or feeding a hungry crowd, this recipe has your back. It’s crunchy, juicy, quick to make, and best of all—no greasy cleanup.
We’re going to walk through it all together, step by step. You’ll learn why this method works so well, how to get that golden crust in the oven, and how to make this recipe your own. Let’s jump in.
Why You’ll Love This Recipe
Key Benefits
There’s a reason this recipe is in constant rotation at my house. First off, it’s just plain easy. No standing over hot oil, no messy splatter, and no lingering fryer smell in your kitchen for days. Everything goes right on one baking sheet and into the oven.
And the texture? Genuinely crispy. Thanks to the magic of panko breadcrumbs and a few smart tricks, you’ll get that beautiful crunch every time—without the fry. These cutlets are also a blank canvas. Use chicken, pork, turkey, or even fish. Spice them up, tone them down, or keep them classic. The choice is yours.
This recipe is:
-
Weeknight-friendly
-
Meal-prep approved
-
Freezer-friendly
-
A picky-eater pleaser
-
Customizable for gluten-free or dairy-free diets
Suitable For
These oven-baked cutlets are the definition of versatility. They’re great for:
-
Weeknight dinners when you want something satisfying but don’t want to fuss
-
Busy families looking for quick, homemade meals
-
Anyone trying to lighten up traditional fried food
-
Kids (yes, even the picky ones)
-
Casual hosting, game nights, or potlucks
Whether you’re a beginner in the kitchen or someone who could bread chicken in their sleep, this recipe meets you where you are.
Ingredients for Super Crispy Oven-Baked Cutlets
Let’s talk about what makes these cutlets so delicious. The ingredients list is short, straightforward, and full of pantry staples you probably already have.
Core Ingredients
-
Chicken breasts or pork cutlets – Boneless and pounded to even thickness so they cook evenly. If you’re using chicken, go for breasts or tenderloins.
-
All-purpose flour – The first layer of the breading process. It helps the egg stick.
-
Eggs – The binder that holds it all together.
-
Panko breadcrumbs – These are lighter and crispier than regular breadcrumbs, which is key for that oven-baked crunch.
-
Parmesan cheese – Adds saltiness, depth, and more crisp. Use finely grated for even distribution.
-
Garlic powder and paprika – For subtle flavor and golden color.
-
Salt and pepper – Don’t skip the seasoning!
-
Cooking spray or olive oil – This is what helps everything crisp up beautifully in the oven.
Substitutions and Tips
Here’s where you can make this recipe your own:
-
Protein swaps: Turkey cutlets, boneless pork chops, or mild white fish like cod or tilapia all work beautifully.
-
Breadcrumb options: If you need gluten-free, there are great GF panko substitutes on the market. Crushed rice cereal or cornflakes also give a great crunch.
-
Dairy-free? Omit the Parmesan or replace it with nutritional yeast.
-
Spice it up: A pinch of cayenne or a dash of chili powder in the breadcrumb mix adds a nice kick.
-
Herb upgrade: Toss in some dried oregano, basil, or parsley to add Italian flair.
Don’t be afraid to experiment. This recipe is forgiving and welcomes your tweaks.
Best Breadcrumbs for Crispy Oven-Baked Cutlets
Let’s take a quick detour to talk breadcrumbs—because not all crumbs are created equal.
If you’ve ever wondered why some baked cutlets end up soggy or sad, the culprit is often the breadcrumb. Traditional breadcrumbs are too fine and dense for oven baking. They don’t let air circulate the way panko does, and you’ll miss out on that light, crackly finish.
Panko breadcrumbs are the gold standard here. Their airy texture and larger flakes make them perfect for crisping up in the oven. They don’t soak up as much oil, so you get crunch without greasiness.
Tips for even better results:
-
Toast the panko lightly in a dry skillet before breading for extra depth and color.
-
Use plain panko and season it yourself—you’ll have better control over flavor.
-
If you’re using flavored panko (like Italian), adjust added seasoning to avoid overpowering the cutlets.
The breadcrumb mix is also a great place to sneak in your favorite dried herbs or a bit of lemon zest for brightness.
Kitchen Tools You’ll Need
You don’t need a fancy kitchen setup to pull this off—just a few reliable tools and you’re good to go.
Must-Have Tools
-
Baking sheet: Go for a real metal sheet pan, not a disposable one. It holds heat better and gives you that needed surface sizzle.
-
Wire rack: Helps the hot air circulate underneath the cutlets so they crisp on all sides. It’s optional but highly recommended.
-
Mixing bowls: For flour, eggs, and breadcrumbs—your standard breading setup.
-
Tongs or a fork: Makes coating and flipping easier without making a mess.
Nice-to-Have Tools
-
Meat mallet: Helps ensure all your cutlets are the same thickness so they cook evenly.
-
Silicone brush: Handy if you want to brush olive oil instead of spraying it.
-
Kitchen thermometer: Want to know for sure when your chicken hits 165°F? This takes out the guesswork.
Setting yourself up with the right tools makes the whole process smoother—and dare I say, even a little fun.
How to Make Super Crispy Oven-Baked Cutlets
No frying. No mess. Just beautifully crisp, golden cutlets right out of your oven. Here’s exactly how to make them.
Step 1: Preheat Your Oven and Prep Your Baking Sheet
Start by preheating your oven to 425°F (220°C). This high temperature is one of the secrets to getting a crispy crust without frying.
Next, line a metal baking sheet with parchment paper, or better yet, place a wire rack inside the sheet. The rack lifts the cutlets slightly, letting hot air circulate underneath for extra crunch. If you don’t have one, no problem—just space them out on the parchment-lined pan and avoid crowding.
Tip: Avoid using a disposable aluminum pan. It doesn’t conduct heat the same way and you won’t get that same level of crisp.
Step 2: Set Up the Breading Station
Now it’s time to build your breading station. This part is simple, and having everything ready ahead makes the process smooth.
You’ll need three shallow bowls:
-
Bowl 1: Flour
Add 1 cup of all-purpose flour. This is your first layer and helps the egg cling to the cutlet. -
Bowl 2: Eggs
Crack two large eggs into a bowl and beat them well. -
Bowl 3: Panko Mix
Combine 1 cup panko breadcrumbs, ½ cup grated Parmesan cheese, 1 teaspoon garlic powder, 1 teaspoon paprika, plus a good pinch of salt and pepper.
Feel free to mix in any extra dried herbs or a pinch of chili flakes if you’re feeling adventurous.
Step 3: Bread the Cutlets
Here comes the fun part.
-
Coat in flour:
Dredge each chicken or pork cutlet in flour, shaking off any excess. You want them lightly coated, not caked. -
Dip in egg:
Make sure the cutlet is fully coated—this is what helps the crumbs stick. -
Press into breadcrumb mix:
Don’t just sprinkle the crumbs on—press them in. Really pat the mixture onto the surface so it adheres. Flip and press again.
Tip: If you’re doing a big batch, use one hand for the wet ingredients and the other for dry. This keeps things a lot cleaner.
Step 4: Arrange and Oil
Place your breaded cutlets in a single layer on your prepared baking sheet or wire rack. Give each one a little space to breathe—crowding the pan leads to steaming, not crisping.
Now, either lightly spray them with cooking spray or drizzle with olive oil. This is the key to getting that deep golden crunch.
You don’t need much. Just enough to moisten the tops and encourage that beautiful browning.
Step 5: Bake Until Golden and Crispy
Pop your pan into the preheated oven and bake for 20 to 25 minutes, flipping the cutlets halfway through.
You’re looking for a deep golden brown color and that telltale crunch when tapped with a fork.
Check for doneness:
Use a kitchen thermometer to check the internal temperature—165°F (74°C) for chicken is the sweet spot. Pork can be pulled at around 145°F (63°C) if you prefer it juicier.
Once they’re done, flip them one last time immediately after baking while the oil is still hot—this trick helps the crust stay ultra crispy.
Step 6: Let Them Rest (and Stay Crispy)
After baking, transfer your cutlets to a cooling rack instead of stacking them on a plate. This allows air to circulate and keeps that beautiful crust from going soggy.
If you don’t have a rack, try leaning the cutlets on their sides in a baking dish so they don’t sit flat on top of each other.
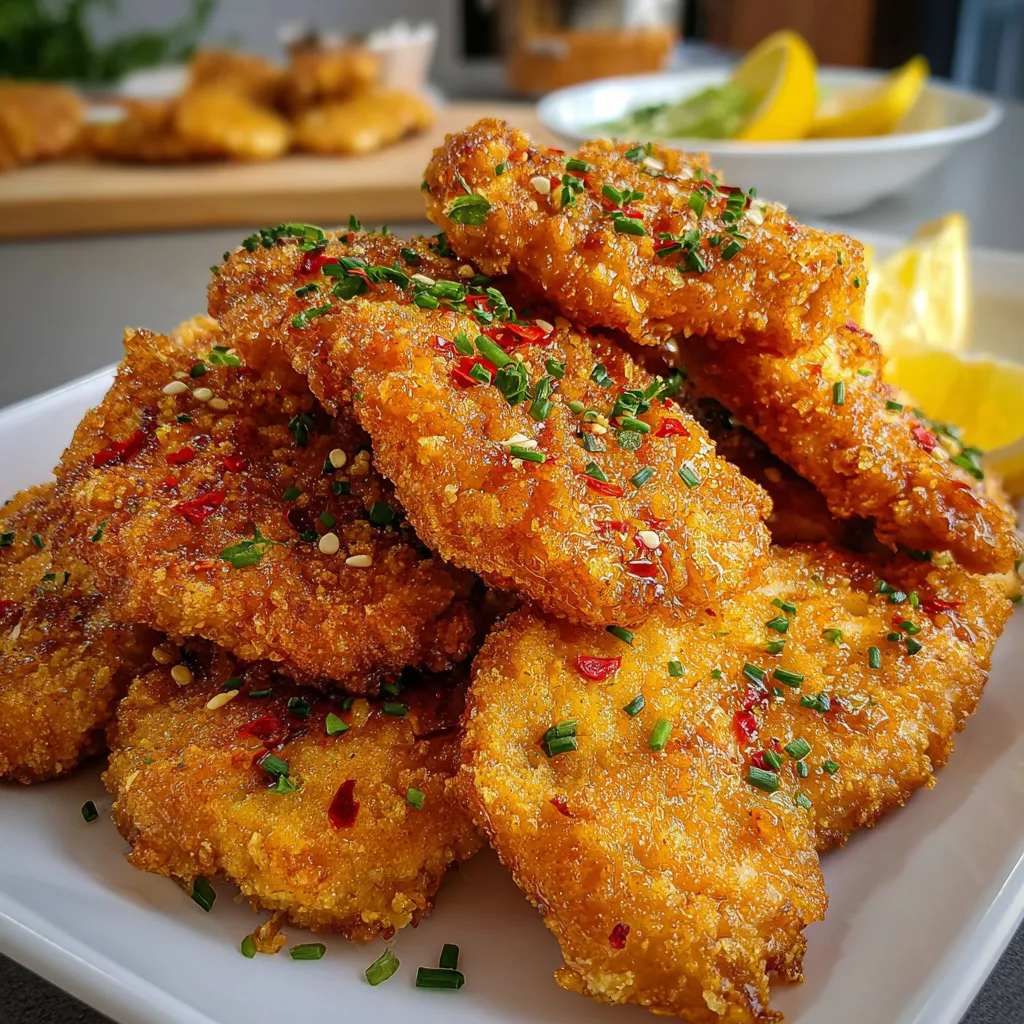
Serve them hot, straight from the oven, with lemon wedges, your favorite dipping sauce, or piled onto a sandwich or salad.
Tips for Success
Here are a few things I’ve learned after making these cutlets dozens of times.
-
Don’t skip the oil spray: Even if it’s just a light mist, it’s what gives you that crispy, fried look and feel.
-
Use panko, not regular breadcrumbs: Traditional breadcrumbs just don’t give the same crunch.
-
Let the oven do the work: Avoid opening the oven too often—it lets out heat and can reduce crispiness.
-
Use a real metal baking sheet: Thin, disposable pans don’t retain heat well and may lead to soggy bottoms.
-
Cool on a wire rack: This simple step keeps your hard-earned crisp intact.
How to Store Super Crispy Oven-Baked Cutlets
The good news? These cutlets store beautifully. With a little care, you can enjoy leftovers that are nearly as crispy as the first time around.
At Room Temperature
If you’re serving right away, let the cutlets rest on a wire rack for up to 30–45 minutes. After that, pop them in the fridge to keep them safe.
In the Refrigerator
Store cooled cutlets in an airtight container for up to 4 days. Place a piece of parchment between layers to prevent sticking.
To reheat, use a toaster oven or conventional oven at 375°F for about 10 minutes. Avoid the microwave unless you’re okay with sacrificing crispiness.
Freezing Tips
Want to make a batch ahead of time? These cutlets freeze like a dream.
-
Freeze before baking: Bread the cutlets, lay them flat on a tray, and freeze. Once solid, transfer to a freezer bag.
-
Freeze after baking: Let them cool completely, then freeze individually on a tray before moving to a container or bag.
To reheat, go straight from frozen into a 400°F oven for 15–20 minutes.
Frequently Asked Questions (FAQs)
Can I make this gluten-free?
Yes, absolutely. Use a gluten-free flour blend and swap the panko for a gluten-free version. Many brands make gluten-free panko now, and they work beautifully.
Do I have to flip the cutlets while baking?
Yes, flipping halfway helps both sides brown evenly and keeps the crust from sticking or getting soggy. It only takes a minute and makes a big difference.
Can I prep them ahead of time?
Definitely. You can bread the cutlets a few hours ahead and store them in the fridge until you’re ready to bake. Just make sure they’re well-covered and not stacked.
What kind of protein works best?
Chicken breasts, chicken tenders, pork chops, turkey cutlets, and even mild white fish like tilapia or cod all work great. Just adjust the cooking time based on thickness.
How do I keep them crispy when reheating?
Avoid the microwave. Reheat in the oven at 375°F until warmed through. If you have a toaster oven, even better—it’s fast and keeps them crisp.
Related Recipes
If you loved these Super Crispy Oven-Baked Cutlets, check out these related easy dinner ideas:
-
Parmesan Crusted Chicken with Creamy Garlic Sauce – Crispy, cheesy, and loaded with flavor.
-
Shake and Bake Chicken Breast – A fast and flavorful baked chicken dinner.
-
Garlic Butter Chicken Pasta – Perfect pairing for any breaded protein.
-
Golden Garlic Chicken Bites – Bite-sized and baked to crispy perfection.
-
One Pan Garlic Herb Chicken with Potatoes & Green Beans – Balanced and baked in one go.
Final Thoughts
There’s just something so comforting about a crispy cutlet fresh from the oven—warm, golden, and ready to please just about anyone at the table. And the best part? You did it all without frying.
Whether you serve them with mashed potatoes, pile them into sandwiches, or eat them straight from the pan (no judgment), this recipe is the kind of thing that finds a permanent spot in your rotation.
Give it a try, make it your own, and don’t forget to share it with someone who could use a new dinner idea. These cutlets are too good not to pass along.
Print
Super Crispy Oven-Baked Cutlets
- Total Time: 40 minutes
- Yield: 4 servings
Description
Golden, crunchy cutlets made entirely in the oven—no frying required. These crispy oven-baked cutlets are a healthy, easy weeknight favorite.
Ingredients
- 2 large eggs
- 1 cup panko breadcrumbs
- 1/2 cup grated Parmesan cheese
- 4 boneless chicken breasts or pork cutlets, pounded to even thickness
- 1 cup all-purpose flour
- 1 teaspoon garlic powder
- 1 teaspoon paprika
- Salt and pepper, to taste
- Cooking spray or olive oil
Instructions
- Preheat oven to 425°F (220°C) and prepare a baking sheet with parchment or a wire rack.
- Place flour in one shallow bowl. Beat eggs in a second bowl.
- In a third bowl, mix panko, Parmesan, garlic powder, paprika, salt, and pepper.
- Coat each cutlet in flour, dip into egg, then press into breadcrumb mixture until well coated.
- Place on baking sheet or rack. Lightly spray or drizzle with oil.
- Bake for 20–25 minutes, flipping halfway, until golden and cooked through (165°F/74°C for chicken).
- Let rest on a wire rack before serving to retain crispiness.
Notes
- Add cayenne or chili powder for a spicy twist.
- Try dried herbs like oregano or parsley for flavor variety.
- Works well with turkey or fish as alternative proteins.
- Freeze breaded cutlets before or after baking for easy meal prep.
- Prep Time: 15 minutes
- Cook Time: 25 minutes
Nutrition
- Serving Size: 1 cutlet
- Calories: 315
- Sugar: 1g
- Sodium: 480mg
- Fat: 12g
- Saturated Fat: 3.5g
- Unsaturated Fat: 7g
- Trans Fat: 0g
- Carbohydrates: 22g
- Fiber: 1g
- Protein: 29g
- Cholesterol: 135mg
")