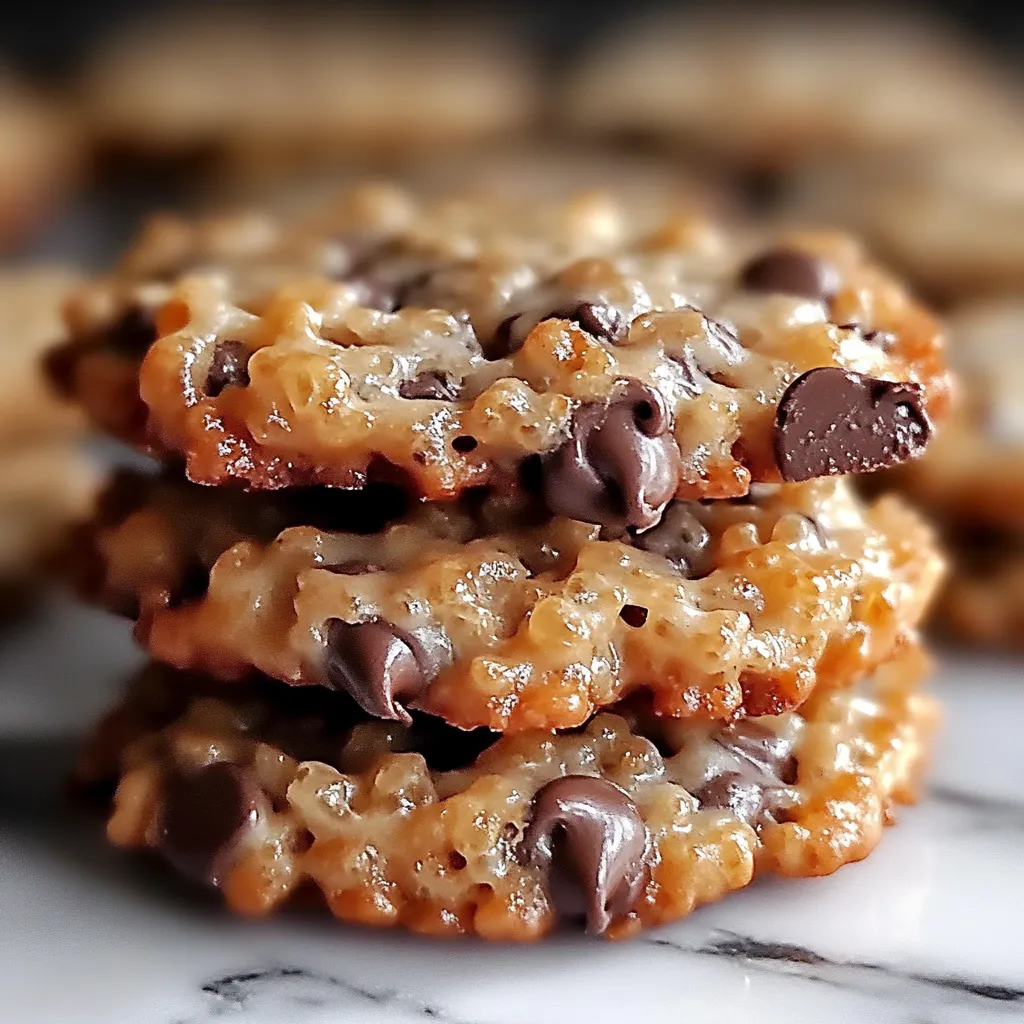
Welcome to the ultimate cookie adventure! If you’re looking for a fun, delicious, and beginner-friendly recipe, Rice Krispie Chocolate Chip Cookies are here to wow your taste buds. Imagine the chewy softness of classic chocolate chip cookies combined with the airy crunch of Rice Krispies. This cookie is not just a treat; it’s a playful twist on a beloved classic that’ll leave everyone asking for seconds.
What makes this recipe a must-try? It’s ridiculously easy to make, doesn’t require any fancy ingredients, and is perfect for any occasion. Whether you’re baking for a family gathering, a school event, or just for fun, these cookies are guaranteed to steal the show. The addition of Rice Krispies brings a light, crispy texture that balances the gooey sweetness of the chocolate chips.
In this article, I’ll guide you step-by-step through the process of making these cookies. We’ll cover everything from key ingredients to pro tips for success. Ready to bake your way into cookie heaven? Let’s dive in!
Why You’ll Love This Recipe
Key Benefits
1. Easy to Make with Everyday Ingredients
Don’t you love recipes that don’t require a last-minute grocery run? All the ingredients for these cookies are pantry staples, from butter and sugar to Rice Krispies and chocolate chips. No need to hunt for anything fancy—just grab what you already have and get started!
2. Perfect Combination of Chewiness and Crispiness
These cookies are a textural dream. The soft, chewy base is complemented by the light crunch of Rice Krispies, creating a cookie that’s both satisfying and unique. Every bite is a mix of gooey chocolate and crispy delight.
3. Kid-Friendly and Great for Gatherings
Kids adore these cookies! They’re a playful snack that’s perfect for lunchboxes, birthday parties, or just a sweet afternoon treat. Plus, they’re a crowd-pleaser at gatherings, blending nostalgic flavors with a modern twist.
Suitable For
1. Holiday Baking, School Snacks, or Quick Desserts
These cookies are versatile enough to fit any occasion. Whether you’re baking for Christmas, packing snacks for school, or whipping up a quick dessert, they’re always a hit.
2. Flexible for Dietary Needs
Got dietary restrictions? No problem! This recipe is easily adaptable. Swap out ingredients to make it gluten-free, vegan, or lower in sugar without compromising on flavor. Later in the article, I’ll share tips for substitutions and tweaks so everyone can enjoy these cookies.
Ingredients for Rice Krispie Chocolate Chip Cookies
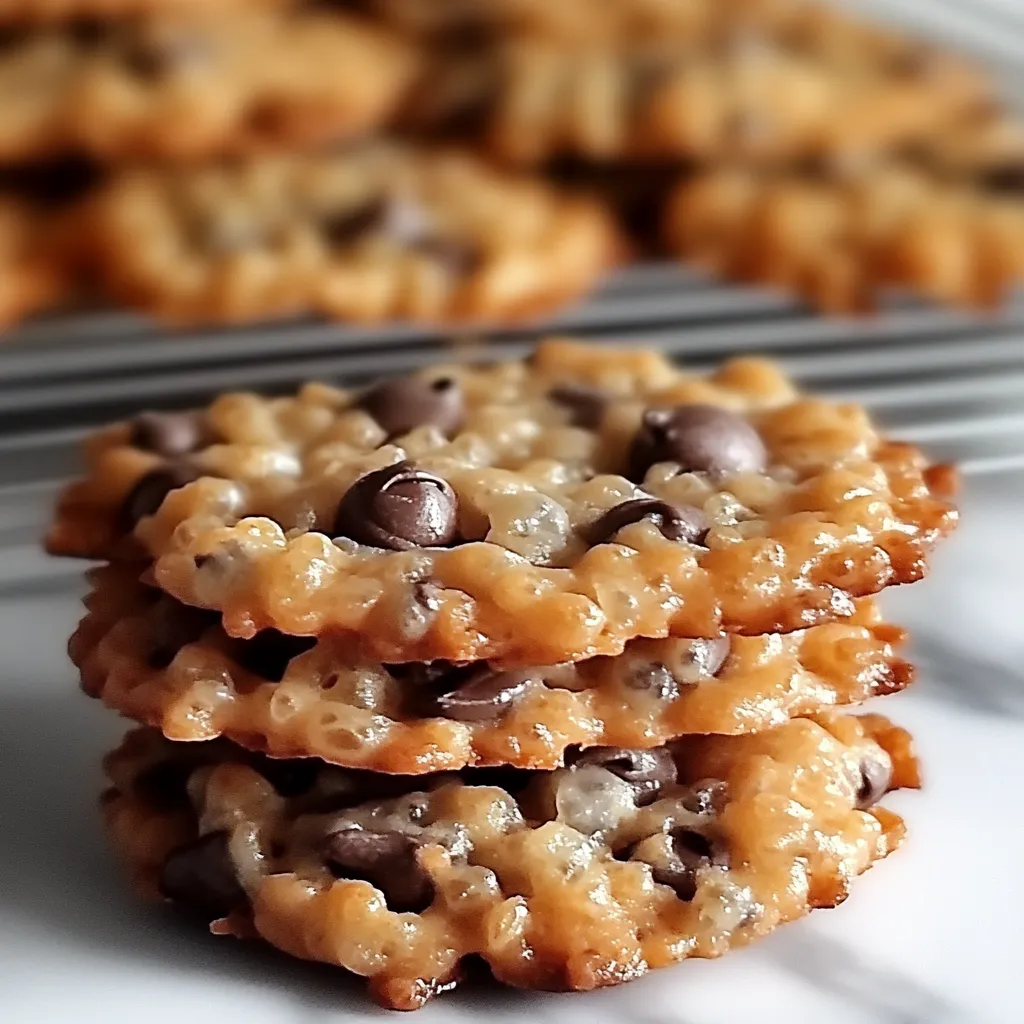
Let’s talk ingredients! One of the best things about this recipe is how simple and straightforward it is. Everything you need is either already in your pantry or easy to find at your local store. Here’s a breakdown of the essentials and some tips to help you make these cookies just right.
Core Ingredients
1. Butter (1 cup, softened)
Butter is the base of any great cookie recipe, adding richness and flavor. Make sure it’s softened (not melted) to create a creamy, fluffy dough that bakes into perfectly tender cookies.
2. Brown Sugar (1 cup, packed)
The molasses in brown sugar gives these cookies a chewy texture and a deeper, caramel-like sweetness. Packed tightly into your measuring cup, it’s the key to that gooey center.
3. Granulated Sugar (1 cup)
For balanced sweetness and a slight crispness around the edges, granulated sugar does the trick. The combination of brown and white sugar creates the ideal texture.
4. Eggs (2 large)
Eggs act as the glue that holds everything together, while also adding moisture and richness. Room-temperature eggs blend better with the other ingredients.
5. Vanilla Extract (2 teaspoons)
A good vanilla extract enhances all the other flavors, making the cookies taste bakery-quality.
6. All-Purpose Flour (2 ½ cups)
Flour provides structure to the cookies. Measure it carefully to avoid dense cookies—spoon it into your measuring cup and level it off with a knife.
7. Baking Soda & Baking Powder
These leavening agents work together to give your cookies just the right amount of lift and softness.
8. Salt (½ teaspoon)
Don’t skip the salt! A little bit enhances the sweetness and balances the flavors.
9. Chocolate Chips (2 cups)
Semi-sweet chocolate chips are the classic choice, but you can swap in milk or dark chocolate depending on your preference. The melty chocolate pockets make every bite heavenly.
10. Rice Krispies (2 cups)
The star of the show! These bring a delightful crunch and make these cookies truly unique. Be gentle when folding them in to keep their airy texture intact.
Substitutions and Tips
1. Dietary-Friendly Swaps
- Gluten-Free: Use a 1:1 gluten-free flour blend. Be sure to double-check that your Rice Krispies and oats are certified gluten-free.
- Dairy-Free: Swap the butter with a plant-based alternative like vegan butter or coconut oil (refined coconut oil works best to avoid a coconut flavor).
- Lower Sugar: Reduce both sugars by ¼ cup each, or substitute coconut sugar for a deeper, slightly less sweet flavor.
2. Add Some Fun Mix-Ins
- Nuts: Chopped walnuts or pecans add a delightful crunch and nutty flavor.
- Dried Fruits: Toss in dried cranberries, raisins, or even chopped dried apricots for a sweet-tart twist.
- Cocoa Twist: Swap out ¼ cup of flour for unsweetened cocoa powder for a double-chocolate version of these cookies.
3. Keep the Rice Krispies Crunchy
To maintain their crispy texture, gently fold in the Rice Krispies at the end. Avoid overmixing, as this can crush them and take away the magic crunch!
Kitchen Tools You’ll Need
Baking is always smoother with the right tools. Here’s a list of must-haves and nice-to-haves to make your cookie-making experience enjoyable and hassle-free.
Must-Have Tools
1. Mixing Bowls
You’ll need at least two—one for wet ingredients and another for the dry ingredients. Using a large bowl for the wet ingredients ensures plenty of room to mix everything together.
2. Measuring Cups and Spoons
Accuracy is key when baking, so be sure to use proper measuring tools for both wet and dry ingredients.
3. Electric Mixer
Whether you prefer a hand mixer or a stand mixer, this tool is essential for creaming the butter and sugar to create a light and fluffy dough.
4. Baking Sheets
Go for heavy-duty, flat sheets for even baking. Line them with parchment paper or silicone mats to prevent sticking and make cleanup a breeze.
5. Spatula or Wooden Spoon
You’ll need these for folding in the chocolate chips and Rice Krispies without overmixing.
6. Wire Cooling Rack
This helps the cookies cool evenly and prevents soggy bottoms.
Nice-to-Have Tools
1. Cookie Scoop
If you want perfectly uniform cookies, a cookie scoop is your best friend. It makes portioning the dough quick and easy.
2. Silicone Baking Mats
A reusable alternative to parchment paper, silicone mats help cookies bake more evenly and save on waste.
3. Airtight Storage Container
Keep your cookies fresh and chewy by storing them in an airtight container. These are especially handy if you’re baking ahead for a special occasion.
With these ingredients and tools, you’re all set to create cookies that are crunchy, chewy, and completely irresistible. Ready to start baking? Let’s move on to the step-by-step instructions in the next section!
How to Make Rice Krispie Chocolate Chip Cookies
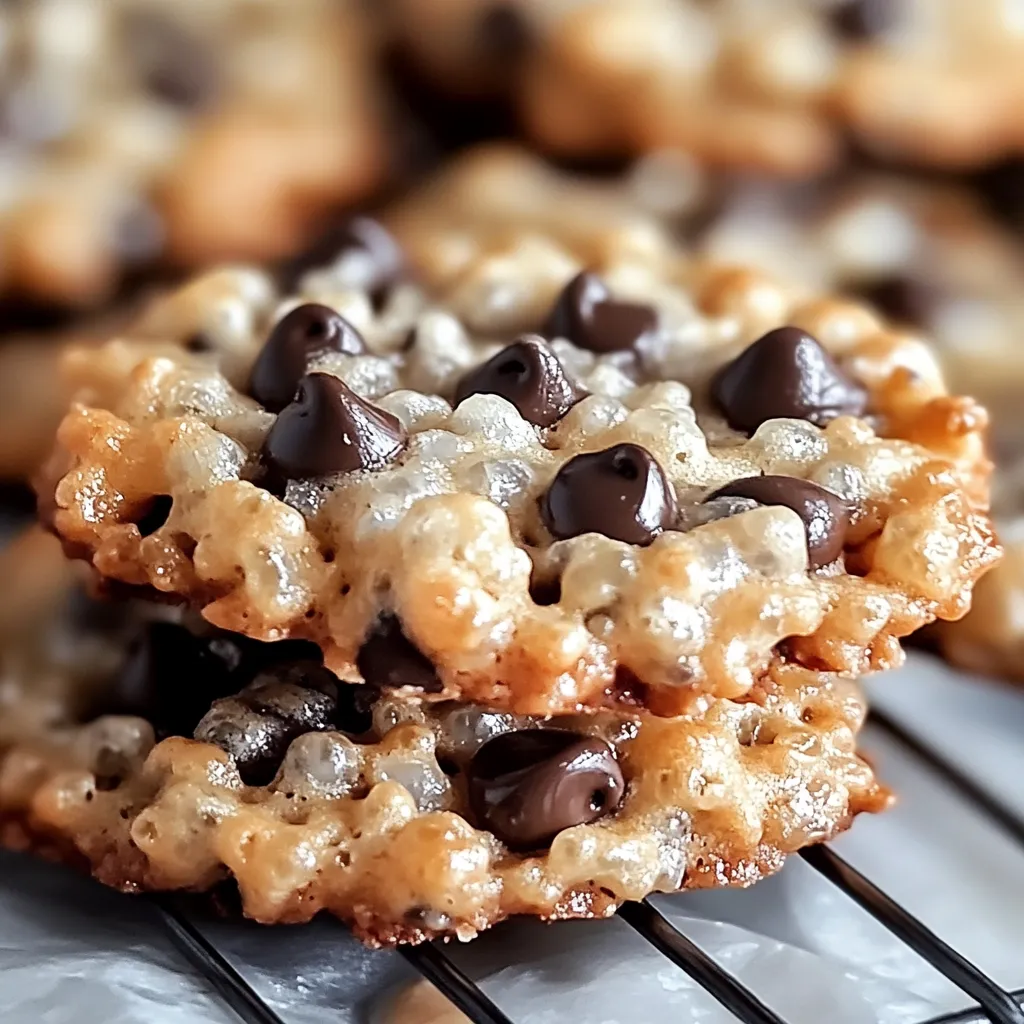
Ready to bake some magic? This step-by-step guide will walk you through the process of making these delightful Rice Krispie Chocolate Chip Cookies. Trust me, it’s easier than you think, and the results are absolutely worth it.
Step 1: Preheat the Oven
Start by preheating your oven to 350°F (175°C). This ensures the cookies bake evenly right from the start. While the oven heats up, line your baking sheets with parchment paper or silicone mats. Not only does this prevent sticking, but it also makes cleanup a breeze. A well-prepared baking surface is the secret to picture-perfect cookies!
Step 2: Mix the Wet Ingredients
Now for the fun part—creating the creamy base for your cookies.
Step-by-Step:
- Grab a large mixing bowl and add 1 cup of softened butter, 1 cup of granulated sugar, and 1 cup of packed brown sugar.
- Using an electric mixer (hand or stand), cream the butter and sugars together on medium speed for 2-3 minutes. The goal is to achieve a light, fluffy texture that gives your cookies that melt-in-your-mouth consistency.
- Next, add 2 large eggs, one at a time, mixing well after each addition. This step ensures the eggs are fully incorporated and helps maintain a smooth batter.
- Finally, mix in 2 teaspoons of vanilla extract. This tiny addition packs a flavorful punch, making every bite irresistible.
Pro Tip: If you’re mixing by hand, don’t rush! Take your time to get a smooth, creamy consistency—it’s worth the effort.
Step 3: Combine Dry and Wet Ingredients
Time to bring the dough together!
Step-by-Step:
- In a separate bowl, whisk together the dry ingredients:
- 2 ½ cups of all-purpose flour
- 1 teaspoon of baking soda
- ½ teaspoon of baking powder
- ½ teaspoon of salt
- Slowly add the dry mixture into the bowl of wet ingredients. Mix on low speed or use a spatula to combine. This step is key—overmixing can make your cookies dense instead of soft and chewy.
- Stop mixing as soon as you don’t see any more streaks of flour in the dough.
Pro Tip: Mixing gradually helps distribute the dry ingredients evenly without deflating the dough.
Step 4: Fold in Add-Ins
Now comes the magic touch!
Step-by-Step:
- Using a spatula, gently fold in 2 cups of chocolate chips and 2 cups of Rice Krispies.
- Be careful not to crush the Rice Krispies. The goal is to keep their airy texture intact so they add that signature crunch.
Pro Tip: Love experimenting? This is where you can throw in extras like chopped nuts, dried fruit, or even a sprinkle of sea salt for a sweet-and-salty twist.
Step 5: Bake and Cool
It’s baking time!
Step-by-Step:
- Scoop tablespoon-sized portions of dough onto your prepared baking sheets, leaving about 2 inches of space between each cookie. This allows them to spread without merging into one another.
- Bake in the preheated oven for 10-12 minutes, or until the edges are lightly golden. The centers may still look soft, but that’s perfect—they’ll firm up as they cool.
- Remove the cookies from the oven and let them cool on the baking sheet for 5 minutes. Then transfer them to a wire rack to cool completely.
Pro Tip: Resist the urge to overbake! The cookies will continue to set as they cool, ensuring a soft and chewy texture.
Tips for Success
Want bakery-quality cookies every time? Here are some expert tips to ensure your baking adventure is a smashing success:
1. Avoid Overmixing
When combining the wet and dry ingredients, mix just until combined. Overmixing can overwork the gluten in the flour, resulting in tough cookies.
2. Chill the Dough (Optional)
If you find your cookies spreading too much while baking, chill the dough for 15-30 minutes before scooping. This step helps the butter firm up, keeping the cookies thick and chewy.
3. Measure Flour Correctly
Too much flour can make cookies dry and crumbly. Use the spoon and level method—spoon the flour into your measuring cup and level it off with a knife.
4. Keep Rice Krispies Crunchy
To maintain that delightful crunch, fold the Rice Krispies in gently at the very end. Crushing them too much will take away their magic!
5. Use Quality Chocolate
Good-quality chocolate chips or chunks make a world of difference. Semi-sweet is a classic choice, but feel free to experiment with milk or dark chocolate.
6. Don’t Skip the Salt
A small amount of salt enhances the sweetness and balances the flavors in the cookies. It’s a tiny ingredient with a big impact!
With these tips in your back pocket, you’re all set to bake the best Rice Krispie Chocolate Chip Cookies. Now go ahead and enjoy the process—it’s as fun as the result!
How to Store Rice Krispie Chocolate Chip Cookies
Cookies this good deserve proper storage to keep them fresh and irresistible for as long as possible. Whether you’re planning to enjoy them over a few days or saving some for later, here’s how to store them like a pro.
At Room Temperature
If you’re planning to devour these cookies within a few days (and trust me, you will), store them in an airtight container at room temperature. They’ll stay fresh and chewy for up to 3-4 days. To prevent sticking, layer parchment paper between cookies. Keep them away from heat or direct sunlight to avoid them going stale.
In the Refrigerator
Need to extend their freshness a bit longer? Pop your cookies into the fridge! Stored in an airtight container, they’ll last up to a week. Pro Tip: Let the cookies come to room temperature before eating or warm them in the microwave for 5-10 seconds for that freshly baked feel.
Freezing Tips
Want to enjoy these cookies weeks or months later? Freezing is the way to go!
For Baked Cookies: Once cooled, place cookies in a freezer-safe bag or container with parchment paper between layers. They’ll stay fresh for up to 3 months.
For Raw Dough: Scoop the dough into balls and freeze on a tray until solid, then transfer to a freezer-safe bag. Bake directly from frozen—just add an extra 1-2 minutes to the baking time.
Creative Variations
These Rice Krispie Chocolate Chip Cookies are perfect as they are, but if you’re feeling adventurous, here are a few fun ways to mix things up:
Nutty Crunch
Add ½ cup of chopped walnuts or pecans to the dough for an extra layer of crunch and a nutty flavor that pairs beautifully with the chocolate chips.
Double Chocolate
For the chocoholics out there, swap ¼ cup of flour for unsweetened cocoa powder. Alternatively, use chocolate-flavored Rice Krispies for a rich, double chocolate twist.
White Chocolate and Macadamia
Want something tropical? Replace the semi-sweet chocolate chips with white chocolate chips and fold in ½ cup of chopped macadamia nuts. It’s a luxurious take that’s perfect for special occasions.
Serving and Pairing Suggestions
These cookies are delightful on their own, but pairing them takes them to the next level.
- Classic Pairing: Serve warm with a cold glass of milk for a nostalgic treat.
- Coffee Companion: Enjoy with your morning coffee or an afternoon latte for a sweet pick-me-up.
- Dessert Upgrade: Sandwich a scoop of vanilla ice cream between two cookies for the ultimate indulgence.
Whether you’re snacking, gifting, or celebrating, these cookies are versatile enough to fit any occasion. Give these ideas a try—you might discover your new favorite way to enjoy them!
Frequently Asked Questions (FAQs)
Baking can sometimes raise questions, and I’m here to help! Here are answers to some of the most common questions about making Rice Krispie Chocolate Chip Cookies.
How Do I Keep the Rice Krispies Crunchy?
The key to keeping your Rice Krispies crunchy is to handle them gently. When folding them into the dough, use a spatula and a light hand to avoid crushing them. Additionally, avoid overmixing the dough, as this can break down the cereal. Finally, bake the cookies just until the edges are golden; overbaking can make them lose their crisp texture.
Can I Freeze the Dough?
Absolutely! Freezing cookie dough is a great way to always have freshly baked cookies on hand. Simply scoop the dough into tablespoon-sized balls, place them on a tray, and freeze until solid. Transfer the frozen dough balls to an airtight bag or container. When you’re ready to bake, pop them directly into the oven—just add an extra 1-2 minutes to the baking time.
Why Are My Cookies Spreading Too Much?
Cookies that spread too much usually mean the butter was too soft or the dough wasn’t chilled. To fix this, make sure your butter is softened, not melted. If your kitchen is warm, chill the dough for 15-30 minutes before baking. Using a cookie scoop also helps ensure consistent sizes, which bake more evenly.
Can I Make This Recipe Vegan or Gluten-Free?
Yes, you can! For a vegan version, swap the butter with a plant-based alternative and replace the eggs with flax eggs (1 tablespoon ground flaxseed mixed with 3 tablespoons water for each egg). For a gluten-free option, use a 1:1 gluten-free flour blend and ensure your Rice Krispies are certified gluten-free. With these adjustments, everyone can enjoy these cookies!
Related Recipes
If you loved these Rice Krispie Chocolate Chip Cookies, you might enjoy these other sweet treats from Recipe Seasy’s blog:
- Peanut Butter Rice Krispie Treats with M&Ms and Chocolate Chips: A colorful and crunchy twist on a classic.
- Maraschino Cherry Chocolate Chip Cookies: A fruity take on chocolate chip cookies.
- Christmas Whipped Shortbread Cookies: Light, buttery, and festive!
- Chocolate Peanut Butter Cake: Perfect for chocolate lovers who want a rich dessert.
- Oatmeal Chocolate Chip Banana Muffins: A healthier breakfast or snack option.
Why This Recipe is a Must-Try
These Rice Krispie Chocolate Chip Cookies are not just cookies—they’re an experience. The combination of textures and flavors is what makes them truly special. The chewy base, melty chocolate, and crispy Rice Krispies come together to create something unforgettable.
Whether you’re baking with kids, prepping for a party, or simply treating yourself, this recipe is a guaranteed success. Plus, the flexibility of the ingredients means you can easily adapt it to suit your preferences or dietary needs.
Now it’s your turn! Grab your mixing bowl and whip up a batch. Don’t forget to share your creations in the comments below or tag me on social media—I can’t wait to see how your cookies turn out! Happy baking!
Print
Rice Krispie Chocolate Chip Cookies
- Total Time: 25 minutes
- Yield: 24 cookies
Description
These Rice Krispie Chocolate Chip Cookies combine the classic chocolate chip cookie with the airy crunch of Rice Krispies. Perfectly chewy and crispy, they’re great for holidays, gatherings, or an indulgent treat!
Ingredients
- 1 cup unsalted butter, softened
- 1 cup granulated sugar
- 1 cup packed brown sugar
- 2 large eggs
- 2 teaspoons vanilla extract
- 2 ½ cups all-purpose flour
- 1 teaspoon baking soda
- ½ teaspoon baking powder
- ½ teaspoon salt
- 2 cups semisweet chocolate chips
- 2 cups Rice Krispies cereal
Instructions
- Preheat the oven to 350°F (175°C) and line baking sheets with parchment paper.
- Cream butter, granulated sugar, and brown sugar until fluffy. Mix in eggs and vanilla.
- In another bowl, whisk together flour, baking soda, baking powder, and salt. Gradually mix this into the wet ingredients.
- Fold in chocolate chips and Rice Krispies gently.
- Scoop dough onto the prepared baking sheet, leaving 2 inches of space.
- Bake for 10-12 minutes until edges are golden. Let cool on the baking sheet for 5 minutes before transferring to a wire rack.
Notes
- For a vegan version, use flax eggs and plant-based butter.
- Chill the dough for 15 minutes to prevent excess spreading.
- Prep Time: 15 minutes
- Cook Time: 10 minutes
- Category: Dessert
- Method: Baking
- Cuisine: American
Nutrition
- Calories: 160
- Sugar: 12g
- Sodium: 80mg
- Fat: 8g
- Carbohydrates: 21g
- Fiber: 1g
- Protein: 2g

