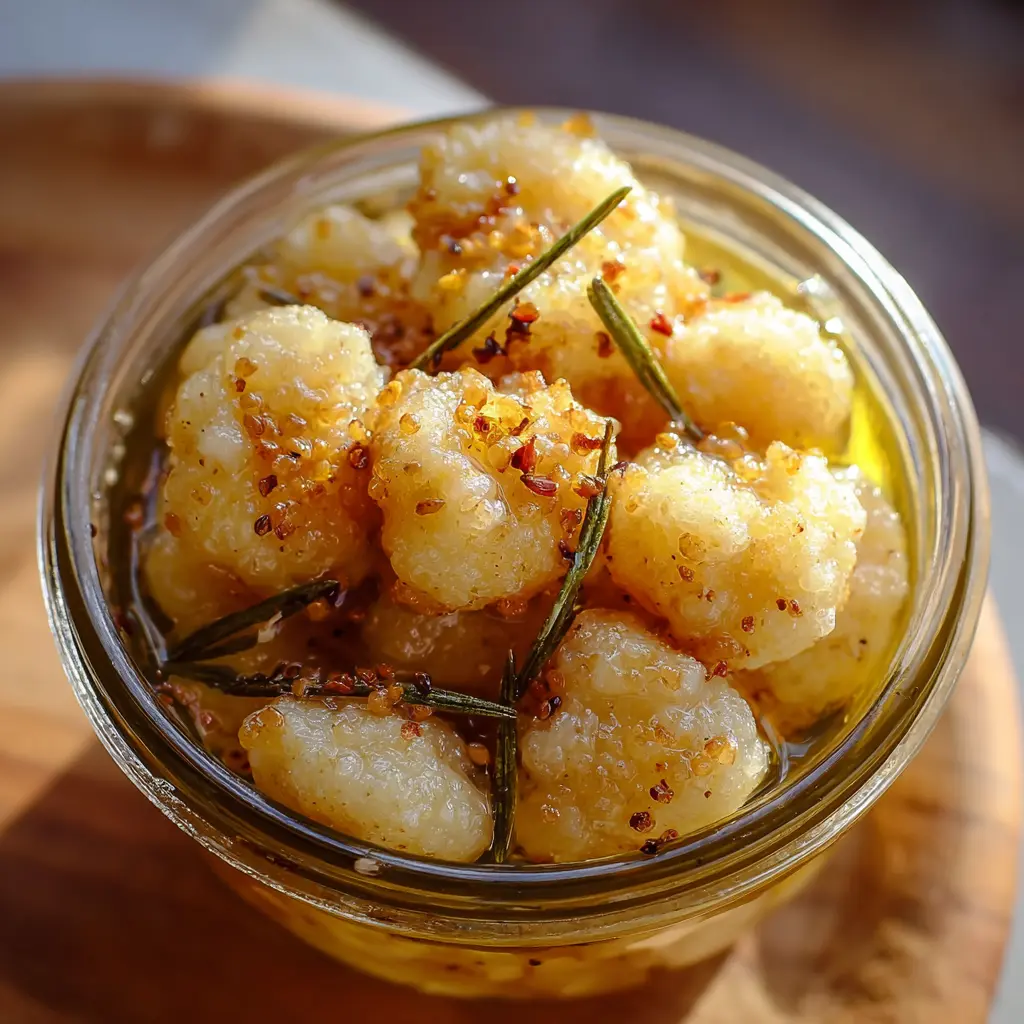
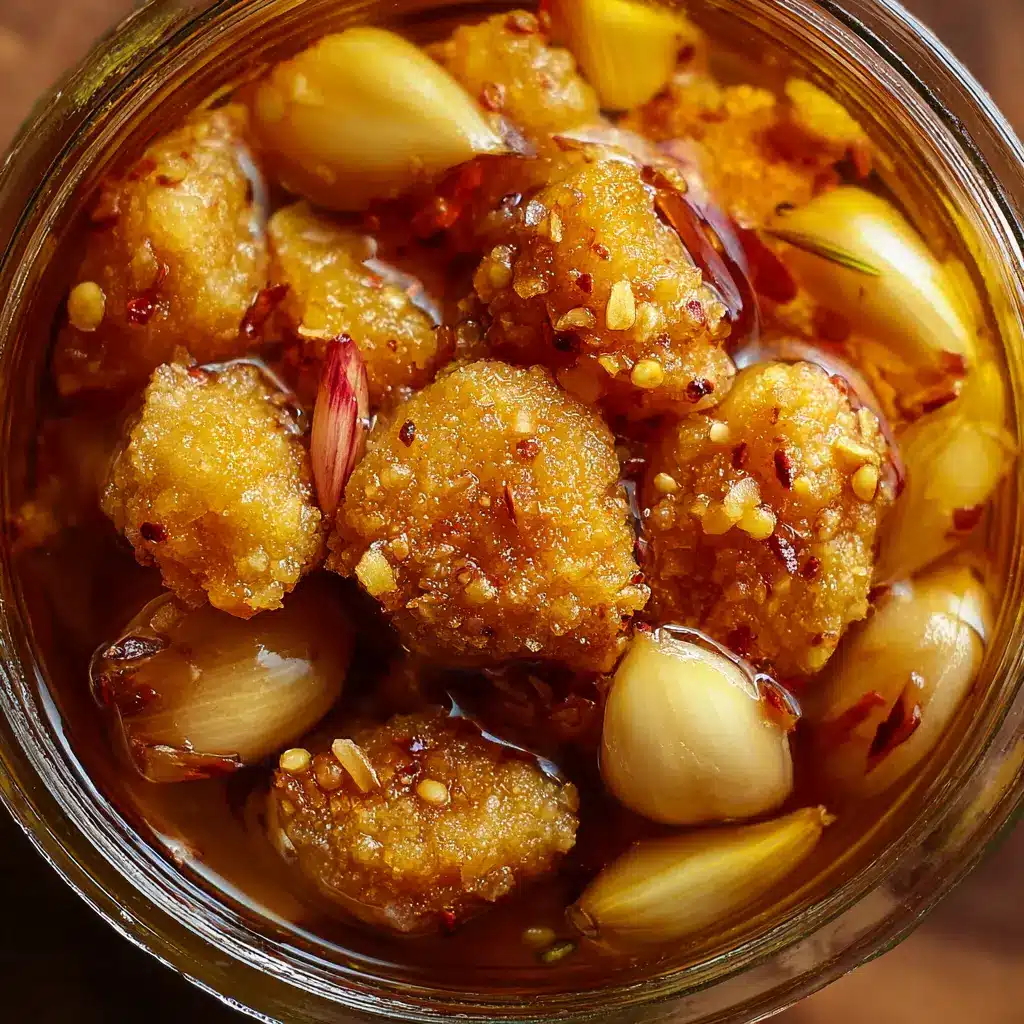
Introduction to Pickled Garlic Nuggets
If you’re looking to elevate your homemade food game, pickled garlic nuggets just might be the secret ingredient you didn’t know you were missing. These delightful bites of garlicky goodness are not just packed with flavor; they also bring a satisfying crunch and a zesty punch to any dish. Imagine the burst of flavors when you add pickled garlic to sandwiches, salads, or even on charcuterie boards!
Why Pickled Garlic Nuggets Are a Game Changer for Your Homemade Food Journey
Pickled garlic nuggets offer a unique way to enjoy garlic, a staple ingredient known for its numerous benefits. According to the Garlic Research Institute, garlic is not just delicious; it’s also rich in allicin, a compound linked to various health perks. When you transform garlic into these tangy little nuggets, you not only prolong its shelf life but also enhance its flavors, making it a versatile addition to your meals.
-
Versatility: You can use pickled garlic nuggets as a garnish, toss them in salads, or even enjoy them straight from the jar. Their adaptability means they’ll fit seamlessly into any meal.
-
Easy to Make: The process of pickling garlic is surprisingly simple. With just a few ingredients, you can whip up a batch in no time, allowing you to embrace your culinary creativity.
-
Health Benefits: Beyond flavor, garlic is renowned for its immune-boosting properties. Incorporating pickled garlic into your diet can be a delicious way to support your overall health.
If you’re excited to dive deeper into the world of pickled garlic, consider checking out The Kitchn’s pickling guide for more inspiration. Your pickled garlic nuggets can also pair exceptionally well with dishes featuring turkey bacon or chicken ham, providing a contrast that will tantalize your taste buds.
The beauty of pickling is that it’s a personal journey—experimenting with flavors, spices, and even the type of vinegar will set your pickled garlic nuggets apart. So grab some garlic and get ready to explore an avenue of homemade food that’s not only flavorful but also downright fun!
Ingredients for Pickled Garlic Nuggets
Essential ingredients for the perfect pickled garlic nuggets
When it comes to creating the ultimate pickled garlic nuggets, you’ll want to gather a few key ingredients that truly enhance their flavor. Here’s what you’ll need:
- Fresh Garlic: Start with a few bulbs of high-quality fresh garlic. The fresher, the better; it will give your nuggets a strong flavor and enticing aroma.
- Vinegar: Use white vinegar or apple cider vinegar as your acidic base. Both options provide a tangy kick that pairs beautifully with garlic.
- Water: To balance out the vinegar, you’re going to want a bit of water. It dilutes the acidity just enough for that perfect tang.
- Sugar: A touch of granulated sugar helps to mellow out the sharpness of the vinegar and garlic.
- Salt: Choose kosher or sea salt for the best results, as it helps with the overall preservation.
- Spices: Think peppercorns, mustard seeds, or even red pepper flakes for a little heat.
Using these ingredients not only will help you create delicious pickled garlic nuggets, but adding your favorite spices can personalize the flavor, making it your own. Explore more variations and tips on pickling garlic here.
Happy pickling!
Preparing Pickled Garlic Nuggets
Who doesn’t love the tangy crunch of pickled garlic nuggets? They’re not just a fantastic snack; they can elevate a multitude of dishes, from sandwiches to salads. Ready to dive into the world of pickling? Let’s embark on this flavorful journey together.
Prepare the jars
The first step in creating your vibrant pickled garlic nuggets is to get your jars ready. You’ll want to use glass jars with tight-fitting lids, preferably quart-sized or pint-sized, depending on your batch size.
-
Sanitize your jars: To prevent any unwanted bacteria from ruining your pickles, wash your jars with hot, soapy water. You can also sterilize them by placing them in a 225°F oven for about 10 minutes. Alternatively, run them through your dishwasher on a hot cycle for an extra layer of cleanliness.
-
Check your lids: Ensure the lids are in good condition; they should seal properly for optimal freshness.
Pro-tip: If you’re unsure about jar sterilization, you can find a comprehensive guide on USDA’s food preservation page for reliable methods!
Pack the jar with garlic and cucumbers
Once your jars are clean and ready, it’s time to pack them with garlic and cucumbers.
-
Choose your garlic: Fresh cloves work best! Aim for about 1 head of garlic for every jar. Peel the cloves, and if you’re feeling adventurous, lightly smash them to release even more flavor.
-
Add cucumbers: Slice your cucumbers into spears, rounds, or leave them whole if they’re petite. The crunchiness complements the bold flavors of the garlic beautifully. You might want about 2 to 3 medium-sized cucumbers per quart jar.
Layer the garlic and cucumbers tightly within your jars but avoid overstuffing them, as this can hinder the pickling process. You want them snug but not squished!
Make the flavorful brine
The magic of pickled garlic nuggets lies in the brine. Here’s how to whip it up:
- Ingredients for the brine:
- 2 cups distilled white vinegar
- 1 cup water
- 1 tablespoon salt (preferably kosher)
- 1 tablespoon sugar
- Optional: spices like black peppercorns, red pepper flakes, or dill for extra zest.
First, combine your vinegar and water in a saucepan. Stir in the salt and sugar until completely dissolved. Bring the mixture to a gentle boil, and then remove it from the heat. The warmth helps meld the flavors, ensuring your pickles are anything but bland.
Pour the brine over the garlic and cucumbers
Now it’s time for the fun part: pouring your brine.
Carefully pour the hot brine over the packed garlic and cucumber in your jars. Make sure to cover the ingredients completely. If you’re using spices, toss them in now for an extra kick!
- Leave some space: It’s important to leave about half an inch of space at the top of each jar; this prevents overflow as the ingredients swell while cooling.
Cool and refrigerate for the boldest flavors
The secret to bold pickled garlic nuggets is time. Allow your jars to cool at room temperature for about an hour before sealing them tightly with your sanitized lids.
- Refrigerate: Once cooled, place the jars in the fridge. The flavors will marry beautifully over the next few days. For the best taste, let them sit for at least 48 hours—if you can resist diving in sooner.
And there you have it! In just a few simple steps, you’ve crafted delightful pickled garlic nuggets that can add a tangy twist to any meal. Enjoy your pickling adventure!
Variations on Pickled Garlic Nuggets
When it comes to crafting your own pickled garlic nuggets, there’s no shortage of creativity you can unleash! Here are a couple of delicious variations that can elevate your garlic game to a whole new level.
Spicy Pickled Garlic Nuggets
If you have a zest for the bold and spicy, try adding some heat to your pickled garlic nuggets! Here’s how:
- Chili Flakes or Fresh Chilies: Toss in a teaspoon of chili flakes or a couple of sliced fresh chilies for that extra kick.
- Peppercorns: Whole peppercorns can add a nuanced heat and interesting texture.
- Cayenne Pepper: Just a pinch can elevate the spice factor without overpowering the garlic’s inherent flavor.
Spicy garlic lovers, rejoice—this version is perfect alongside grilled meats or as a daring addition to sandwiches!
Sweet and Tangy Pickled Garlic Nuggets
For those who appreciate a touch of sweetness, the sweet and tangy version might be the one for you. It pairs exceptionally well with savory dishes and offers a delightful contrast:
- Sweeteners: Incorporate a tablespoon of honey or maple syrup into your pickling solution. This balances the acidity beautifully.
- Apple Cider Vinegar: Swap your regular vinegar for apple cider vinegar for a fruity kick. Rich in antioxidants, it’s also a fantastic health choice.
- Spices: Add cloves or cinnamon sticks for a warm, comforting flavor.
These sweet and tangy pickled garlic nuggets are an ideal condiment for Turkey Bacon sandwiches or served atop Chicken Ham for an appetizing experience.
Your pickled garlic nuggets are truly a canvas waiting for your personal touch. Experiment, have fun, and enjoy transforming a simple ingredient into something extraordinary! For more tips and ideas on pickling, check out this fantastic resource from Food Network, where food lovers gather for inspiration.
Cooking tips for Pickled Garlic Nuggets
Tips for Selecting the Best Garlic and Cucumbers
When diving into the world of pickled garlic nuggets, choosing the right ingredients is crucial. Here are some tips to help you pick the best garlic and cucumbers for your recipe:
-
Garlic Selection: Look for firm, dry bulbs with no signs of sprouting. Fresh garlic not only enhances flavor but offers health benefits too. You might also consider specialty varieties like Black Garlic for a unique twist.
-
Cucumber Quality: Opt for smaller, pickling cucumbers—often labeled as “Kirby” or “Persian.” Their crisp texture ensures a satisfying crunch in every bite. Check for smooth, vibrant skin, and avoid any with bruises or soft spots.
It’s amazing how these small details can elevate your pickled garlic nuggets. If you’re unsure where to start, consider local farmers’ markets; they often have the freshest ingredients! When you select the best, your pickles will shine. For more insights, check out the National Center for Home Food Preservation for expert advice on pickling.
Serving suggestions for Pickled Garlic Nuggets
Creative ways to enjoy your pickled garlic nuggets
If you’re looking for unique ways to feature pickled garlic nuggets on your dinner table, you’re in for a treat! These flavorful little bites can elevate countless dishes, making them an essential ingredient for any foodie’s pantry.
-
Charcuterie Boards: Slice up your favorite cheeses and pair them with pickled garlic nuggets. They add a zesty kick that complements meats like turkey bacon and chicken ham perfectly.
-
Salads & Grain Bowls: Toss diced pickled garlic nuggets into leafy greens or mixed grain bowls. The tangy flavor can replace traditional dressings, cutting down on unnecessary calories while adding zest.
-
Savory Sandwiches: Layer them in your favorite sandwich for a burst of flavor. Imagine turkey bacon, fresh greens, and pickled garlic nuggets in a whole grain bun; it’s a game-changer.
-
Snacking Option: Enjoy them straight from the jar as a tangy snack. They can also complement hummus or guacamole for a delightful dip experience.
For more ideas and inspiration, consider checking out resources like Food52 or Bon Appétit. Enjoy your culinary adventures with pickled garlic nuggets!
Time Breakdown for Pickled Garlic Nuggets
Preparation Time
To dive into this deliciously tangy adventure, you’ll need about 15 minutes for prep. This step involves peeling and chopping your garlic, as well as gathering your spices and vinegar. Don’t rush this part! Taking the time to get your ingredients ready is crucial for achieving the perfect balance of flavors in your pickled garlic nuggets.
Pickling Time
Next up is the pickling process, which typically takes about 1 week. Yes, I know you’re eager to taste those garlic nuggets, but trust me—patience is key. The longer they soak, the more intense and delicious the flavors become. You might want to stash a few jars in the fridge and forget about them until the flavor is fully developed.
Total Time
In total, you’re looking at roughly 1 week and 15 minutes to enjoy your pickled garlic nuggets. While the time might sound lengthy, most of it is hands-off waiting, so you can take this opportunity to whip up your favorite dishes or entertain friends. Just think of how impressed they’ll be when you finally serve those homemade pickled garlic nuggets! For more ideas on how to integrate them into meals, check out this guide on pickling basics to get your creativity flowing.
Nutritional Facts for Pickled Garlic Nuggets
Calories per Serving
When it comes to indulging in pickled garlic nuggets, you might be surprised to find that each serving typically contains about 30-40 calories. This makes them a flavorful addition to your meals without significantly impacting your daily caloric intake.
Key Nutritional Highlights
These delightful nuggets pack more than just flavor; they are rich in health benefits too!
- Low in Sugars: Naturally, they contain little to no added sugars, making them a guilt-free snacking option.
- Rich in Antioxidants: Garlic is known for its high antioxidant content, which may help in reducing oxidative stress in the body, promoting overall health.
- Vitamins and Minerals: They are a good source of vitamins B and C, essential for maintaining energy levels and immune health. For more on the health benefits of garlic, check out Healthline.
Incorporating pickled garlic nuggets into your diet can add zest to your meals while supporting your health goals. Plus, they’re versatile enough to be used in salads, as a side dish, or even as a bold topping for your favorite grain bowls!
FAQs about Pickled Garlic Nuggets
When it comes to pickled garlic nuggets, you might have a few burning questions. Don’t worry; we’ve got you covered!
How long can I store pickled garlic nuggets?
Once you’ve made your batch of pickled garlic nuggets, you can store them in the refrigerator for up to three months. The acidity of the pickling solution helps preserve their freshness while adding that delightful tang. Just make sure to keep them in an airtight container to lock in the flavor. And let’s be honest, they’re so delicious, they probably won’t last that long anyway!
Can I use other vegetables for pickling?
Absolutely! While pickled garlic nuggets are a fantastic choice, you can experiment with a variety of vegetables. Here are some ideas to consider:
- Cucumbers
- Carrots
- Green beans
- Cauliflower
Feel free to mix and match; the beauty of pickling lies in its versatility. Curious about ways to get creative? Check out some guides on pickling other vegetables here.
What are the health benefits of pickled garlic?
Pickled garlic nuggets aren’t just tasty; they also offer several health benefits. Garlic is known for its immune-boosting properties and potential heart health benefits. Studies suggest that garlic can help lower blood pressure and improve cholesterol levels. Plus, pickling can enhance the bioavailability of nutrients, making them easier for your body to absorb.
Looking to delve deeper into the health benefits of garlic? Check out this article from the National Institutes of Health.
Enjoy your pickling journey—your taste buds (and health) will thank you!
Conclusion on Pickled Garlic Nuggets
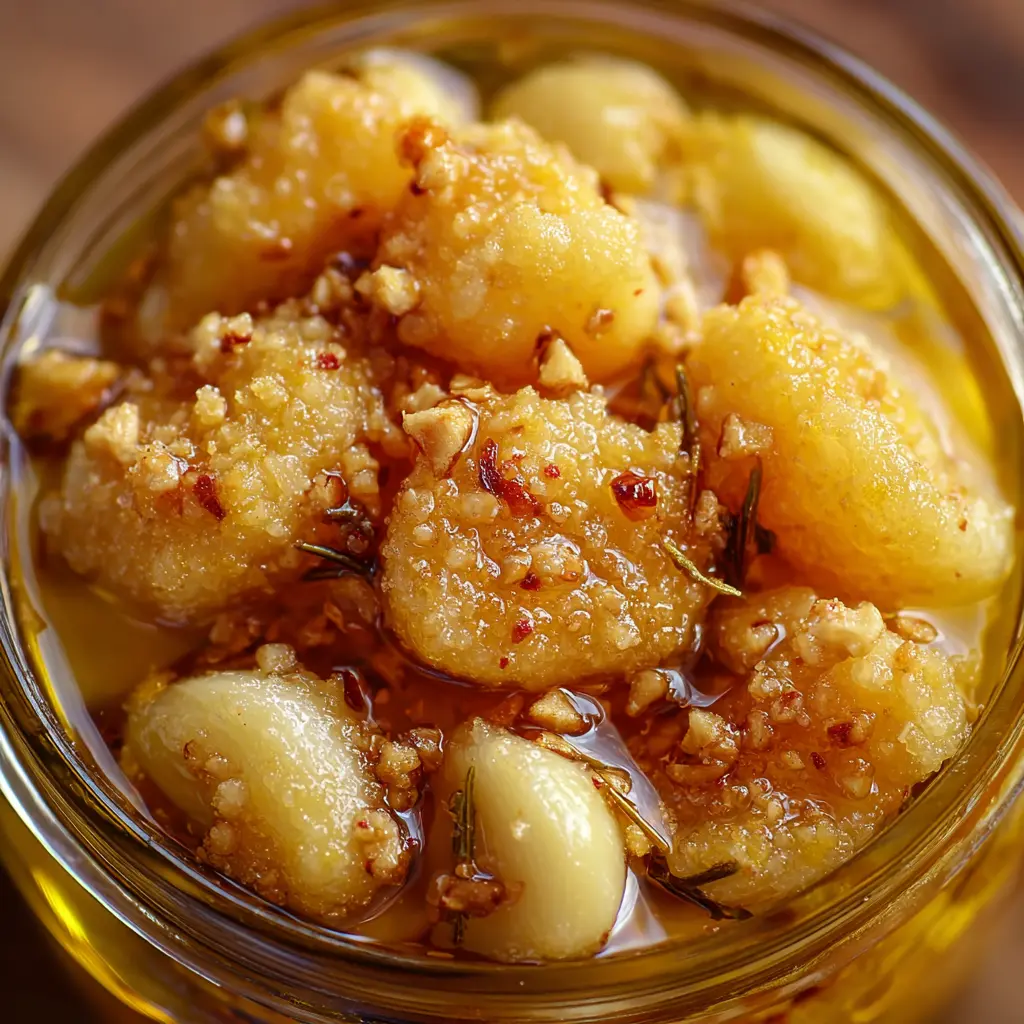
Embracing homemade food with pickled garlic nuggets
There’s something truly special about crafting your own pickled garlic nuggets at home. Not only do you get to enjoy the rich flavors, but you also control the ingredients, making it a healthy choice. These nuggets are versatile and can elevate a variety of dishes, from salads to sandwiches.
Imagine biting into a crunchy nugget that bursts with flavor – it’s a delightful surprise for your taste buds! Plus, making them yourself helps you connect with the food you eat, promoting a more mindful approach.
So why not give it a try? Check out resources like Food Network or Bon Appétit for more ideas on enhancing your homemade ventures, and savor the rewarding experience of your very own pickled creations.
Print
Pickled Garlic Nuggets: Easy Flavor Boost for Your Dishes
- Total Time: 24 hours 25 minutes
- Yield: 4 jars
- Diet: Vegan
Description
Pickled Garlic Nuggets are a deliciously easy way to add flavor to your meals. Whether you’re using them in salads, sandwiches, or as a standalone snack, these tangy morsels will enhance any dish.
Ingredients
- 3 cups garlic cloves
- 2 cups white vinegar
- 1 cup water
- 1 tablespoon salt
- 1 tablespoon sugar
- 2 teaspoons peppercorns
- 1 teaspoon red pepper flakes
Instructions
- Peel the garlic cloves and set aside.
- In a pot, combine the vinegar, water, salt, and sugar. Heat the mixture until the salt and sugar dissolve.
- Add the garlic cloves, peppercorns, and red pepper flakes into the pot.
- Bring the mixture to a boil for about 10 minutes.
- Remove from heat and let it cool slightly.
- Transfer the garlic and liquid into sterilized jars.
- Seal the jars and refrigerate for at least 24 hours before use.
Notes
- Adjust the level of spices based on your flavor preference.
- Great for gifting!
- Prep Time: 15 minutes
- Cook Time: 10 minutes
- Category: Condiments
- Method: Pickling
- Cuisine: American
Nutrition
- Serving Size: 1 jar
- Calories: 20
- Sugar: 1g
- Sodium: 300mg
- Fat: 0g
- Saturated Fat: 0g
- Unsaturated Fat: 0g
- Trans Fat: 0g
- Carbohydrates: 4g
- Fiber: 0g
- Protein: 1g
- Cholesterol: 0mg
")