Introduction to Peanut Butter Dream Bars
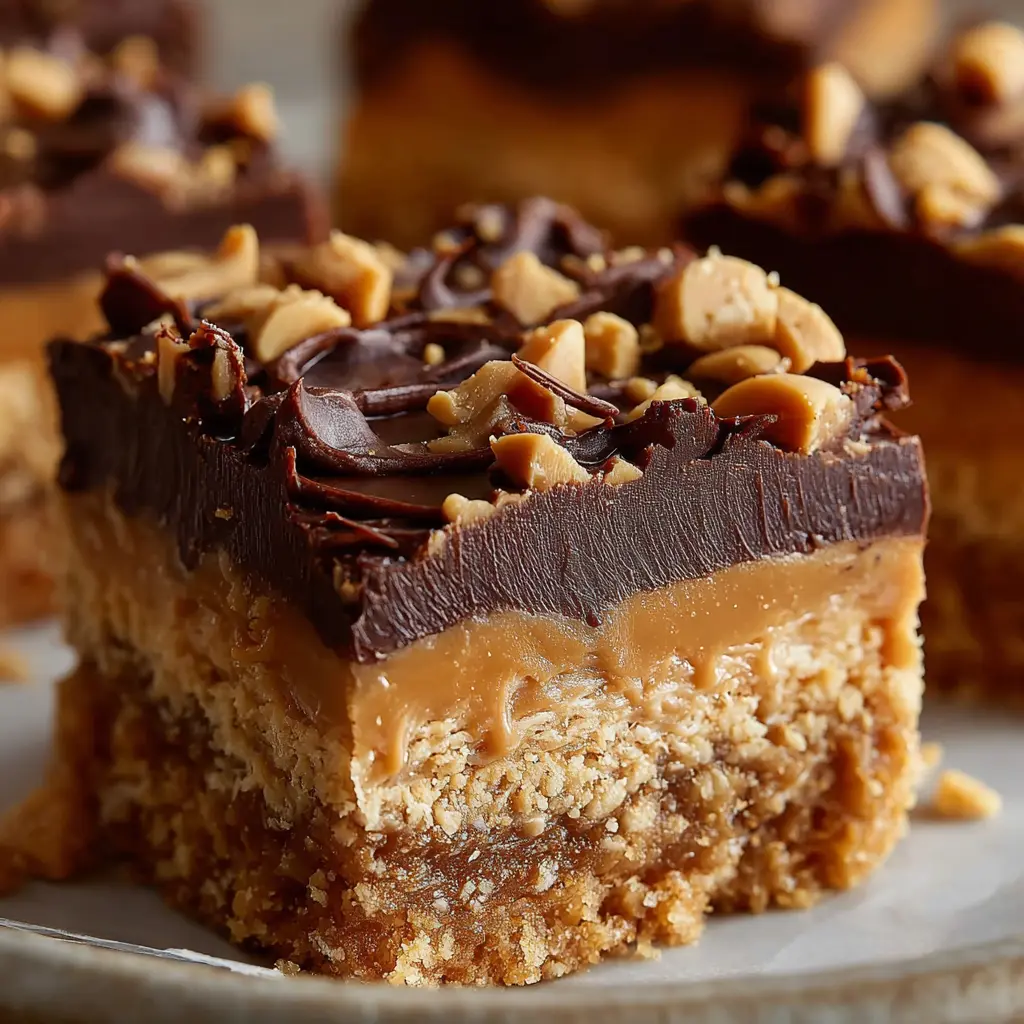
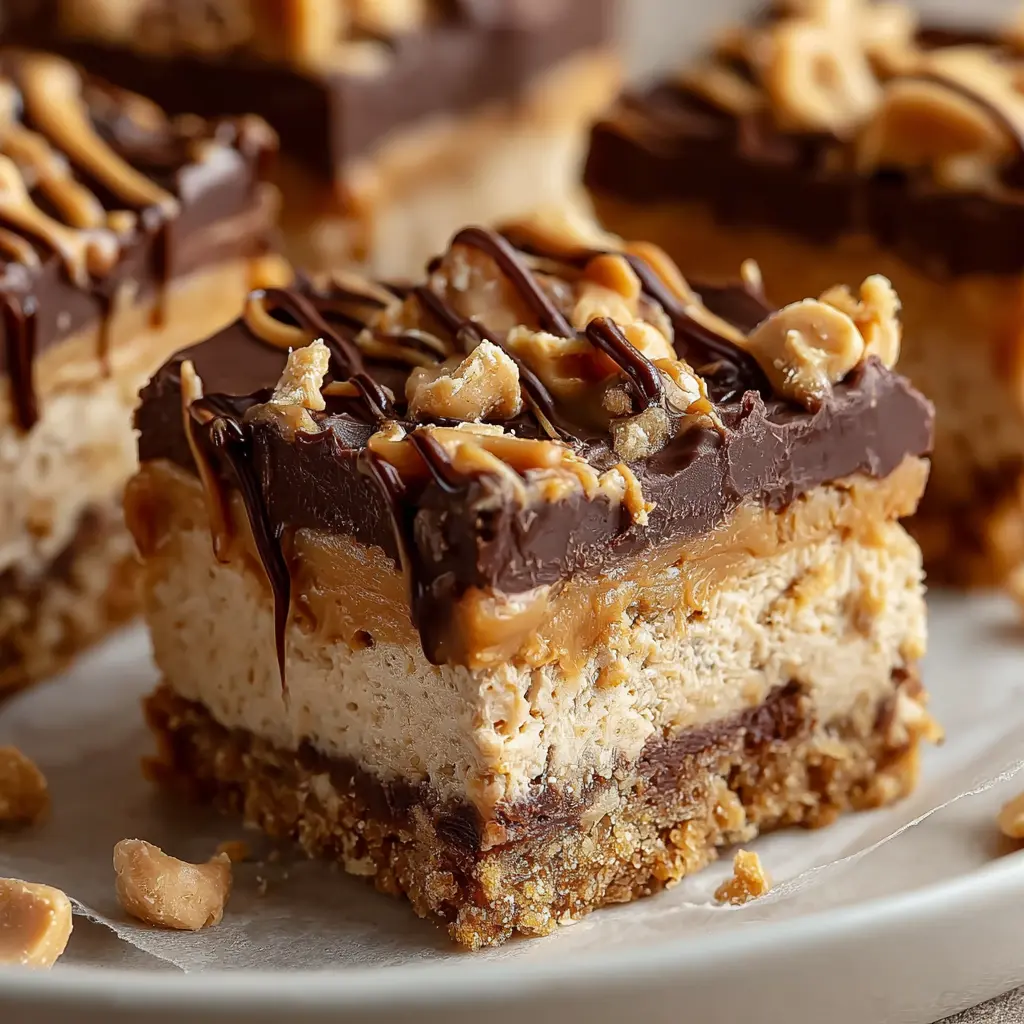
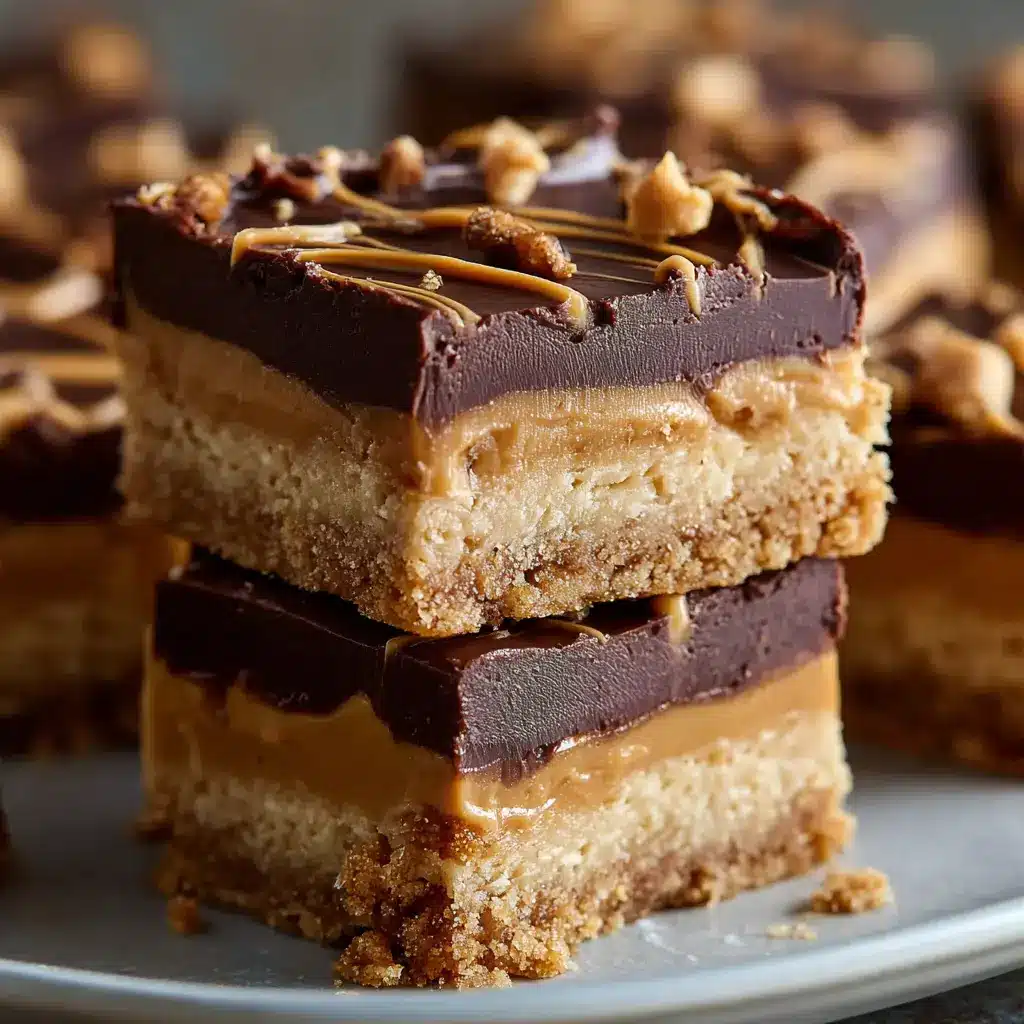
When it comes to indulging your sweet tooth, Peanut Butter Dream Bars are a delightful treat that you simply must try. They combine the rich, creamy flavor of peanut butter with a sweet, chewy texture that’s just hard to resist. Picture this: a buttery, crumbly base layered with a luscious peanut butter filling and topped with a generous drizzle of chocolate. It’s an effortless dessert that not only satisfies your cravings but also makes you feel like a culinary wizard in your own kitchen!
Why You’ll Fall in Love with Peanut Butter Dream Bars
One of the best things about peanut butter dream bars is their versatility. Whether you’re hosting a casual get-together, prepping for a week of snacks, or simply want to treat yourself after a long day, these bars have you covered. The ingredients are straightforward and often what you might already have on hand: graham crackers, peanut butter, powdered sugar, and chocolate chips. No need for complex baking skills here—just mix, layer, and chill!
Don’t take my word for it. A quick search on nutrition insights reveals that peanut butter offers essential nutrients like protein and healthy fats. According to the American Peanut Council, incorporating peanut butter can lead to increased satiety, helping you feel full longer. So, why not enjoy it in a delicious dessert?
Furthermore, if you’re looking to connect with like-minded foodies, blogging communities like Food52 or Serious Eats can provide plenty of inspiration and variations. Consider swapping the chocolate layer for a caramel drizzle or incorporating different nut butters for an exciting twist.
Imagine serving these bars at your next gathering and being met with enthusiastic nods and smiles as your friends take their first bites. They’ll be raving about your Peanut Butter Dream Bars long after they’re gone, and you might just be asked to share your secret recipe.
So grab your apron, and let’s dive into making these irresistible treats. Trust me, once you taste them, you’ll understand exactly why they’re called “dream bars.”
Ingredients for Peanut Butter Dream Bars
Essential ingredients you’ll need
Creating your Peanut Butter Dream Bars is a delightful experience that requires just a handful of essential ingredients. Let’s make sure you have everything you need to whip up this delicious treat!
- Oats: Rolled oats provide a wholesome base and chewy texture.
- Peanut Butter: The star of the show! Use a creamy variety for a smooth, indulgent flavor.
- Honey or Maple Syrup: These natural sweeteners bring a touch of sweetness and help bind the bars.
- Coconut Oil: A great alternative to butter, coconut oil adds moisture and a subtle tropical flavor.
- Chocolate Chips: Semi-sweet or dark chocolate chips will elevate your bars to a whole new level of deliciousness.
- Salt: Just a pinch enhances all the flavors remarkably well.
Want to learn more about the nutritional benefits of these ingredients? Check out sites like Healthline for more insights. With these basics in hand, you’re ready to embark on the journey to making your very own Peanut Butter Dream Bars! Trust me, they won’t last long!
Step-by-step Preparation of Peanut Butter Dream Bars
Creating scrumptious Peanut Butter Dream Bars in your own kitchen is not only rewarding but also incredibly simple. Whether you’re planning a cozy night in or a gathering with friends, these delightful bars are a hit! Let’s break down the preparation process step-by-step, ensuring you get the most delicious results.
Preheat the oven and prepare your pan
First things first, preheating your oven is crucial for optimal baking. Set your oven to 350°F (175°C) and let it warm up while you get your ingredients ready.
Now, let’s focus on your pan. A good choice would be an 8×8-inch square baking dish. To ensure your bars are easy to remove later, line the bottom and sides of the pan with parchment paper, allowing some overhang for easy lifting. You can lightly grease the paper as well, just to be on the safe side. This initial preparation sets a solid foundation for your Peanut Butter Dream Bars.
Mix the peanut buttery base
While your oven is reaching the perfect temperature, it’s time to whip up the peanut buttery base. In a mixing bowl, combine:
- 1 cup of creamy peanut butter (make sure it’s the good stuff; natural peanut butter works wonders)
- 1/2 cup of honey or maple syrup for sweetness
- 1/4 cup of coconut oil (melted works best) to ensure that lovely texture
- 1 cup of rolled oats for a satisfying chewiness
- A pinch of salt to balance the flavors
Using a spatula or a wooden spoon, mix these ingredients until fully combined, and you’re left with a thick, luscious mixture that will be the heart of your bars.
Press the mixture into the pan
Now comes the fun part! Take the peanut buttery mixture and press it evenly into the prepared pan. Use your hands to spread it out, ensuring every corner is filled. Don’t be shy—this step is crucial for getting that solid foundation for your bars. A flat, compact layer will help them hold together perfectly once they’re set.
Optional baking for a firmer texture
If you prefer your bars to have a firmer texture, consider baking the base for about 10 minutes. This step is optional, but it does enhance the flavor and helps the bars not crumble as easily. If you choose this route, let the pan cool for a few minutes before moving on to the next step.
Prepare the chocolate peanut butter topping
While your base is cooling, let’s whip up that magical topping. In a separate bowl, mix together:
- 1/2 cup of chocolate chips (dark chocolate pairs beautifully)
- 1/4 cup of peanut butter
Microwave the mixture in short bursts, stirring in between until everything is melted and beautifully combined. You’re going for a luscious, glossy topping that will elevate your Peanut Butter Dream Bars to the next level.
Spread and swirl the topping
Once your base has cooled (or if you opted not to bake it, right after you pressed it), spread the chocolate-peanut butter topping over the base. Use an offset spatula or the back of a spoon to ensure even coverage. For an extra touch, feel free to swirl the topping lightly with a knife to create a marbled effect. Again, this little visual element makes a big difference!
Chill and cut the bars
This is the hardest part—waiting! Place your pan in the refrigerator for at least 2 hours (or overnight if you can wait that long). Chilling helps the bars set, making them easier to cut into squares. Once they are firm, lift the bars out using the parchment overhang, and slice them into squares or rectangles. You now have irresistible Peanut Butter Dream Bars ready for enjoyment!
These bars are perfect for snacks, meal prep, or dessert. Plus, they keep well in the refrigerator for up to a week. So, what are you waiting for? Get started on these Peanut Butter Dream Bars and relish in the delight of homemade goodness! For more inspiration, check out the Health Benefits of Peanut Butter and incorporate them into your routine. Enjoy!
Variations of Peanut Butter Dream Bars
When it comes to peanut butter dream bars, the possibilities are truly endless! Whether you’re seeking to shake things up or cater to different taste preferences, these variations will keep your dessert game strong.
Swapping Out the Chocolate Chips
While chocolate chips are a classic choice, why not experiment? Try replacing them with butterscotch or white chocolate chips for a sweet twist. You could also consider dried fruit like cranberries or raisins for a chewy texture that balances the richness of the peanut butter. If you’re in the mood for something adventurous, why not throw in some mini marshmallows for a s’mores-inspired version?
Adding Nuts or Crispy Elements
For those who crave a satisfying crunch, incorporating nuts can add depth to your peanut butter dream bars. Chopped peanuts or almonds provide a delightful crunch that complements the creamy filling. If you’re after an extra layer of flavor, consider adding crushed pretzels or rice cereal. This not only enhances the texture but brings a hint of saltiness that contrasts beautifully with the sweetness.
When it comes to creativity, think beyond the bars! What about forming these mixtures into balls for a fantastic family-friendly treat?
These variations let you tailor your peanut butter dream bars to suit any occasion. Have fun experimenting and don’t hesitate to invite friends over for a taste test—who doesn’t want an excuse for a dessert party? If you’re looking for more inspiration or tips on ingredient substitutes, check out sites like Bon Appétit or Serious Eats. Happy baking!
Cooking Tips and Notes for Peanut Butter Dream Bars
Common Pitfalls and How to Avoid Them
When making peanut butter dream bars, there are some common pitfalls you might encounter. Here are a few tips to ensure your bars turn out perfectly every time:
-
Measure Ingredients Accurately: Baking is a science, so be precise with your measurements. Not using the right amount of peanut butter or sugar can drastically change the texture.
-
Room Temperature Ingredients: Ensure your eggs and butter are at room temperature. This ensures a creamier texture and better overall mixing.
-
Mixing Technique: Don’t overmix your batter. While thorough mixing is essential, it can lead to a tougher bar. Aim for a smooth consistency without overdoing it.
-
Chilling Time: Patience is key! Allow the bars to cool completely before cutting them. This gives them time to set properly, ensuring clean cuts.
For more tips, check out resources like the American Baking Society for expert advice. Happy baking!
Serving Suggestions for Peanut Butter Dream Bars
Perfect Pairings for These Sweet Treats
When it comes to enjoying Peanut Butter Dream Bars, the right accompaniment can elevate your experience. Here are some mouthwatering ideas to complement these delightful bars:
-
Fresh Fruit: Sliced bananas or juicy strawberries not only add a refreshing contrast but also balance the richness of peanut butter, making each bite even more satisfying.
-
Greek Yogurt: Swap out heavy desserts for a dollop of Greek yogurt. The creamy texture and tangy flavor provide a fantastic contrast to the Peanut Butter Dream Bars.
-
Nutty Trail Mix: For that added crunch, consider a sprinkle of nutty trail mix on the side. It’s the perfect crunchy companion to indulge in alongside the bars.
-
Herbal Tea: Instead of reaching for coffee, try a soothing cup of herbal tea. The warmth and subtle flavors will create a cozy pairing that enhances the overall enjoyment.
Think about mixing and matching these treats based on your mood! Balancing sweetness with freshness not only brings variety but also makes for a delightful snack or dessert that fits any occasion. Don’t forget to explore more serving ideas on culinary blogs like BBC Good Food or New York Times Cooking for inspiration.
Time Breakdown for Peanut Butter Dream Bars
Preparation Time
Making peanut butter dream bars is a breeze! You’ll need approximately 15 minutes to gather your ingredients and whip them together. It’s the perfect recipe for a weekday pick-me-up or a weekend treat.
Chilling Time
Once you’ve spread that luscious mixture into your pan, it’s crucial to let it chill. This allows the bars to set properly and enhances the flavors. Plan for about 2 hours in the refrigerator. Think of it as a little time to relax while your dessert comes together!
Total Time
All told, you’re looking at about 2 hours and 15 minutes from start to finish. Not too shabby for a dessert that’ll have everyone asking for seconds! For a little extra guidance, check out this article for tips on maximizing your chilling time. Your peanut butter dream bars are going to be a hit!
Nutritional Facts for Peanut Butter Dream Bars
Calories per serving
Each serving of peanut butter dream bars packs approximately 180 calories. This makes them a satisfying but indulgent treat for those moments when you need a little pick-me-up without overdoing it.
Important nutritional breakdown
Understanding the nutritional profile of these bars can help you make informed decisions. Here’s a quick breakdown per serving:
- Fat: 10g (primarily from peanut butter, offering healthy monounsaturated fats)
- Carbohydrates: 19g (includes 5g of fiber, aiding digestion)
- Protein: 5g (delivering a decent source of plant-based protein)
Including these bars in your diet can boost your energy levels, thanks to their blend of whole ingredients. If you’re interested in healthier snacking options, check out resources like the American Heart Association for more tips on incorporating nutritious snacks into your lifestyle. The balance of nutrients not only satisfies cravings but can also help fuel your busy day!
FAQs about Peanut Butter Dream Bars
What’s the best way to store Peanut Butter Dream Bars?
To keep your peanut butter dream bars fresh and delicious, storing them properly is essential. Ideally, you should place them in an airtight container. You can keep them at room temperature for up to a week, but if you want to extend their shelf life, refrigerate them. For even longer storage, consider freezing them. Just wrap them tightly in plastic wrap or foil before placing in a freezer-safe container. They can last up to three months in the freezer, and you can enjoy a sweet treat whenever the craving strikes!
How can I make these bars gluten-free?
Making peanut butter dream bars gluten-free is a breeze! You simply need to choose gluten-free alternatives for the ingredients that contain wheat. For the crust, replace traditional graham crackers with gluten-free graham crackers or even processed oats. When selecting peanut butter, always check for gluten-free labels. Additionally, be cautious with mix-ins like chocolate chips; opt for brands explicitly labeled as gluten-free to avoid any gluten cross-contamination.
Can I substitute natural peanut butter for creamy?
Absolutely! If you prefer using natural peanut butter instead of a creamy version, feel free to do so. Just keep in mind that the consistency may vary slightly, as natural peanut butter often contains no stabilizers and can be a little oilier. You might need to adjust the quantities to achieve your desired texture. For helpful insights on making this substitution, check out this resource on peanut butter varieties.
Crafting peanut butter dream bars can be simple and enjoyable, and with these tips, you can tweak the recipe to fit your lifestyle perfectly! If you have more questions or need further clarification, don’t hesitate to reach out. Happy baking!
Conclusion on Peanut Butter Dream Bars
Why You Need to Try This Delightful Dessert!
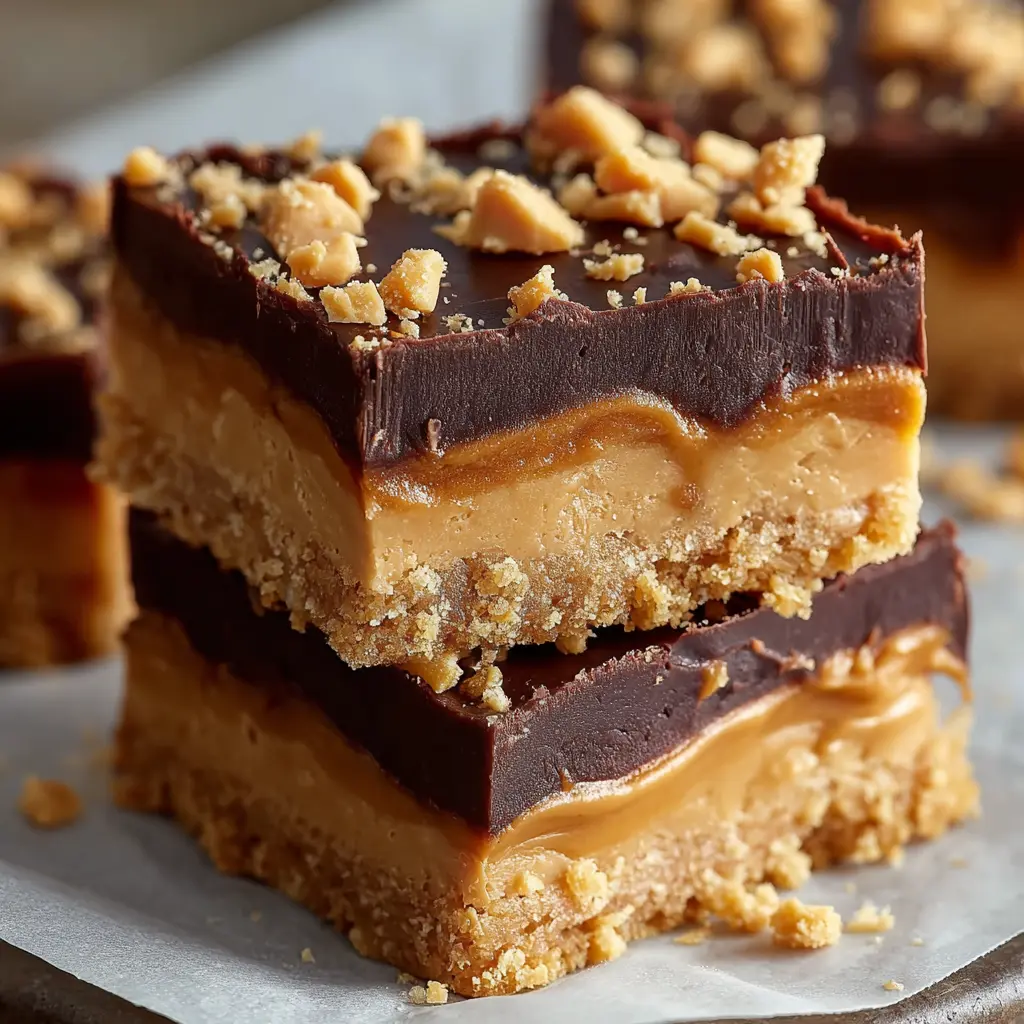
If you haven’t yet tasted peanut butter dream bars, you’re genuinely missing out! This irresistible dessert combines rich peanut butter with a buttery crust, creating a symphony of flavors that dance on your palate. Perfect for gatherings or a sweet indulgence at home, these bars are simple to make and even more satisfying to eat.
Imagine sharing these sweet creations with friends over coffee or enjoying a quiet moment with a cozy book. They’re not just a treat; they’re an experience!
For tips on perfecting your dessert skills, check out these resources from Serious Eats and Bon Appétit. So, gather your ingredients and treat yourself to some homemade joy with these peanut butter dream bars!
Print
Peanut Butter Dream Bars: The Indulgent Treat You’ll Love
- Total Time: 40 minutes
- Yield: 16 bars
- Diet: Vegetarian
Description
Experience the delightful blend of flavors with these Peanut Butter Dream Bars. Perfect for any occasion, they are sure to satisfy your sweet tooth!
Ingredients
- 1 cup peanut butter
- 1 cup brown sugar
- 2 cups rolled oats
- 1/2 cup honey
- 1 teaspoon vanilla extract
Instructions
- Preheat your oven to 350°F (175°C).
- In a large bowl, mix together the peanut butter and brown sugar until smooth.
- Add rolled oats, honey, and vanilla extract to the peanut butter mixture and stir until well combined.
- Spread the mixture into a greased baking pan.
- Bake for 25 minutes or until golden brown.
- Allow to cool before cutting into bars.
Notes
- For added flavor, consider adding chocolate chips or nuts.
- These bars can be enjoyed warm or chilled.
- Prep Time: 15 minutes
- Cook Time: 25 minutes
- Category: Dessert
- Method: Baking
- Cuisine: American
Nutrition
- Serving Size: 1 bar
- Calories: 200
- Sugar: 10g
- Sodium: 150mg
- Fat: 10g
- Saturated Fat: 2g
- Unsaturated Fat: 8g
- Trans Fat: 0g
- Carbohydrates: 25g
- Fiber: 3g
- Protein: 6g
- Cholesterol: 0mg
")