Introduction to Peanut Butter Butterfinger Pie
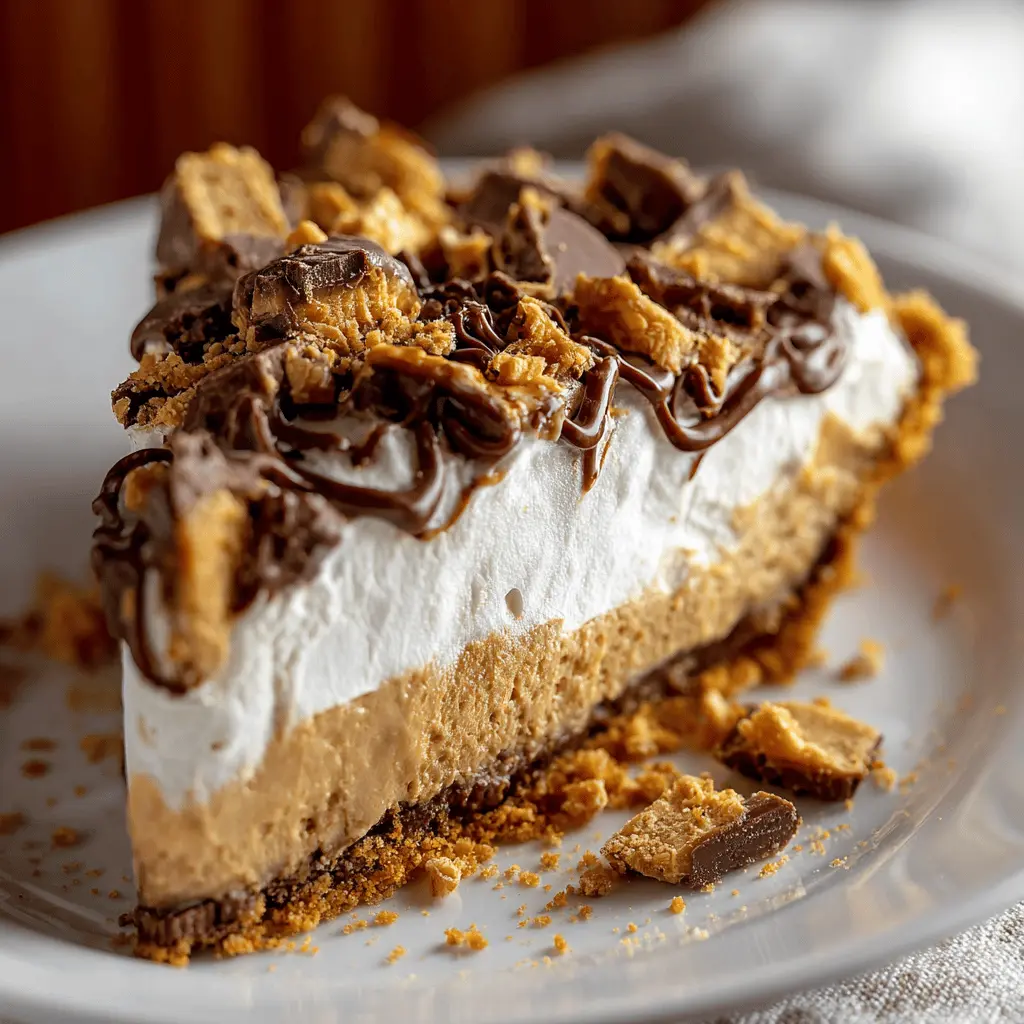
If you’re on the lookout for a dessert that strikes the perfect balance between creamy and crunchy, then peanut butter butterfinger pie is a must-try! This delightful treat captures the rich, nutty essence of creamy peanut butter combined with the sweet, crunchy goodness of Butterfinger candies. Imagine a velvety peanut butter filling nestled in a buttery graham cracker crust, topped with a generous drizzle of chocolate sauce and a scattering of crushed Butterfinger bars. It’s a dessert that not only satisfies your sweet tooth but also gives you that nostalgic kick.
Why Peanut Butter Butterfinger Pie is a must-try dessert
-
Textures Galore: The magic of peanut butter butterfinger pie lies in its textures. The creamy filling contrasts beautifully with the crunchy pie crust and the crispy Butterfinger bits. This interplay of textures keeps every bite interesting and satisfying.
-
Effortless to Make: Unlike many desserts that require hours of labor, this pie comes together relatively quickly, making it perfect for young professionals who have a busy lifestyle. Most of the ingredients are easy to find and don’t require extensive prep work. You can whip it up in about 30 minutes and let it chill before serving.
-
Impressive without the Stress: Hosting a gathering and don’t know what to bring? Peanut butter butterfinger pie is your ticket to impressing friends without breaking a sweat. Its visual appeal and rich flavors will have everyone asking for seconds—and the recipe!
-
Customizable: Want to add a twist? Try experimenting with different crusts, like an Oreo or almond flour base. Or, for an extra kick, mix in a swirl of caramel or chocolate fudge in the filling!
-
Crowd-Pleaser: This dessert is not only delicious; it often sparks fond memories of childhood candy ads and Saturday matinees. Bringing it to a potluck or family gathering is guaranteed to start some sweet conversations about everyone’s favorite snacks!
So, are you ready to make this dreamy dessert part of your baking repertoire? Check out more tips and tricks for perfecting your pie on renowned food blogs, like Serious Eats or Bon Appétit, to get inspired!
Ingredients for Peanut Butter Butterfinger Pie
Creating a delicious Peanut Butter Butterfinger Pie is the perfect way to treat yourself and impress friends. Here’s what you’ll need to whip up this delightful dessert:
- 1 pre-made graham cracker crust: This saves time and gives a great base flavor.
- 1 cup creamy peanut butter: Opt for natural peanut butter for a wholesome touch.
- 8 oz cream cheese: Softened, which will create a smooth filling.
- 1 cup powdered sugar: For that perfect sweetness without graininess.
- 1 cup whipped topping: This lightens the filling, making it airy and delicious.
- 1 cup chopped Butterfinger bars: Bring on the crunch! This is what makes your pie irresistible.
- Chocolate syrup: A drizzle on top adds the finishing touch—who doesn’t love a chocolatey drizzle?
- Chopped peanuts (optional): For garnishing and an extra crunchy bite.
Ready to dive into baking? Check out this guide for more tips on pie-making. Let’s make dessert magic happen!
Preparing Peanut Butter Butterfinger Pie
Making a Peanut Butter Butterfinger Pie isn’t just a kitchen task; it’s an adventure in confectionery delight! This no-bake dessert is perfect for gatherings, movie nights, or even just a treat for yourself. Let’s dive into the delightful steps of how to prepare this scrumptious pie!
Gather Your Ingredients
Before you get your hands messy, let’s get organized. Here’s what you’ll need:
- 8 oz cream cheese, softened
- 1 cup creamy peanut butter (feel free to use crunchy for extra texture)
- 1 cup powdered sugar
- 8 oz whipped topping (thawed)
- 4-5 Butterfinger bars, crushed
- 1 Graham cracker pie crust (store-bought or homemade)
Having everything on hand not only streamlines the process but also sparks excitement. If you’re curious about homemade pie crusts, check out this delicious graham cracker crust recipe that’s sure to take your pie to the next level!
Beat the Cream Cheese to Perfection
Start by grabbing your mixing bowl and an electric mixer. Add the softened cream cheese and beat it on medium speed until it’s beautifully smooth. This process is crucial; you want to make sure there are no lumps because nobody wants a chunky pie filling! As you beat, you can start daydreaming about that delightful peanut butter flavor waiting for you.
Mix in the Peanut Butter and Sugar
Next up, it’s time to elevate your cream cheese with the addition of peanut butter and powdered sugar. Add one cup of creamy peanut butter, followed by one cup of powdered sugar. Mix on low to prevent that sugar cloud from engulfing your kitchen! This step perfectly balances the creaminess with sweetness, preparing for the star of the show—the Butterfinger crunch.
Fold in the Whipped Topping
Once your mixture is smooth and delicious, gently fold in the whipped topping with a spatula. This step adds an airy lightness to your filling, giving it that melt-in-your-mouth texture. Remember, the key here is to be gentle to maintain that fluffiness. If you’re wondering about the nutritional benefits of incorporating whipped toppings, take a look at this nutrition guide to help you appreciate your dessert a little more!
Add the Butterfinger Crunch
Now, the moment we’ve been waiting for—adding the crushed Butterfinger bars! Fold these into the mixture like you’re creating a treasure map; each piece of Butterfinger ensures a burst of flavor with every bite. Biting into the combination of that silky peanut butter and the crunchy candy is truly something special. Feel free to reserve some crumbs for topping your pie later!
Assemble the Pie in the Crust
With your filling ready, grab your Graham cracker crust. Pour in the peanut butter filling and spread it evenly. It’s okay to lick the spoon—this is your dessert after all! Once the filling is in, you can sprinkle the reserved Butterfinger crumbs on top to give your pie a finished look.
Refrigerate Until Set
Finally, cover your pie with plastic wrap and place it in the refrigerator for at least 4 hours, or overnight if you’re feeling patient. This cooling time allows the pie to set so that each slice holds its shape. It’s often during this waiting period that the anticipation builds—think of the delight your friends will have once they take their first bite!
To serve, pair this delicious peanut butter Butterfinger pie with a small dollop of additional whipped topping. Enjoy the praises coming your way—you’ve earned it! And if you’re looking for beverage pairings, I recommend a nice cold glass of milk or a creamy vanilla smoothie to complement your dessert perfectly.
What’s your favorite pie to whip up? Happy baking!
Variations on Peanut Butter Butterfinger Pie
Exploring variations of peanut butter butterfinger pie can make your dessert table even more exciting. Here’s how you can add some creative twists to this classic treat.
Chocolate Peanut Butter Butterfinger Pie
For chocolate lovers, this version takes your beloved peanut butter butterfinger pie to new heights. Simply add a layer of chocolate ganache beneath your peanut butter filling. To whip up the ganache, melt dark chocolate and heavy cream together until smooth. Once your pie is assembled, drizzle some extra chocolate on top and sprinkle with crushed Butterfinger bar pieces for that perfect crunch. It’s chocolate overload, and we’re here for it!
No-Bake Peanut Butter Butterfinger Pie
Short on time or want to avoid turning on the oven? Try making a no-bake peanut butter butterfinger pie. Use a pre-made graham cracker crust to simplify your process. Blend cream cheese, peanut butter, and powdered sugar until creamy, then fold in whipped topping. Pour the mixture into the crust and refrigerate for several hours. The end result is a dreamy, chilled pie that’s perfect for hot summer days.
Vegan Peanut Butter Butterfinger Pie
For those following a vegan lifestyle, enjoying the deliciousness of peanut butter butterfinger pie is still possible! Swap the cream cheese for cashew cream or silken tofu blended with peanut butter and maple syrup. Use a date and nut crust instead of traditional pie crust. Not only does it taste amazing, but it’s also a healthier alternative that your guests will love. Learn more about vegan desserts here.
These variations on peanut butter butterfinger pie ensure you can cater to any dietary preference or special occasion. So get creative, and don’t hesitate to put your unique spin on this delightful dessert!
Cooking Tips and Notes for Peanut Butter Butterfinger Pie
Creating the perfect Peanut Butter Butterfinger Pie is all about balance and flavor. Here are some helpful tips to ensure your pie turns out scrumptious every time!
Use Quality Ingredients
- Opt for high-quality peanut butter; it can elevate your pie from good to amazing. Natural brands without added sugar work wonders!
- When selecting Butterfinger candy bars, go for fresh ones for that crunchy texture. Check expiration dates to avoid any stale surprises.
Keep It Cool
- Chill your pie for at least 4 hours before serving. This not only helps it set beautifully but also enhances the flavors.
- If you’re short on time, using a store-bought crust can save you some effort, but homemade is always a plus for flavor!
Creative Variations
- Try adding a layer of chocolate ganache on top for an extra indulgent touch. Just melt chocolate chips with a splash of milk, cool slightly, and pour over the pie.
- For a nutty twist, sprinkle chopped peanuts or your favorite nuts on top before serving.
These small tweaks can significantly impact your peanut butter butterfinger pie. Happy baking! For more insights on baking tips, check out resources at The Spruce Eats or Food Network.

Serving suggestions for Peanut Butter Butterfinger Pie
How to serve the pie elegantly
When hosting a gathering, an elegant presentation can take your peanut butter butterfinger pie to the next level. Start by slicing the pie into clean wedges and serving each piece on a chic dessert plate. A drizzle of chocolate sauce and a dollop of whipped cream on the side can elevate the look while adding extra flavor. Garnish with crushed Butterfinger candies for that delightful crunch. For a finishing touch, consider adding a sprig of mint. This not only enhances the visual appeal but also adds a refreshing aroma.
Pairing ideas for the perfect dessert experience
To truly enjoy the scrumptiousness of your peanut butter butterfinger pie, pair it with complementary flavors:
- Fresh Berries: Strawberries or raspberries bring a tartness that contrasts beautifully with the rich, nutty pie.
- Coffee or Herbal Tea: A robust coffee or a soothing herbal tea can enhance the flavors and round out your dessert experience.
- Ice Cream: Vanilla or chocolate ice cream adds a creamy texture that balances the pie’s richness.
Explore more about dessert pairings at websites like Epicurious for fun insights and expert recommendations. Your guests will surely appreciate the thought you put into their dessert experience!
Time Breakdown for Peanut Butter Butterfinger Pie
Preparation Time
Making your peanut butter butterfinger pie starts with a quick and enjoyable 15 minutes of prep. This is when you’ll gather your ingredients and mix everything together—easy enough for a weeknight treat!
Chilling Time
Once your pie is assembled, it’s time for it to chill. Let it relax in the fridge for about 4 hours, or ideally overnight. This helps the flavors meld perfectly and gives the pie that creamy texture we all love.
Total Time
In total, you’re looking at about 4 hours and 15 minutes from start to finish, most of which is hands-off chilling time. So, set it and forget it for a little while! Perfect for entertaining or treating yourself after a long day at work. Want more ideas for delicious desserts? Check out this guide on quick desserts for some inspiration!
Nutritional Facts for Peanut Butter Butterfinger Pie
When it comes to indulging in a delicious dessert like a peanut butter butterfinger pie, understanding its nutritional profile can empower you to make informed choices. Here’s a quick breakdown:
Calories
A slice of this rich pie typically contains around 350–400 calories. While it’s not exactly a light snack, the peanut butter base provides a satisfying burst of flavor.
Fat
You’ll find that one serving packs about 25 grams of fat, with a combination of both healthy fats from the peanut butter and some from cream cheese and the crust. Remember, not all fats are created equal!
Sugar
With approximately 20 grams of sugar per slice, it’s definitely a sweet treat. If you’re watching your sugar intake, enjoy it in moderation, or consider pairing it with a light beverage to balance out the sweetness.
For more detailed insights, check out reputable sources like the USDA or NutritionData. Knowing what’s in your food can make all the difference, especially when you’re treating yourself to something as delightful as a peanut butter butterfinger pie.
FAQs about Peanut Butter Butterfinger Pie
Can I use natural peanut butter for this recipe?
Absolutely! You can use natural peanut butter in your Peanut Butter Butterfinger Pie. Just keep in mind that natural peanut butter tends to be a bit runnier than its processed counterpart, which may affect the overall texture of your pie. If you do decide to use it, consider chilling the pie a bit longer to help it set properly.
How do I store leftovers?
Storing leftovers is quite straightforward. Place any remaining slices of your Peanut Butter Butterfinger Pie in an airtight container or wrap them tightly with plastic wrap. You can keep it in the refrigerator for up to five days. If you want to extend its life even further, you can freeze slices by wrapping them individually in foil and placing them in a freezer-safe bag. Just remember to let it thaw in the fridge before you dive in again—trust me, the wait is worth it!
Can I substitute the whipped topping?
If you’re looking for an alternative to whipped topping, you can definitely experiment! Homemade whipped cream is a great option, adding a fresh flavor. You could also try Greek yogurt for a healthier twist—just sweeten it to your liking. Depending on your choice, the texture may vary slightly, but the delicious flavor of the pie will still shine through!
Feel free to check out additional tips on pie variations on sites like Food Network or Taste of Home. Enjoy baking and indulging in this delightful treat!
Conclusion on Peanut Butter Butterfinger Pie
As you wrap up your culinary adventure with this delectable peanut butter butterfinger pie, remember that it’s more than just a dessert; it’s a celebration of flavors. The creamy peanut butter blends beautifully with the crunch of Butterfinger pieces, creating a treat that’s perfect for any occasion.
Sharing the Joy
Sharing this pie is a fantastic way to bring friends and family together. Whether you’re hosting a casual dinner or celebrating a special moment, it’s sure to impress. When you serve it, consider pairing it with a scoop of vanilla ice cream or a drizzle of chocolate sauce for that extra touch.
Lasting Impressions
Don’t forget to share your pie-making experience online! Tagging your creations on social media not only lets others admire your skills but also makes for a great conversation starter. If you’re interested in learning more about desserts, check out resources like the Food Network or Serious Eats for inspiration.
In essence, peanut butter butterfinger pie is more than just a dessert—it’s a delicious way to bring friends and family closer. Enjoy every slice!
Print
Peanut Butter Butterfinger Pie: The Best Indulgent Treat Ever
- Total Time: 4 hours 20 minutes
- Yield: 8 servings
Description
A deliciously rich and creamy dessert that combines the flavors of peanut butter and Butterfinger candy bars for a decadent treat.
Ingredients
- 1 pre-made graham cracker crust
- 1 cup creamy peanut butter
- 1 cup powdered sugar
- 8 oz cream cheese, softened
- 1 cup whipped topping
- 6 Butterfinger candy bars, crushed
- 1/2 cup chocolate syrup
Instructions
- In a mixing bowl, combine the creamy peanut butter, powdered sugar, and softened cream cheese.
- Mix until smooth and creamy, then fold in the whipped topping and half of the crushed Butterfinger bars.
- Pour the mixture into the graham cracker crust and spread evenly.
- Drizzle chocolate syrup over the top and sprinkle the remaining crushed Butterfinger bars.
- Chill in the refrigerator for at least 4 hours before serving.
Notes
- For an extra touch, you can add additional whipped topping on the top before serving.
- Make sure to use room temperature cream cheese for easy mixing.
- Prep Time: 20 minutes
- Cook Time: 0 minutes
Nutrition
- Serving Size: 1 slice
- Calories: 350
- Sugar: 25g
- Sodium: 150mg
- Fat: 24g
- Saturated Fat: 10g
- Unsaturated Fat: 12g
- Trans Fat: 0g
- Carbohydrates: 30g
- Fiber: 1g
- Protein: 6g
- Cholesterol: 30mg
")