Introduction to No-Bake Cannoli Pie
If you’re seeking a delightful dessert that combines the classic flavors of traditional Italian cannoli without the hassle of baking, you’re in for a treat! This no-bake cannoli pie is the perfect solution for those busy weekdays when you want something sweet but don’t want to spend hours in the kitchen.
Why No-Bake Desserts Are Perfect for Young Professionals
Let’s face it: balancing work, social life, and personal time can feel overwhelming, especially for young professionals. Between deadlines and social commitments, finding time to whip up an elaborate dessert often falls to the bottom of the priority list. That’s where no-bake desserts come in! Here are a few reasons why this style of dessert is ideal for our fast-paced lives:
-
Time-Saving: No-bake recipes drastically cut down on prep and cooking time. Imagine coming home after a long day, mixing a few ingredients, and letting them chill while you unwind. With a no-bake cannoli pie, it’s that simple!
-
Minimal Equipment: No oven means fewer dirty dishes. This can be a game-changer when you’re not keen on spending your precious downtime scrubbing pots and pans.
-
Versatility: No-bake desserts can be customized easily. Whether you want to add chocolate chips, fruity twists, or even make it dairy-free, this pie can adapt to your tastes and dietary considerations.
-
Impressive Results: Despite being simple, no-bake desserts can yield impressive results that are sure to wow friends and family. You only need to present your no-bake cannoli pie, topped with fresh fruit or whipped cream, to gain compliments and requests for the recipe!
This type of dessert isn’t just limited to casual gatherings; it’s perfect for work potlucks or weekend brunches. If you’re eager to elevate your culinary skills without the commitment of a full bake, check out more ideas at AllRecipes and Food Network.
With that in mind, let’s dive into the delicious details of crafting your very own no-bake cannoli pie with chocolate chips!
Ingredients for No-Bake Cannoli Pie
List of Ingredients
Creating a delicious no-bake cannoli pie is simple when you have the right ingredients. Here’s what you’ll need:
-
Crust:
-
1 ½ cups of crushed graham crackers
-
⅓ cup of melted butter
-
Filling:
-
2 cups of ricotta cheese
-
1 cup of mascarpone cheese
-
⅔ cup of powdered sugar
-
1 tsp of vanilla extract
-
½ cup of mini chocolate chips
-
Zest of 1 orange (optional, but highly recommended!)
-
Topping:
-
Additional mini chocolate chips for garnish
-
Whipped cream (homemade or store-bought)
Importance of Freshness in Ingredients
When making this no-bake cannoli pie, freshness in your ingredients is key to achieving that authentic taste. For instance, using fresh ricotta cheese makes a world of difference in flavor and creaminess. Similarly, opt for high-quality chocolate chips to elevate your dessert. Did you know that fresh ingredients not only enhance the flavor but can also impact the texture of your pie? Avoid refrigerating your ingredients too long; this can compromise their quality. If you’re looking for more tips on using fresh ingredients, check out The Kitchn.
Using quality ingredients ensures your .no-bake cannoli pie not only looks tempting but also leaves a lasting impression on your guests. Trust me; it’s worth investing a little extra time in this step!
Step-by-Step Preparation for No-Bake Cannoli Pie
Creating a delightful no-bake cannoli pie might seem like a lofty task, but once you break it down step-by-step, you’ll find that it’s quite manageable. Perfect for a gathering or just a weekend treat, this recipe offers a taste of Italy without the oven. Let’s dive into the preparation process!
Gather Your Ingredients
Before you start mixing and folding, make sure you have all your ingredients at hand. For a classic no-bake cannoli pie, here’s what you’ll need:
- 1 ½ cups ricotta cheese
- 1 cup powdered sugar
- 1 teaspoon vanilla extract
- 1 cup heavy whipping cream
- ½ cup mini chocolate chips
- 1 pre-made graham cracker or Oreo pie crust
- Optional toppings: chopped nuts, extra chocolate chips
Having everything ready before you start means you can keep your focus on making this pie delicious. This pie is so easy to make; you’ll wonder why you haven’t whipped one up before!
Prepare the Ricotta Mixture
Start by putting your ricotta cheese, powdered sugar, and vanilla extract into a large mixing bowl. It helps to use a high-quality ricotta for the best flavor and texture, so consider checking out this expert guide on ricotta. Using a spatula or a hand mixer, blend these ingredients until smooth and well incorporated. It should have a creamy consistency that will serve as the base for your filling.
Whip the Cream to Perfection
While the ricotta mixture is settling, it’s time to whip the cream! Grab your chilled bowl and beat the heavy whipping cream with an electric mixer until stiff peaks form. This will typically take about 3–5 minutes. The texture is key here; you want it light and airy to ensure your pie has the perfect fluffy consistency. Remember, don’t be tempted to overwhip, or you’ll end up with something more akin to butter!
Fold and Combine Gently
Now it’s time to bring the two mixtures together to form your filling. Gently fold the whipped cream into the ricotta mixture. Use a rubber spatula and a soft folding motion to preserve the airiness of the whipped cream. After you achieve a uniform mixture, sprinkle in half of those delectable mini chocolate chips. Yes, please! This step ensures the chocolate is distributed throughout, giving every bite a sweet surprise.
Fill the Pie Crust
With your mixture ready, it’s time to fill your pie crust! Spoon the filling into the pre-made graham cracker or Oreo crust, spreading it out evenly. If you’re feeling adventurous, you can add an extra layer of chocolate chips on top of the filling before refrigerating. This little touch adds a nice pop of flavor and texture.
Chill the Pie Until Set
Patience is key here! Cover your no-bake cannoli pie with plastic wrap or a lid and place it in the refrigerator. Ideally, you’ll want it to chill for at least 4 hours, or even overnight if you can resist the temptation. The chilling allows the flavors to meld beautifully while firming up the filling.
Once set, you can garnish the top with some chocolate chips, nuts, or even a drizzle of melted chocolate for an impressive presentation.
With these clear, straightforward steps, you’ll end up with an irresistible no-bake cannoli pie that’s perfect for any occasion. So pull on that apron and get ready to impress your friends (or yourself!) with this delectable dessert. Happy baking (or should I say* no-baking*)!
Variations on No-Bake Cannoli Pie
The no-bake cannoli pie is a delightful treat that lends itself to endless variations, allowing you to customize it based on your mood or the season. Let’s dive into a couple of enticing twists that can take your dessert to the next level.
Chocolate-Dipped Version
For an indulgent experience, consider making a chocolate-dipped version of your no-bake cannoli pie. Start by melting some dark chocolate (or your favorite type) and drizzle it over the pie after it’s set. You can also add a layer of chocolate ganache between the pie crust and the ricotta filling for a creamy richness that balances beautifully with the sweetness of the filling. The contrast of the chocolate with the creamy filling is simply heavenly!
- Use high-quality chocolate for the best flavor.
- Top with extra mini chocolate chips or chocolate shavings to make it even more appealing.
This variation is perfect for those moments when you’re craving that extra chocolatey goodness!
Fruity Twist with Fresh Berries
If you’re looking for a lighter option, try incorporating fresh berries into your no-bake cannoli pie. Strawberries, blueberries, or raspberries can elevate your dessert with bright flavors and a refreshing touch. Just fold the berries into the ricotta mixture or scatter them on top, along with a dusting of powdered sugar.
- Seasonal fruit adds a lovely natural sweetness that complements the creamy filling.
- Serve with a side of berry compote for an extra flavor boost.
This fruity twist not only looks stunning but also provides a lighter finish to your meal. The vibrant colors make it a show-stopper at any gathering!
Whether you prefer a rich chocolate treat or a fresh berry delight, these variations can enhance your no-bake cannoli pie experience, making it truly your own. If you’re interested in more culinary inspiration, check out sites like Serious Eats for innovative dessert recipes.
Cooking Tips and Notes for No-Bake Cannoli Pie
Tips for Achieving the Perfect Whipped Cream
To create a luscious topping for your no-bake cannoli pie, start with chilled equipment. Place your mixing bowl and beaters in the freezer for about 10 minutes before whipping; this helps the cream hold its shape better. Use heavy whipping cream for a rich texture and gradually add powdered sugar to sweeten it up while you whip. Don’t overbeat, as this can turn your cream into butter!
Avoiding a Soggy Crust
A soggy crust can dampen your pie experience. To prevent this, consider pre-baking the crust or using a store-bought option that’s sturdier. If you use melted butter in the crust, ensure it’s evenly mixed to coat every crumb. Also, refrigerate the crust for at least 30 minutes before adding your no-bake cannoli filling. This step solidifies the butter and helps it set, leaving you with a delightful crunch when you take that first bite.
For more baking tips, check out resources like King Arthur Baking.
Serving Suggestions for No-Bake Cannoli Pie
Garnishing Options
When it comes to presenting your no-bake cannoli pie, a little garnish goes a long way to elevate its charm. Here are some delightful ideas:
- Fresh Berries: Top each slice with a handful of mixed berries for a burst of color and fresh flavor. Raspberries, strawberries, or blueberries are all excellent choices.
- Chopped Nuts: Sprinkle chopped pistachios or almonds around the pie for an added crunch. Just remember to toast them lightly for extra flavor.
- Chocolate Drizzle: A simple drizzle of melted chocolate over each slice not only adds elegance but also complements the chocolate chips in the filling beautifully.
Pairing Suggestions with Beverages
Finding the right beverage to accompany your no-bake cannoli pie can enhance this dessert experience. Consider serving it with:
- Herbal Tea: A soothing chamomile or mint tea contrasts the sweetness perfectly, making for a balanced dessert pairing.
- Iced Coffee: If you prefer a caffeinated option, an iced coffee with a splash of cream pairs well and adds a refreshing twist.
- Sparkling Water with Lemon: For something light, serve your pie with sparkling water infused with lemon. It’s refreshing and cleanses the palate after each bite.
These serving suggestions not only make your no-bake cannoli pie look inviting but also create an occasion out of dessert. Who wouldn’t be tempted to dive right in? Need more inspiration? Check out this article on dessert pairings for additional ideas!
Time Breakdown for No-Bake Cannoli Pie
When whipping up this delightful no-bake cannoli pie with chocolate chips, it’s handy to know the time commitment involved. Let’s dive into the time breakdown so you can plan accordingly for this sweet treat!
Preparation Time
You’ll need about 30 minutes to gather your ingredients and prepare the filling and crust. This quick prep time makes it perfect for weeknight desserts or last-minute gatherings.
Chilling Time
Once assembled, allow your no-bake cannoli pie to chill in the refrigerator for at least 4 hours. This step is crucial for the flavors to meld and for a slice that holds its shape. If you can wait overnight, even better!
Total Time
In total, you’re looking at roughly 4 hours and 30 minutes from start to finish. Think of it as the perfect excuse to kick back and relax while this masterpiece sets up. For more tips on achieving the best texture, check out resources from Taste of Home and Food Network. Enjoy your pie-making adventure!
Nutritional Facts for No-Bake Cannoli Pie
When you’re indulging in a slice of no-bake cannoli pie, it’s good to know what you’re enjoying. Here’s a quick look at the nutritional facts to help satisfy your curiosity.
Calories per Slice
Each slice of this delicious no-bake cannoli pie typically contains around 300 calories. This makes it a perfect dessert for those cozy evenings when you’re looking to treat yourself without overdoing it.
Breakdown of Macronutrients
- Carbohydrates: Approximately 35g
- Protein: Around 6g
- Fat: About 16g
Notably, much of the fat comes from the creamy filling, which includes ricotta and cream cheese. Pair this dessert with a fresh fruit salad or a warm cup of herbal tea for a balanced treat. For more tips on healthy eating and dessert options, check out sources like the Harvard T.H. Chan School of Public Health. Enjoying sweets in moderation is a great way to maintain a balanced diet!
FAQs about No-Bake Cannoli Pie
Can I make this pie in advance?
Absolutely! One of the great things about no-bake cannoli pie is that it benefits from some time in the fridge to let those flavors meld together. Feel free to prepare it up to 2 days in advance. Just remember to cover it tightly with plastic wrap or aluminum foil to keep it fresh.
What are some storage tips?
When it comes to storing your no-bake cannoli pie, keeping it airtight is key. Here are a few handy tips:
- Refrigerator: Store leftovers in the fridge for up to 4-5 days.
- Freezing: If you want to save some for later, slice it up and freeze individual pieces. Just wrap them in plastic wrap followed by foil to prevent freezer burn. Thaw in the fridge the night before you plan to serve it.
- Serving Tip: For the freshest taste, consider adding a sprinkle of mini chocolate chips or chopped pistachios right before serving. A little texture boost goes a long way!
How can I adjust the sweetness?
Not a fan of overly sweet desserts? You can easily tweak the sugar levels in your no-bake cannoli pie. Start by reducing the powdered sugar gradually until you reach your desired sweetness. You might also experiment with natural sweeteners like honey or maple syrup. Just note that this may slightly change the consistency, so adjust the mascarpone ratio accordingly.
For more on balancing sweetness in desserts, check out this article from the Food Institute. Happy baking!
Conclusion on No-Bake Cannoli Pie
Summary of the Delicious Experience
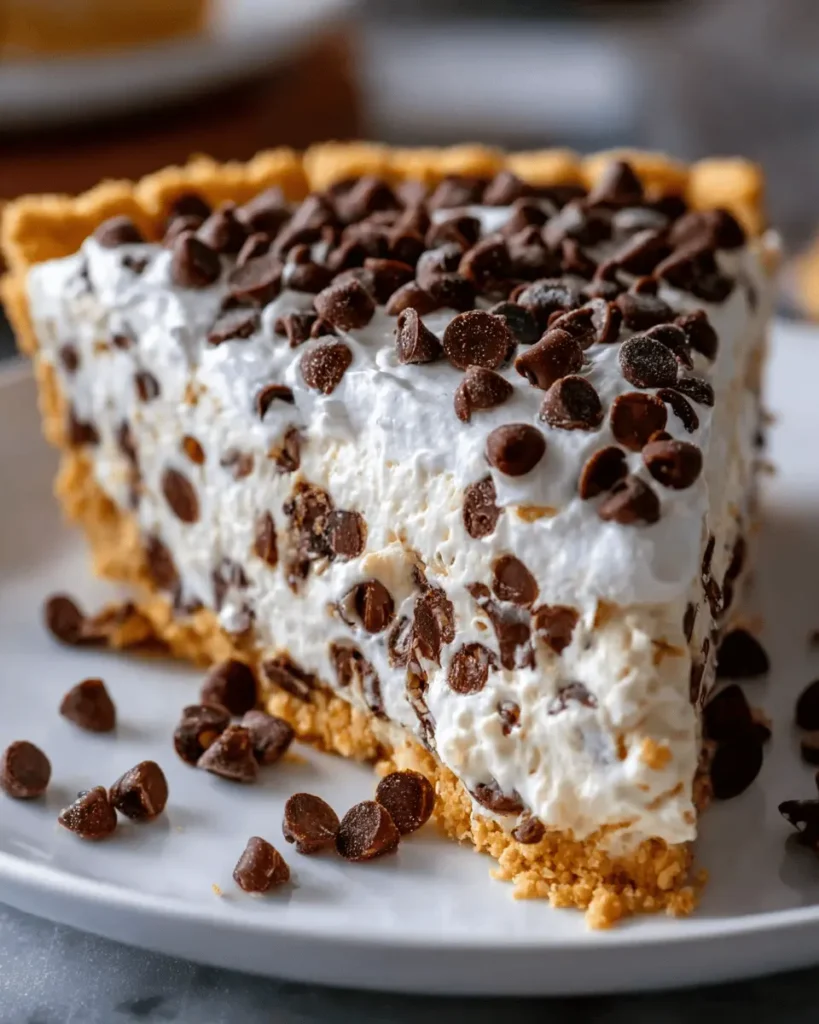
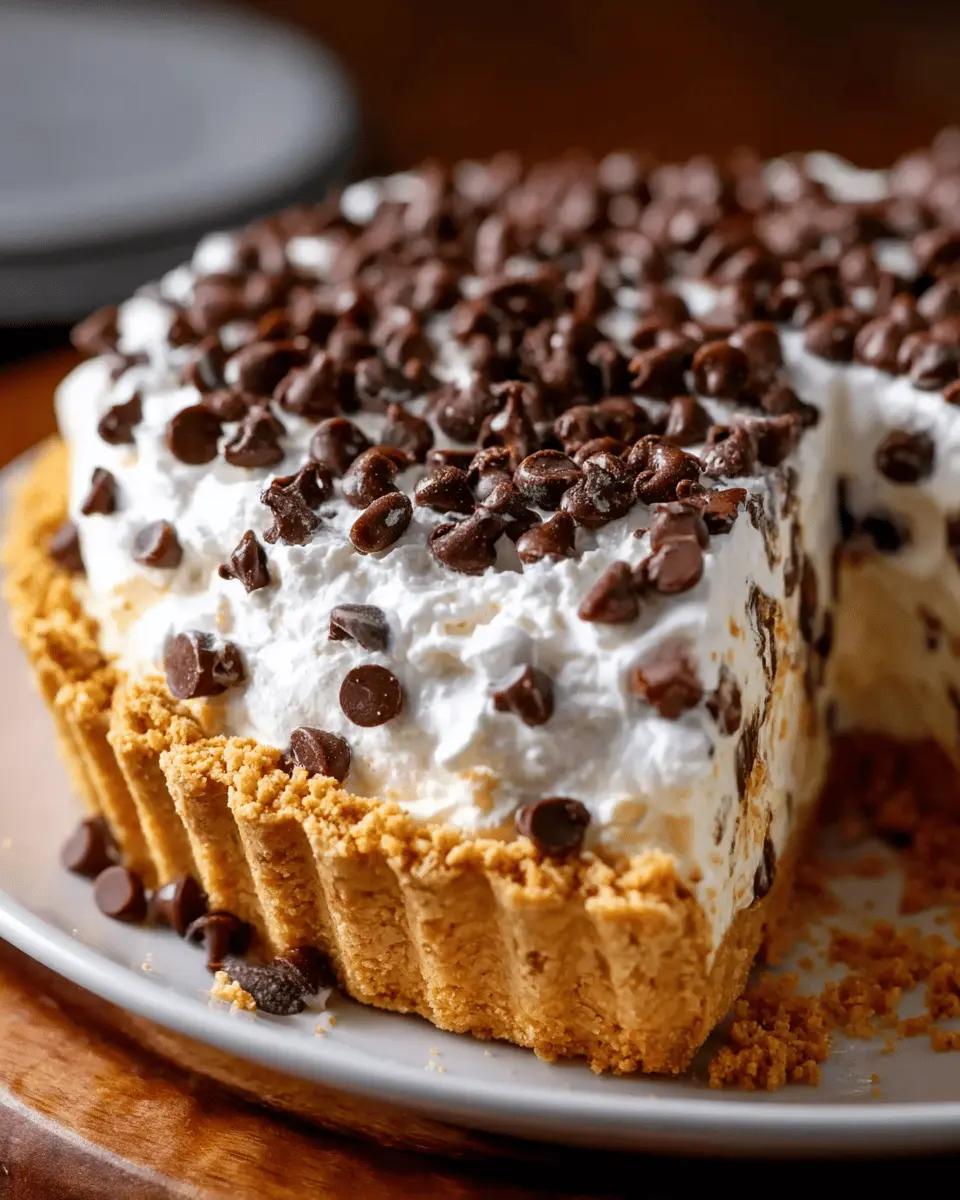
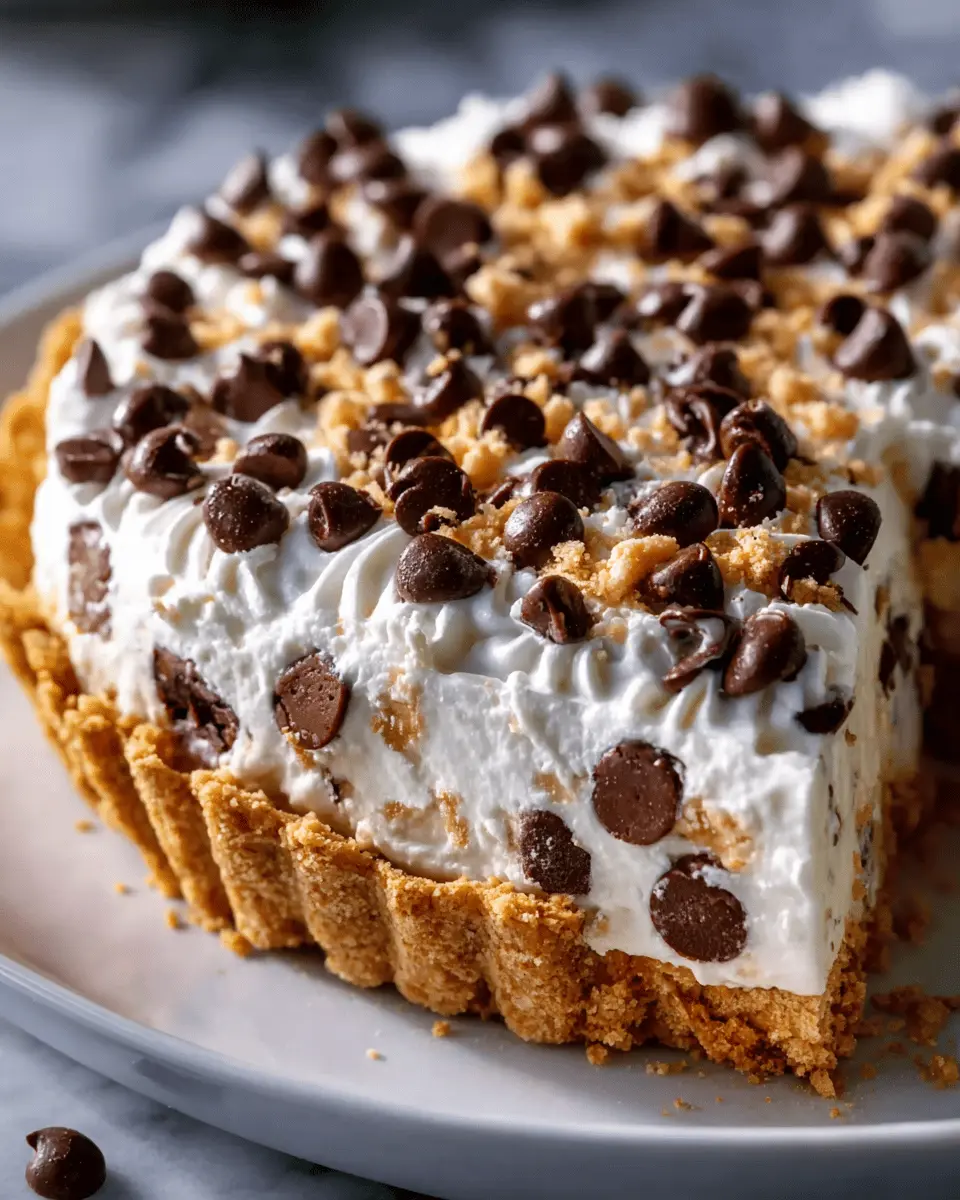
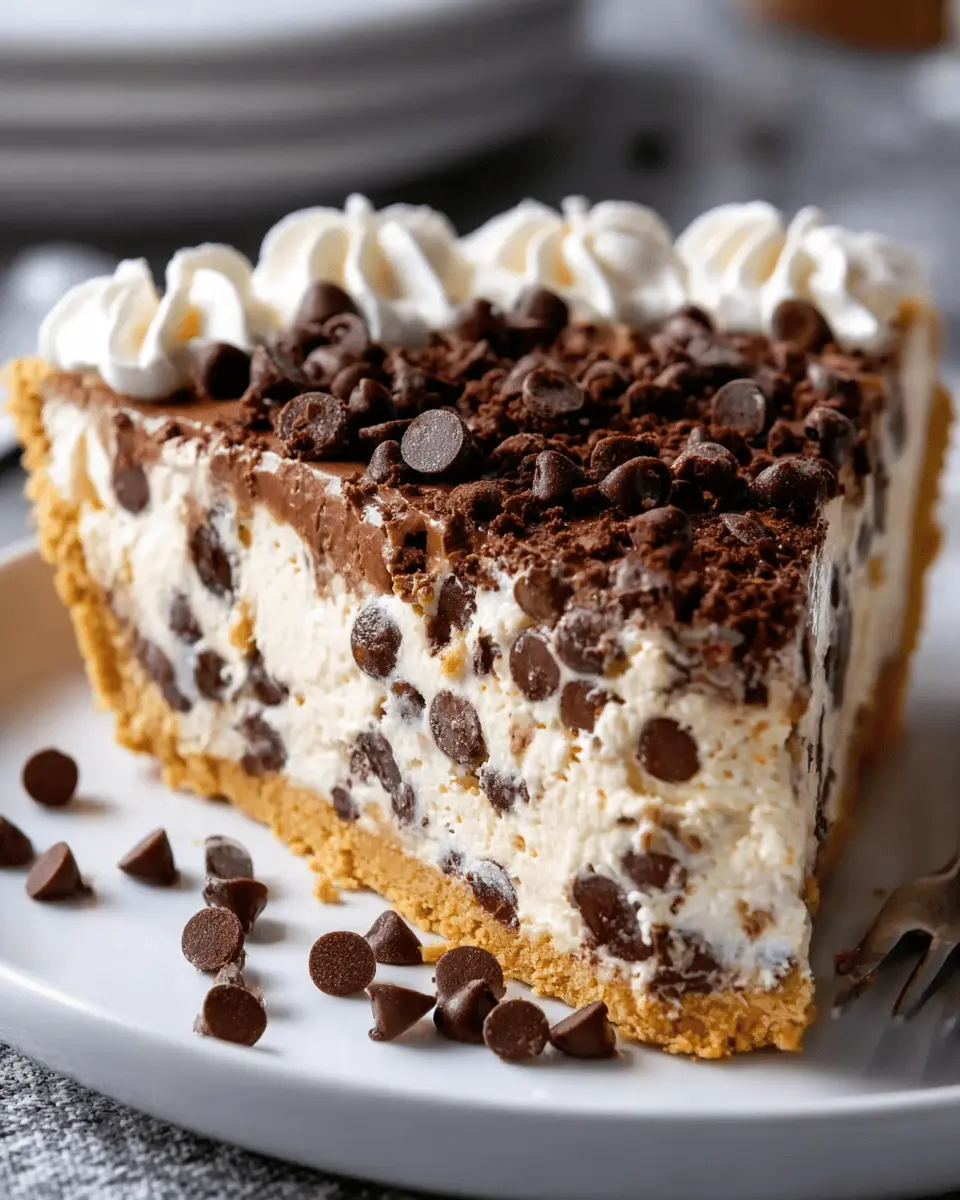
Indulging in a no-bake cannoli pie is like biting into a slice of Italy right at home. The creamy filling, studded with chocolate chips, perfectly complements the crunchy crust, creating a harmonious balance of textures and flavors. Plus, the no-bake aspect means this dessert is as easy to prepare as it is delightful to eat—perfect for busy young professionals looking to impress their guests without spending hours in the kitchen.
As you take that first bite, you might just find yourself dreaming of sun-soaked Italian summers. Whether enjoyed at a gathering or as a personal treat, this dessert never fails to deliver joy. Ready to take your dessert game to the next level? Try out this no-bake cannoli pie and let each bite whisk you away to flavor paradise! For more dessert ideas, check out Serious Eats for inspiration.
Print
No-Bake Cannoli Pie with Chocolate Chips: An Easy Indulgence
- Total Time: 4 hours 20 minutes
- Yield: 8 servings
- Diet: Vegetarian
Description
This No-Bake Cannoli Pie with Chocolate Chips is a delightful dessert that is both easy to make and indulgent.
Ingredients
- 1 pie crust (graham cracker or pastry)
- 15 ounces ricotta cheese
- 1 cup powdered sugar
- 1 teaspoon vanilla extract
- 1 cup mini chocolate chips
- 1 cup heavy cream
- 1 teaspoon cinnamon
Instructions
- In a medium bowl, mix the ricotta cheese, powdered sugar, and vanilla extract until smooth.
- Fold in the mini chocolate chips and cinnamon.
- In another bowl, whip the heavy cream until stiff peaks form.
- Gently fold the whipped cream into the ricotta mixture.
- Pour the filling into the pie crust and smooth the top.
- Refrigerate for at least 4 hours or until set.
- Slice and serve chilled.
Notes
- For added flavor, you can mix in extra chocolate chips or nuts.
- Prep Time: 20 minutes
- Category: Dessert
- Method: No-Bake
- Cuisine: Italian
Nutrition
- Serving Size: 1 slice
- Calories: 250
- Sugar: 20g
- Sodium: 150mg
- Fat: 15g
- Saturated Fat: 9g
- Unsaturated Fat: 4g
- Trans Fat: 0g
- Carbohydrates: 25g
- Fiber: 1g
- Protein: 5g
- Cholesterol: 30mg
")