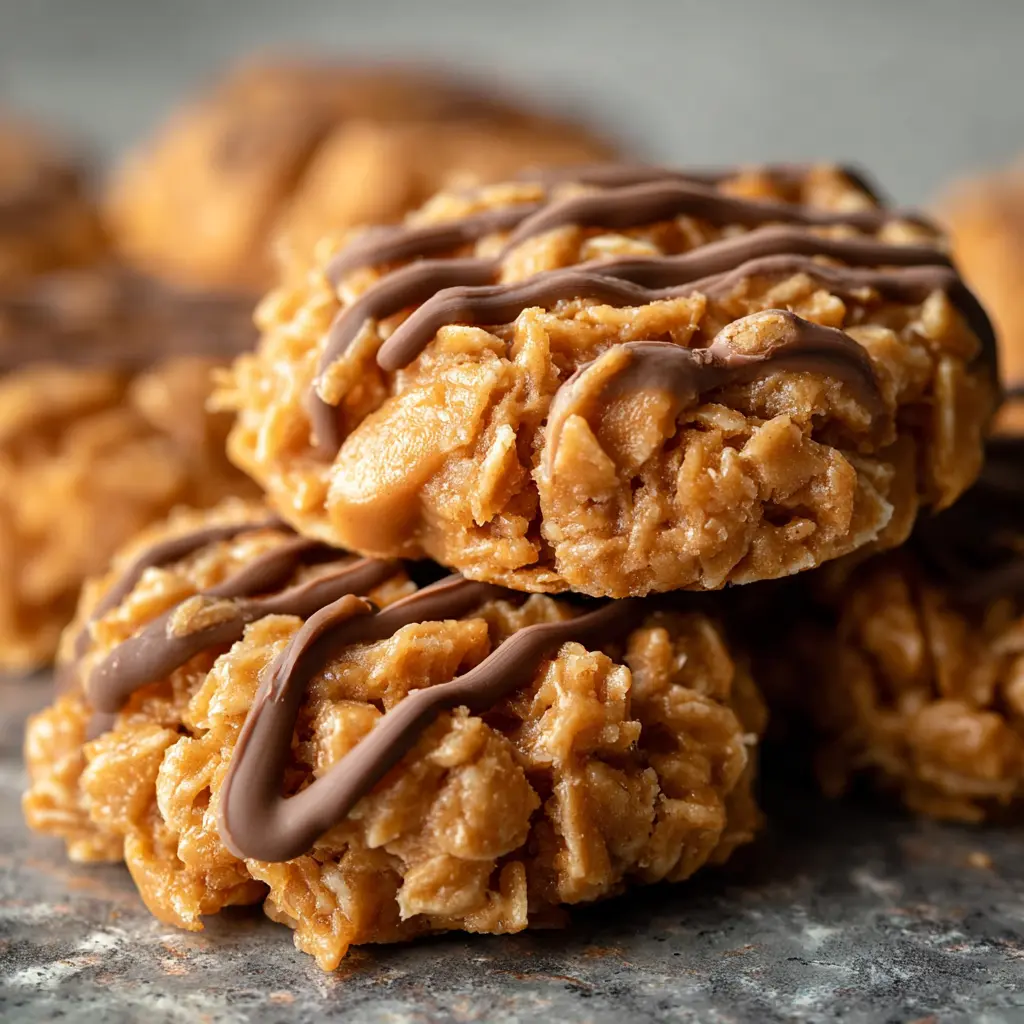
If you’re looking for a cookie that checks all the boxes—easy, quick, sweet, crunchy, and totally addictive—you’re in the right place. These No-Bake Avalanche Cookies are the kind of treat you make once and suddenly they become the go-to for every bake sale, holiday tray, or late-night snack craving. The best part? You don’t even need to turn on your oven.
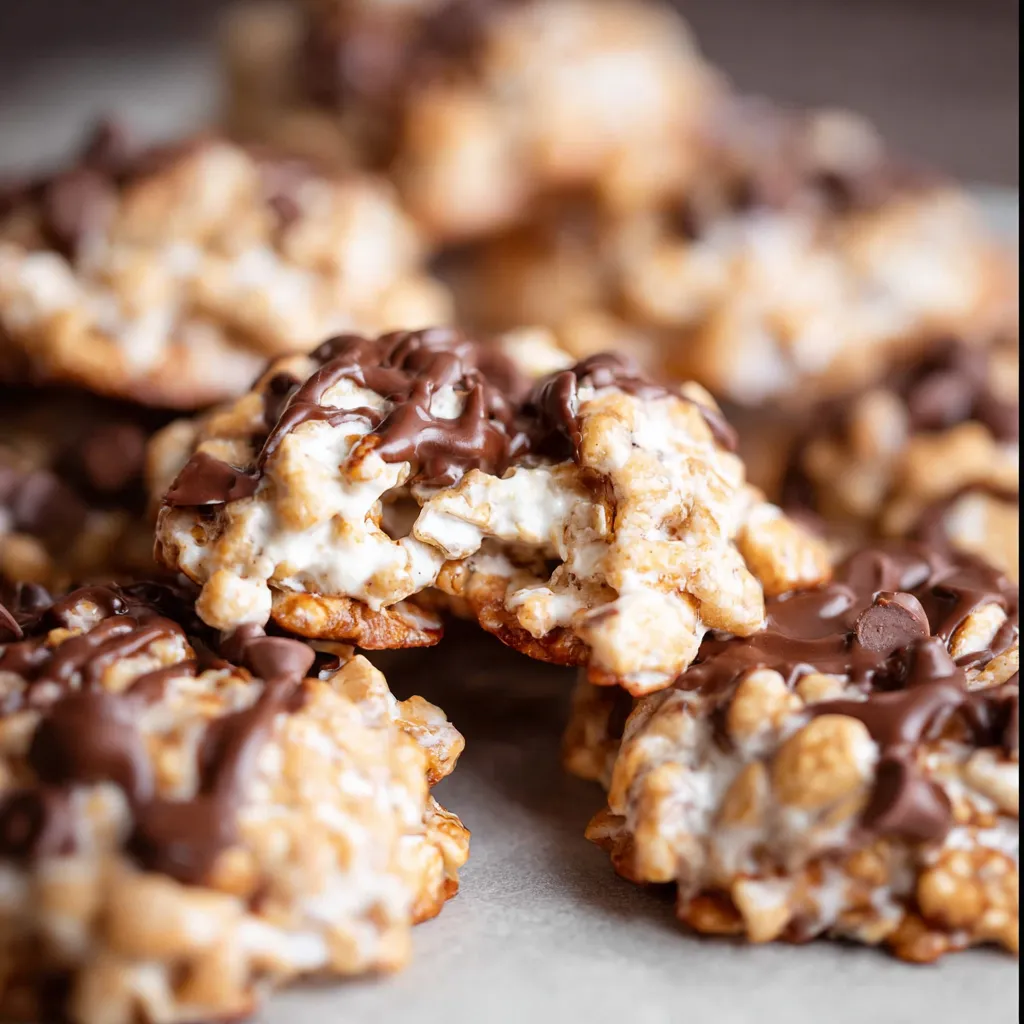
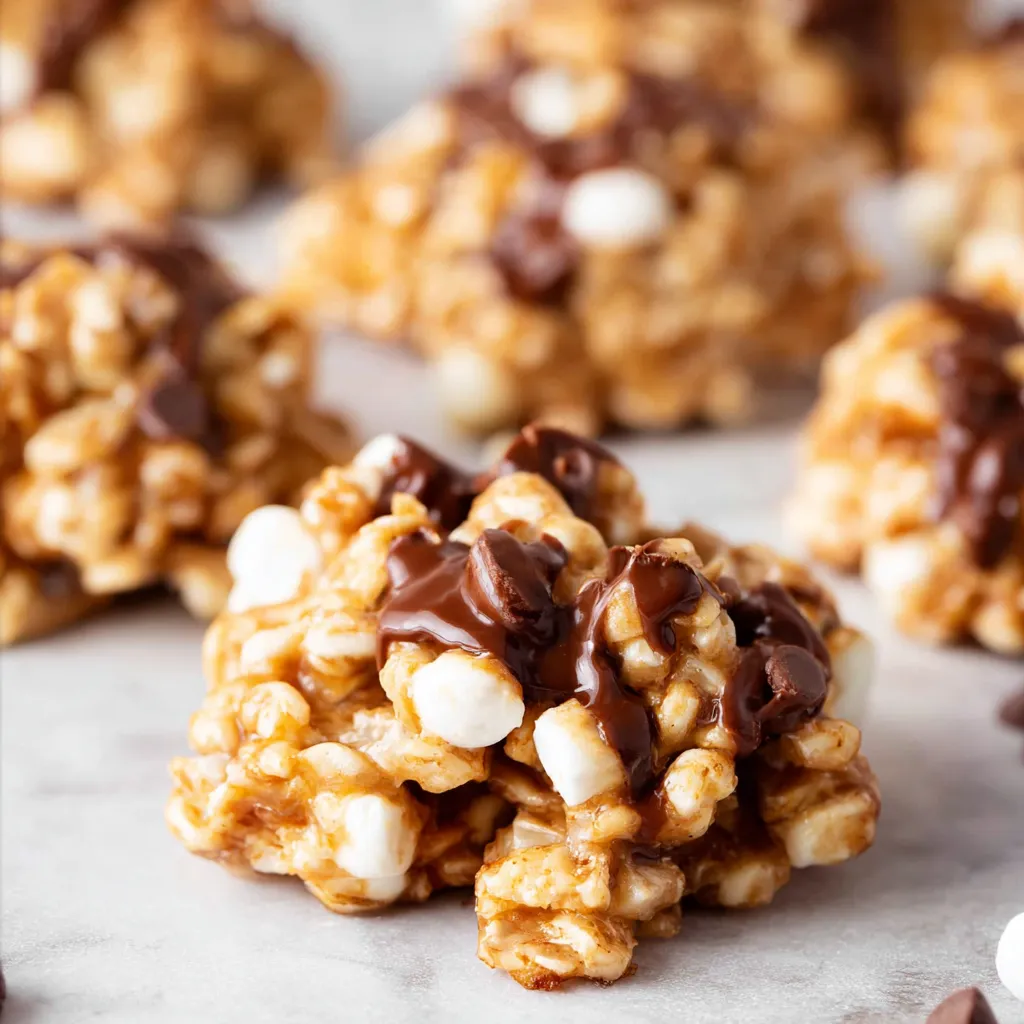
This recipe brings together creamy peanut butter, sweet white chocolate, crispy rice cereal, and soft mini marshmallows in the most magical way. There’s just the right balance of chew and crunch, with optional mini chocolate chips on top for that little extra “wow.” Whether you’re a seasoned baker or stepping into the kitchen for the first time, these cookies are foolproof and full of joy.
Let’s dig into what makes this recipe such a must-make.
Why You’ll Love This Recipe
These cookies are more than just a quick dessert. They’re comforting, crave-worthy, and built for sharing. Here’s why you’ll want to keep this recipe close.
Key Benefits
No oven, no problem: If the thought of preheating a baking sheet makes you groan, this is your kind of cookie. Everything comes together in one bowl, with zero bake time required.
Simple ingredients, big flavor: With just a handful of pantry staples—white chocolate, peanut butter, cereal, and marshmallows—you get a treat that tastes like you spent way more time on it.
Perfect texture combo: The softness of marshmallows with the crunch of cereal and the smoothness of melted chocolate is something special. These cookies manage to be rich without being heavy, sweet without being cloying.
Crowd-pleaser: Kids love them. Adults love them. They’re portable, giftable, and freezer-friendly. You can make a batch for the holidays or whip them up on a random Tuesday night.
Suitable For
Busy schedules: These are ready in under 30 minutes, making them perfect for last-minute parties or when you need a dessert right now.
Gluten-free diets: Use certified gluten-free crispy rice cereal and you’re good to go.
All ages and skill levels: There’s no tricky technique here—just melt, stir, scoop, and chill. Even kids can help make them.
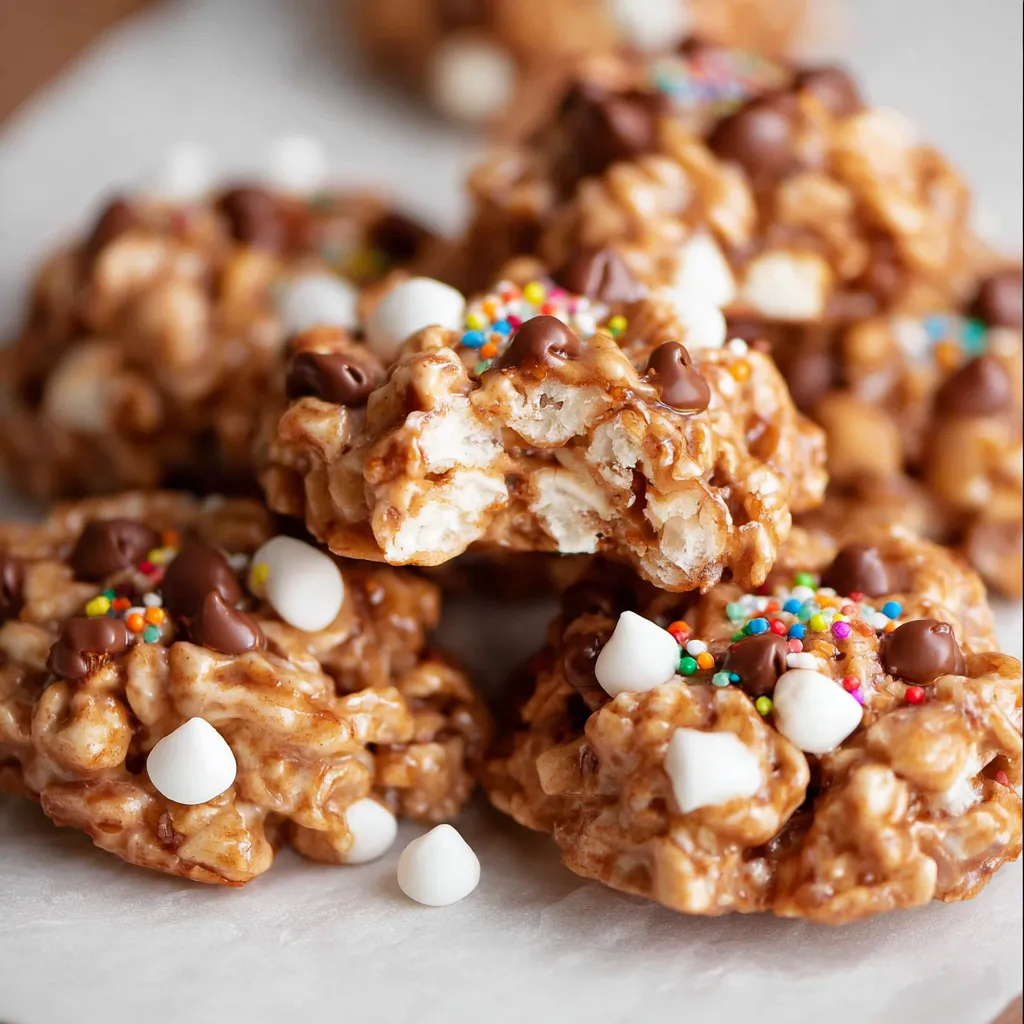
Customizers and snackers: Love mix-ins like M&Ms or Reese’s? Toss them in. Want a smaller bite-size version? Use a mini scoop. This recipe is as flexible as it is fun.
Ingredients for No-Bake Avalanche Cookies
One of the things I love most about this recipe is how low-effort the ingredient list is. You probably already have most of these on hand.
Core Ingredients
-
White chocolate chips: This forms the base of the cookie and gives it that sweet, creamy finish. Go for a high-quality brand for the best flavor and meltability.
-
Creamy peanut butter: The unsung hero of the recipe. It adds richness and helps bind everything together. Smooth and shelf-stable types like Skippy or Jif work best.
-
Crispy rice cereal: You’ll want the classic kind here—not puffed rice. Think Rice Krispies or any similar brand. It adds the perfect crunch.
-
Mini marshmallows: These add chew and a pop of texture. The fresher, the better.
-
Mini chocolate chips (optional): Freeze these before adding so they don’t melt. Sprinkle them on top or stir them in last—either way, they’re a delicious bonus.
Substitutions and Tips
-
Nut-free? Use sunflower seed butter or Wowbutter instead of peanut butter. The texture will still be creamy, and the flavor surprisingly similar.
-
No white chocolate? Try almond bark or vanilla candy melts, though they’ll be a bit sweeter and less rich.
-
Want to mix it up? M&Ms, chopped Reese’s, crushed pretzels, or even dried cranberries make fun add-ins.
-
Prefer less sweet? Reduce the marshmallows slightly or use bittersweet chocolate chips on top for balance.
Best White Chocolate for Avalanche Cookies
White chocolate can be a little fussy, so choosing the right kind makes a difference. You want something that melts smoothly and tastes creamy—not waxy.
Stick to brands like Ghirardelli, Guittard, or Callebaut if you can find them. Avoid candy melts or almond bark unless you’re in a pinch—they’ll work, but they don’t offer quite the same depth of flavor.
Pro tip: Always melt white chocolate slowly. Microwave it in short bursts (20–30 seconds), stirring well between each. If it starts to clump or seize, add a tiny bit of coconut oil or shortening to loosen it up.
Kitchen Tools You’ll Need
No fancy equipment required, but a few basic tools will make your life easier.
Must-Have Tools
-
Microwave-safe bowl: For melting the chocolate and mixing everything together.
-
Silicone spatula: Great for folding ingredients without breaking the cereal.
-
Baking sheet: You’ll scoop the cookies onto this to set.
-
Parchment or wax paper: Keeps the cookies from sticking and makes cleanup a breeze.
Nice-to-Have Tools
-
Cookie scoop: Makes portioning quick and easy. Aim for a 1.5 to 2 tablespoon size.
-
Silicone baking mat: An eco-friendly alternative to parchment, and reusable.
-
Measuring cups and spoons: Accuracy matters, especially when melting and mixing.
How to Make No-Bake Avalanche Cookies
Making these cookies is honestly one of the easiest ways to impress a crowd without turning on the oven. Whether you’re baking with kids, prepping for a last-minute party, or just want something sweet without the hassle, these come together in no time. Let’s walk through it, step by step.
Step 1: Prep Your Workspace
Line a baking sheet with parchment or wax paper and set it aside. If you’re planning to use mini chocolate chips, pop them in the freezer now. This quick trick keeps them from melting later when stirred into the warm mixture.
A little prep now makes the rest of the process feel seamless.
Step 2: Melt the White Chocolate
Add your white chocolate chips to a large microwave-safe bowl. Heat in short bursts—about 25 to 30 seconds—stirring between each round. It usually takes around 3 cycles, but every microwave is a bit different.
Stir until the chocolate is completely smooth. Don’t rush this step; white chocolate can burn fast. If it starts to thicken too quickly, add a teaspoon of neutral oil (like canola or coconut) to help loosen it.
Step 3: Stir in the Peanut Butter
Once the chocolate is smooth, add the peanut butter directly into the bowl. Stir until the two are fully combined into a glossy, creamy mixture. This is the glue that holds the cookies together and gives them that perfect salty-sweet balance.
Step 4: Fold in the Crispy Rice Cereal
Pour the cereal into the bowl and gently fold everything together. The goal here is even coverage without crushing the cereal. A silicone spatula works beautifully to scoop and turn without being too aggressive.
You’ll know it’s ready when every piece is lightly coated in that delicious peanut butter-chocolate mixture.
Step 5: Let It Cool Slightly, Then Add Marshmallows
Now, pause. Wait 2 to 3 minutes before adding the marshmallows. If the mixture is too warm, the marshmallows will melt and you’ll lose their pillowy texture.
Once it’s just warm to the touch, fold in the mini marshmallows gently. You want to see those little white clouds peeking out in every bite.
Step 6: Stir in the Chocolate Chips
Take the mini chocolate chips out of the freezer and stir them in. Because they’re cold and the mixture has cooled slightly, they’ll hold their shape and add a pop of chocolate in every cookie.
If your mixture starts to set up and feels too firm, you can warm it for just 10 seconds in the microwave and stir gently before continuing.
Step 7: Scoop and Shape
Use a cookie scoop or heaping tablespoon to drop mounds of the mixture onto the prepared baking sheet. Work fairly quickly before the mix starts to harden. If you want to be extra precise, press each scoop together slightly to make the cookies more uniform.
You can also sprinkle a few more mini chocolate chips on top of each one for a bakery-style finish.
Step 8: Let Them Set
Let the cookies sit at room temperature for about 30 minutes, or pop them in the fridge for 15. Once they’re firm to the touch, they’re ready to eat.
Tips for Success
Here’s how to make sure your avalanche cookies turn out perfectly every single time.
-
Don’t overheat the chocolate. Go low and slow. It’s tempting to blast it in one go, but that’s how you get grainy, seized chocolate.
-
Mix gently. You want to keep the cereal from turning to powder. Folding is your friend.
-
Freeze your chocolate chips. Just ten minutes in the freezer prevents them from melting into the mix.
-
Work quickly. Once everything is stirred together, the mixture will start to firm up fast. Having your tools and ingredients prepped makes a big difference.
-
Use parchment or wax paper. This makes cleanup easy and prevents cookies from sticking.
How to Store No-Bake Avalanche Cookies
These cookies are great for making ahead—and they store beautifully, too.
At Room Temperature
Keep them in an airtight container for up to 3 to 4 days. They’ll stay soft and slightly chewy. If your kitchen runs warm, they may soften a bit, but they’ll still taste great.
In the Refrigerator
If you like your cookies a little firmer, refrigerate them. They’ll last up to a week this way. Just make sure they’re sealed well to avoid absorbing fridge smells.
Freezing Tips
These freeze like a dream. Layer them between pieces of wax paper in a freezer-safe container or bag. They’ll keep for up to 3 months. Let them thaw in the fridge or on the counter before serving.
Frequently Asked Questions
Can I make these nut-free?
Absolutely. Swap the peanut butter for sunflower seed butter or another nut-free spread. The texture stays creamy, and the cookies still hold together perfectly.
Can I use regular chocolate instead of white chocolate?
You can, though it changes the flavor profile. White chocolate is a little sweeter and blends more smoothly with peanut butter. Milk or semi-sweet chocolate will give you more of a Reese’s vibe.
Are these cookies gluten-free?
They can be—just use a certified gluten-free crispy rice cereal and double-check your chocolate chips and marshmallows. Many brands are safe, but it’s always good to verify.
Do I have to chill them?
Technically no, but chilling helps them firm up quickly and hold their shape. If you’re short on time or don’t mind a softer cookie, letting them rest at room temp will work too.
Related Recipes to Try Next
If you loved these No-Bake Avalanche Cookies, try these next from RecipeSeasys:
-
Peanut Butter Rice Krispie Treats with M&Ms and Chocolate Chips – A colorful, crunchy twist perfect for parties.
-
No-Bake Coconut Cream Balls – Another simple no-bake treat with tropical flavor.
-
Christmas Whipped Shortbread Cookies – Soft, buttery cookies that melt in your mouth.
-
Reese’s Peanut Butter Chocolate Chip Cookie Bites – A rich and chewy mini dessert with similar flavors.
-
Maraschino Cherry Chocolate Chip Cookies – A fruity, chewy option for cookie lovers.
Conclusion
There’s something wonderfully comforting about a dessert that takes so little effort but delivers so much joy. These No-Bake Avalanche Cookies are one of those recipes you’ll come back to over and over again—especially when time is short and sweet tooths are loud.
Whether you’re whipping up a batch for holiday trays, snack time, or just because you feel like something homemade, these cookies deliver. Simple ingredients, no oven, and that perfect mix of chewy, crunchy, and creamy.
Print
No-Bake Avalanche Cookies Recipe
- Total Time: 25 minutes (includes chill time)
- Yield: 30-35 cookies
Description
These No-Bake Avalanche Cookies combine white chocolate, peanut butter, crispy cereal, and marshmallows into chewy, crunchy perfection.
Ingredients
- 2¾ cups white chocolate chips
- 1¾ cups creamy peanut butter
- 2 cups crispy rice cereal
- 1½ cups mini marshmallows
- ½ cup mini chocolate chips (optional, for garnish)
Instructions
- Line baking sheets with parchment paper and freeze mini chocolate chips.
- Melt white chocolate in a microwave-safe bowl using 30-second bursts, stirring until smooth.
- Stir in peanut butter until fully incorporated and creamy.
- Fold in crispy rice cereal until well-coated.
- Allow mixture to cool for 2–3 minutes, then stir in marshmallows.
- Gently stir in frozen chocolate chips.
- Drop spoonfuls onto the prepared baking sheets.
- Optional: top with extra mini chocolate chips.
- Chill for 30 minutes at room temp or 15 in the fridge.
Notes
- Use high-quality white chocolate for smoother melting.
- Chill chips before mixing to avoid melting.
- Substitute with almond butter for a twist.
- Store in an airtight container for up to 1 week or freeze for 3 months.
- Prep Time: 10 minutes
- Cook Time: 0 minutes
Nutrition
- Serving Size: 1 cookie
- Calories: 271
- Sugar: 20g
- Sodium: 82mg
- Fat: 13g
- Saturated Fat: 5g
- Unsaturated Fat: 6g
- Trans Fat: 0g
- Carbohydrates: 36g
- Fiber: 1g
- Protein: 5g
- Cholesterol: 4mg
")