Introduction to King’s Hawaiian Cheesecake Danish
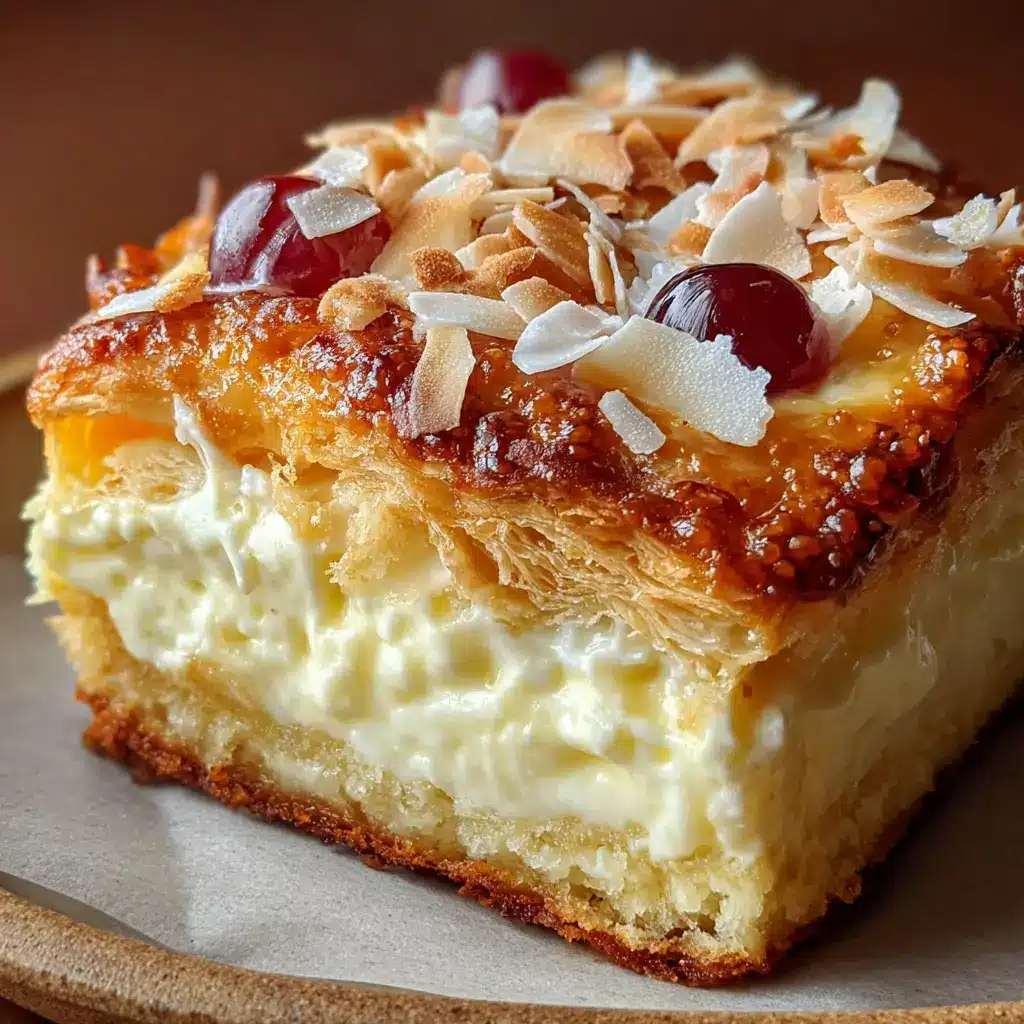
When you think about dessert, cheesecake often comes to mind as a rich, indulgent treat. But have you ever considered how you might elevate that classic favorite? Enter the King’s Hawaiian Cheesecake Danish – a delightful fusion that incorporates the sweet, fluffy bread of King’s Hawaiian rolls with the creamy, tangy goodness of cheesecake. This unique treat is not just another pastry; it’s a flavor experience that is bound to impress.
A delightful twist on traditional cheesecake
The essence of a traditional cheesecake lies in its creamy texture and rich flavor, while King’s Hawaiian rolls provide a sweet and airy base that is truly special. Combining these two elements results in something extraordinary — a Danish that effortlessly melds flavors and textures. As you bite into this treat, you’ll first experience the lightness of the roll, leading to the decadent cream cheese filling that’s often enhanced with hints of vanilla or even citrus.
What makes this recipe stand out even more is its versatility. You can dress it up with various toppings like fresh fruits, drizzles of caramel or chocolate, or sliced nuts, allowing for a customizable experience every time you whip it up. Perfect for brunch gatherings, mid-week treats, or even holiday celebrations, a King’s Hawaiian Cheesecake Danish satisfies sweet cravings while offering a unique spin on an old favorite.
Moreover, it’s an approachable recipe, whether you’re a seasoned baker or just starting out. As sourcing quality ingredients is crucial, consider exploring high-quality cream cheese and fresh local fruits for the ultimate flavor burst. Don’t forget to check out resources like Serious Eats for expert baking tips and techniques that can enhance your baking skills.
So, whether you’re impressing guests or simply treating yourself after a long day, this Danish promises a delightful way to savor the comforting flavors of a classic cheesecake, reimagined for a new generation. Get ready to take your love for cheesecake to a whole new level!
Ingredients for King’s Hawaiian Cheesecake Danish
Creating a delicious King’s Hawaiian Cheesecake Danish at home is simpler than you might think! To get started, gather these essential ingredients, which come together to create a mouthwatering treat perfect for any occasion.
Dough:
- 1 package of King’s Hawaiian Sweet Rolls: The star of the show! Their fluffy texture and sweetness make for an irresistible base.
- 1 egg: For a rich, golden finish.
Cream Cheese Filling:
- 8 oz cream cheese: Softened, for that creamy texture.
- 1/4 cup sugar: Sweetening up the filling just right.
- 1 tsp vanilla extract: Enhances the overall flavor profile.
Topping:
- Powdered sugar: To dust on top for a sweet finish.
- Fresh fruit (e.g., strawberries or blueberries): To elevate the dish and provide a burst of freshness.
With these ingredients on hand, you’re ready to make a King’s Hawaiian Cheesecake Danish that will impress your friends and family. For tips on the best ways to serve or pair this delightful treat, check out this resource for inspiration!
Preparing King’s Hawaiian Cheesecake Danish
If you’re in the mood for something sweet, fluffy, and downright irresistible, you’re in for a treat with this King’s Hawaiian Cheesecake Danish. This delightful pastry combines the unique flavor of King’s Hawaiian bread with a creamy cheesecake filling, creating a dessert that’s perfect for brunch, dessert, or just because. Let’s dive into the preparation process!
Gather Your Ingredients
Before jumping into your baking adventure, it’s essential to have all your ingredients ready to go. This will make your cooking experience much smoother and more enjoyable. Here’s what you’ll need:
- 1 package of King’s Hawaiian sweet rolls
- 8 oz cream cheese, softened
- 1/3 cup sugar
- 1 egg
- 1 teaspoon vanilla extract
- 1/2 teaspoon lemon juice (freshly squeezed for best results)
- 1 tablespoon all-purpose flour
- Powdered sugar for dusting (optional)
- Fresh fruit for garnish (optional)
Make sure to set out your ingredients beforehand. This not only saves time but also ensures you don’t accidentally leave out something crucial. Who hasn’t found themselves in a frantic hunt for missing baking soda halfway through a recipe?
Preheat the Oven and Prepare Your Baking Dish
To get started, you’ll want to preheat your oven to 350°F (175°C). This step is vital because it ensures that your King’s Hawaiian Cheesecake Danish bakes evenly and achieves that coveted golden-brown color.
While the oven warms up, grab a baking dish—preferably a 9-inch pie pan or a rectangular baking sheet. Lightly grease your dish with butter or cooking spray to prevent sticking. If you prefer, you can line it with parchment paper for easy cleanup. It’s the little things that make a huge difference, right?
Create the Cream Cheese Filling
Now for the fun part—the cream cheese filling! This delectable blend is what truly makes a King’s Hawaiian Cheesecake Danish stand out. In a medium bowl, mix the following:
- Cream cheese
- Sugar
- Egg
- Vanilla extract
- Lemon juice
- Flour
Using an electric mixer, beat the ingredients until the mixture is smooth and creamy. Make sure to scrape down the sides of the bowl to incorporate everything fully. Taste it, if you’re feeling adventurous; the sweetness mixed with the tang of the cream cheese is simply divine.
Assemble the Danish
Now that your filling is ready, let’s bring it all together. Start by unwrapping the King’s Hawaiian sweet rolls. You’ll want to slice them in half horizontally, creating a top and bottom. Arrange the bottom halves in your greased baking dish, slightly overlapping them, if necessary.
Once they’re snugly in place, spread the cream cheese filling evenly over the rolls, and finally, top with the other halves of the sweet rolls. This layering is what gives the Danish that pillowy comfort that everyone loves. Brush the tops with a little melted butter for an extra touch of golden-brown perfection.
Bake Until Golden
It’s time for magic to happen in the oven! Place your assembled King’s Hawaiian Cheesecake Danish in the preheated oven. Bake for about 25-30 minutes, or until the top turns golden brown and the edges are slightly crispy. To give it the finishing touch, consider dusting some powdered sugar over the top once it’s cooled slightly.
Finally, you can slice it up and serve it warm, perhaps garnished with fresh fruit for that pop of color and flavor. This Danish is most enjoyable fresh out of the oven, but trust me when I say it’s pretty great even as leftovers.
Now you’re ready to impress your friends and family or treat yourself to a delightful indulgence. Enjoy your baking journey!

Variations on King’s Hawaiian Cheesecake Danish
When it comes to the King’s Hawaiian Cheesecake Danish, the possibilities are endless! Whether you’re enamored with fruity flavors or decadent chocolate, there’s a delicious twist just waiting for you.
Tropical Fruit Danish
Imagine sinking your teeth into a King’s Hawaiian Cheesecake Danish, bursting with the flavors of the tropics. To create this version, simply incorporate your favorite tropical fruits into the filling. Think fresh pineapple, mango, or even passion fruit for that refreshing zing. You can also add a sprinkle of toasted coconut on top for a delightful texture. To make it extra special, drizzle a light coconut glaze over the entire Danish—trust me, it’ll take your tropical experience to new heights.
Use fruits that are in season for the best flavor, and check out sources like the USDA’s Agricultural Marketing Service for a seasonal guide to produce availability.
Chocolate Chip Cheesecake Danish
If you have a sweet tooth, this King’s Hawaiian Cheesecake Danish variation is for you. By mixing in chocolate chips with your cheesecake filling, you can create a delightful contrast between the rich creaminess of the cheesecake and the sweet chunks of chocolate. For an even more indulgent experience, top your Danish with a drizzle of chocolate sauce and a sprinkle of powdered sugar.
Did you know that research has shown that chocolate can actually enhance your mood? So, not only will this variant satisfy your cravings, but it could also give you a little happiness boost.
Whichever version you choose, be sure to experiment and make it your own. Happy baking!
Cooking tips and notes for King’s Hawaiian Cheesecake Danish
When crafting your King’s Hawaiian Cheesecake Danish, a little guidance can elevate your baking game. Here are some friendly tips to help you create a delightful treat!
Choose Quality Ingredients
Opt for fresh, high-quality cream cheese for that luscious filling. This will ensure your cheesecake is rich and creamy. Look for brands that prioritize natural ingredients – you can dive into more about this on Food Network.
Perfecting the Dough
If you’re using King’s Hawaiian bread, consider letting it sit out for a bit before incorporating it into your recipe. This way, it becomes slightly stale and easier to work with. For a little extra flavor, try adding a pinch of cinnamon to the dough.
Assembly Tips
When filling the pastries, avoid overstuffing! You want that sweet cheesecake filling to peek out but not overflow. A little goes a long way, ensuring each bite remains balanced.
Baking Techniques
Keep your eye on the oven! The visual cue is golden-brown tops and a slight jiggle for the cheesecakes. Always use parchment paper on your baking sheet for easy removal.
Happy baking!
Serving Suggestions for King’s Hawaiian Cheesecake Danish
When it comes to King’s Hawaiian Cheesecake Danish, the options for serving are as delightful as the treat itself. Here are some creative ideas to elevate your experience:
Perfect Pairings
- Beverage Matches: Consider serving your Danish alongside a freshly brewed cup of coffee or a refreshing fruit-infused herbal tea. Both beverages enhance the sweet and creamy flavors, making each bite more enjoyable.
- Fresh Fruits: For a pop of color and freshness, slice up some strawberries or blueberries to scatter over your plate. This not only adds a vibrant touch but also brings a juicy contrast to the rich cheesecake filling.
Ideal Presentation
- Serving Platters: Arrange your King’s Hawaiian Cheesecake Danish on a rustic wooden board or an elegant cake stand. This creates an enticing visual that’s perfect for brunch gatherings or casual get-togethers.
- Decorative Toppings: A drizzle of honey or a dusting of powdered sugar can add a charming finish. For a gourmet twist, try a dollop of whipped cream or a sprinkle of toasted almonds if you’re feeling adventurous.
By incorporating these suggestions, your King’s Hawaiian Cheesecake Danish will not only satisfy sweet cravings but also impress your guests. Want more tips on serving desserts? Check out this guide on dessert pairings.
Time breakdown for King’s Hawaiian Cheesecake Danish
Preparation time
Getting ready to whip up your King’s Hawaiian Cheesecake Danish takes about 20 minutes. This includes gathering your ingredients and prepping the cream cheese filling. Pro-tip: Make sure your cream cheese is at room temperature for a smooth mix!
Baking time
Once your danish is assembled, pop it in the oven for about 25 to 30 minutes. You’ll know it’s done when it’s perfectly golden brown and the delicious aromas fill your kitchen!
Total time
In total, expect to spend roughly 50 to 60 minutes from start to finish. You can easily enjoy this delightful treat on a cozy weekend morning or as a sweet surprise for a gathering. For storage tips, you might want to check out resources on keeping baked goods fresh!
Feeling inspired? Ready to impress your friends and family with this scrumptious King’s Hawaiian Cheesecake Danish? You’ve got this!
Nutritional facts for King’s Hawaiian Cheesecake Danish
When indulging in a King’s Hawaiian Cheesecake Danish, it’s a good idea to be aware of what you’re consuming. Here’s a simple breakdown of its nutritional value to help you make informed choices.
Calories
A single serving of the King’s Hawaiian Cheesecake Danish typically contains around 300–350 calories. It’s the perfect treat for satisfying a sweet craving without going overboard on calories.
Protein
This decadent dessert offers approximately 5 grams of protein per serving. While it’s not a protein powerhouse, every bit helps, especially when paired with higher-protein options like Turkey Bacon for breakfast.
Sugar content
With about 15–20 grams of sugar, the King’s Hawaiian Cheesecake Danish is sweet enough to delight your taste buds. While moderate sugar intake is fine for most, consider balancing your overall diet with lower-sugar foods for the rest of the day.
For more detailed nutritional insights, you might find resources like the USDA Food Composition Database helpful. Remember, dessert is best enjoyed in moderation!
FAQs about King’s Hawaiian Cheesecake Danish
Can I make this cheesecake Danish ahead of time?
Absolutely! One of the great things about the King’s Hawaiian Cheesecake Danish is its adaptability. You can prepare the filling a day in advance and store it in the refrigerator. Just make sure to wrap it well to keep it fresh. If you’re short on time, you can also assemble the Danish and refrigerate it before baking. Just add a few extra minutes to your baking time if it goes into the oven straight from the fridge.
What’s the best way to store leftovers?
If there are any leftovers (and they’re so good you might find it hard to believe!), storing them properly will help maintain their delightful texture. First, let the Danish cool completely, then place it in an airtight container. Store it in the refrigerator for up to three days. You can also freeze portions for future enjoyment — just wrap them tightly in foil or plastic wrap and then place them in a freezer bag. When you’re ready to indulge again, just thaw in the fridge and warm in the oven for a few minutes!
Can I substitute ingredients in this recipe?
Certainly! The beauty of the King’s Hawaiian Cheesecake Danish lies in its versatility. You can easily swap out the cream cheese for ricotta or mascarpone for a different flavor profile. If you’re looking to make it a bit healthier, consider using Greek yogurt in place of some of the cream cheese. And if you’re not a fan of certain fruits, feel free to use what you love. Think peaches, berries, or even diced apples. Remember, cooking should be fun and a bit of experimentation might just lead you to your new favorite version!
For more tips on ingredient substitutions, check out resources like Substituting Ingredients for even more ideas.
Conclusion on King’s Hawaiian Cheesecake Danish
In conclusion, the King’s Hawaiian Cheesecake Danish is a delightful blend of flavors and textures, perfectly suited for any occasion—be it a brunch gathering or a cozy weekend treat. The sweet, fluffy bread combined with a rich cream cheese filling offers a delightful balance that’s hard to resist. Plus, it’s an impressive dish to share with friends and family.
Why You’ll Love This Recipe
- Versatile Serving Options: Enjoy it fresh out of the oven or as a delightful snack throughout the day.
- Easy to Customize: Feel free to add fresh fruits or nuts to tailor the recipe to your liking.
Whether you enjoy it yourself or share it at your next gathering, this King’s Hawaiian Cheesecake Danish is sure to leave a lasting impression. Don’t forget to check out tips for other delicious pastries on Food Network for even more culinary inspiration!
Print
King’s Hawaiian Cheesecake Danish: Indulgent Twist on a Classic
- Total Time: 45 minutes
- Yield: 8 servings
- Diet: Vegetarian
Description
A delectable and creative recipe merging the classic flavors of cheesecake with the soft, sweet bread of King’s Hawaiian rolls.
Ingredients
- 1 package King’s Hawaiian rolls
- 2 cups cream cheese
- 1/2 cup sugar
- 1 teaspoon vanilla extract
- 2 eggs
- 1 cup fresh berries
- 1/4 cup powdered sugar for dusting
Instructions
- Preheat the oven to 350°F (175°C).
- In a mixing bowl, blend cream cheese, sugar, and vanilla extract until smooth.
- Add eggs one at a time, mixing well after each addition.
- Slice the King’s Hawaiian rolls in half and place in a greased baking dish.
- Spoon the cream cheese mixture over the rolls.
- Top with fresh berries and bake for 25-30 minutes until set and golden.
- Dust with powdered sugar before serving.
Notes
- For added flavor, consider adding a splash of lemon zest to the cream cheese mixture.
- Serve warm for the best experience.
- Prep Time: 15 minutes
- Cook Time: 30 minutes
- Category: Dessert
- Method: Baking
- Cuisine: American
Nutrition
- Serving Size: 1 piece
- Calories: 350
- Sugar: 15g
- Sodium: 200mg
- Fat: 20g
- Saturated Fat: 10g
- Unsaturated Fat: 8g
- Trans Fat: 0g
- Carbohydrates: 35g
- Fiber: 1g
- Protein: 6g
- Cholesterol: 80mg
")