Introduction to King’s Hawaiian Cheesecake Danish
Have you ever craved a delightful treat that combines the rich flavors of cheesecake with the soft, sweet goodness of King’s Hawaiian bread? Look no further than the King’s Hawaiian Cheesecake Danish! This delectable pastry is not just a meal; it’s an experience, making it a perfect addition to your weekend brunch or an afternoon pick-me-up.
Why Homemade Treats are a Game Changer for Young Professionals
For many young professionals, busy schedules often lead to reliance on store-bought snacks and meals. However, embracing the art of homemaking treats can be remarkably fulfilling. Preparing your own King’s Hawaiian Cheesecake Danish can save you money, enhance your culinary skills, and provide a creative outlet. Plus, it’s a great way to impress friends during weekend gatherings.
But why invest time in making something from scratch? Here are a few compelling reasons:
- Quality Ingredients: When you make your own pastries, you have full control over the quality of ingredients. You can use fresh fruits, premium cheeses, and avoid unnecessary additives that are commonly found in commercial baked goods.
- Healthier Alternatives: You can tailor your Danish to suit your dietary preferences, substituting ingredients where necessary. For example, you can use low-fat cream cheese or add a sprinkle of cinnamon for extra flavor without the guilt.
- Mindful Moments: Cooking can act as a form of self-care. Dedicating a bit of time to bake can serve as a wonderful stress reliever. Engaging in a hands-on activity allows your mind to disconnect from work pressures and refocus on something enjoyable.
The Perfect Balance of Flavors
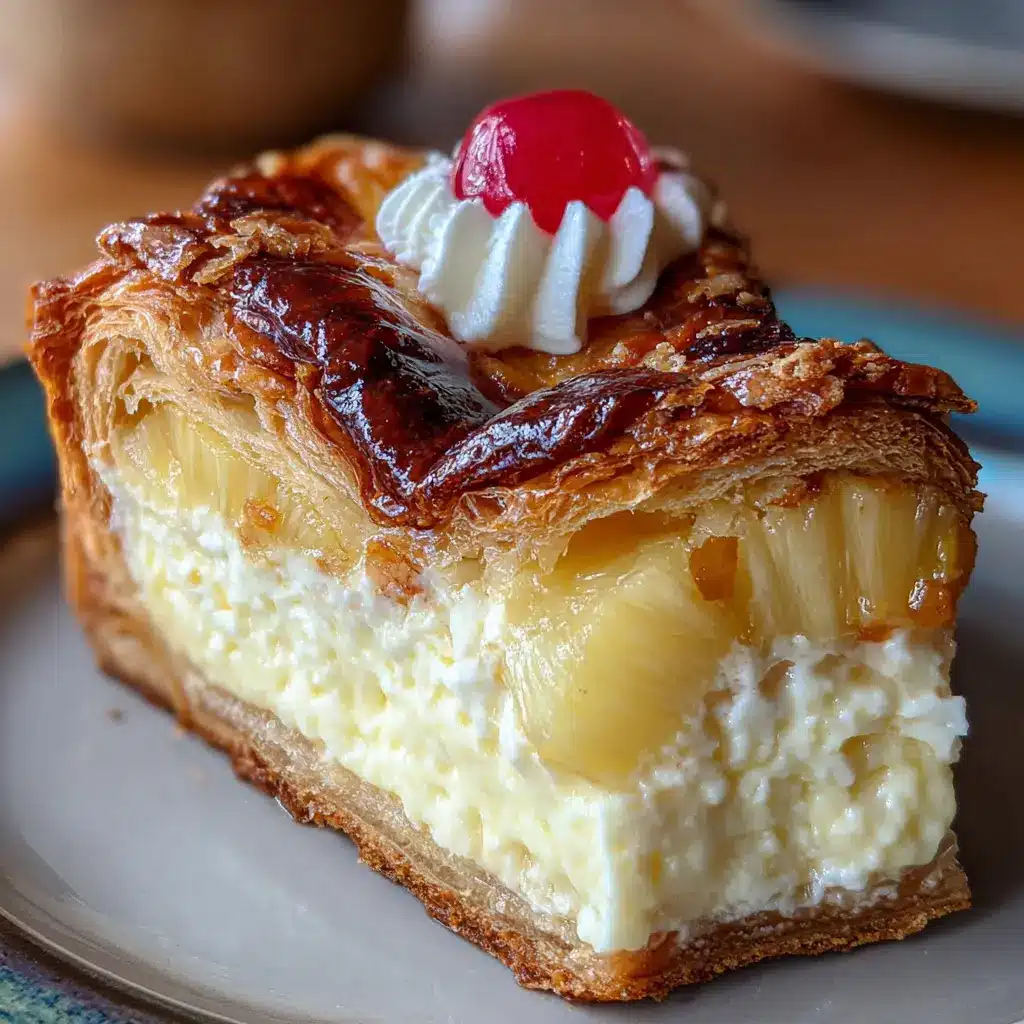
A King’s Hawaiian Cheesecake Danish not only offers a delightful sweetness but also marries textures—imagine the flaky crust enveloping a creamy filling, all balanced with the buttery-softness of King’s Hawaiian bread.
To make the experience even richer, consider pairing your homemade treat with your favorite coffee or a refreshing herbal tea. With a bit of practice, you’ll soon find yourself whipping up these delightful pastries with ease, charming everyone around you.
For those looking to dive into the art of baking, check out helpful cooking resources from BBC Good Food or America’s Test Kitchen for tips on perfecting your technique!
Ingredients for King’s Hawaiian Cheesecake Danish
Creating a delicious King’s Hawaiian Cheesecake Danish starts with the right mix of ingredients. Each component plays a unique role, ensuring a sweet treat that’s hard to resist.
Key ingredients for the cheesecake filling
For the rich, creamy filling, you’ll need:
- Cream Cheese: This gives the filling its smooth and luscious texture.
- Sugar: To add just the right amount of sweetness.
- Vanilla Extract: Enhances the flavor beautifully.
- Eggs: They help bind all the filling ingredients together, adding structure.
Feeling adventurous? You can also experiment with flavors—like lemon zest or almond extract. Remember, the cheesecake part is key to the overall King’s Hawaiian Cheesecake Danish experience!
Sweet rolls as the perfect base
Now, let’s talk about the star of the show: King’s Hawaiian Sweet Rolls. These golden-brown, soft rolls are not just a tasty choice; they offer a slightly sweet base that perfectly complements the rich cheesecake filling.
You can shape them in various ways—twist, braid, or simply top them—allowing your creativity to shine. Plus, the easy-to-use rolls make assembly a breeze for any home chef. Looking for the rolls? Check out King’s Hawaiian’s Official Website.
By combining these ingredients, you’re well on your way to impressing friends and family with your homemade King’s Hawaiian Cheesecake Danish!
Step-by-step Preparation of King’s Hawaiian Cheesecake Danish
Creating a King’s Hawaiian Cheesecake Danish is an exciting culinary adventure, especially when you’re craving a delightful and sweet breakfast or dessert option. Each step builds on the last, and before you know it, you’ll have a warm, gooey treat ready to impress yourself and your friends. Let’s dive right in!
Preheat the oven and prepare your baking dish
First things first, preheating your oven is essential for achieving that perfect golden color on your Danish. Set your oven to 350°F (175°C). While the oven warms up, take a moment to prepare your baking dish—it’s best to use a 9-inch round or square pan for this recipe. Lightly grease it with cooking spray or butter to prevent sticking. This small step can make a big difference when it’s time to serve.
Get the rolls ready for assembly
Now that your oven is warming up, it’s time to prepare the star of the show: the King’s Hawaiian rolls. The sweetness of these rolls combined with the creamy cheesecake filling creates a delectable contrast.
- Open a package of King’s Hawaiian rolls (you’ll need about 12).
- Gently pull apart each roll and lay them in the greased baking dish, creating a beautiful base for your Danish. You want them to snugly fit together but not be squished.
Remember, these fluffy rolls are what make this cheesecake Danish so indulgent, so don’t rush this step!
Whip up the creamy cheesecake filling
Next, we’re diving into an oh-so-creamy cheesecake filling that makes this Danish irresistible. Here’s what you’ll need:
- 8 ounces of cream cheese, softened
- 1/4 cup of granulated sugar
- 1 teaspoon of vanilla extract
- 1 large egg
In a bowl, beat the softened cream cheese until smooth. Gradually mix in the sugar and vanilla, and then add the egg. For best results, try using a hand mixer or stand mixer for a fluffier texture. You can also visit resources like The Cheesecake Factory for some cheesecake inspiration!
Assemble the Danish layers
With your rolls and filling prepped, it’s time to bring everything together. Here’s how to assemble your masterpiece:
- Pour the cream cheese filling evenly over the arranged rolls, ensuring it seeps between each roll to maximize that creamy goodness.
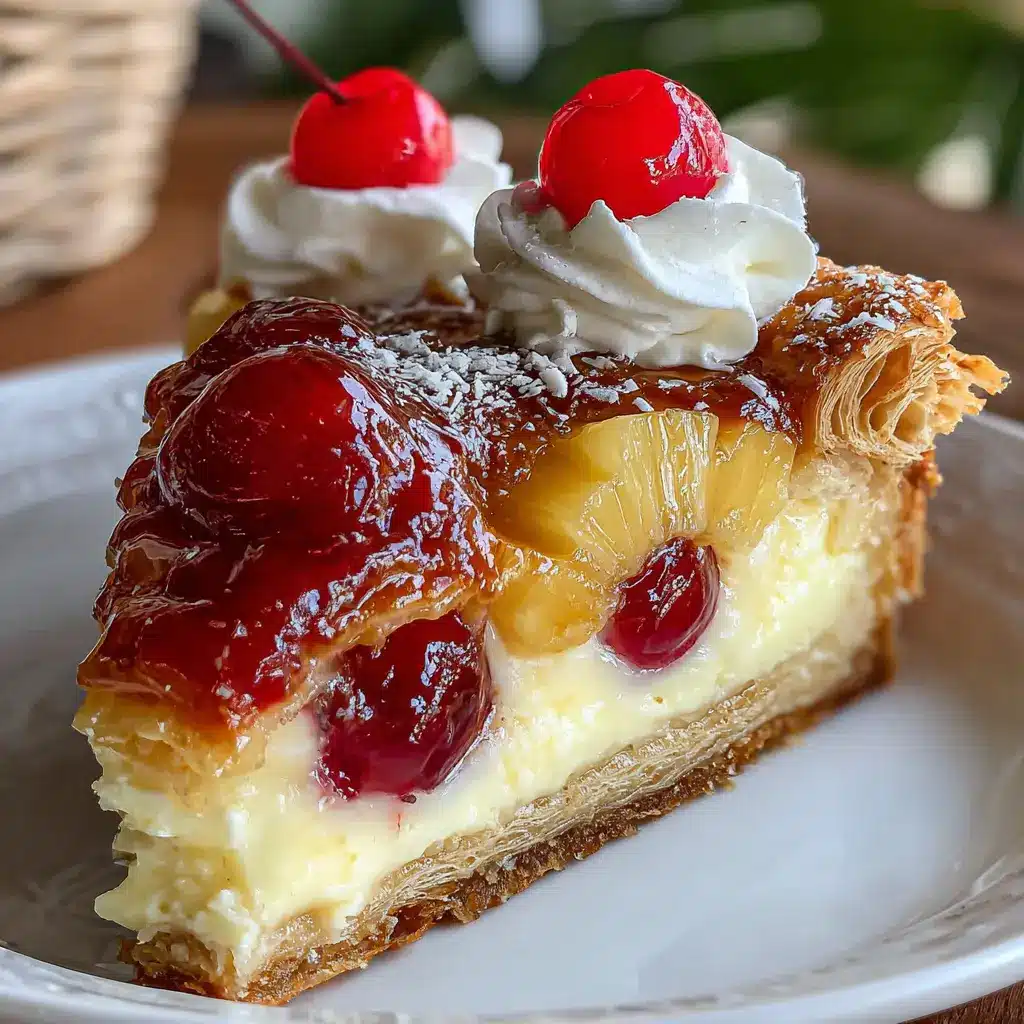
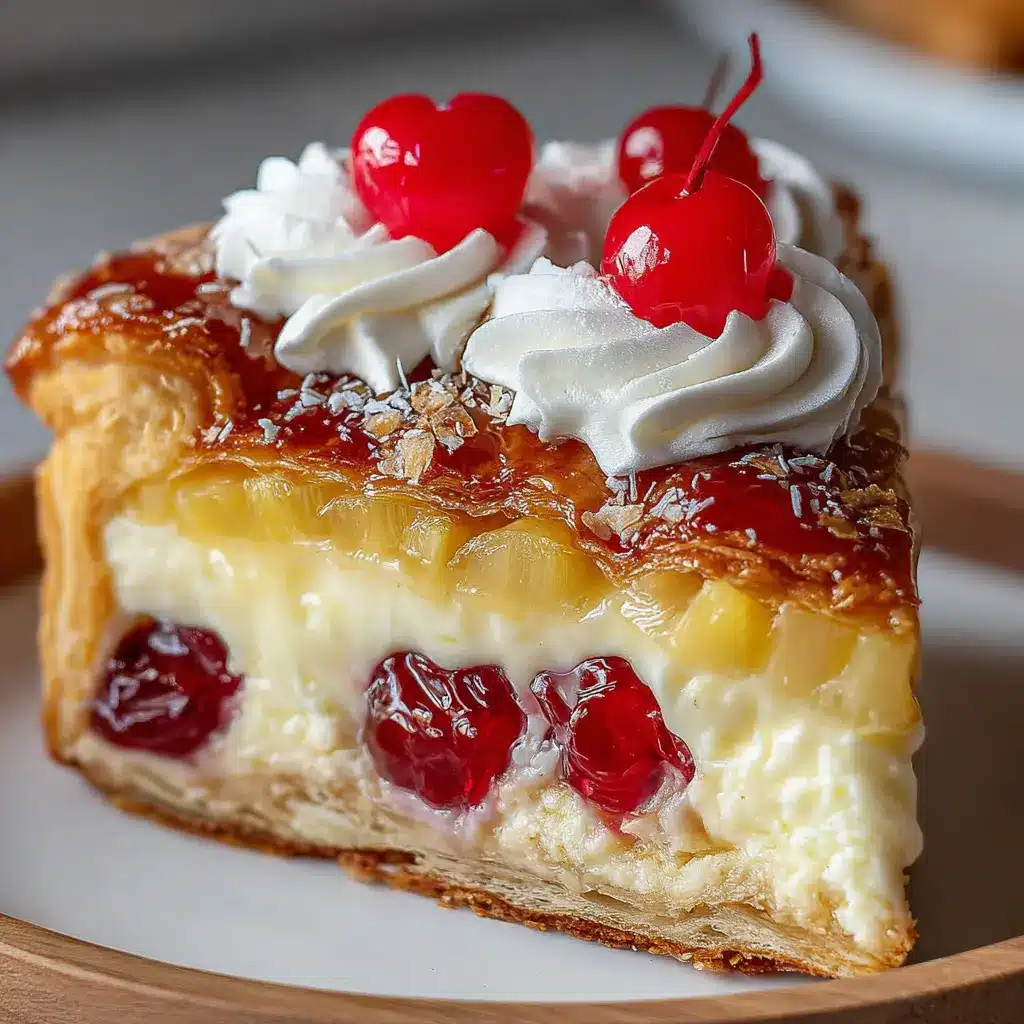
- If you’d like, you can sprinkle some fresh fruits like berries or cherries on top to enhance flavor and add a pop of color.
Brush with melted butter and prepare for baking
Now, let’s give your King’s Hawaiian Cheesecake Danish a delightful finish. Melt about 2 tablespoons of butter and brush it over the top of the rolls. This will create a lovely golden crust as it bakes and adds a flavor depth that is simply mouth-watering.
Bake until golden and delicious
Slide your prepared dish into the oven, letting it bake for about 25-30 minutes or until the rolls are golden brown and the filling is set. The aroma wafting through your kitchen will be hard to resist—your friends might start congregating in the kitchen!
Make that tasty glaze to finish!
While your Danish cools, whip up a simple glaze to drizzle over the top:
- Combine 1 cup of powdered sugar with 2-3 tablespoons of milk and a splash of vanilla.
- Stir until smooth. Adjust the consistency by adding more milk or sugar, as needed.
Once the King’s Hawaiian Cheesecake Danish has cooled slightly, drizzle the glaze generously on top. And there you have it—your delightful creation is ready to be devoured!
Making this King’s Hawaiian Cheesecake Danish is a fun and enjoyable way to brighten your day or wow friends at brunch. Give this recipe a try, and enjoy the compliments that will surely come your way!
Variations on King’s Hawaiian Cheesecake Danish
Tropical Twist with Additional Fruits
The classic King’s Hawaiian Cheesecake Danish brings a delightful blend of sweet and creamy flavors, but have you considered adding a tropical twist? Think about incorporating fresh fruits like ripe pineapple, mango, or even kiwi. These fruits not only add vibrant color but also enhance the overall flavor profile.
- Pineapple: Adds a tangy note that complements the cream cheese.
- Mango: Brings a sweet, juicy quality that pairs beautifully with the buttery dough.
- Kiwi: Its mild tartness can balance out the richness of the cheesecake filling.
You can mix these fruits into the cheesecake batter or use them as a topping for an added tropical flair. Not only does this variation create visual appeal, but it also opens a fun conversation about your creativity in the kitchen!
Make It a Berry Cheesecake Danish
If you’re a berry lover, then a berry cheesecake Danish might just be your new favorite indulgence. Strawberries, blueberries, and raspberries are fantastic candidates for this variation. Their natural sweetness adds depth to the richness of the cheesecake.
- Strawberries: Slice them fresh on top or blend them into the cheesecake for a burst of flavor.
- Blueberries: They can be folded in to provide a juicy surprise with each bite.
- Raspberries: Their slight tartness makes them perfect for balancing the sweet cream cheese filling.
To elevate this version, consider drizzling a homemade berry sauce over your Danish before serving. Simple tasks like these make your baking experience even more rewarding. You can find fabulous berry sauce recipes here!
Whether you venture into tropical fruits or berry delights, these variations on the King’s Hawaiian Cheesecake Danish will surely impress your friends and elevate your baking game.
Cooking Tips and Notes for King’s Hawaiian Cheesecake Danish
Ensure cream cheese is at room temperature for the best texture
When making your King’s Hawaiian Cheesecake Danish, one of the most important steps is ensuring your cream cheese is at room temperature. Cold cream cheese can be lumpy and hard to blend, resulting in a less-than-smooth filling. Take the cream cheese out of the fridge about 30 minutes before you start your recipe. This simple step will help you achieve that creamy, velvety texture that makes the cheesecake filling irresistible.
Tips for achieving a golden finish
To get that beautiful golden hue on your King’s Hawaiian Cheesecake Danish, preheat your oven properly and keep an eye on the baking time. Here are some tips to help you achieve that perfect bake:
- Brush with egg wash: A mixture of beaten egg and water brushed over the dough before baking can enhance color.
- Don’t overcrowd the baking pan: Leave space between your danishes to allow for even heat distribution.
- Rotate your pan: Midway through baking, give your pan a gentle rotation for consistent browning.
For even more insights on baking techniques, check out resources like America’s Test Kitchen. Enjoy the process, and savor the delightful results!
Serving Suggestions for King’s Hawaiian Cheesecake Danish
Pairing with Coffee or Tea
The King’s Hawaiian Cheesecake Danish is a delightful treat that pairs beautifully with your favorite coffee or tea. Consider a rich espresso or a smooth latte for an indulgent combination. If you’re more of a tea person, herbal teas like chamomile or chai can create a lovely counterbalance to the creamy sweetness of the cheesecake. Adding a sprinkle of cinnamon on top of your cappuccino can enhance the flavors even more. For tips on brewing the perfect cup, check out this guide.
Serving it at Brunch or as Dessert
Imagine serving a warm King’s Hawaiian Cheesecake Danish at your next brunch gathering. It’s perfect paired with fresh fruit, like strawberries or blueberries, adding a burst of freshness. You could even wrap it up with sides of turkey bacon and chicken ham for a savory touch. If you’re leaning towards dessert, serve it with a dollop of whipped cream or a scoop of vanilla ice cream. Trust me — your friends will be coming back for seconds! Plus, it’s a great conversation starter, blending sweet and savory in a way that’s sure to make everyone smile.
Time Breakdown for King’s Hawaiian Cheesecake Danish
Preparation time
Making your King’s Hawaiian Cheesecake Danish requires about 20–25 minutes of prep time. This is when you’ll gather your ingredients, roll out that fluffy dough, and prepare your creamy cheesecake filling. It’s perfect for when you want to squeeze in a little baking adventure before heading out for the day. Don’t forget to set your ingredients out ahead of time for the best results!
Baking time
The baking will take approximately 25–30 minutes. You want that golden-brown crust to form and the cheesecake filling to set perfectly. Picture your kitchen filling with a delightful aroma as the danish bakes to perfection.
Total time
All in all, you’re looking at about 55–60 minutes from start to finish for your King’s Hawaiian Cheesecake Danish. That’s just enough time to whip up a delicious treat to impress your friends or family. And just think—you’ll have a quick, scrumptious dessert ready to enjoy in no time! For more tips on baking, check out resources from King Arthur Baking or America’s Test Kitchen.
Nutritional Facts for King’s Hawaiian Cheesecake Danish
When indulging in a delicious King’s Hawaiian Cheesecake Danish, it’s essential to understand its nutritional makeup. This delightful treat typically contains about 350 calories per serving. While that may seem indulgent, let’s break it down further:
Calories per serving
With each serving, you’re not just enjoying the flavors but also accounting for those calories that contribute to your daily intake.
Breakdown of sugars and fats
The King’s Hawaiian Cheesecake Danish includes approximately 12 grams of sugar and 18 grams of total fat, which gives that creamy texture and sweet taste we all love. However, be mindful of the sugar content if you’re watching your intake.
Key nutrients to consider
In addition, this Danish offers some key nutrients to keep in mind:
- Calcium: Great for healthy bones
- Vitamin A: Supports vision and immune function
- Protein: Essential for muscle repair
So, while this treat is a delightful way to satisfy your sweet tooth, it does pack some nutritional value. Always feel free to explore Nutrition.gov for more details on specific dietary needs and recommendations! Keeping a balanced diet while occasionally enjoying a King’s Hawaiian Cheesecake Danish can make for satisfying treat in your week.
FAQ about King’s Hawaiian Cheesecake Danish
What if I can’t find King’s Hawaiian rolls?
If you’re struggling to find King’s Hawaiian rolls, don’t worry! You can substitute them with another brand of sweet bread rolls or even make your own. Look for fluffy, slightly sweet options like brioche or soft dinner rolls. The key is to capture that delightful texture and sweetness that makes the King’s Hawaiian Cheesecake Danish so irresistible. If you’re inspired to make a homemade alternative, check out this easy sweet bread recipe to craft your own!
Can I make this in advance?
Absolutely! One of the fantastic things about the King’s Hawaiian Cheesecake Danish is that it can be prepared ahead of time. You can assemble your danishes and keep them in the refrigerator for up to 24 hours before baking. This makes it effortless to whip up a delicious breakfast for guests or an indulgent treat for yourself. Just pop them in the oven when you’re ready to enjoy!
How should I store leftovers?
If you find yourself with leftovers (though that might be a challenge!), you can store your King’s Hawaiian Cheesecake Danish in an airtight container. They should remain fresh in the fridge for about 3 days. Reheat in the oven or microwave when you’re ready for a tasty treat. For tips on proper storage methods, consider checking out this helpful guide on keeping baked goods fresh.
Whether you’re making this delightful dessert for a special occasion or just because, these tips will help you enjoy every bite!
Conclusion on King’s Hawaiian Cheesecake Danish
The joy of homemade desserts never ceases to amaze. When you create your King’s Hawaiian Cheesecake Danish, you’re not just baking — you’re crafting a delicious experience that warms the heart and delights the taste buds. Each bite captures the essence of sweet, buttery goodness combined with creamy cheesecake filling, making it a perfect treat for any occasion.
If you’ve never tried making this Danish, now’s your chance! Share the experience with friends or family, and witness the smiles as they savor your creation. Don’t forget to check out more dessert ideas like these on Taste of Home or Bon Appétit for even more inspiration in your culinary adventures!
Print
King’s Hawaiian Cheesecake Danish: Indulgent Sweet Delight at Home
- Total Time: 45 minutes
- Yield: 8 servings
- Diet: Vegetarian
Description
Experience the heavenly combination of creamy cheesecake and soft Hawaiian bread in this delicious recipe.
Ingredients
- 2 cups King’s Hawaiian Sweet Bread, cubed
- 1 package cream cheese, softened
- 1/2 cup granulated sugar
- 1 teaspoon vanilla extract
- 2 large eggs
- 1/4 cup heavy cream
- 1 tablespoon lemon juice
- 1/4 teaspoon salt
- 1/2 cup fresh fruit (optional, for topping)
Instructions
- Preheat your oven to 350°F (175°C).
- In a mixing bowl, beat the cream cheese and sugar until smooth.
- Add the vanilla extract, eggs, heavy cream, lemon juice, and salt, mixing well.
- Gently fold in the cubed King’s Hawaiian Sweet Bread until evenly coated.
- Pour the mixture into a greased baking dish and spread it evenly.
- Bake for 25-30 minutes or until the top is golden and the center is set.
- Allow to cool slightly before slicing and serving.
- Top with fresh fruit if desired.
Notes
- For added flavor, you can mix in some chocolate chips or nuts.
- This dessert can also be served warm or cold.
- Prep Time: 15 minutes
- Cook Time: 30 minutes
- Category: Dessert
- Method: Baking
- Cuisine: American
Nutrition
- Serving Size: 1 slice
- Calories: 280
- Sugar: 15g
- Sodium: 200mg
- Fat: 18g
- Saturated Fat: 10g
- Unsaturated Fat: 6g
- Trans Fat: 0g
- Carbohydrates: 24g
- Fiber: 1g
- Protein: 5g
- Cholesterol: 80mg
")