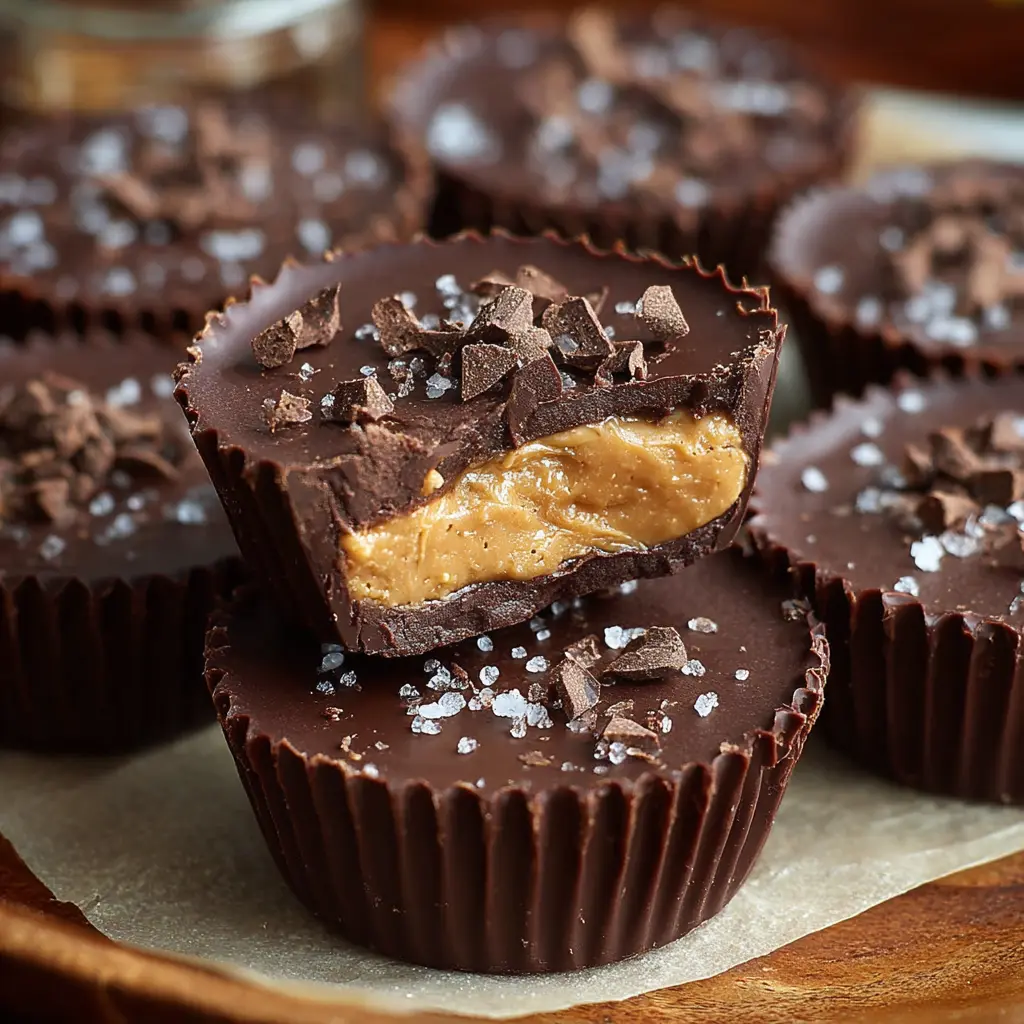
Introduction to Homemade Peanut Butter Cups
There’s something incredibly satisfying about indulging in a treat that you have made from scratch. Enter: homemade peanut butter cups. These delightful morsels are more than just a sweet snack; they’re a game changer for numerous reasons.
Why homemade peanut butter cups are a game changer?
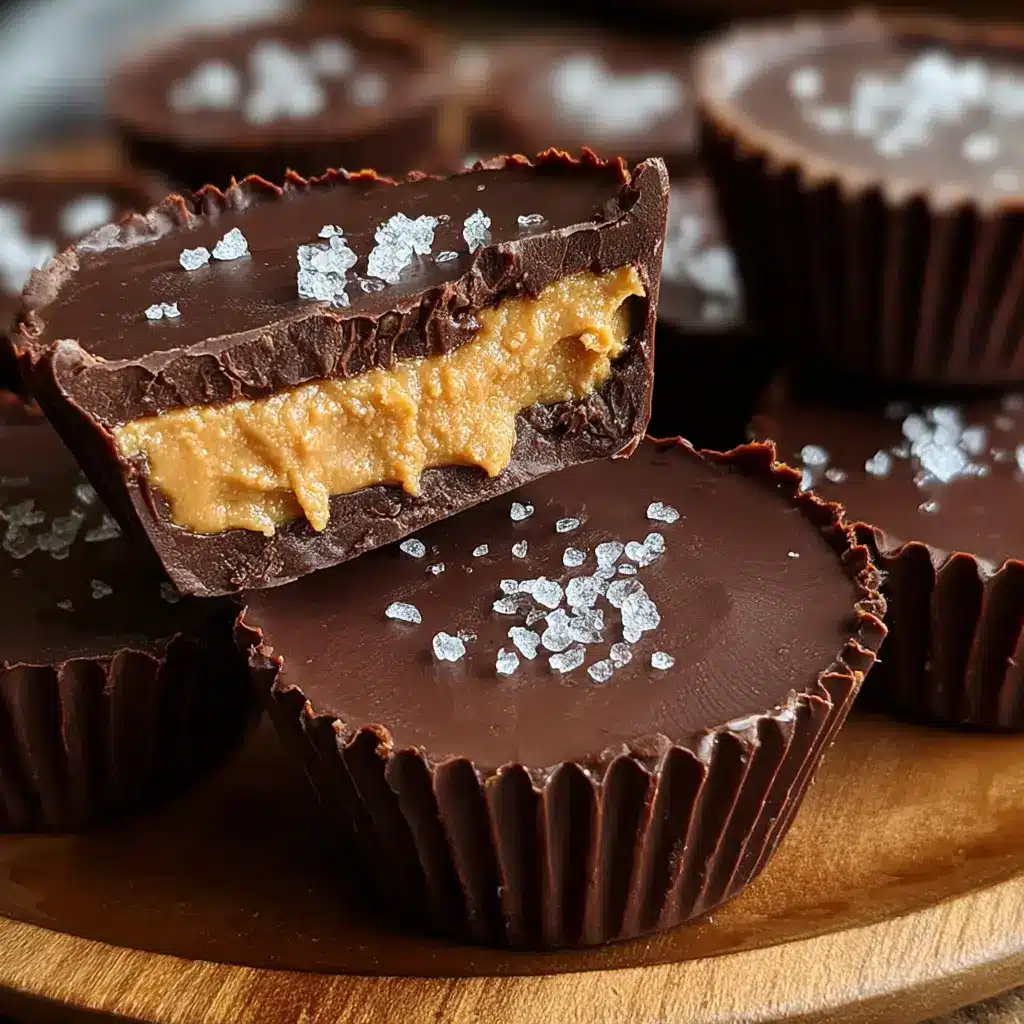
First and foremost, making your own peanut butter cups allows you to control the ingredients. Commercial versions often contain preservatives and artificial flavors, making your homemade version a healthier choice. You can opt for organic peanut butter, reduce sugar, or even use alternative sweeteners without compromising taste. Additionally, making them from scratch gives you the flexibility to customize flavors. Feel like a dash of sea salt? Go for it! Want to experiment with dark chocolate? Why not!
Homemade peanut butter cups also make for a great activity to share with friends or family. Picture this: a cozy afternoon spent melting chocolate, spreading peanut butter, and enjoying the sweet aroma wafting through the kitchen. It’s perfect for building memories, and who doesn’t love a bit of DIY magic?
In fact, studies suggest that involvement in food preparation can enhance your appreciation for what you eat. According to a report from the Harvard T.H. Chan School of Public Health, people who spend time cooking tend to make healthier food choices. So not only are you taking control of what goes into your treats, but you’re also cultivating a relationship with food.
Alternatively, consider these creative variations you can try:
- Adding crushed nuts for an added crunch.
- Swapping coconut oil for butter for a tropical twist.
- Infusing flavors like vanilla or cinnamon to elevate your classic recipe.
The next time you’re craving something sweet, why not whip up a batch of homemade peanut butter cups? Feel free to experiment, and don’t forget to let your friends in on the fun! For more inspiration, check out resources like Serious Eats for creative takes and tips on candy-making.
Get ready to redefine your snacking game with homemade peanut butter cups! They’re more than just a treat; they are a way to express creativity and enjoy the comfort of something made with love.
Ingredients for Homemade Peanut Butter Cups
Creating your own homemade peanut butter cups is not just a treat; it’s an adventure in the kitchen! Here’s what you’ll need to whip up these delicious delights:
- Chocolate: Use high-quality semisweet or dark chocolate. Aim for about 1 ½ cups, as this will be your outer shell.
- Peanut Butter: Smooth and creamy is ideal! You’ll need roughly 1 cup. Opt for natural peanut butter if you want a richer flavor.
- Powdered Sugar: A half cup will help sweeten your peanut butter filling, giving it that classic taste we all love.
- Butter: Two tablespoons of unsalted butter help the chocolate melt smoothly.
- Vanilla Extract: A teaspoon adds a delightful warmth to the flavor profile.
Feeling adventurous? You can experiment by mixing in some sea salt or even adding crushed nuts for a crunchy twist. Don’t forget to check out this source for more on the benefits of peanut butter!
By gathering these simple ingredients, you’re on your way to enjoying your very own delightful homemade peanut butter cups. Happy cooking!
Preparing Homemade Peanut Butter Cups
Making homemade peanut butter cups is not just a culinary endeavor; it’s an exercise in nostalgia, a treat that brings back memories of childhood, while also giving you the chance to express your culinary creativity. With a few simple steps, you can whip up these delightful confections right in your kitchen. Let’s dive into the process of preparing your very own batches!
Gathering Your Materials
Before you start, it’s crucial to gather all the materials you need. Here’s a handy list:
-
Ingredients:
-
1 cup of semi-sweet chocolate chips (or your favorite chocolate)
-
1 cup of creamy peanut butter
-
1 cup of powdered sugar
-
1 teaspoon of vanilla extract
-
Pinch of salt
-
Tools:
-
Muffin tin with liners
-
Microwave-safe bowl or a double boiler
-
Mixing bowl
-
Spoon or spatula
Having everything organized will not only streamline the process but also make it more enjoyable. Imagine the satisfaction of checking off each item as you progress!
Melting the Chocolate
Start by melting the chocolate, which forms the outer shell of your homemade peanut butter cups. You can choose between using a microwave or a double boiler.
- Microwave Method:
- Place the chocolate chips in a microwave-safe bowl.
- Heat in short bursts of 15-30 seconds, stirring in between, until melted and smooth.
- Double Boiler Method:
- Fill a saucepan with a couple of inches of water and bring to a simmer.
- Place the chocolate chips in a glass or metal bowl on top, making sure it doesn’t touch the water.
- Stir occasionally until the chocolate is melted.
Whichever method you choose, remember to keep an eye on the chocolate to avoid burning it. The result should be silky and glossy—just perfect for your cups!
Creating the Peanut Butter Mixture
While your chocolate is melting, let’s prepare the peanut butter filling. In a mixing bowl, combine the peanut butter, powdered sugar, vanilla extract, and a pinch of salt.
- Mix until fully combined; your mixture should have a thick yet creamy consistency.
- Tip: If you want a bit of crunch, consider adding some chopped peanuts for texture—after all, who doesn’t love a bit of extra crunch?
This delectable filling is what transforms plain chocolate into rich, mouthwatering homemade peanut butter cups.
Assembling the Layers
Now comes the fun part—layering! Grab your muffin tin lined with paper liners.
- Start by spooning about a tablespoon of melted chocolate into the bottom of each liner, spreading it to create an even layer.
- Next, place a dollop of the peanut butter mixture on top of the chocolate. Use the back of the spoon to flatten it a bit, ensuring it doesn’t reach the edges.
- Finish by topping each cup with more melted chocolate, covering the peanut butter completely.
Feel free to experiment with the proportions! More peanut butter? Yes, please.
Chilling and Setting the Cups
Once you’ve layered everything, it’s time to let these beauties chill. Place the muffin tin in the refrigerator for about 30 minutes, or until the chocolate is fully set.
After they’ve chilled, carefully remove the homemade peanut butter cups from the liners. You can store them in an airtight container in the fridge, but good luck keeping them around for long!
Making these cups is not just about indulging your sweet tooth; it’s about the joy of creating something delicious. Original, customizable, and undeniably delightful, your homemade treats are sure to impress everyone around—and who knows, you might just create a new family favorite. Enjoy!
Variations on Homemade Peanut Butter Cups
When it comes to indulgent treats, homemade peanut butter cups are hard to beat. However, there’s no reason to stick with a single recipe! Let’s explore two delicious variations that will elevate your dessert game.
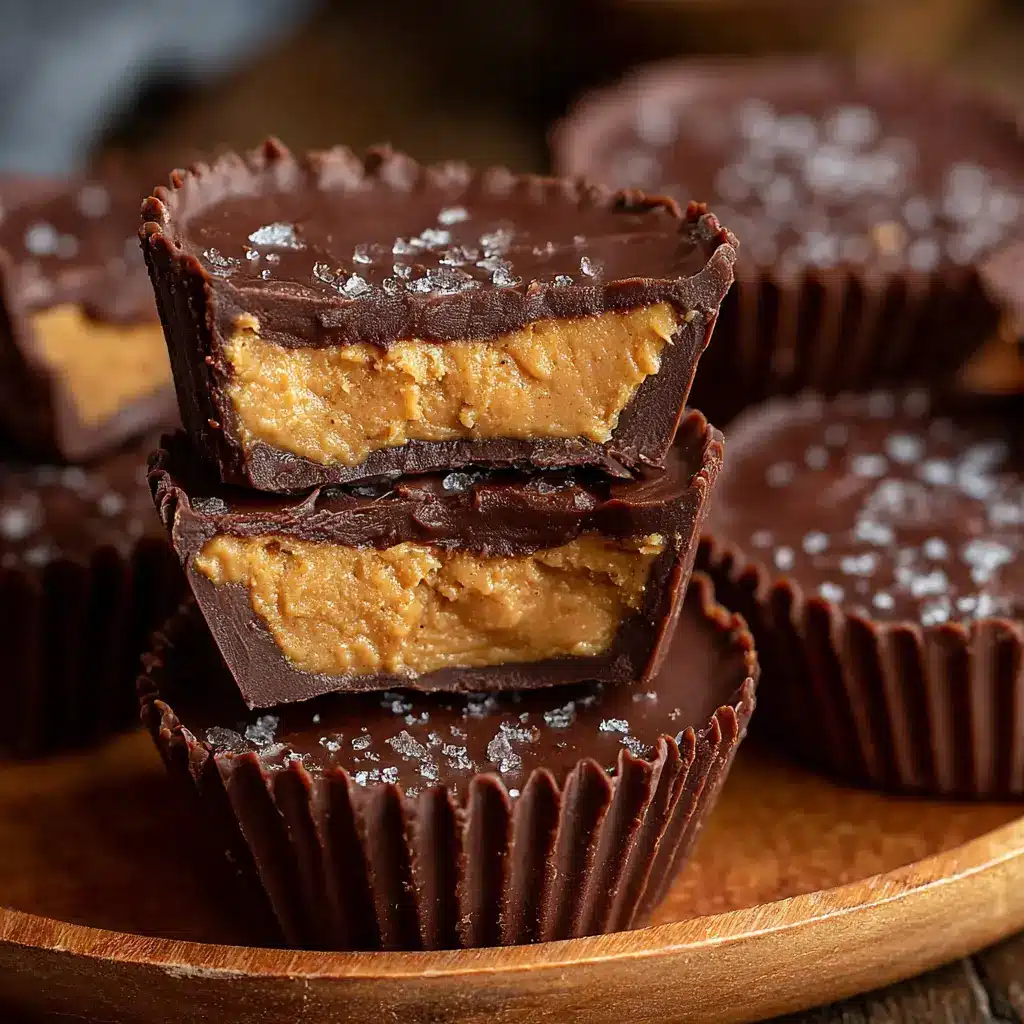
Dark Chocolate Peanut Butter Cups
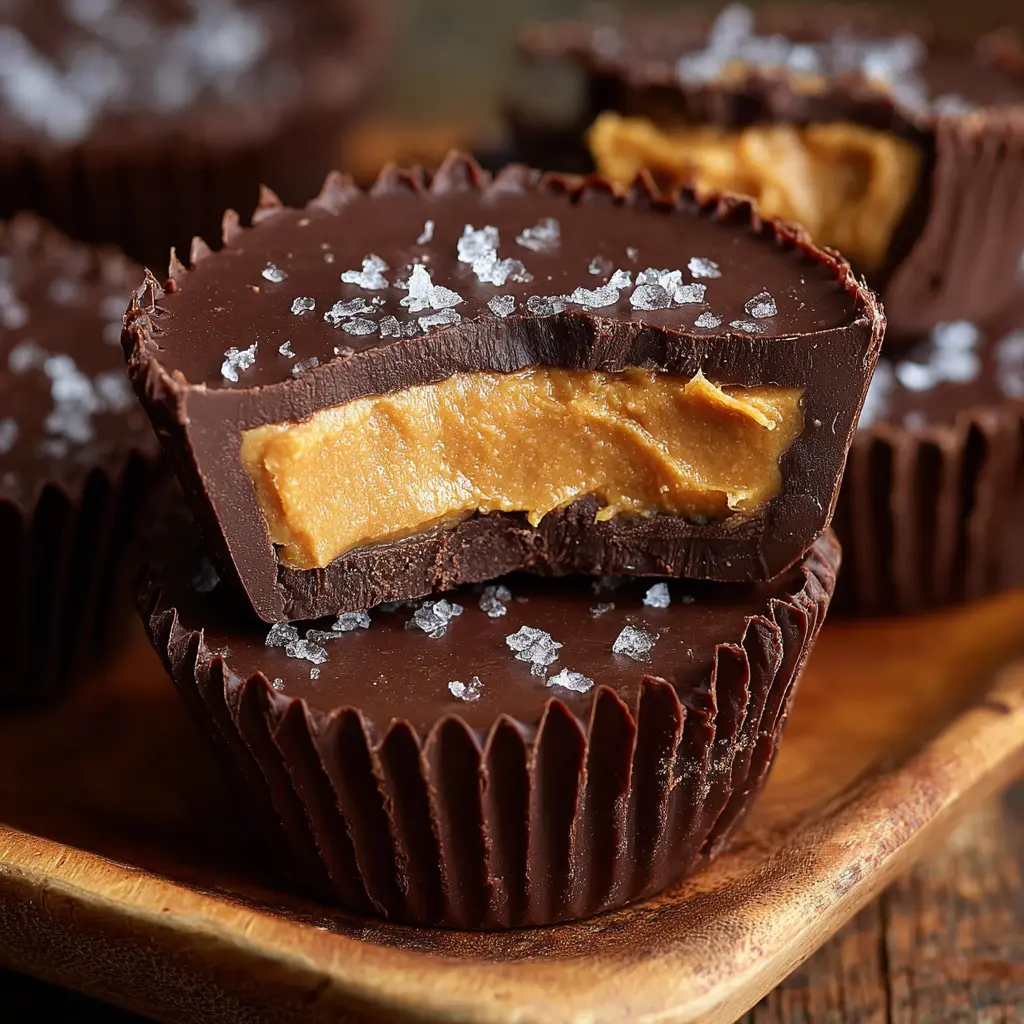
If you’re a fan of rich, intense chocolate flavors, dark chocolate peanut butter cups are a must-try. The bitterness of dark chocolate beautifully offsets the sweetness of the peanut butter filling, creating a delightful contrast.
- Choose your chocolate: A high-quality dark chocolate with at least 60% cacao works wonders. Consider brands like Ghirardelli or Callebaut for a velvety texture.
- Customization: Feel free to add a hint of sea salt on top for an extra flavor burst. The combination of sweet and salty is simply irresistible!
Crunchy Peanut Butter Cups with Nuts
For those who enjoy a bit of texture, crunchy peanut butter cups take the classic treat to the next level. Adding chopped nuts gives these cups a delightful crunch that complements the creamy filling perfectly.
- Nuts of choice: Try using roasted peanuts for a classic flavor or switch it up with almonds or hazelnuts for a unique twist. Just chop them coarsely and mix them into your peanut butter filling.
- Mix and match: Want to take it even further? Layer in some crushed pretzels as well for a sweet and salty combo that’s sure to please any palate.
These variations on homemade peanut butter cups don’t just change the flavor – they also provide a fun way to experiment with different ingredients. So, what are you waiting for? Dive into these delicious options and make your treats even more enjoyable! For more inspiration, check out the history of chocolate here.
Cooking Tips and Notes for Homemade Peanut Butter Cups
Creating your own homemade peanut butter cups is both a rewarding and delicious experience. Here are some helpful tips to make your treats perfect every time:
Choosing the Right Chocolate
- Opt for high-quality chocolate chips, which melt more smoothly and provide a rich flavor. Dark chocolate adds a wonderful depth, while milk chocolate offers a classic sweetness. Consider experimenting with different types to find your favorite combination.
Be Mindful of Texture
- The creamy or crunchy peanut butter you choose will greatly affect your final product. If you prefer a bit of crunch, go for crunchy peanut butter. For a smoother finish, stick with creamy—both can add a delightful texture contrast.
Use Paper Liners
- Invest in decent paper liners for your muffin tin. They help in easy removal and keep your cups looking pristine, ready for gifting or sharing. If you’re looking for eco-friendly options, consider reusable silicone liners.
Store Properly
- After making your homemade peanut butter cups, store them in an airtight container in the fridge for up to two weeks. You can also freeze them for longer storage; just make sure they’re well-wrapped!
For more peanut butter inspiration, check out resources like The Peanut Institute for nutrition insights. Happy cooking!
Serving Suggestions for Homemade Peanut Butter Cups
When it comes to enjoying your homemade peanut butter cups, the options are delightfully endless. Here are a few serving suggestions that can elevate your treat into something truly special!
Pairing with Fresh Fruits
Think about combining your peanut butter cups with some sliced apples or bananas. The crunchiness of the apple or the creamy sweetness of the banana complements the rich, chocolatey flavor of the cups beautifully, giving your snack a nutritious boost.
Serve With a Side of Dip
Why not take it up a notch? Melt some extra chocolate or make a quick ganache for dipping. The combination of flavors creates an irresistible experience, great for sharing at parties or cozy movie nights.
Try Creative Desserts
Consider creating a deconstructed dessert by crumbling your peanut butter cups over vanilla ice cream or yogurt. It adds a festive flair and turns a simple dessert into a gourmet treat.
For more tips on pairing flavors, check out this article on food pairings that might inspire your next delicious combination!
Time breakdown for Homemade Peanut Butter Cups
Preparation time
Creating your own homemade peanut butter cups is a delightful adventure that takes about 15 minutes of prep. Gather your ingredients—dark chocolate, creamy peanut butter, and a sweetener of your choice. While you’re mixing, consider cranking up your favorite playlist to make the process even more enjoyable!
Cooling time
Once you’ve assembled your treats, let them chill in the refrigerator for about 30-60 minutes. This cooling time is crucial for achieving that amazing, melt-in-your-mouth texture.
Total time
In total, you’re looking at roughly 45-75 minutes from start to finish. Not too long for a sweet, satisfying treat that’s healthier than store-bought options! Plus, making these homemade peanut butter cups allows you to customize them however you like—talk about a win!
If you’re eager for a little chocolatey treat, check out sites like Serious Eats for more inspiration on chocolate-based recipes.
Nutritional facts for Homemade Peanut Butter Cups
When you whip up a batch of homemade peanut butter cups, not only are you indulging in a delicious treat, but you’re also nourishing your body in a fun way. Let’s break down some key nutritional facts.
Calories per cup
Each homemade peanut butter cup typically contains around 100-120 calories. This means you can enjoy a sweet treat without overwhelming your diet—perfect for satisfying your sweet tooth!
Sugar content
Made with natural ingredients, homemade versions often have about 8-10 grams of sugar per cup. Using alternatives like honey or maple syrup can reduce processed sugar levels while keeping that rich sweetness intact.
Protein breakdown
One of the best parts is the protein boost! Each cup may provide about 3-4 grams of protein, mainly from peanut butter. For a deeper dive into incorporating protein into your diet, you can check reliable sources like the American Heart Association.
So there you have it—knowing the nutritional facts makes enjoying your homemade peanut butter cups even sweeter! How do you like to elevate your own recipes?
FAQ about Homemade Peanut Butter Cups
Can I make these vegan-friendly?
Absolutely! Making homemade peanut butter cups vegan is straightforward and delicious. Simply substitute dairy chocolate with vegan chocolate or dark chocolate that contains no milk solids. For the filling, use natural peanut butter without added oils or sugar to keep it pure. You can also try almond or cashew butter for a delightful twist. Many recipes online offer vegan alternatives, so your options are limitless.
How should I store leftover peanut butter cups?
To keep your homemade peanut butter cups fresh and tasty, store them in an airtight container. If you anticipate them lasting a while (though they might disappear quickly!), consider refrigeration. Cold storage not only preserves flavor but also intensifies the chocolate experience. Just make sure to let them sit at room temperature for a few minutes before indulging, so they soften up a bit. For long-term storage, you can freeze them — just wrap each cup in plastic wrap before placing them in a freezer-safe container. Thaw them in the fridge when you’re ready for a treat.
What if I don’t have mini cupcake liners?
No mini cupcake liners? No problem! You can easily create your own by cutting squares of parchment paper and placing them inside a muffin pan. This provides a makeshift liner to help remove your homemade peanut butter cups once set. Another option is to pour the mixture directly into silicone molds, which makes for fun shapes and easy release. Get creative — shapes like hearts or stars can make your treats even more special!
By addressing these common questions, we hope you feel fully equipped to dive into the wonderful world of homemade peanut butter cups. Happy baking!
Conclusion on Homemade Peanut Butter Cups
Creating your own homemade peanut butter cups is not just about indulging your sweet tooth; it’s an experience you can savor. These treats are easily customizable, allowing you to experiment with different types of chocolate and nut butters. Plus, making them at home ensures you control the ingredients, offering a healthier option that doesn’t skimp on flavor.
As you embark on your peanut butter cup journey, don’t hesitate to share your unique twists on the recipe. Whether it’s adding a sprinkle of sea salt or experimenting with dark chocolate, the possibilities are endless. Ultimately, enjoy the process and delight in your delicious creations! For more inspiration, check out Serious Eats for tips on chocolate tempering and flavor variations.
Print
Homemade Peanut Butter Cups: The Easy Indulgence You’ll Love
- Total Time: 1 hour 25 minutes
- Yield: 12 servings
- Diet: Vegetarian
Description
Indulge in the rich and creamy taste of homemade peanut butter cups that are simple to make and utterly delicious.
Ingredients
- 1 cup creamy peanut butter
- 2 cups chocolate chips
- 1/4 cup powdered sugar
- 1/2 teaspoon vanilla extract
Instructions
- In a mixing bowl, combine the peanut butter, powdered sugar, and vanilla extract.
- In a microwave-safe bowl, melt the chocolate chips in the microwave, stirring every 30 seconds until smooth.
- Line a muffin tin with cupcake liners and pour a small amount of melted chocolate into each liner.
- Add a spoonful of the peanut butter mixture on top of the chocolate, then cover with more melted chocolate.
- Refrigerate for at least an hour until set, then enjoy!
Notes
- For an extra crunch, add crushed peanuts to the peanut butter mixture.
- These can be made ahead and stored for a quick treat.
- Prep Time: 15 minutes
- Cook Time: 10 minutes
- Category: Desserts
- Method: No-bake
- Cuisine: American
Nutrition
- Serving Size: 1 cup
- Calories: 200
- Sugar: 12g
- Sodium: 50mg
- Fat: 12g
- Saturated Fat: 6g
- Unsaturated Fat: 4g
- Trans Fat: 0g
- Carbohydrates: 20g
- Fiber: 2g
- Protein: 6g
- Cholesterol: 0mg
")