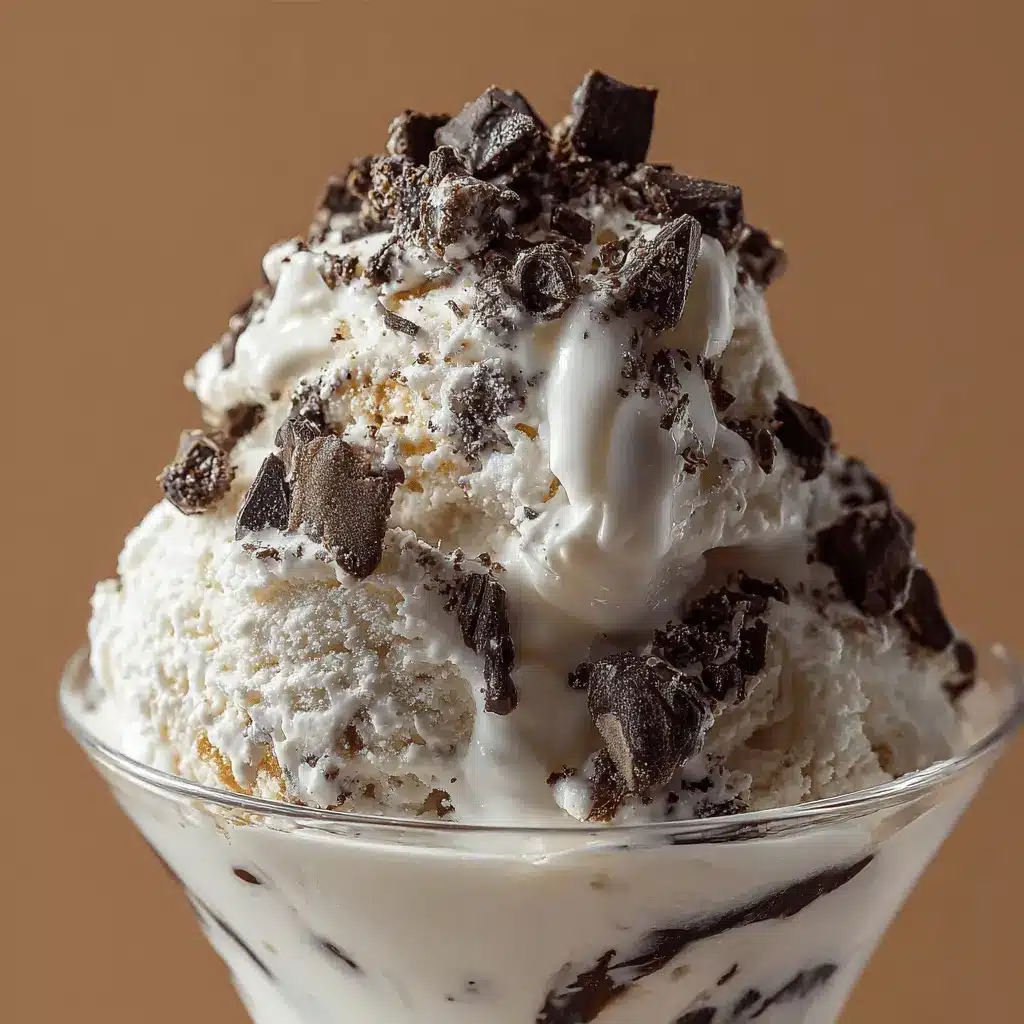
Introduction to Homemade Moose Tracks Ice Cream
Making ice cream at home might seem like a daunting task, but trust me, it’s one of life’s little joys that anyone can master. Homemade Moose Tracks Ice Cream is a perfect blend of rich, velvety ice cream swirled with decadent chocolate fudge and delightful peanut butter cups. Oddly delicious, right? The best part is you control every ingredient, letting you make it as indulgent or as light as you prefer!
Why Homemade Ice Cream is the Best
When it comes to ice cream, store-bought options often fall short in flavor and texture. If you’ve ever tasted freshly churned ice cream, you understand the enchantment of that creamy goodness. Here’s why making it at home is a game changer:
-
Freshness: There’s something magical about using fresh ingredients. You can opt for organic dairy or even alternative milk like almond or oat, making your Homemade Moose Tracks Ice Cream customizable to your dietary needs.
-
Quality Control: Ever read the ingredient list on a store-bought ice cream? You might encounter hard-to-pronounce additives and preservatives. By making it at home, you ensure all-natural ingredients without any hidden surprises.
-
Creative Freedom: Have fun with flavors and mix-ins! You can tailor the fudge and peanut butter cup components, playing around with different types of chocolate or even adding your favorite candy.
-
Cost-Effective: Did you know that making ice cream at home can save you a significant amount of money? Plus, you can prepare a larger batch for a fraction of the price of multiple scoops at an ice cream shop.
In a world where we can sometimes feel like we have little control, creating your own ice cream recipe can be incredibly satisfying. Plus, it’s a fantastic way to impress friends at a summer gathering or a cozy movie night. I remember the first time I whipped up Homemade Moose Tracks Ice Cream for a group of friends; the smile on their faces was absolutely priceless!
For more tips on ice cream-making techniques, you can explore credible resources like the Ice Cream Makers Association, where you can find innovative methods and delicious inspiration.
So roll up your sleeves, and let’s dive into making a dessert that will surely become a favorite. After all, who can resist a scoop of creamy, delectable ice cream right at home?
Ingredients for Homemade Moose Tracks Ice Cream
Creating your own Homemade Moose Tracks Ice Cream can be a delightful adventure that brings both fun and flavor into your kitchen. Let’s break down what you’ll need to achieve that perfect creamy goodness!
For the Ice Cream Base
To craft the perfect ice cream base, you’ll need:
- 2 cups heavy cream: This is essential for that rich and velvety texture.
- 1 cup whole milk: Balances out the creaminess and adds a refreshing element.
- 3/4 cup granulated sugar: Sweetens your ice cream; feel free to adjust based on your preference.
- 1 teaspoon vanilla extract: For that warm, aromatic flavor that complements your chocolatey mix-ins.
Want some alternative suggestions? Check out The Ice Cream Encyclopedia for more creative bases!
For the Moose Tracks Mix-ins
Now, onto the fun part: the mix-ins!
- 1/2 cup peanut butter: Go for creamy here—it’s a must for that classic Moose Tracks flavor.
- 1/2 cup hot fudge sauce: A drizzle of decadence that swirls beautifully into the ice cream.
- 1/2 cup chocolate-covered peanuts: Their crunch complements the creaminess perfectly.
- Optional add-ins: You could even throw in some crushed cookies or mini marshmallows for extra texture.
By mixing and matching these ingredients, you can create a Homemade Moose Tracks Ice Cream that is uniquely your own. Who said ice cream should only be vanilla? Let your creativity flow! Happy churning!
Step-by-Step Preparation of Homemade Moose Tracks Ice Cream
Making Homemade Moose Tracks Ice Cream is not just a treat; it’s a journey into the creamy depths of flavor that’s sure to indulge your sweet tooth. The delightful combination of chocolate fudge, peanut butter swirls, and crunchy chocolate-covered treats provides a unique ice cream experience that’s hard to resist. Ready to embark on this delectable pathway? Let’s dive into the steps!
Make the Ice Cream Base
To start your homemade adventure, you’ll need to create a delicious ice cream base. This base is what gives your ice cream its smooth and creamy texture. Here’s what you’ll need:
- 2 cups heavy cream
- 1 cup whole milk
- 3/4 cup granulated sugar
- 1 teaspoon vanilla extract
- Pinch of salt
In a medium saucepan over medium heat, combine the heavy cream, whole milk, sugar, and salt. Stir gently until the sugar is dissolved and the mixture is warm but not boiling. Once warmed, add in the vanilla extract for that extra layer of flavor. Did you know that using fresh, high-quality vanilla can make a significant difference in your ice cream’s flavor?
Whisk the Egg Yolks
While the base is warming up, it’s time to focus on the egg yolks. You’ll need:
- 4 large egg yolks
In a separate bowl, whisk the egg yolks until they’re smooth and pale. This step is crucial as it introduces richness into your ice cream. Some folks worry about using raw eggs, but if you source high-quality eggs, they are generally safe to use. Check out this resource from the USDA Food Safety and Inspection Service for more on safe egg handling.
Temper the Egg Yolks
Now comes the fancy technique of tempering. Gradually pour about a cup of the warm cream mixture into the beaten egg yolks while whisking continuously. This process raises the temperature of the yolks gently, preventing them from scrambling. Once well mixed, pour the yolk mixture back into the saucepan with the remaining cream.
Cook and Cool the Mixture
Over medium heat, continue to cook the combined mixture, stirring frequently until it thickens enough to coat the back of a spoon. This usually takes about 5-7 minutes. Don’t rush this step; patience is key! After reaching the right consistency, remove it from heat and allow it to cool in the refrigerator for at least 4 hours or overnight. This cooling period helps develop those rich flavors.
Churn the Ice Cream
Now for the fun part! Pour the chilled mixture into your ice cream maker, following the manufacturer’s instructions. Churn until it reaches a soft-serve consistency. This typically takes about 20-30 minutes, depending on your machine. When you see that beautiful silky texture forming, you know you’re on the right track!
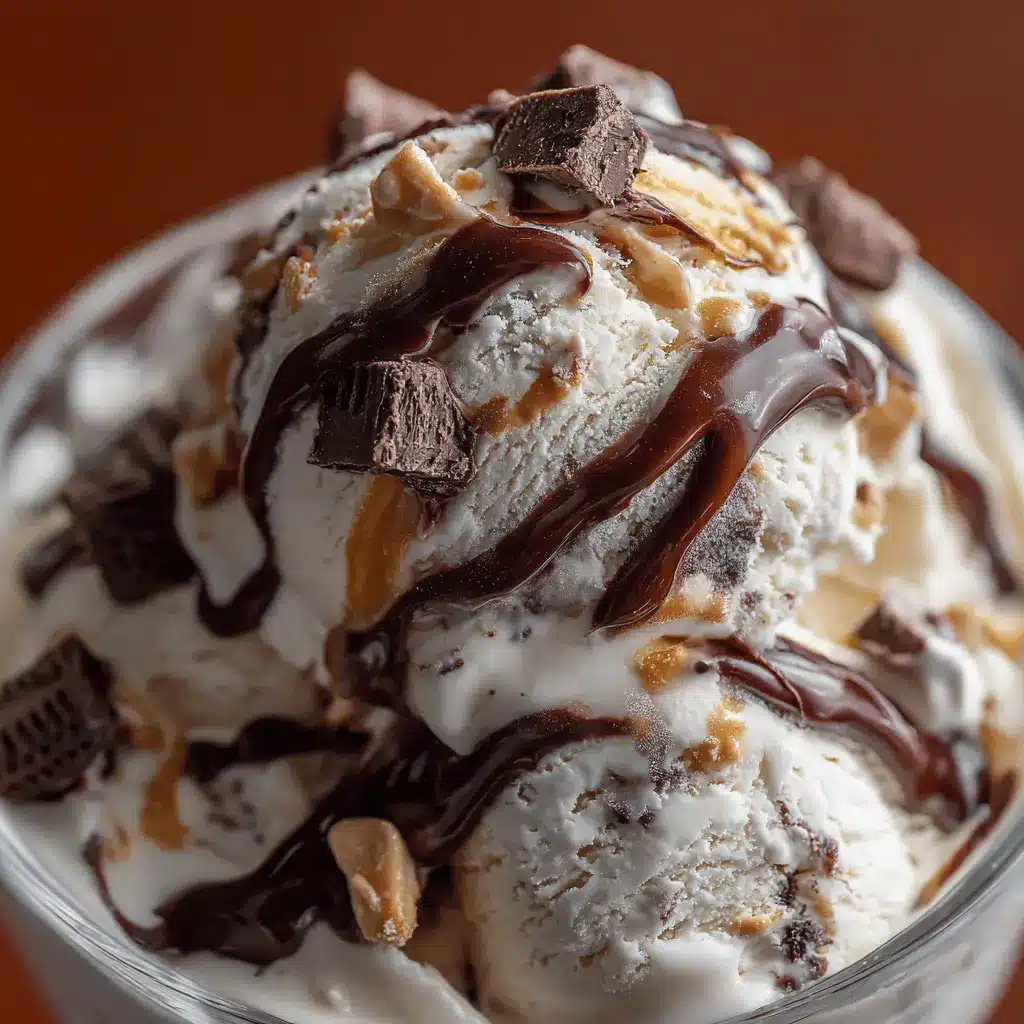
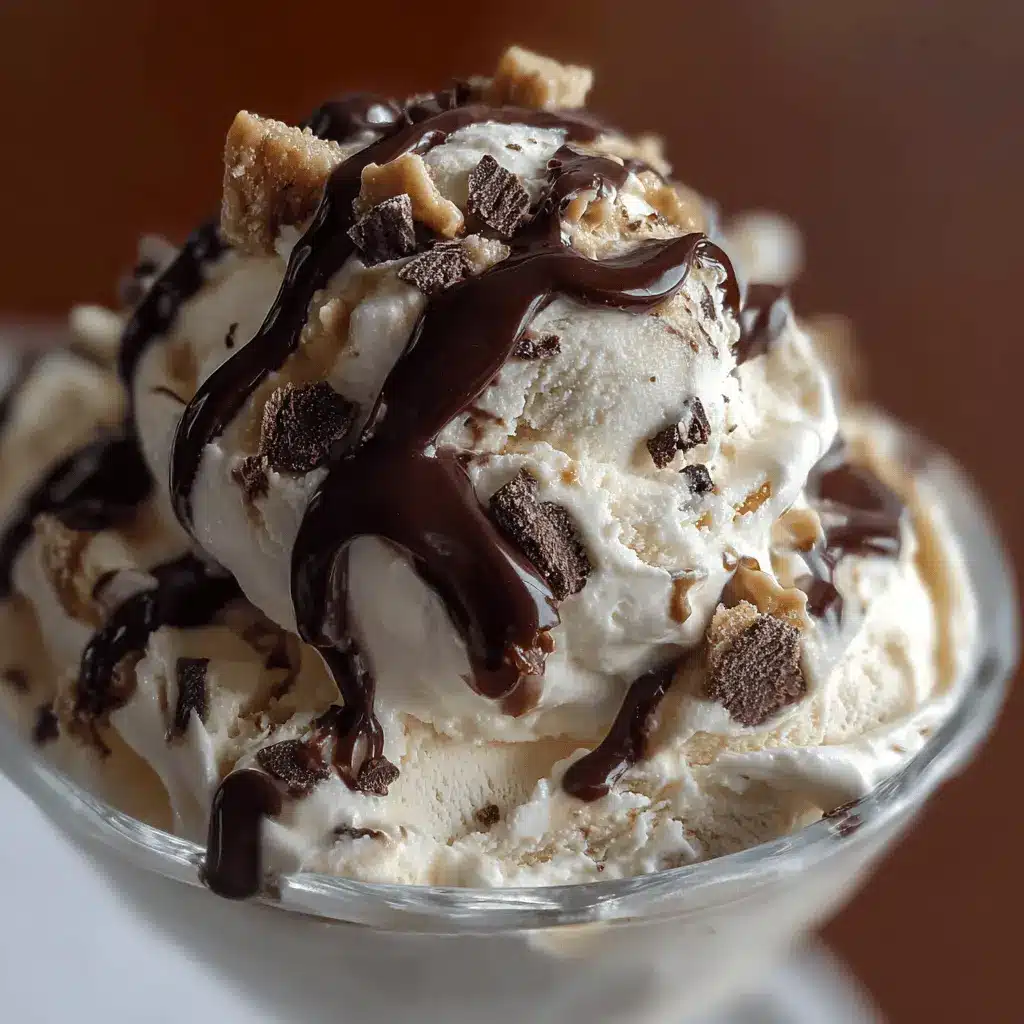
Swirl in the Moose Tracks
Here comes the highlight of Homemade Moose Tracks Ice Cream: the delicious mix-ins! You’ll need:
- 1 cup chocolate fudge (store-bought or homemade)
- 1 cup peanut butter sauce (a simple blend of peanut butter and some cream works beautifully)
In a large bowl, gently fold in your fudge and peanut butter sauce into the churned ice cream. Aim for a marbled effect without completely mixing it. You want those tasty swirls to stand out!
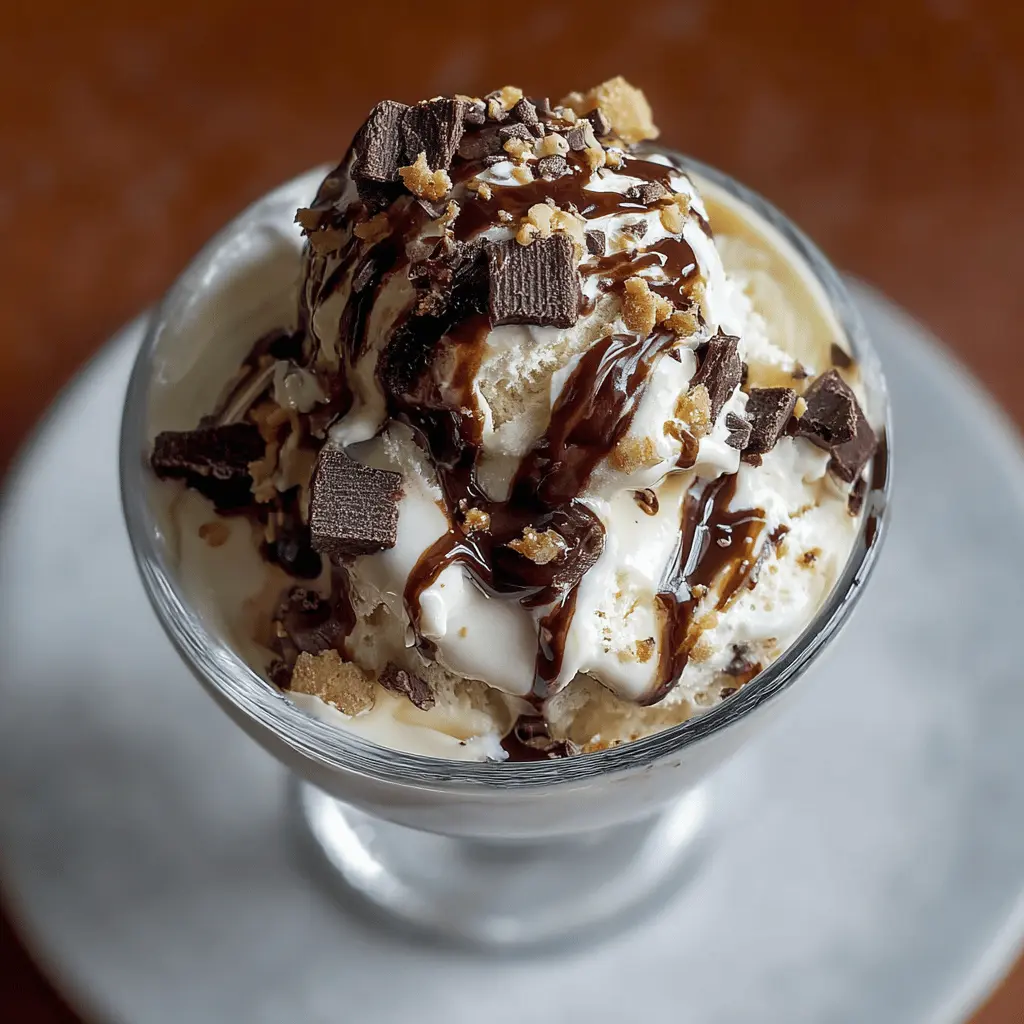
Freeze the Ice Cream
Finally, transfer your delicious mixture to an airtight container. Cover it tightly and place it in the freezer for at least 4 hours or until fully set. This last step is crucial because it’s where your homemade ice cream transforms into an indulgent dessert ready for scooping.
Enjoying a bowl of Homemade Moose Tracks Ice Cream makes for a perfect movie night or a sweet ending to your dinner parties. Share your creations on social media—don’t forget to tag your friends to join in on the delight! Happy scooping!
Variations of Homemade Moose Tracks Ice Cream
Nutty Moose Tracks
If you’re a fan of additional crunch and flavor, consider crafting a really delicious Nutty Moose Tracks Ice Cream. By simply swirling in your choice of chopped nuts, like pecans or walnuts, you can elevate your homemade treat to new heights. These nuts add not only a crunchy texture but also a rich, nutty flavor that complements the creamy base beautifully.
- Ingredients to try:
- Chopped pecans or walnuts
- A sprinkle of sea salt to enhance the sweetness
- Chocolate or peanut butter swirls to mix it up
Just imagine spooning into that ultra-creamy texture, the rich chocolate fudge, and the delightful nutty crunch—it’s pure indulgence! For tips on incorporating nuts into your ice cream, check out this excellent guide on Nuts in Ice Cream.
Dairy-Free Delight
For those embracing a dairy-free lifestyle, creating a Dairy-Free Moose Tracks Ice Cream version is not only possible but also incredibly delicious! Utilizing frozen bananas or coconut cream as a base creates a luscious and creamy texture, minus the dairy.
- Dairy-free options:
- Use coconut milk or almond milk for the ice cream base
- Add in extra dark chocolate chips for a healthful twist
- Consider almond butter for that extra oomph in flavor
You’ll find that dairy alternatives maintain the richness while accommodating various dietary preferences. If you’re curious about the nutritional benefits of plant-based diets, you might find this article on Plant-Based Benefits illuminating.
Whether you choose the nutty creation or the dairy-free take, Homemade Moose Tracks Ice Cream can satisfy your cravings in a variety of delightful, mouthwatering ways. Which version will you try first?
Cooking Tips and Notes for Homemade Moose Tracks Ice Cream
Temperature Matters!
When making homemade Moose Tracks ice cream, temperature is key to achieving that creamy, dreamy texture everyone loves. Be sure your ice cream maker is pre-frozen as per the manufacturer’s instructions. This allows your ice cream base to churn properly, ensuring a smooth finish. If you’re mixing in gooey elements, like chocolate fudge or peanut butter swirls, it’s best to have them at a somewhat warmer temperature, so they blend seamlessly with the cold ice cream.
The Importance of Chilling the Base
Never underestimate the significance of a chilled base! Allow your ice cream mixture to chill in the fridge for at least 2 hours, or even overnight if you can wait. This step enhances the flavors and helps in the churning process. According to the experts at the Ice Cream Science Institute, a properly chilled base results in smaller ice crystals, creating a velvety texture.
Incorporating these easy tips will elevate your homemade Moose Tracks ice cream experience. So grab your favorite mix-ins and get churning! If you’re looking for more detailed guidance, check out resources like Serious Eats for further insights on ice cream making.
Serving Suggestions for Homemade Moose Tracks Ice Cream
Perfect Pairings
When you whip up a batch of homemade Moose Tracks ice cream, the right accompaniments can really elevate your dessert experience. Think about pairing it with:
- Fresh Berries: Strawberries, raspberries, or blueberries add a nice tart contrast to the sweetness of the ice cream.
- Brownies or Cookie Crumbles: The added texture and flavor make each bite delightful. Try it with a warm brownie for a luxurious treat!
- Hot Fudge or Caramel Sauce: Drizzle some on top for an extra layer of indulgence that complements the chocolate and peanut butter swirls.
Creative Serving Ideas
Serving homemade Moose Tracks ice cream can be a fun experience! Here are a few ideas to inspire you:
- Ice Cream Sundae Bar: Set up a sundae station with various toppings—think chopped nuts, sprinkles, and Turkey Bacon bits for a surprising crunch.
- Milkshakes: Blend the ice cream with milk for a rich, creamy shake, and add additional mix-ins like banana or chocolate syrup.
- Ice Cream Sandwiches: Scoop the ice cream between two cookies (chocolate chip cookies work great!) for a nostalgic treat.
Remember, the presentation can make a big difference. Serve it in a fancy bowl or a waffle cone for a touch of elegance. Embrace your creativity, and don’t forget to check out more dessert ideas on sites like AllRecipes or BBC Good Food for inspiration!
Time Breakdown for Homemade Moose Tracks Ice Cream
When you’re craving a delightful scoop of Homemade Moose Tracks Ice Cream, understanding the time involved can make your culinary adventure smoother. Let’s break it down!
Preparation Time
The preparation for this creamy indulgence usually takes about 20-30 minutes. You’ll be mixing together your base, adding in the must-have fudge and peanut butter swirls, and packing it all into your ice cream maker.
Freezing Time
Once the mixture is ready, the real magic happens! You’ll want to freeze your ice cream for a minimum of 4-6 hours. For the best texture, an overnight freeze is recommended.
Total Time
In total, you’re looking at roughly 4 to 6.5 hours, but don’t worry; most of that is just waiting around while your ice cream freezes up!
For tips on perfecting your homemade ice cream technique, check resources like The Kitchn or Serious Eats. Your taste buds will thank you for the patience!
Nutritional Facts for Homemade Moose Tracks Ice Cream
Calories per Serving
When you’re indulging in homemade Moose Tracks ice cream, it’s essential to know what you’re treating yourself to. A typical serving (about half a cup) has around 200-300 calories, depending on the specific ingredients you choose. If you opt for lighter options, like using reduced-fat ice cream or lower-sugar mix-ins, you can enjoy your dessert guilt-free.
Sugar Content
The sugar content in your homemade Moose Tracks ice cream can vary, but it generally falls between 15-25 grams per serving. This figures in the chocolate fudge and peanut butter swirls, which are undeniably scrumptious but can add up quickly. If you’re looking to cut back, consider using a natural sweetener, as these can offer a delicious alternative without compromising on flavor.
For more insights on managing sugar intake, check out the American Heart Association’s suggestions for sugar consumption.
All in all, enjoying homemade ice cream in moderation can be part of a balanced diet, so don’t hesitate to indulge in this delightful treat every now and then!
FAQs about Homemade Moose Tracks Ice Cream
Can I make this without an ice cream maker?
Absolutely! If you don’t have an ice cream maker, you can still enjoy a delicious batch of Homemade Moose Tracks Ice Cream. Just mix your ingredients as indicated in the recipe, pour them into a freezer-safe container, and place it in the freezer. Every 30 to 60 minutes, stir it vigorously with a fork or whisk for about 5 minutes to break up any ice crystals. Repeat this for about 3-4 hours until it’s firm and fluffy. It might take a bit longer, but the reward is worth it!
How long will the ice cream last in the freezer?
Once you’ve mastered your Homemade Moose Tracks Ice Cream, you’ll want to enjoy it as soon as possible! Generally, it can last in the freezer for about two weeks if stored in an airtight container. However, for the best texture and flavor, try to consume it within a week. The longer it sits, the more likely it is to develop ice crystals, which can affect creaminess and taste.
What can I substitute for peanut butter?
If you’re not a fan of peanut butter or have allergies, there are several tasty alternatives! You can substitute with alternatives such as almond butter, cashew butter, or even sunbutter for a nut-free option. Each provides a unique flavor twist to your Homemade Moose Tracks Ice Cream. Another fun route is to use Nutella if you’re in the mood for a chocolatey experience!
For more tips on ice cream making, check out resources like the Ice Cream Science blog, which is full of insights on the art of creating perfect frozen treats!
Conclusion on Homemade Moose Tracks Ice Cream
Embrace the Homemade Experience!
There’s something truly special about crafting your own Homemade Moose Tracks Ice Cream. Not only do you get to customize ingredients, like selecting your favorite mix-ins and adjusting sweetness, but the process itself creates delightful moments in your kitchen. Remember the excitement you felt when you first discovered ice cream flavors? Recreating that joy at home can be immensely satisfying.
So, why not gather your friends for a fun ice cream-making night? You can even pair your delectable creation with a homemade dessert wine or fruit-infused soda for a refreshing treat. With this simple recipe, you’ll be able to share not just a dessert, but an experience filled with laughter and creativity. Dive in and make ice cream magic happen!
Print
Homemade Moose Tracks Ice Cream: The Indulgent Treat You’ll Love
- Total Time: 4 hours 15 minutes
- Yield: 6 servings
Description
Indulge in the creamy, chocolaty goodness of Homemade Moose Tracks Ice Cream. Perfect for any ice cream lover, this recipe combines rich flavors in a delightful dessert.
Ingredients
- 2 cups heavy cream
- 1 cup whole milk
- 3/4 cup granulated sugar
- 1 teaspoon vanilla extract
- 1/2 cup chocolate fudge sauce
- 1/2 cup peanut butter cups, chopped
Instructions
- In a mixing bowl, combine heavy cream, whole milk, sugar, and vanilla extract. Mix until the sugar is dissolved.
- Pour the mixture into an ice cream maker and churn according to manufacturer instructions.
- During the last few minutes of churning, drizzle in the chocolate fudge sauce and add the chopped peanut butter cups.
- Transfer the ice cream to a lidded container and freeze for at least 4 hours before serving.
Notes
- For a richer flavor, use dark chocolate fudge sauce.
- Make sure to let the ice cream soften for a few minutes before scooping.
- Prep Time: 15 minutes
- Cook Time: 0 minutes
Nutrition
- Serving Size: 1/2 cup
- Calories: 300
- Sugar: 25g
- Sodium: 50mg
- Fat: 20g
- Saturated Fat: 10g
- Unsaturated Fat: 8g
- Trans Fat: 0g
- Carbohydrates: 30g
- Fiber: 1g
- Protein: 4g
- Cholesterol: 100mg
")