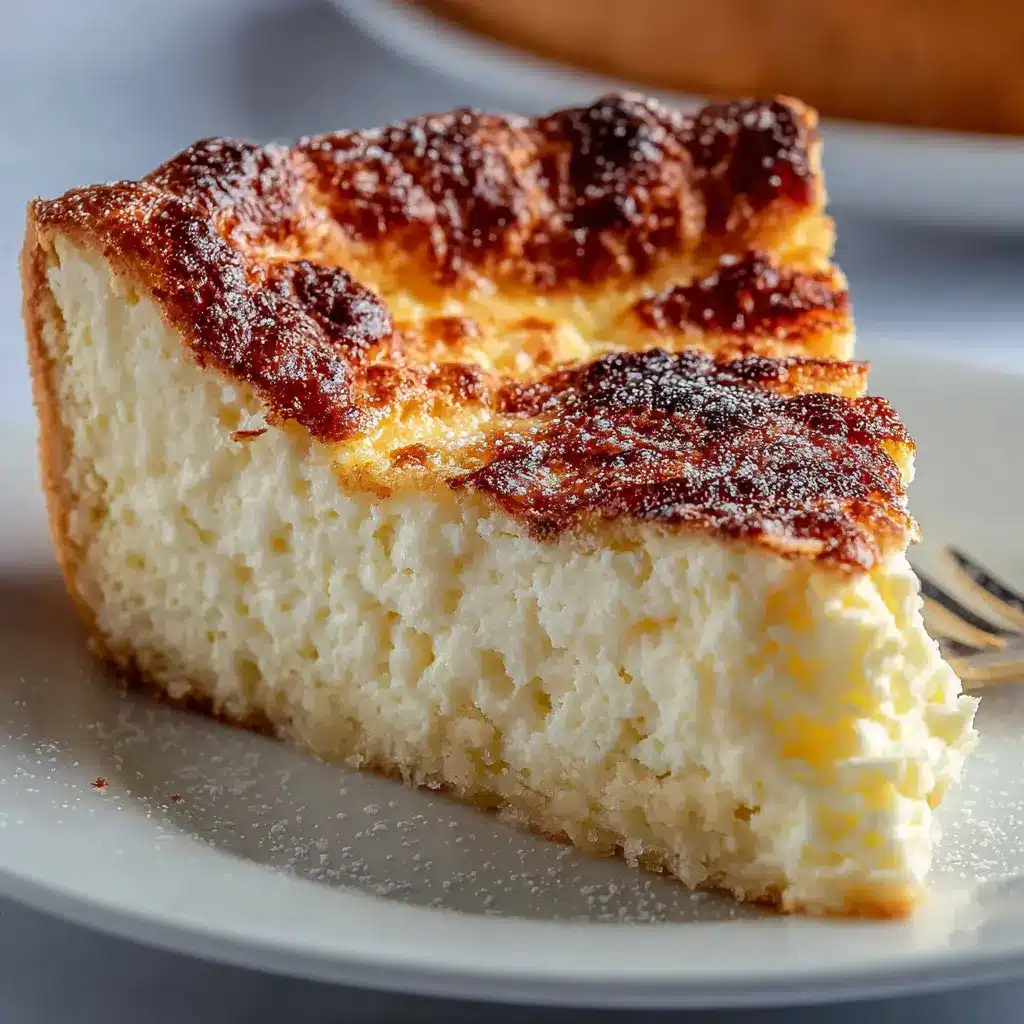
Introduction to Homemade Greek Baklava
Why homemade baklava beats store-bought
If you’ve ever indulged in baklava from a bakery or grocery store, you might have noticed that while it’s delicious, it often lacks that personal touch and freshness that homemade treats can offer. Crafting homemade Greek baklava allows you to customize flavors, control the sweetness, and use fresh ingredients. You can experiment with textures and even choose between walnuts, pistachios, or a combination for the ultimate nutty experience. Many culinary experts agree that homemade desserts not only taste better but also carry the warmth of love and care in their preparation. Give it a try, and you’ll likely discover the joy of bringing this delightful treat to life in your own kitchen.
A personal story about making baklava for the first time
I vividly remember the first time I ventured into the world of baklava making. It was a chilly afternoon, and I found myself craving something sweet and indulgent. I had always admired this flaky pastry from a distance, but the idea of making it myself was both exhilarating and daunting. After a quick online search filled with tempting recipes, I decided to take the plunge and try my hand at homemade Greek baklava.
The process began with layers of phyllo dough, which I learned was quite forgiving if treated with care. As I brushed each sheet with melted butter, I couldn’t help but feel a connection to the countless generations of cooks who had turned this simple mixture of nuts, sugar, and layers into a cherished dessert. By the time I poured the fragrant honey syrup over the warm baklava, my kitchen was filled with a sweet aroma that beckoned family members to peek in.
After letting it cool, I called everyone to gather for the first taste. The moment we bit into those golden, crisp layers was magical. Not only did it taste divine, but it also sparked a wave of laughter and nostalgia. Moments like these remind us that food isn’t just about sustenance; it’s about creating memories and sharing joy.
Once you experience making homemade Greek baklava, you might just find that the spirit of that first batch lingers with every creation you make. For more tips on making delicious desserts at home, check out Serious Eats for additional insights into flavor pairings and baking techniques!
Ingredients for Homemade Greek Baklava
When it comes to crafting homemade Greek baklava, selecting the right ingredients is essential for achieving that perfect balance of flavor and texture. Each component plays a vital role in this beloved dessert.
Essential ingredients for the nut filling
The heart of any baklava lies in its nut filling. For a truly memorable experience, you’ll want:
- Walnuts: Chopped coarsely, they provide a rich, buttery flavor.
- Pistachios: These add a delightful crunch and a hint of earthiness.
- Sugar: A touch of sweetness to complement the nuts.
- Cinnamon: Just a dash for warmth and depth.
Combining these ingredients creates a delightful filling that bursts with flavor in every bite.
The importance of good quality phyllo dough
Don’t underestimate the role of phyllo dough in your baklava. Using high-quality, fresh phyllo prevents sogginess and allows for that iconic flaky texture. A well-stacked phyllo will enhance your baklava’s crispiness, making each layer a treat.
Creating the perfect honey syrup
A luscious honey syrup ties everything together. You’ll need:
- Honey: Choose a good-quality variety for flavor depth.
- Water: To balance the sweetness.
- Lemon juice: Adds brightness and prevents crystallization.
This syrup will soak into the baklava, providing moisture and a sweet finish. For tips on making the syrup, check out this guide for more insights. Happy baking!
Preparing Homemade Greek Baklava
If you’ve ever found yourself daydreaming about homemade Greek baklava, you’re not alone. This delightful dessert, layered with nuts and sheets of crispy phyllo dough drenched in aromatic honey syrup, is a showstopper at any gathering. Let’s dive into the art of preparing this traditional Mediterranean treat step by step.
Prepare the nut filling
The heart of any great baklava is its nut filling. For a truly authentic touch, combine walnuts and pistachios, which lend unique flavors and textures. Start by roughly chopping about 2 cups of walnuts and 1 cup of pistachios. Feel free to toss in a pinch of cinnamon and sugar for extra flavor, as both spices complement the nuts beautifully.
- Tip: Toast the nuts in a dry pan over medium heat for 5 to 7 minutes to enhance their flavors. Just be sure to keep an eye on them; burnt nuts can ruin your filling!
Prepare the phyllo dough
Using phyllo dough can feel daunting at first, but with a little care, you’ll become a pro in no time. First, ensure that your phyllo dough is fully thawed. It’s typically sold frozen, so transfer it to the fridge a day before you plan to bake.
Once you’re ready, take two sheets of phyllo and lay them flat on a clean, dry surface. Make sure to cover the remaining sheets with a damp towel to prevent them from drying out and cracking.
Layer the phyllo and nut mixture
Now comes the fun part—layering! Start by brushing the bottom of your baking dish with melted butter to prevent sticking. Then, layer about 8 sheets of phyllo in the dish, brushing melted butter on each layer.
- Sprinkle a portion of your nut mixture evenly on top.
- Continue layering phyllo sheets (again, brushing each sheet with butter) and nut mixture until you reach the top layer.
Finish with about 8 last sheets of phyllo, making sure to brush the top layer generously with butter. This creates that signature golden-brown crust.
Cut the baklava before baking
Before you put your masterpiece in the oven, it’s crucial to cut the baklava into diamond or square shapes. Use a sharp knife and be gentle—this step allows the syrup to penetrate each piece after baking.
Bake to perfection
Preheat your oven to 350°F (175°C). Place the baklava in the oven and bake for roughly 45 to 55 minutes, or until golden brown and crisp. Keep an eye on it; the perfect baklava is golden and crispy, not burnt.
- Pro Tip: Rotate the baking dish halfway through for even baking.
Prepare the honey syrup
While your baklava bakes, prepare the honey syrup. In a saucepan, combine 1 cup of sugar, 1 cup of water, and 1 cup of honey. Bring it to a boil, then reduce the heat. Simmer it gently for about 10 minutes. You can add a splash of lemon juice to prevent crystallization and enhance flavor.
Soak the baklava with syrup
Once your baklava is out of the oven, allow it to cool for 10 minutes. Then, pour the warm honey syrup evenly over the hot baklava. The contrast of temperatures helps the syrup soak in, creating that deliciously sticky texture we love.
Let it rest before serving
Patience is key here. Allow your homemade Greek baklava to rest for several hours or overnight to let those flavors meld perfectly together. Serving it the next day will yield an even more delightful treat.
In summary, while making baklava may seem labor-intensive, the end result is undeniably worth it. Not only will you be impressing your friends and family with your baking skills, but you’ll also be creating lasting memories around the table. For more delicious twists on traditional desserts, check out resources like The Mediterranean Dish for inspiration. Happy baking!

Variations on Homemade Greek Baklava
Adding Different Nuts
When crafting your homemade Greek baklava, consider using a variety of nuts to elevate its flavor profile. While walnuts and pistachios are traditional, incorporating almonds or pecans can bring a delightful twist. Almon’s subtle sweetness and pecan’s buttery richness blend perfectly, creating a unique texture and taste experience. Experiment with combinations—perhaps a mix of walnuts and pecans—or even roast your nuts beforehand for a more intense flavor. Which combo sparks your culinary curiosity?
Incorporating Spices for a Unique Twist
Don’t shy away from adding spices when making your homemade Greek baklava. A dash of cinnamon or a hint of cardamom can introduce warmth and depth to the dessert. For an even greater flavor explosion, toss in a pinch of nutmeg or cloves. These spices not only enhance the baklava but also bring a comforting aroma that fills your kitchen. Imagine surprising your friends with a baklava that dances on their taste buds—what a conversation starter!
Vegan Baklava Options
If you’re looking for a vegan alternative, fear not! You can easily substitute traditional ingredients to create a plant-based version of homemade Greek baklava. Opt for vegan butter or coconut oil instead of regular butter, and use agave syrup or maple syrup in place of honey for sweetening—the result is just as delicious and satisfying. Plus, these swaps make it accessible for anyone following a vegan diet, ensuring nobody misses out on this scrumptious treat.
For more exciting twists, check out other recipes at Serious Eats or BBC Good Food to inspire your baklava journey!
Cooking Tips and Notes for Homemade Greek Baklava
Working with phyllo dough: tips to prevent drying out
When making homemade Greek baklava, the key is to keep the phyllo dough moist. Lay out a damp kitchen towel over the sheets you’re not using; this prevents them from drying out as you work. It’s all too easy for these delicate sheets to become brittle, and trust me, you want them pliable for that perfect flaky texture!
Importance of cooling the syrup before pouring
After making your sweet syrup, it’s crucial to let it cool before drenching your baklava with it. Pouring hot syrup on hot baklava can lead to soggy layers. For a beautifully crisp finish, let the syrup sit for at least 30 minutes. This simple step can elevate your homemade Greek baklava from good to legendary!
What to do if the layers are uneven
Uneven layers are a common hiccup, especially with phyllo dough. If you notice variations, don’t fret! Use a sharp knife to gently level the layers before baking. This ensures even cooking and beautiful presentation. Remember, baking is as much about technique as it is about flavor.
For further tips and techniques, check out resources like Serious Eats or Bon Appétit. Happy baking!
Serving Suggestions for Homemade Greek Baklava
Traditional Serving Methods
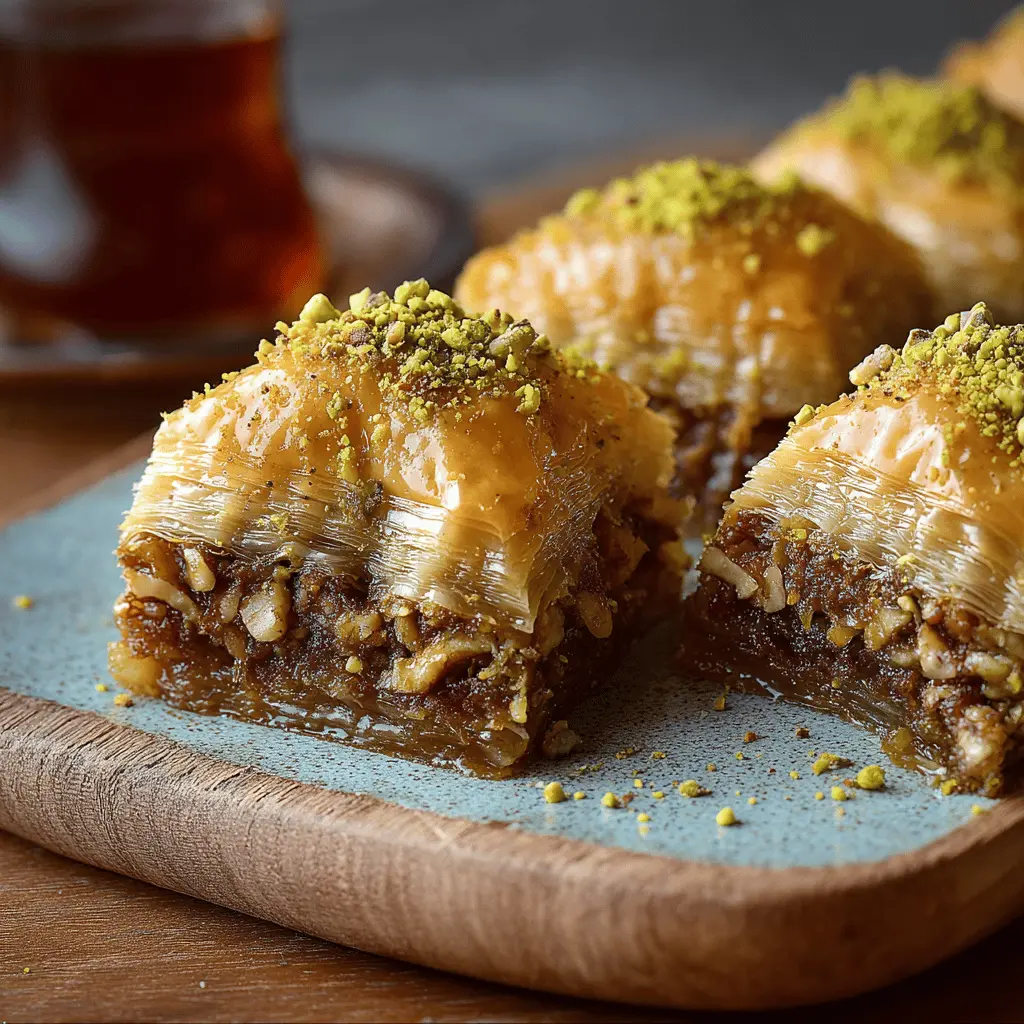
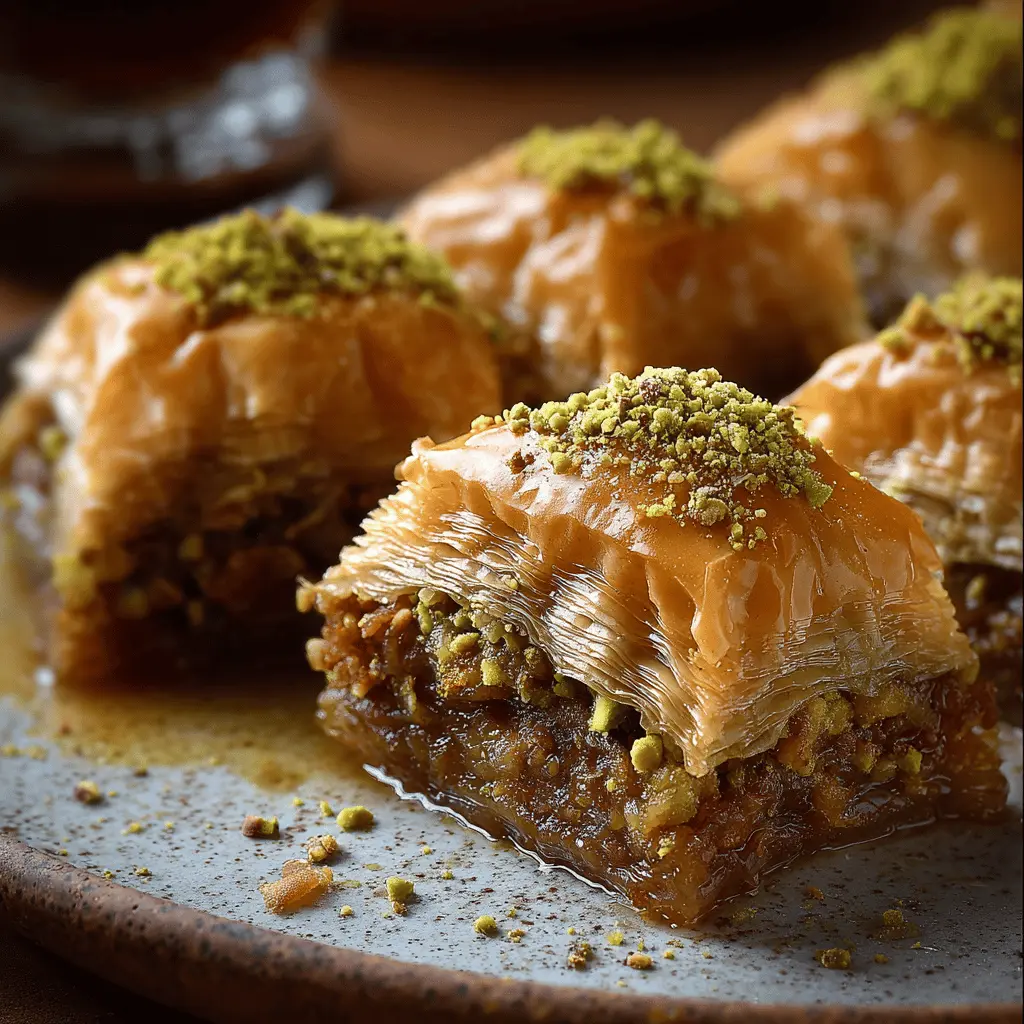
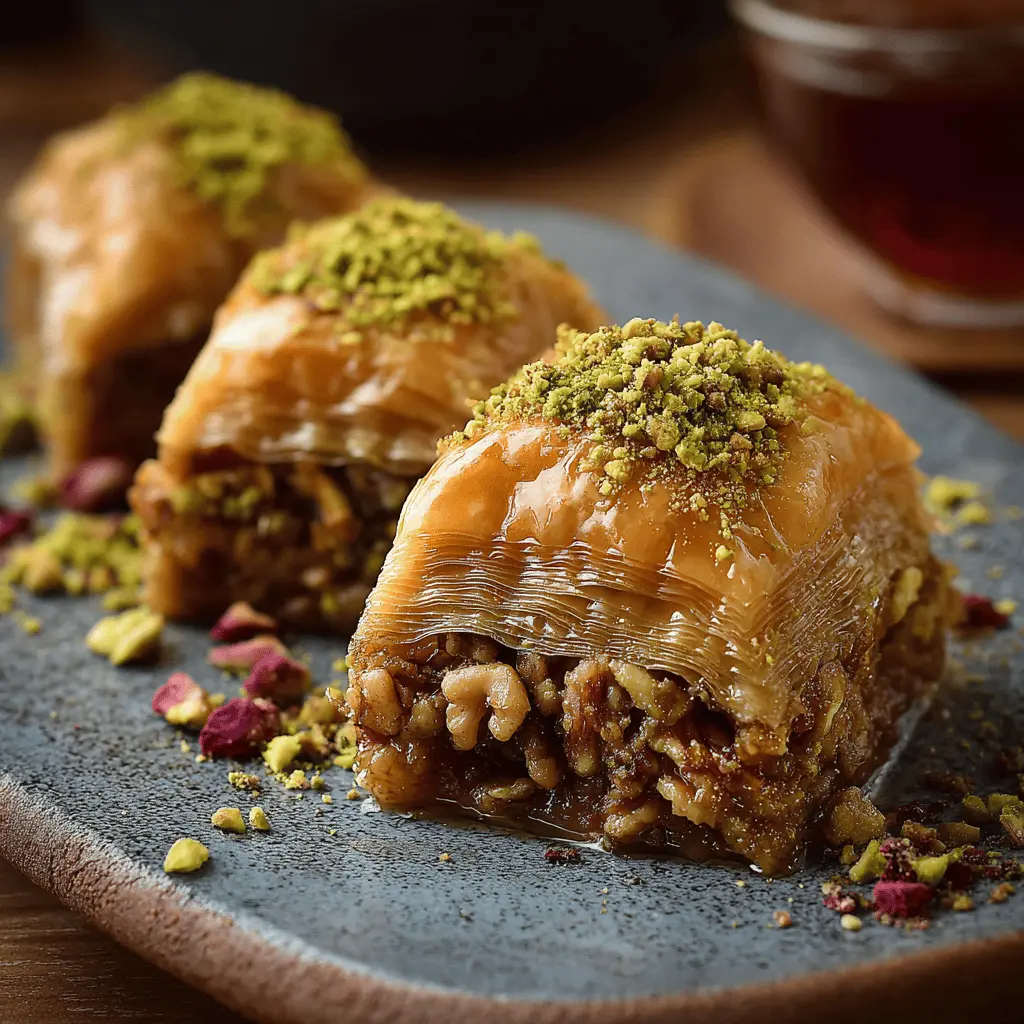
When it comes to serving homemade Greek baklava, the classic way is to cut it into diamond-shaped pieces, showcasing its beautiful layers. Often, it’s placed on a decorative platter or plate, allowing guests to see the glistening honey syrup absorbed into each layer. Don’t forget to garnish with crushed walnuts or pistachios for that extra flair!
Pairing with Tea and Coffee
A cup of strong Greek coffee or herbal tea makes an ideal companion for your baklava. The richness of the pastry pairs wonderfully with these drinks, enhancing both flavors and experiences. Consider a side of mint tea or lemon-infused Greek mountain tea for a refreshing contrast. This not only compliments the sweetness but also enriches the cultural experience.
Creative Plating Ideas
Presentation is key! For a modern twist, try serving individual portions in glass trifle cups, layering baklava pieces with Greek yogurt and a drizzle of honey. This adds a fun visual element that your guests will appreciate. You can also sprinkle cinnamon or a touch of powdered sugar over the top for a sweet finish.
For more on serving desserts with style, check out resources like Epicurious for inspiration!
Time Breakdown for Homemade Greek Baklava
Preparation time
Making homemade Greek baklava is a delightful adventure that begins with about 30–40 minutes of preparation. You’ll need to gather your ingredients—walnuts, pistachios, and phyllo dough require a little TLC—so take your time to chop and layer them just how you like it.
Baking time
Once your baklava is prepped, it’s time for the oven! Bake it for approximately 45–50 minutes, until golden and crispy. The fragrant aroma will fill your kitchen and have everyone coming back for more.
Total time estimate
In total, you’re looking at around 1.5 hours from start to finish. This means you’ll have plenty of time to sip on some tea or coffee while waiting for your homemade Greek baklava to cool before drizzling it with that luscious syrup. For tips on serving, check out sources like Food Network for ideas!
Nutritional Facts for Homemade Greek Baklava
Calories per serving
Each serving of homemade Greek baklava typically contains around 300 calories. While it’s a decadent treat, it’s essential to enjoy it in moderation, especially if you’re mindful of your caloric intake.
Key nutrients: fat, carbs, protein
- Fat: Approximately 15 grams, primarily from nuts and butter, providing rich flavors.
- Carbohydrates: About 35 grams, mainly from the phyllo pastry and honey, offering a sweet bliss.
- Protein: Roughly 5 grams, thanks to the nuts, which also contribute valuable nutrients.
Healthier modifications if needed
If you’re looking for lighter options, consider these tweaks:
- Swap half the butter for a healthier fat alternative, like coconut oil.
- Use a natural sweetener, like agave syrup or stevia, to reduce sugar intake.
- Increase the nut content for more protein, reducing some of the pastry layers.
For more tips on healthy baking, check out resources from Healthline or ChooseMyPlate.gov. Your homemade Greek baklava can be a delightful yet guilt-free pleasure with these adaptations!
FAQs about Homemade Greek Baklava
Can I make baklava ahead of time?
Absolutely! In fact, making homemade Greek baklava ahead of time can enhance its flavors. After baking, let it cool completely and soak it in the syrup just before serving. You can prepare it a day or even a few days in advance. Just remember that the longer it sits, the more the syrup seeps in, making it even more delicious!
How should I store leftover baklava?
Storing your homemade Greek baklava properly is key to maintaining its freshness. Here’s how to do it:
-
Room Temperature: If you plan to eat it within a few days, cover it with a clean kitchen towel or place it in an airtight container to keep it fresh at room temperature.
-
Refrigeration: For longer storage, refrigerate it in an airtight container. While it may lose some of its texture, the flavor will still be delightful!
-
Freezing: Looking to save some for later? You can freeze baklava! Just wrap individual pieces tightly in plastic wrap and then place them in a freezer-safe container. When you’re ready to enjoy, let them thaw at room temperature.
What can I use if I don’t have honey?
If you’re in a pinch and don’t have honey on hand, there are several alternatives to consider for your homemade Greek baklava syrup:
-
Maple Syrup: A popular choice that adds a unique sweetness.
-
Agave Nectar: This works similarly to honey and is great for a vegan option.
-
Corn Syrup: While not as flavorful, it can give you the sweetness without honey.
Experimenting with these alternatives can lead to interesting new flavors in your baklava. For more tips on sweetening desserts, check out this guide from the American Institute for Cancer Research!
Incorporating these FAQs into your baking journey will surely elevate your homemade Greek baklava experience. Happy baking!
Conclusion on Homemade Greek Baklava
Recap on the joy of making baklava
Creating homemade Greek baklava is not just about satisfying a sweet tooth—it’s a delightful journey. The aroma of warm spices and the sound of crunchy phyllo layers are enough to make anyone feel like a kitchen wizard. Each step brings a sense of accomplishment, as you layer walnuts and pistachios with buttery pastry, crafting a treat that’s both rich in flavor and tradition.
Encouragement to try the recipe at home
So why not roll up your sleeves and give this recipe a whirl? Not only will you impress friends and family, but you’ll also enjoy the meditative process of baking. If you’re curious about variations, consider exploring different nuts or spices. The possibilities are endless! For tips on finding high-quality ingredients, check out sources like What’s Cooking America or Serious Eats. Your own kitchen could soon be filled with the irresistible scent of homemade Greek baklava.
Print
Homemade Greek Baklava: Indulgent Treat with Walnuts & Pistachios
- Total Time: 1 hour 20 minutes
- Yield: 12 servings
Description
Delve into the rich and flaky layers of homemade Greek baklava, filled with the crunchy goodness of walnuts and pistachios. This indulgent treat is perfect for special occasions or as a delightful dessert.
Ingredients
- 1 pound walnuts
- 1 pound pistachios
- 1 package phyllo dough
- 1 cup unsalted butter, melted
- 1 cup sugar
- 1 cup water
- 1/2 cup honey
- 1 teaspoon vanilla extract
- 1 teaspoon ground cinnamon
Instructions
- Preheat the oven to 350°F (175°C).
- Chop the walnuts and pistachios and mix them with sugar and cinnamon.
- Lay the first phyllo sheet in a greased pan, brush with melted butter.
- Repeat until you have 8 layers.
- Add a layer of the nut mixture, then top with more phyllo sheets, repeating the process until all ingredients are used.
- Cut the baklava into diamond or square shapes before baking.
- Bake for about 50 minutes until golden brown.
- While baking, combine water, sugar, honey, and vanilla in a saucepan and bring to a boil.
- Once the baklava is done, pour the syrup over it and let it rest.
Notes
- Make sure to keep the phyllo dough covered with a damp cloth while working to prevent it from drying out.
- For a richer flavor, consider adding a pinch of nutmeg to the nut mixture.
- Prep Time: 30 minutes
- Cook Time: 50 minutes
Nutrition
- Serving Size: 1 piece
- Calories: 250
- Sugar: 18g
- Sodium: 45mg
- Fat: 15g
- Saturated Fat: 5g
- Unsaturated Fat: 7g
- Trans Fat: 0g
- Carbohydrates: 30g
- Fiber: 2g
- Protein: 4g
- Cholesterol: 0mg
")