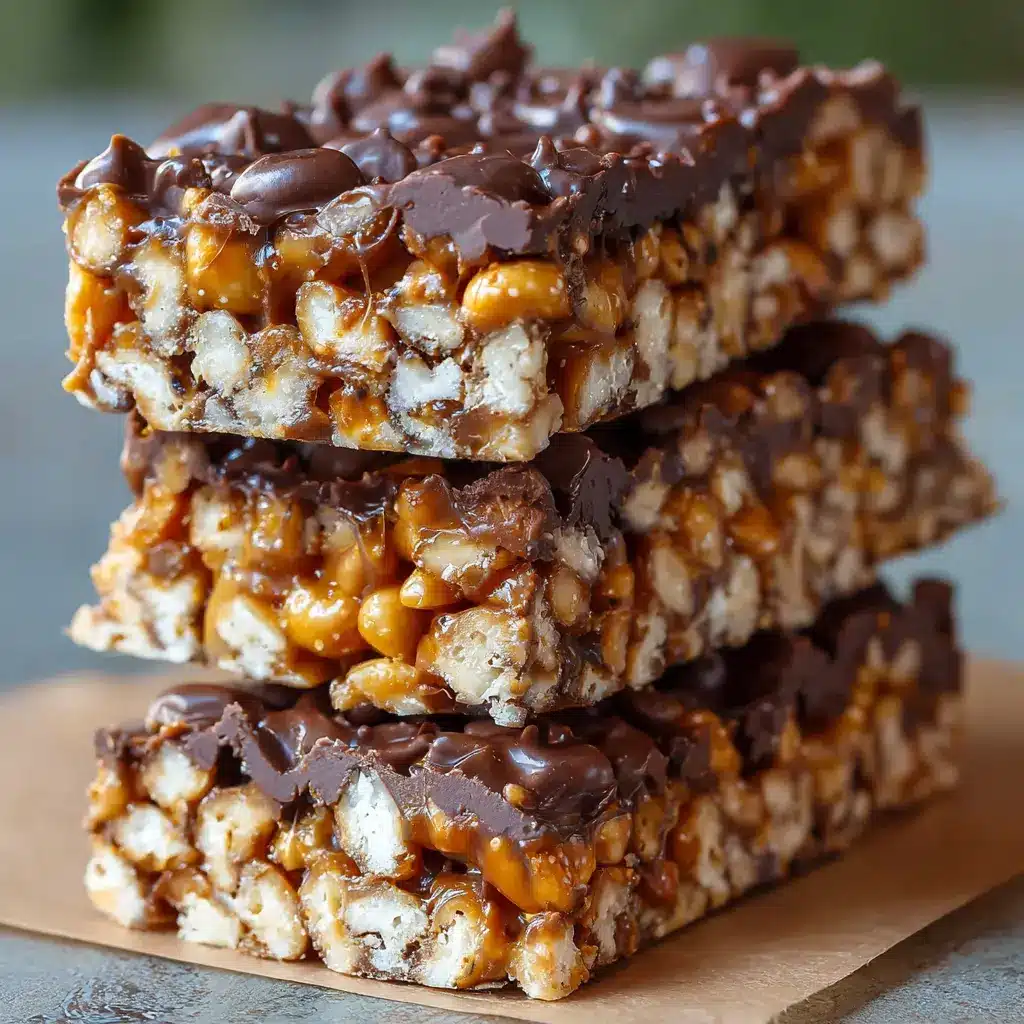
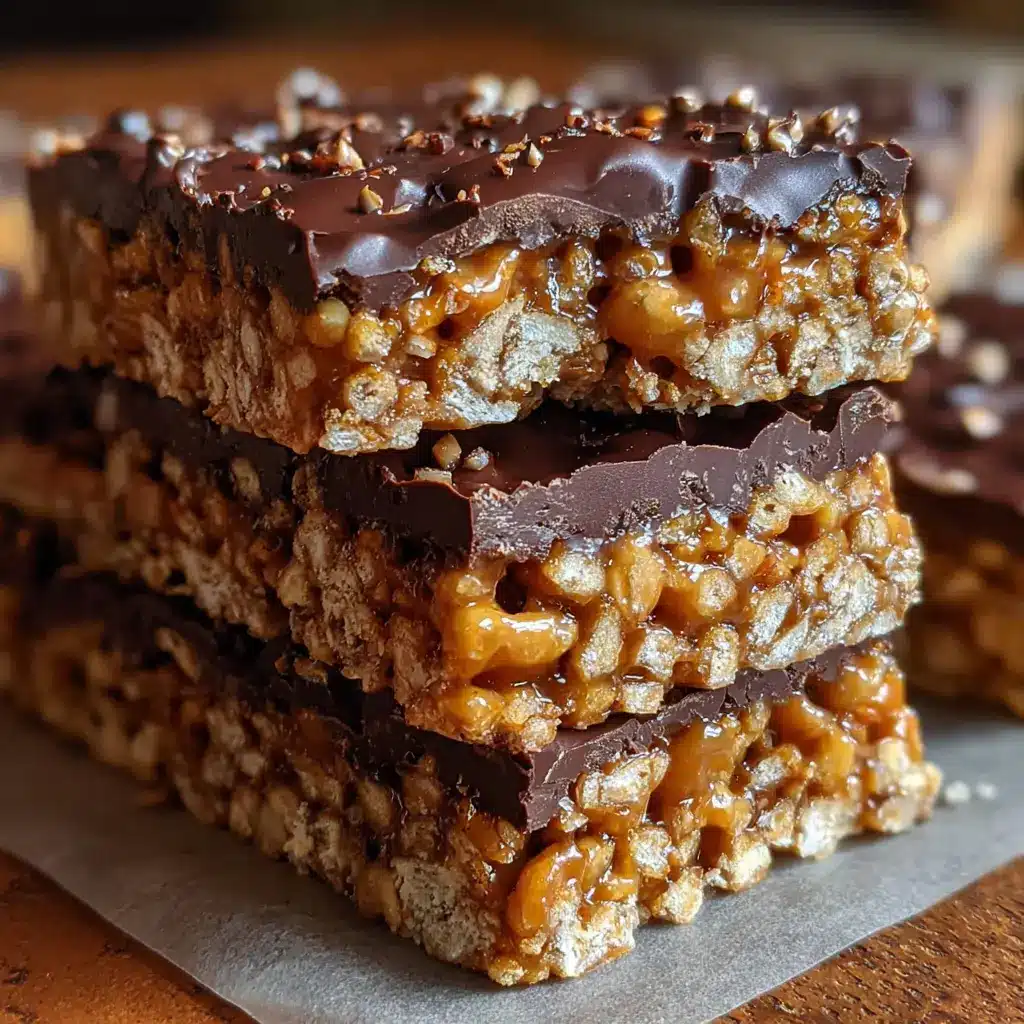
Introduction to Homemade Crunch Bars
When life gets busy, it’s easy to reach for store-bought snacks, but there’s something truly satisfying about creating your own homemade crunch bars. Not only do these delightful treats satisfy your sweet tooth, but they also allow you to control the ingredients, tailoring them to your taste preferences and dietary needs. Imagine biting into a bar that’s perfectly crafted just for you!
Why is homemade food so rewarding?
The joy of preparing homemade food goes beyond just taste. It taps into creativity and serves as a delightful escape from a hectic lifestyle. When you make your own crunch bars, you get to experiment with flavors and textures—maybe introducing a hint of sea salt or a drizzle of dark chocolate to elevate your creation. The act of cooking can be meditative, providing a unique opportunity to unwind and disconnect from screens.
Beyond creativity, there’s a sense of pride that comes with crafting your snacks. According to a study by the American Psychological Association, the process of making your food can significantly boost your mood. Just think of the satisfaction of pulling those perfectly toasted crunch bars from the oven and knowing you made them from scratch. Plus, you can share them with friends or colleagues, sparking conversations about your new culinary skills!
Making homemade crunch bars not only tastes better; it’s often healthier too. You have the power to select high-quality ingredients free from artificial preservatives and additives. For instance, opting for natural sweeteners like honey or maple syrup, or even adding nutrient-rich nuts and seeds, can make a huge difference. This not only enhances the flavor but offers additional nutritional benefits—providing you with energy to power through your day.
Furthermore, websites like Healthline and EatingWell provide great resources on healthy snacking and ingredient options, helping you make more informed decisions.
In the coming sections, we’ll delve into a simple yet delicious recipe for homemade crunch bars, guiding you through each step of the process. So roll up your sleeves, and let’s create something delightful together!
Ingredients for Homemade Crunch Bars
Essential ingredients for crunch bars
Creating delicious homemade crunch bars starts with a handful of essential ingredients. Here’s what you’ll need:
- Chocolate: Dark or milk chocolate works beautifully. Choose high-quality chocolate for the best flavor.
- Cereal: Crisp rice cereal offers the perfect crunch. You can also experiment with other cereals for different textures.
- Nut butter: Consider incorporating almond or peanut butter for added richness and creaminess.
- Sweetener: Honey or agave syrup brings sweetness and helps bind everything together.
These ingredients form the base of your homemade crunch bars, making them a delightful treat that’s as satisfying as it is simple to prepare.
Optional toppings for added flair
Want to elevate your crunch bars? Here are some fun toppings to consider:
- Chopped nuts: Almonds, walnuts, or pecans add a delightful crunch.
- Sprinkles: For a festive touch, colorful sprinkles can give your bars an exciting pop.
- Dried fruits: Raisins, cranberries, or chopped apricots add a chewy sweetness that balances the bars perfectly.
With these toppings, your homemade crunch bars won’t just be tasty—they’ll also be a feast for the eyes! You can check out this article for more inspiration and tips on enhancing your treats.
Step-by-Step Preparation of Homemade Crunch Bars
Creating delicious homemade crunch bars might seem daunting, but it’s surprisingly easy and incredibly rewarding! With just a few basic ingredients, you can whip up a treat that will impress friends and family alike. So, let’s dive into this step-by-step process.
Prepare the pan
The first thing you’ll want to do is prepare your pan. This is crucial to ensure your bars come out perfectly and don’t stick. Grab an 8×8-inch baking dish (or similar size) and line it with parchment paper, allowing some overhang for easy removal later. For added non-stick assurance, lightly grease the paper with a bit of coconut oil or cooking spray. Voila! Your pan is now ready for the delightful mix that’s about to come.
Melt chocolate and peanut butter
Next up is the melting stage. Grab a medium saucepan and gently heat the following ingredients on low:
- 1 cup chocolate chips (milk, dark, or a mix!)
- ½ cup creamy peanut butter
Stir continuously until everything is melted and well combined. If you want to avoid the stovetop completely, you can also melt these ingredients in the microwave in a microwave-safe bowl in 30-second intervals. Be careful not to overheat; you want a smooth and creamy mixture, not a burnt one. If you haven’t tried this combination before, you’re in for a treat—there’s nothing quite like chocolate and peanut butter melting together!
Mix in the rice cereal
Now that you have a lovely melted chocolate-peanut butter base, it’s time to add your crunch. Mix in 3 cups of crispy rice cereal until it’s coated evenly. This step is where you’ll feel the excitement build! The combination of chocolate, peanut butter, and that delightful crunch creates a texture that’s simply unbeatable. If you’re looking for variations, consider adding a handful of mini marshmallows or some dried fruit for an extra twist.
Press the mixture into the pan
With your mixture ready, it’s time to transfer it to the prepared pan. Pour the chocolate-rice mixture into the lined dish and use a spatula to spread it out evenly. The key here is to press it down firmly, ensuring everything sticks together. You can use the bottom of a measuring cup or your hands (lightly greased) to help pack it tightly. When it’s compact and smooth on top, you’re ready for the next step.
Chill and cut into bars
The final step in our homemade crunch bars journey is chilling! Pop your pan into the refrigerator for at least 30 minutes, allowing the chocolate to set and the bars to firm up nicely. Once chilled, carefully lift the bars from the pan using the parchment paper overhang. Place them on a cutting board and slice them into your desired bar size—be it small squares or generous rectangles, the choice is yours.
Optional: For an extra fancy touch, you might drizzle some melted chocolate on top or sprinkle with sea salt before slicing. The contrast of flavors will take your bars to the next level!
And there you have it! Freshly made homemade crunch bars that are perfect for grabbing on the go or sharing at social gatherings. Not only are they quick to prepare, but they’ll also satisfy your sweet tooth without all the preservatives found in store-bought options. They’re a win-win!
Curious about more delicious recipes? Check out this article on easy homemade snacks for more inspiration! Happy cooking!
Variations of Homemade Crunch Bars
When it comes to homemade crunch bars, the best part is how easily you can customize them to fit your taste preferences. Let’s explore two delightful variations that can elevate your snack game!
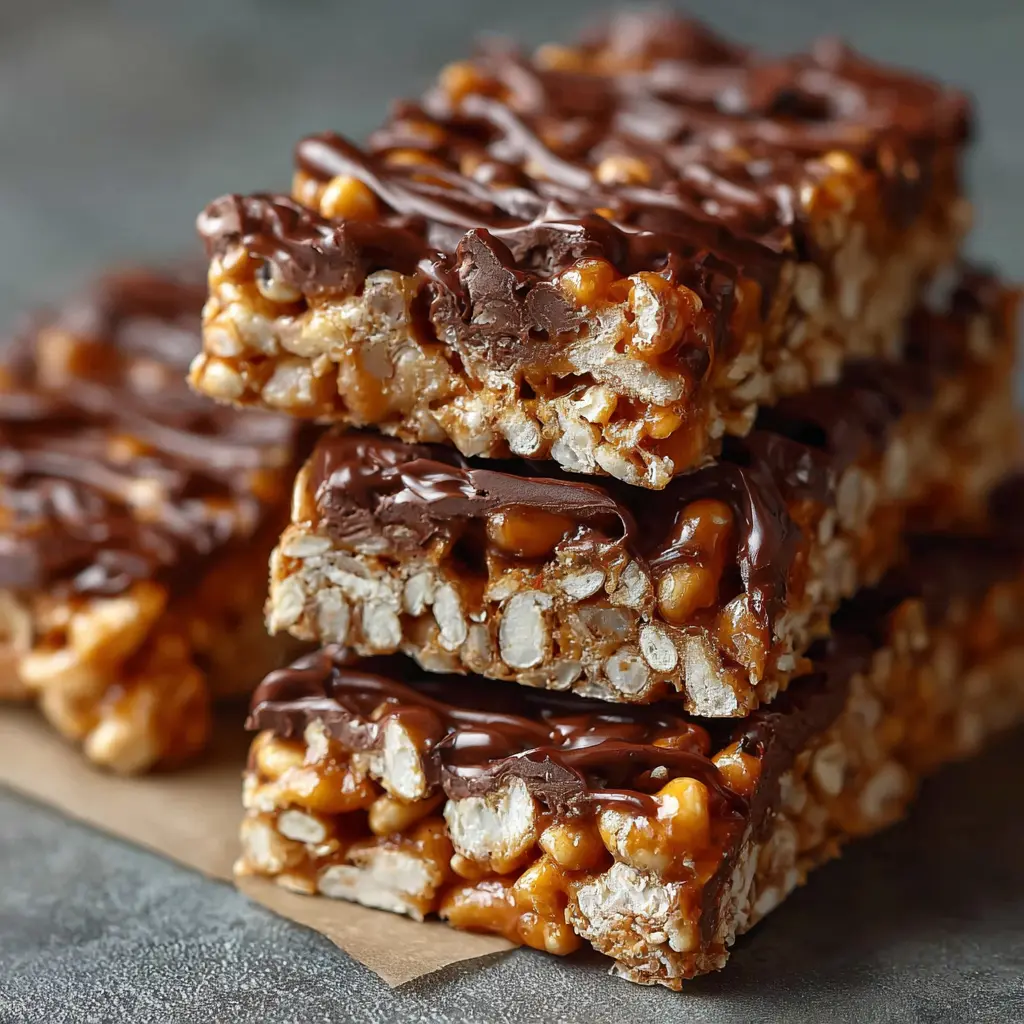
Chocolate-Nut Crunch Bars
If you’re a chocolate lover, consider creating chocolate-nut crunch bars. Not only do they satisfy the sweet tooth, but they’re also packed with healthy fats and protein. Start with your basic crunch bar recipe, then mix in:
- Dark chocolate chips or melted dark chocolate
- A medley of your favorite nuts (almonds, walnuts, or pecans work wonders)
- A sprinkle of sea salt to enhance the flavors
The combination of crunchy texture from the nuts and the rich, smooth chocolate creates an indulgent treat that’s hard to resist. Plus, nuts offer a heart-friendly source of energy—perfect for that afternoon pick-me-up!
Crunch Bars with Dried Fruits
For a fresher twist, why not add some dried fruits to your homemade crunch bars? Whether you opt for cranberries, raisins, or apricots, the natural sweetness and chewiness of the fruits complement the crispy texture beautifully. To prepare:
- Choose a variety of colorful dried fruits to make your bars visually appealing.
- Mix them into your base ingredients like rice cereal or oats.
- Consider adding a hint of cinnamon or vanilla for an extra layer of flavor.
Not only do these dried fruit crunch bars taste fantastic, but they also provide vitamins and nutrients, making them a more wholesome snack option.
Feel free to experiment with these variations! Your homemade crunch bars can be as unique as you are, so let your creativity shine. If you’re looking for more snack inspiration, check out this guide on healthy snacking ideas for a nutritious boost.
Cooking Tips and Notes for Homemade Crunch Bars
Perfecting the Melting Process
To achieve the perfectly smooth chocolate layer for your homemade crunch bars, ensure you melt your chocolate chips slowly and gently. Using a double boiler or the microwave in short bursts works wonders. If using a microwave, heat at 50% power and stir after every 30 seconds. This helps prevent scorching and guarantees a creamy consistency. If you happen to have any lumps, just give it a good stir – it’s often enough to bring everything together!
Storing Your Crunch Bars for Freshness
Once your crunch bars are set, you’ll want to keep them fresh. Wrap each bar individually in parchment paper or cling film to maintain that delightful crunch. Store them in an airtight container at room temperature for up to a week. If you need them to last longer, popping them into the freezer is a great option, where they can maintain their flavor and texture for up to three months. Don’t forget to label your container for easy access later on!
For more storage tips, check out The Kitchn for expert advice.

Serving Suggestions for Homemade Crunch Bars
Pairing with Your Favorite Drinks
When enjoying your homemade crunch bars, think about what you want to sip alongside them. A rich cup of hot cocoa is a classic choice; its sweetness complements the crunchy texture beautifully. If you’re more of a coffee person, consider a smooth latte or a bold espresso. Did you know that coffee can elevate the flavors in chocolate? It’s the perfect pairing for an afternoon pick-me-up. For a lighter option, herbal teas like chamomile or mint infusion can refresh your palate without overpowering the delightful chocolatey goodness.
Crunch Bars as Gifts or Snacks on-the-Go
Looking for a thoughtful gift? Homemade crunch bars are excellent for sharing. Package them in a cute box or jar—they’re perfect for birthdays, holidays, or just to brighten someone’s day. Additionally, these bars make an easy snack for busy professionals. Slip a few into your bag before heading out, and you’ll have an energizing treat ready for those hectic days. For more creative presentation ideas, check out this guide to bring your gifting game to the next level!
Time Breakdown for Homemade Crunch Bars
Preparation Time
Making homemade crunch bars is a breeze! You’ll need about 15 minutes to gather your ingredients and get everything ready. This includes measuring out your chocolate, crispy rice cereal, and any tasty mix-ins you desire.
Cooking Time
Next, the cooking time is roughly 10 minutes. You’ll melt the chocolate and mix everything together, creating that delightful combination of crunch and sweetness.
Total Time
In total, expect to spend around 25 minutes on your homemade crunch bars. This quick treat will have you snacking in no time! Once you’ve let them cool and set, you’ll be ready to enjoy your delicious creation.
For more tips on perfecting your bars, check out this guide on the best chocolate melting techniques, which can elevate your candy-making game!
Nutritional Facts for Homemade Crunch Bars
When crafting your own homemade crunch bars, it’s essential to be aware of their nutritional profile. Here’s a quick breakdown:
Calories
Each bar typically contains around 150 to 200 calories, depending on the ingredients used. This makes them a decent treat when you’re craving something sweet and satisfying.
Protein Content
Homemade crunch bars can provide about 5 to 7 grams of protein per serving, particularly if you include nut butters or protein powder in your recipe. Protein helps keep you feeling full longer!
Sugar and Fat Details
These bars may have around 8 to 10 grams of sugar, depending on your choice of sweeteners. The fat content typically ranges from 6 to 10 grams, mostly coming from healthy sources like nuts and seeds. To ensure you’re getting the best nutrition, consider choosing natural sweeteners or dark chocolate for lower sugar options.
For more insights on healthy snack alternatives, check out Healthline’s guide on nutrition, and dive deeper into how the right ingredients can affect your overall well-being!
FAQ about Homemade Crunch Bars
How long do homemade crunch bars last?
Homemade crunch bars are delicious, but they don’t last indefinitely. Typically, when stored in an airtight container at room temperature, they can last for about one week. If you want to extend their life, consider refrigerating them, where they can stay fresh for up to two weeks. For longer-term storage, you can freeze them. Just wrap each bar tightly in plastic wrap and then place them in a freezer-safe container or bag. They can be kept in the freezer for up to three months. This way, you’ll always have a quick snack on hand!
Can I substitute peanut butter?
Absolutely! If you’re not a fan of peanut butter, you can easily swap it out for other nut or seed butters. Almond butter, sunflower seed butter, or even cashew butter can work wonderfully in your homemade crunch bars. Just make sure to choose a version that’s smooth to achieve that lovely texture. For those looking for a lower-calorie option, try pureed pumpkin or applesauce for a unique twist. This not only changes the flavor but also adds a touch of moisture!
Are there nut-free options?
Definitely! If you need to avoid nuts altogether, you can still enjoy homemade crunch bars. Use sunflower seed butter as a nut-free alternative, but ensure that any chocolate chips you add are also nut-free. You could replace the crunch factor with puffed rice or crushed cornflakes. Want to customize it even further? Giving it a touch of dried fruits like cranberries or raisins can bring a delightful sweetness without nuts.
For more creative ideas, check out articles from The Spruce Eats or Food Network for further inspiration.
Conclusion on Homemade Crunch Bars
Final thoughts on making homemade treats
Creating your own homemade crunch bars is not just a fun kitchen project; it’s a satisfying way to tailor your favorite flavors while indulging your sweet tooth. Plus, knowing exactly what goes into your snacks allows you to make healthier choices, especially crucial for busy young professionals.
When you whip up a batch of these delicious treats, consider experimenting with ingredients—maybe add some dried fruits or swap in Turkey Bacon for a savory twist.
For more inspiring recipes, check out BBC Good Food or Bon Appétit. So gather your ingredients, and start creating memorable homemade crunch bars that everyone will love!
Print
Homemade Crunch Bars: Easy Recipe for a Sweet Indulgence
- Total Time: 20 minutes
- Yield: 12 bars
- Diet: Vegetarian
Description
Enjoy the delightful crunch and sweet taste of homemade crunch bars with this easy-to-follow recipe!
Ingredients
- 2 cups crispy rice cereal
- 1 cup chocolate chips
- 1 cup peanut butter
- 1/2 cup honey
- 1/2 cup chopped nuts (optional)
Instructions
- In a saucepan, combine the peanut butter and honey over medium heat until melted and smooth.
- Remove from heat and stir in the chocolate chips until melted.
- Add the crispy rice cereal and nuts (if using) to the mixture, stirring until well coated.
- Press the mixture into a lined baking dish and refrigerate until set.
- Once set, cut into bars and enjoy!
Notes
- For a more decadent treat, drizzle melted chocolate on top before refrigerating.
- Feel free to substitute almond butter for peanut butter for a different flavor.
- Prep Time: 15 minutes
- Cook Time: 5 minutes
- Category: Dessert
- Method: No-Bake
- Cuisine: American
Nutrition
- Serving Size: 1 bar
- Calories: 200
- Sugar: 10g
- Sodium: 20mg
- Fat: 10g
- Saturated Fat: 2g
- Unsaturated Fat: 8g
- Trans Fat: 0g
- Carbohydrates: 25g
- Fiber: 1g
- Protein: 4g
- Cholesterol: 0mg
")