Introduction to Easter Jello Cups
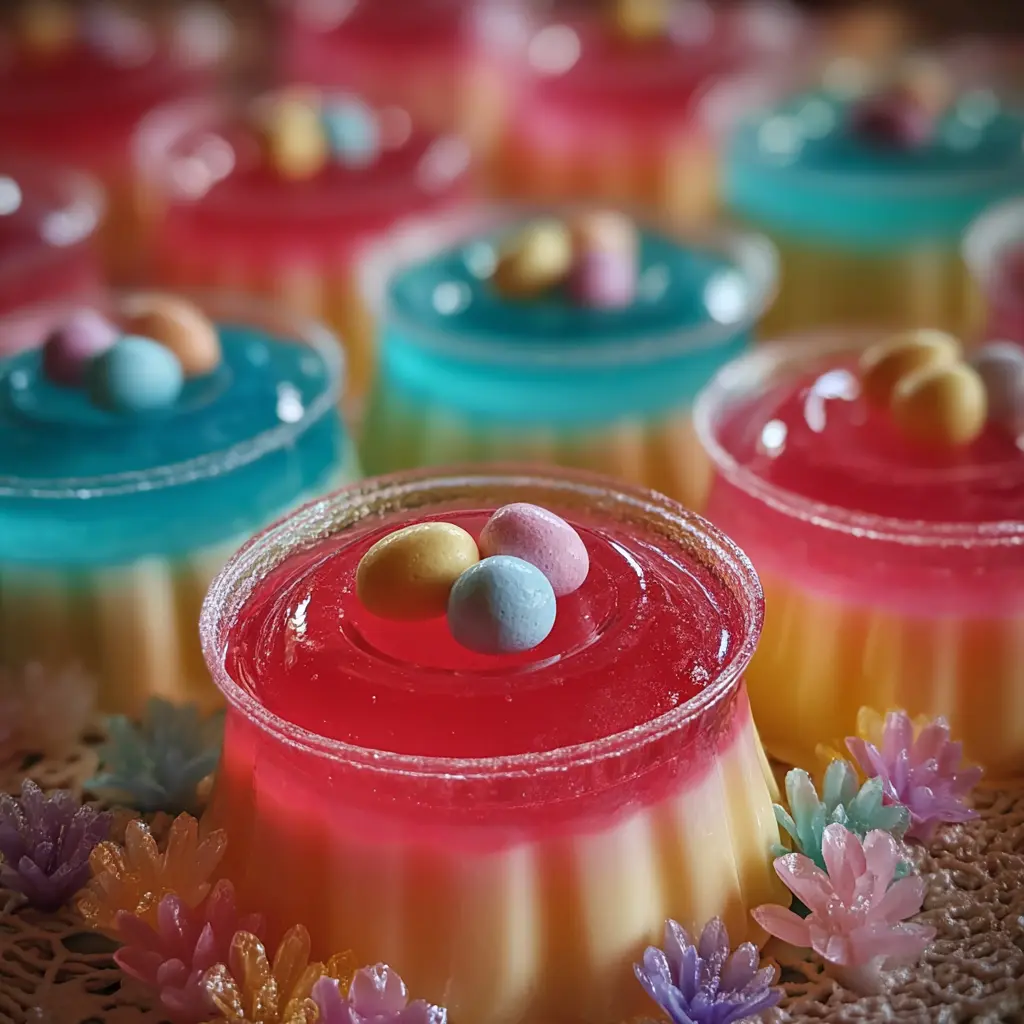
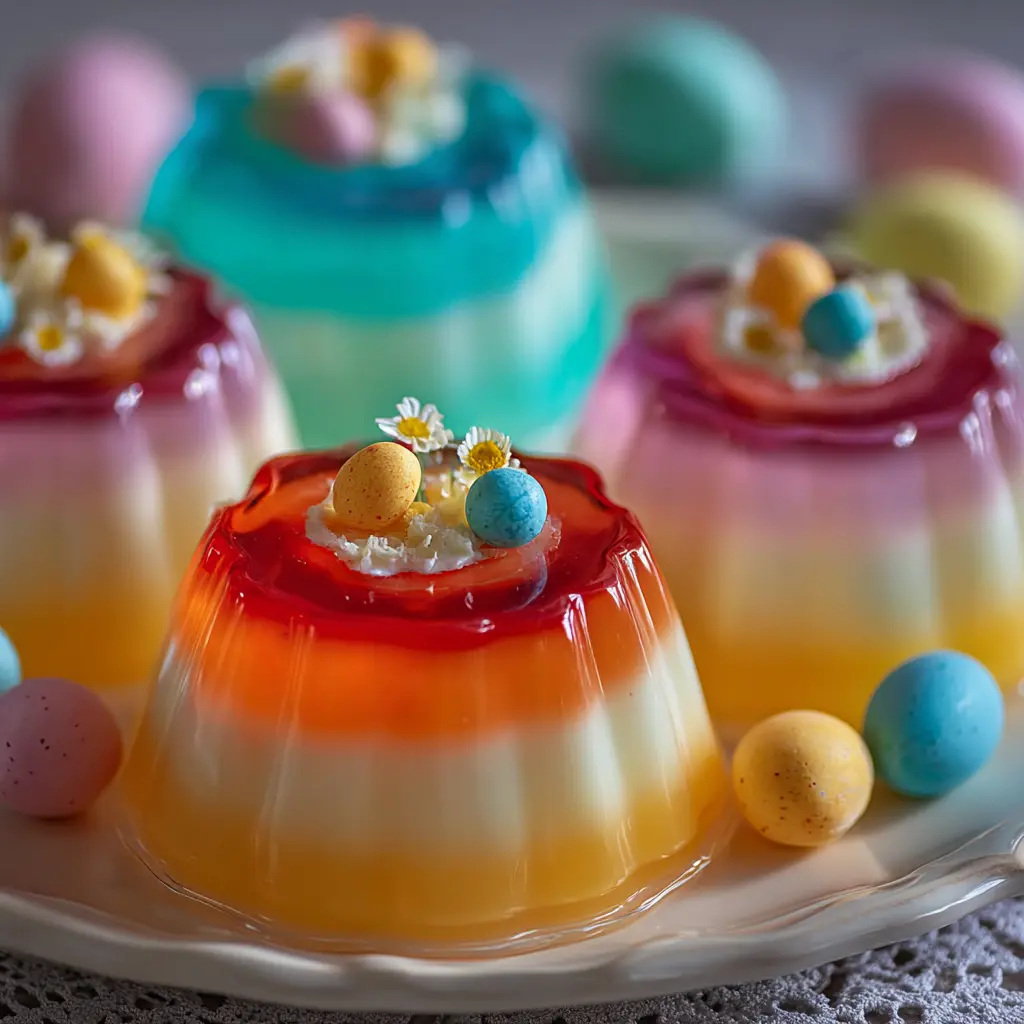
When springtime rolls around, one of the most delightful ways to celebrate Easter is with a vibrant, mouthwatering treat – Easter Jello Cups. These colorful, layered desserts are not only visually stunning but also incredibly easy to make, making them a perfect addition to any Easter gathering. Whether you’re hosting a brunch, attending a family potluck, or simply celebrating at home, these jello cups will surely make an impression.
Why Easter Jello Cups are a Festive Treat
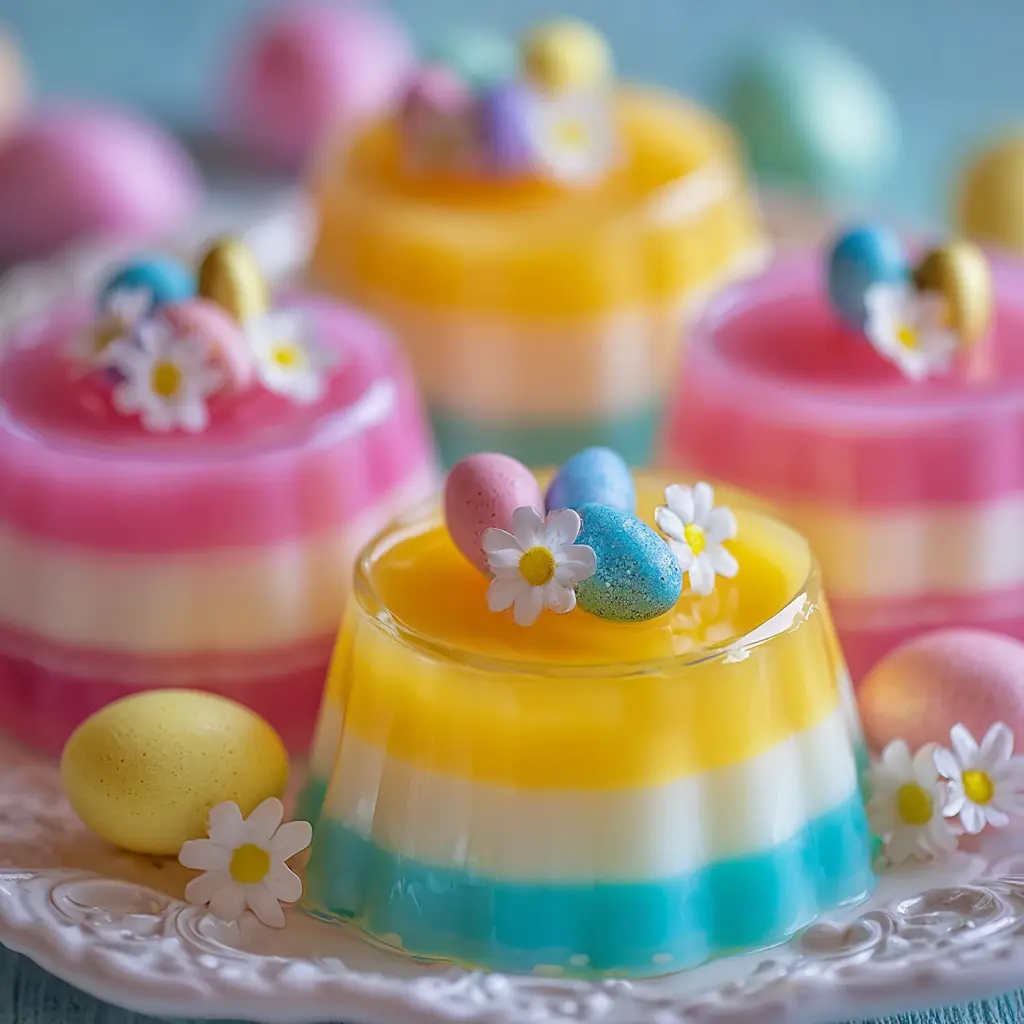
What makes Easter Jello Cups so special? For starters, their bright colors symbolize the revival and freshness that spring brings. You can choose different flavors to match your color scheme, from raspberry reds to lemony yellows and grassy greens. Each layer can be a different flavor, offering a delightful surprise with every spoonful.
Additionally, you can get creative by incorporating themed toppings. Think mini chocolate eggs or edible flowers, which not only enhance the flavor but also add that charming Easter touch. According to the American Institute for Cancer Research, incorporating a variety of fruits into your diet contributes to better health — and these options can be surprisingly nutritious too!
But the appeal of Easter Jello Cups goes beyond aesthetics. They’re incredibly versatile and can easily cater to various dietary preferences. Want to make them vegan? Simply swap gelatin with agar-agar and use fruit juices as a base. Looking for a more decadent option? Try adding a layer of whipped cream or yogurt between the jello layers. The possibilities are endless!
Making these jello cups can also become a fun, interactive activity. Invite friends over, and you can all create your own combinations. This DIY aspect can make gatherings even more memorable. Plus, who doesn’t love a colorful cup of jello that doubles as a centerpiece?
In conclusion, Easter Jello Cups are not just tasty treats; they embody the spirit of spring and creativity. They’re an excellent conversation starter and an easy way to bring people together during the holidays. For more inspiration on festive treats, check out resources like Taste of Home or Food Network for ideas and variations. Happy Easter cooking!

Ingredients for Easter Jello Cups
Creating delightful Easter Jello Cups is the perfect way to add some color and whimsy to your holiday spread. Not only are they visually appealing, but they’re also easy to make and incredibly fun to eat. Here’s what you’ll need:
Essential Ingredients
- Jello mix: Select your favorite flavors. Think vibrant colors like strawberry, lime, and blue raspberry for a playful look.
- Boiling water: This is essential for dissolving the Jello mix.
- Cold water: Helps to set your Jello cups firmly.
- Whipped cream or cool whip: Perfect for that fluffy topping.
- Assorted toppings: Mini marshmallows, sprinkles, or even small chocolate eggs for a festive touch.
Optional Add-ins for Fun
- Fruit slices: Add fresh fruit for texture and flavor.
- Gummy candies: These can bring a delightful burst of sweetness.
Don’t forget to check out sources like Martha Stewart for creative inspiration on how to present your Easter Jello Cups. With just a few simple ingredients, you’re on your way to crafting a dessert that will be the highlight of your Easter celebration!
Step-by-Step Preparation of Easter Jello Cups
Creating Easter Jello Cups is not just fun; it’s a delightful way to get into the holiday spirit. Whether you’re planning a family gathering, a friendly brunch, or simply want to impress your guests, these colorful treats will surely bring a smile to everyone’s face. Follow this easy guide to whip up your own deliciously layered Easter Jello Cups.
Dissolve your flavored gelatin
Before you do anything else, gather your ingredients. You’ll need a few boxes of flavored gelatin in various colors – think vibrant cherry, lime, lemon, and blue raspberry. The more colors, the better!
-
Boil Water: Start by boiling 1 cup of water in a saucepan. Bring it to a rolling boil, ensuring it’s hot enough to dissolve the gelatin completely. Did you know that the boiling water helps achieve a clearer setup? It’s a small trick that makes a big difference!
-
Add Gelatin: Once your water is boiling, remove it from the heat and whisk in your flavored gelatin. Stir until completely dissolved, usually taking about 2-3 minutes. Take a moment to appreciate that beautiful, bright color. If you’re like me, this will likely bring back memories of childhood Easter celebrations!
Mix in the cold water
Now that your gelatin is dissolved, it’s time to enhance it for that perfect consistency.
- Cold Water Addition: Add 1 cup of cold water to the dissolved gelatin mix. This step is crucial as it cools down the mixture, making it easier to pour into your cups without creating a mess.
At this stage, you can also get creative with flavors. A combination of layers in different flavors not only creates visual interest but also tantalizes those taste buds. If you’re interested in more about gelatin’s science and health benefits, consider checking sources like Healthline or the USDA.
Pour into cups and set the first layer
Grab your choice of cups—clear plastic cups work wonderfully for appealing presentation—and it’s time to start layering.
-
Fill Halfway: Pour the gelatin mixture into each cup until it’s about halfway full. Don’t stress if it’s not perfect; the layers will cover small imperfections.
-
Chill: Place the cups in the refrigerator and let them chill for at least 2-4 hours. This ensures that the first layer is fully set before the next is added. Consider this time a good opportunity to plan your final touches for the Easter Jello Cups.
Repeat for remaining flavors
Once your first layer is set, it’s time to repeat the process with your next flavor.
-
Prepare Additional Flavors: Repeat the steps above for your next gelatin flavor: boil water, dissolve the gelatin, add cold water, and then carefully pour the next layer over the previously set layer.
-
Repeat Chilling: Just like before, return the cups to the fridge and let them set for another 2-4 hours. This layering technique not only builds flavor but also creates stunning visuals. Trust me, your friends will be whipping out their phones for a quick snapshot!
Top with whipped cream and garnish
After all your hard work, it’s finally time for the grand presentation!
-
Final Layer: Once the last layer is set, add a dollop of whipped cream on top. You can use store-bought or whip up your own – the choice is yours!
-
Garnishing: For that festive Easter touch, consider adding some cute sprinkles, chocolate eggs, or even fresh fruit like berries. This is your chance to get creative! Remember, a splash of color is always appreciated during Easter brunch.
Creating Easter Jello Cups is not only easy but also allows for endless customization. Invite friends to join in on the fun, and who knows? You might just start a new holiday tradition. Happy crafting!
For more dessert inspirations, don’t forget to check out cooking platforms like Allrecipes or Food Network!
Variations on Easter Jello Cups
Easter Jello Cups are not only vibrant and fun but also incredibly versatile! You can easily customize them to cater to your taste and the palates of your guests. Let’s dive into a couple of delightful variations sure to please everyone at your celebration.
Fruity Gelatin Combinations
When it comes to creating Easter Jello Cups, the flavor possibilities are nearly endless. Why not experiment with fruity combinations that scream spring? Consider these pairings:
- Mixed Berry Medley: Combine raspberry and blueberry jello for a sweet and tart profile. The burst of colors will look stunning in clear cups!
- Tropical Delight: Use pineapple and coconut jello for an exotic touch. Garnish with fresh chunks of fruit for that added crunch.
- Citrus Splash: Orange and lemon jello can create a refreshing, zesty treat perfect for a warm Easter day.
Make sure you use gelatin brands with high ratings and positive reviews—check out this top gelatine pick!.
Layered Dessert Cups with Yogurt
Take your Easter Jello Cups to the next level by incorporating layers of yogurt. Not only does this add creaminess, but it also enhances the visual appeal. Here’s how to do it:
- Prepare your gelatin as instructed and allow it to set.
- Spoon a layer of Greek yogurt into your cups before adding your jello. Flavored options like vanilla or lemon will add a delightful twist.
- Top with a fruit compote for extra sweetness and texture.
These layered cups not only look beautiful but also provide a healthy balance of flavors. Plus, they are sure to impress your guests!
Feel free to share your own variations or ask questions! Easter Jello Cups are all about creativity, so don’t hold back!
Cooking Tips and Notes for Easter Jello Cups
Ensuring perfect layer consistency
To achieve stunning and colorful Easter Jello Cups, focus on allowing each layer enough time to set before adding the next. Typically, letting each layer chill for at least 20-30 minutes works wonders. A quick trick? Use a toothpick to test if the previous layer is firm enough — if it doesn’t stick, you’re good to go!
Additionally, pour the gelatin mixture slowly over the back of a spoon when adding layers. This gentler approach minimizes mixing and preserves those beautiful layers. Don’t forget to use a clear glass container to showcase your colorful creations.
Choosing the right gelatin flavors
Selecting the right flavors can elevate your Easter Jello Cups to the next level. Think fresh, fruity options like strawberry, lemon, or lime for a vibrant look. Feel adventurous? Combining flavors adds a delightful twist — try mixing raspberry with pineapple for a tropical flair.
You can find inspiration and flavor combinations at resources like Wilton or Taste of Home. Just remember to balance strong flavors to ensure each layer is both distinct and harmonious. Happy cooking!
Serving Suggestions for Easter Jello Cups
Presenting Your Jello Cups Creatively
When it comes to your Easter Jello Cups, presentation can elevate this delightful treat into a centerpiece. Consider using clear plastic cups or small mason jars to showcase the vibrant layers of color. For an added fun twist, top each cup with whipped cream and a sprinkle of edible glitter, resembling springtime fairy dust. Fresh fruits like strawberries, blueberries, or edible flowers can also enhance the aesthetic appeal, making it even more festive.
Ideas for Serving at Easter Gatherings
If you’re planning an Easter gathering, these Easter Jello Cups can be a hit! Here are some ideas to incorporate them into your celebration:
- Make them a dessert bar: Set up a colorful display of Jello cups, allowing guests to choose their favorite flavors.
- Pair with light beverages: Refreshing lemonade or sparkling water infused with mint and citrus works beautifully alongside these treats.
- Create a fun DIY station: Let your guests layer their cups with different flavors and toppings – a tasty activity for all ages!
Embrace the spirit of Easter with these innovative serving suggestions, making your gathering delightful and memorable. For more creative ideas, check out Food Network’s festive recipes.
Time Breakdown for Easter Jello Cups
Preparation Time
Making Easter Jello Cups is a breeze! You’ll need about 20 minutes for preparation. This includes gathering your ingredients, mixing the Jello, and pouring it into your fun festive cups. If you are up for adding edible decorations, factor in a few extra moments to let your creativity shine through.
Setting Time
The setting time for your delightful Easter Jello Cups is approximately 4 hours. This allows the Jello to firm up beautifully, creating the perfect texture. You can always make them the night before, so they’re ready to impress your guests the next day.
Total Time
In total, you’re looking at around 4 hours and 20 minutes from start to finish. With minimal active time compared to the chilling, it’s a great treat to prepare ahead of your Easter celebrations. So, why not get started now? For more inspiration, check out these fun ideas at The Spruce Eats and take your dessert game up a notch!
Nutritional Facts for Easter Jello Cups
Calories per serving
When enjoying Easter Jello Cups, you’ll find that each serving typically contains around 80 to 100 calories. This makes them a delightful yet guilt-free treat perfect for the holiday season. If you’re mindful of calorie intake, you can savor these vibrant, wiggly cups without the worry of derailing your diet.
Breakdown of sugars
In terms of sugars, these colorful cups generally have about 15-20 grams per serving. While they satisfy your sweet tooth, it’s essential to be aware of this sugar content. Opting for lower sugar jelly can help keep those numbers in check without losing the fun.
Healthier ingredient alternatives
Looking to lighten up your Easter Jello Cups? Consider these healthier ingredient alternatives:
- Use sugar-free gelatin: This can cut down drastically on calorie counts and sugar intake.
- Add fresh fruits: Incorporate berries or slices of citrus for added fiber and vitamins.
- Swap in yogurt: Mixing in some low-fat yogurt can enhance creaminess while providing beneficial probiotics.
These choices not only make your cups healthier but also more delicious. For detailed nutritional guidelines, check out the USDA FoodData Central. Enjoy your festive treats without compromising on health!
FAQ about Easter Jello Cups
Creating delightful Easter Jello Cups can be an enjoyable tradition for your spring celebrations. Here are some common questions that might pop up while you’re planning your festive treat.
Can I make Jello cups ahead of time?
Absolutely! In fact, making Easter Jello Cups a day or two before your event can save you time and stress. Just be sure to keep them in the refrigerator until you’re ready to serve. The gelatin will set perfectly, and you won’t lose any vibrancy in the colors. Just a tip—if you’re adding whipped cream or other toppings, consider waiting until right before serving to keep everything fresh and fluffy.
What type of gelatin is best for these cups?
When it comes to choosing the right gelatin for your Easter Jello Cups, classic unflavored gelatin or flavored gelatin mixes work wonderfully. Opt for vibrant colors and flavors like strawberry, lime, or blueberry to make those holiday hues pop. You can even explore vegetarian options by using agar-agar if you’re looking to keep things plant-based. For a comprehensive guide on gelatin types, check this resource on gelatin substitutes.
Are Easter Jello Cups kid-friendly?
Definitely! Kids absolutely love Easter Jello Cups for their bright colors and fun shapes. Plus, they’re a great way to include your little ones in the kitchen. Letting them choose their favorite flavors and colors makes the process even more engaging. As an added bonus, they’re a mess-free treat compared to traditional cakes or puddings, making clean-up a breeze.
Feel free to ask any other questions about creating festive treats—sharing ideas only makes the celebration sweeter!
Conclusion on Easter Jello Cups
As you’ve discovered, Easter Jello Cups are not only a visually appealing treat but also a fun, interactive dessert for your celebration. These delightful cups can easily be customized to match your theme, making them a great addition to any Easter gathering. Consider layering different flavors or colors to create a vibrant display that will impress your guests.
If you’re planning a festive menu, pair your jello cups with light fare like salads or appetizers that offer a refreshing complement. Don’t forget to prepare some kid-friendly versions, too!
For more inspiration, check out ideas from the American Egg Board or Taste of Home. Enjoy creating these festive treats and making delicious memories with friends and family!
Print
Easter Jello Cups: Easy, Colorful Treats for Festive Celebrations
- Total Time: 4 hours 10 minutes
- Yield: 6 servings
- Diet: Vegetarian
Description
Celebrate Easter with these colorful and easy-to-make Jello cups that will delight both kids and adults.
Ingredients
- 1 cup boiling water
- 1 cup cold water
- 1 box flavored Jello (any color)
- 1 cup whipped cream
- 1/2 cup Easter-themed sprinkles
Instructions
- In a mixing bowl, dissolve the Jello powder in boiling water.
- Add cold water and stir well.
- Pour the Jello mixture into clear cups and refrigerate until set, about 4 hours.
- Once set, top with whipped cream and sprinkles before serving.
Notes
- For a layered effect, wait for each layer of Jello to set before adding the next.
- Experiment with different flavors and colors for a festive look.
- Prep Time: 10 minutes
- Cook Time: 0 minutes
- Category: Dessert
- Method: Refrigerating
- Cuisine: American
Nutrition
- Serving Size: 1 cup
- Calories: 150
- Sugar: 22g
- Sodium: 10mg
- Fat: 1g
- Saturated Fat: 0g
- Unsaturated Fat: 0g
- Trans Fat: 0g
- Carbohydrates: 36g
- Fiber: 0g
- Protein: 2g
- Cholesterol: 0mg
")