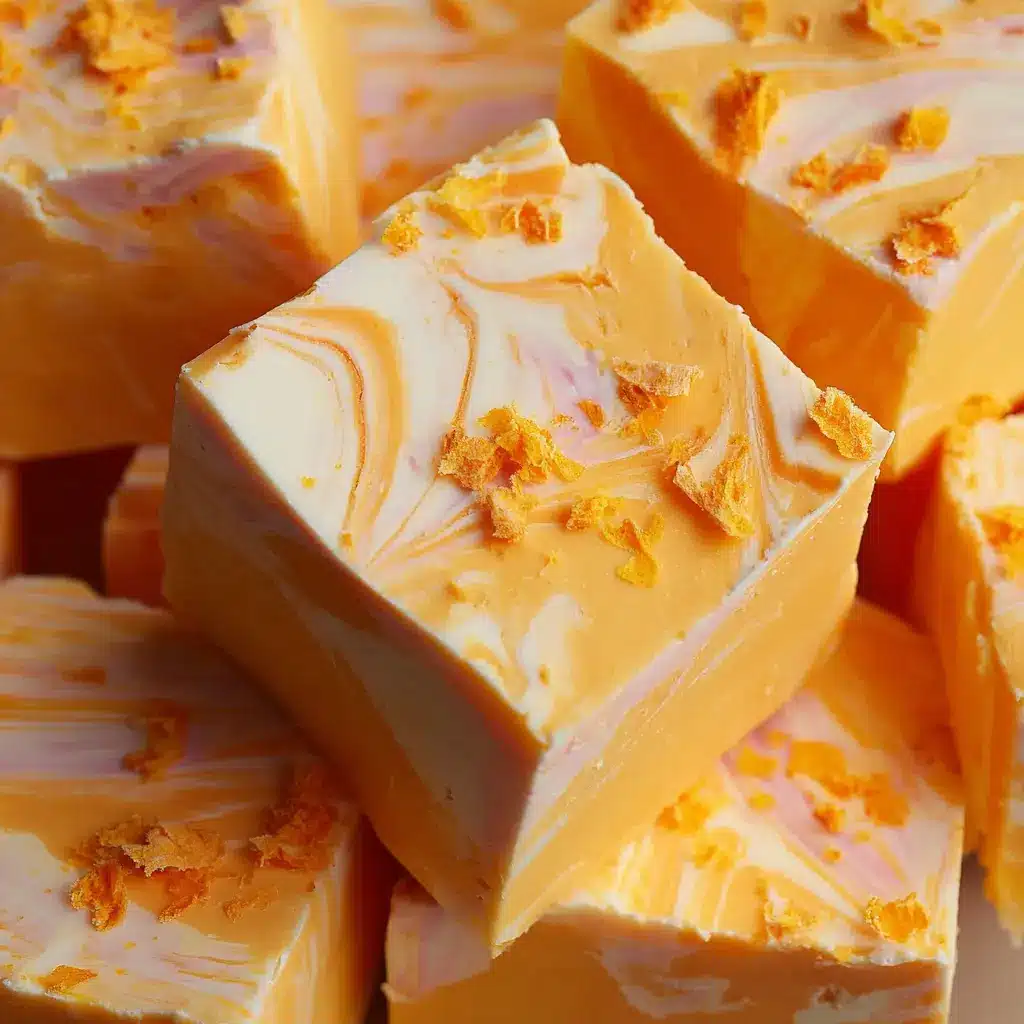
Introduction to Creamsicle Fudge
If you’re searching for a deliciously nostalgic treat that perfectly balances the worlds of creamy chocolate and zesty orange, creamsicle fudge is a must-try! Imagine the familiar flavor of popsicles from your childhood, now crafted into a rich, melt-in-your-mouth fudge. This treat is not just for kids; it’s an enchanting dessert that speaks directly to the hearts—and taste buds—of young professionals trying to escape their fast-paced lives.
Why Creamsicle Fudge is a Must-Try for Young Professionals
Life can get hectic, especially when you’re navigating the demands of work and personal endeavors. Finding small moments of joy, like whipping up a batch of creamsicle fudge, can act as both a sweet escape and a fun culinary project.
-
Quick and Easy: This fudge requires minimal ingredients and can often be prepared in under thirty minutes, making it a perfect activity for a busy weeknight or a fun weekend kitchen experiment. You could even invite friends over for a friendly cooking session. The laughter and memories made in the kitchen are worth just as much as the fudge itself!
-
Perfect for Sharing: Whether you’re looking to impress your coworkers or bring something unique to your next gathering, creamsicle fudge is an excellent choice. Slice it into bite-sized pieces and watch it disappear at parties—everyone loves a treat that reminds them of summer days and carefree moments.
-
Creative Variations: Once you master the classic recipe, don’t hesitate to experiment! Adding nuts, crushed candies, or even different flavors—think peppermint or blueberry—can add unexpected twists to your fudge adventures. Check out Serious Eats for inspiration on how to upgrade your fudge game.
A Treat for Every Palette
As young professionals, we often appreciate treats that are not only pleasing to the eye but also tantalizing to the palate. Creamsicle fudge encapsulates a delightful contrast, offering both creamy sweetness and a refreshing citrus zing. Whether enjoyed as an evening pick-me-up or a midday snack, it’s certain to elevate your sweet tooth experience.
With just a few simple ingredients and a touch of creativity, you’ll find that this fudge not only satisfies your cravings but also serves as a gentle reminder to take a little time for yourself amid a busy lifestyle. So why not give it a try? After all, who doesn’t need a little more sweetness in their life?

Ingredients for Creamsicle Fudge
Essential ingredients for a delightful treat
Creating creamsicle fudge is surprisingly simple, and you probably have most of the ingredients in your pantry already. Here’s what you need:
- White chocolate chips: About two cups will create that creamy base we all love.
- Sweetened condensed milk: This adds richness and a velvety texture to your fudge.
- Orange extract: A teaspoon or two will give that classic creamsicle flavor.
- Food coloring: Optional, but a few drops of orange can enhance the look!
These ingredients come together to create a dreamy, melt-in-your-mouth delight that’s perfect for any occasion.
Optional ingredients for enhanced flavor and color
While the essentials will do the trick, why not take your creamsicle fudge to the next level? Consider adding:
- Zest of an orange: This brightens the flavor and adds a refreshing citrus note.
- Vanilla extract: A splash can round out the taste beautifully.
- Chopped nuts: Almonds or pistachios can add texture and richness.
For more on ingredient substitutions and enhancements, check out this resource from the American Heart Association. Remember, baking is all about experimentation, so feel free to get creative!
Preparing Creamsicle Fudge
Creating delectable creamsicle fudge is not only a delightful project but also a memorable culinary experience. Whether you’re gearing up for a summer gathering or simply indulging your sweet tooth, this creamy treat is sure to impress. Let’s dive into the steps to make your fudge-making journey smooth and enjoyable.
Prepare Your Workspace and Pan
Before you ignite your culinary creativity, it’s essential to create an organized workspace. Start by clearing your countertop of any unnecessary items. You want a clear and clean area to work in diverting your attention solely to the fudge.
Next, gather your tools and ingredients:
- A medium saucepan
- A mixing bowl
- A spatula
- A baking dish (preferably 9×9 inches) lined with parchment paper
These simple preparations can make the entire process more streamlined. And don’t forget to preheat your fridge so it’s ready for the fudge once it’s mixed!
Melt the Fudge Ingredients Gently
Now that your workspace is ready, it’s time to melt the fudge ingredients, a fundamental step in creating rich, creamy fudge. Place your saucepan on low heat and add the following ingredients:
- Sweetened condensed milk
- White chocolate chips
- A pinch of salt (to enhance the sweetness)
Constantly stir the mixture as it melts, ensuring everything combines without burning. This method keeps it smooth—a vital quality for your creamsicle fudge. For an extra tip, check out this guide to melting chocolate for more techniques!
Incorporate Flavorings for That Creamsicle Essence
Once your fudge ingredients are gooey and blended, it’s time to add that unmistakable creamsicle flavor. Here’s how:
- Add vanilla extract (about 1 teaspoon feels just right)
- Introduce orange extract to elevate that signature orange creamsicle taste (start with 1/2 teaspoon and adjust to your preferences)
As you stir in these flavorings, think about your favorite creamsicle memories; it’ll make the process even more enjoyable!
Add Color for Visual Appeal
The appearance of your creamsicle fudge will carry just as much weight as its taste! Let’s awaken those vibrant orange hues reminiscent of summertime treats. Here’s how you can add color:
- Use orange gel food coloring and mix it in gradually until you achieve your desired shade. Gel coloring works best as it won’t alter the texture of your fudge.
Imagine serving up fudge that not only tastes incredible but also looks so inviting that it draws everyone to the dessert table!
Pour and Chill the Fudge
With the flavors and colors beautifully blended, it’s time to transfer the mixture into your prepared baking dish. Pour it in and give it a gentle tap on the counter to settle it and eliminate any air bubbles.
Cover the dish with plastic wrap and place it in the fridge. Allow it to chill for at least 3-4 hours, or until it has hardened completely. This waiting period is crucial; it enhances the texture of your fudge.
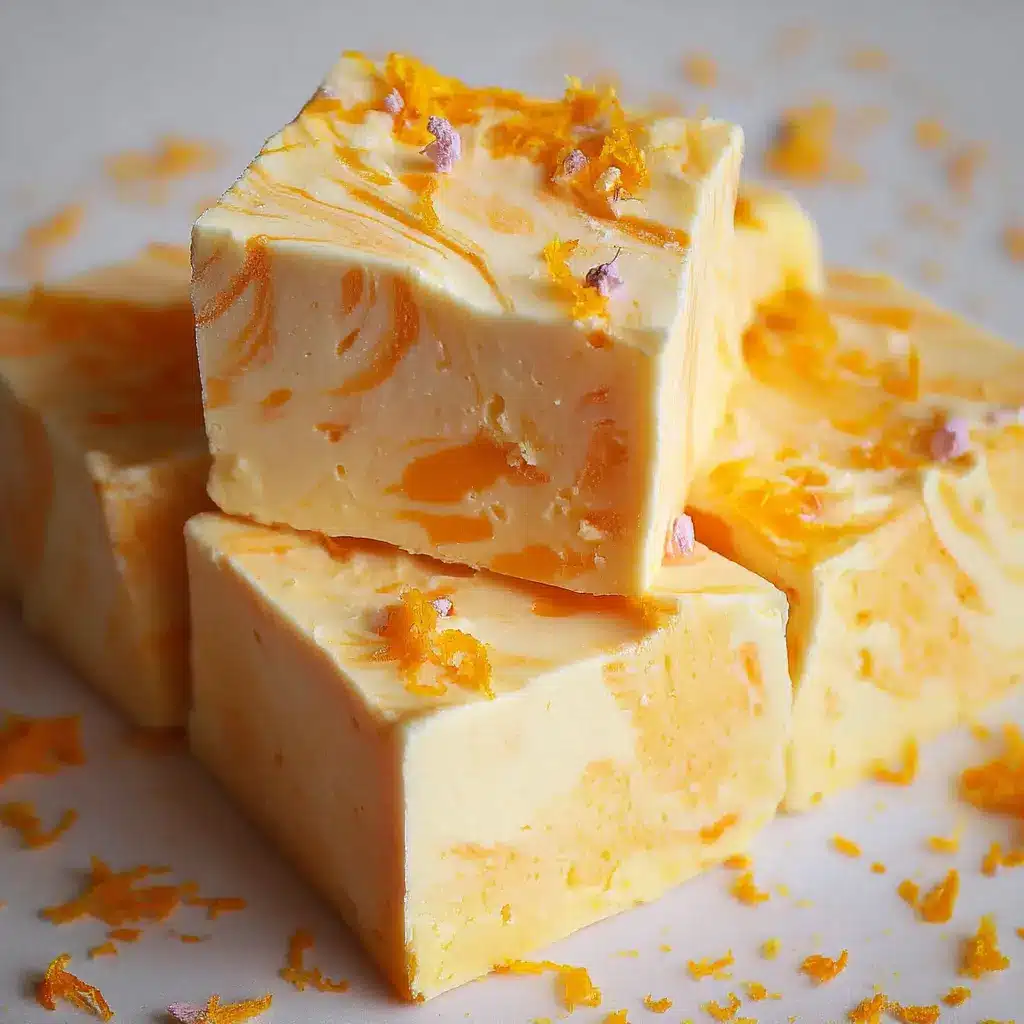
Cut into Perfect Squares for Serving
The moment of truth has arrived! When the fudge has set, take it out from the fridge and carefully pull it out of the baking dish using the parchment paper edges. Place it onto a cutting board.
Using a sharp knife, cut the fudge into squares. Aim for bite-sized pieces—perfect for sharing or nibbling on for yourself.
Whether you plan to serve this at a party or keep it all for yourself (no judgment here!), this creamsicle fudge is sure to be a hit. Bring a taste of nostalgia to your gatherings, and enjoy the compliments that are sure to follow!
This simple, straightforward creamsicle fudge recipe captures the essence of summer in every bite. So roll up those sleeves and enjoy the sweet adventure!
Variations on Creamsicle Fudge
Delicious Vegan Creamsicle Fudge
Who says that creamsicle fudge can’t be enjoyed by everyone? With a few simple swaps, you can whip up a vegan version that delivers all the creamy goodness without any animal products.
To create your vegan creamsicle fudge, replace traditional milk with coconut milk for a rich taste. Use dairy-free chocolate or cacao butter as your chocolate base. For sweetness, maple syrup or agave nectar works wonders! This combination offers the same delightful orange and cream flavor while ensuring it’s accessible to those following a vegan lifestyle. Curious about the health benefits of plant-based diets? Check out this Nutritional Facts guide for insights!
Adding Nuts or Sprinkles for Extra Texture
If you’re looking to level up your creamsicle fudge, consider incorporating nuts or colorful sprinkles. Chopped almonds or cashews can add a satisfying crunch and complement the smoothness of the fudge nicely. Just mix them in before cooling, and you’ll enjoy that flavorful contrast in every bite.
Alternatively, for a touch of fun, you could sprinkle edible glitter or vibrant sprinkles on top of your fudge before it sets. This not only makes it visually appealing but also adds a slightly sweet crunch that kids and adults alike will appreciate.
Remember, the beauty of creamsicle fudge is its versatility. So don’t be afraid to experiment! Whether you stick to classic flavors or add your unique touch, you’re bound to impress your friends and family with this delightful treat. What variation will you try first?
Cooking Tips and Notes for Creamsicle Fudge
Creating the perfect creamsicle fudge is easier than it seems! With a few helpful tips, you’ll ensure a delicious result every time.
Best Practices for Melting Chocolate
Melting chocolate can be tricky, but there’s a foolproof method. Use a double boiler or heat-safe bowl over simmering water, ensuring that no water gets into the chocolate. Stir frequently for even melting. If you prefer the microwave, go for short bursts of 20-30 seconds, stirring in between. This way, you can avoid any scorching and keep the rich flavor intact.
How to Achieve the Perfect Consistency
For the ultimate creamsicle fudge, you’ll want a smooth, creamy texture. Start with soft butter and make sure your cream cheese is at room temperature to prevent lumps. A splash of cream can help, too—just add it gradually until you reach that luscious consistency. If the fudge feels too thick, it’s totally acceptable to add a bit more cream or melted chocolate!
For more tips on melting chocolate, check out Serious Eats, which dives deeper into techniques that can elevate your dessert game!
Serving Suggestions for Creamsicle Fudge
Perfect Beverage Pairings
When indulging in creamsicle fudge, consider pairing it with refreshing beverages that complement its sweet, citrusy flavor. Here are some ideas:
- Iced Tea: A glass of chilled peach or lemon iced tea balances the creaminess of the fudge beautifully.
- Sparkling Water: Flavored sparkling water adds a fizzy touch that’s both light and refreshing.
- Coffee: For a cozy vibe, a cup of vanilla or mocha coffee brings warmth that contrasts nicely with the fudge’s sweetness.
These beverages not only enhance the flavor profile but also make for a delightful gathering.
Creative Presentation Ideas
How you present your creamsicle fudge can elevate your dessert experience. Here are a few creative ideas to try:
- Layered Dessert Cups: Cut the fudge into cubes and layer it with whipped cream and zest in clear cups for a visually stunning treat.
- Gift Packaging: Wrap pieces in colorful parchment paper and tie with a ribbon for thoughtful gifts that friends and family will love.
- Serving Platter: Arrange the fudge on a vibrant platter, garnished with orange slices or mint leaves for a pop of color.
By exploring these serving suggestions, you’ll not only impress your guests but also create memorable moments centered around this delicious treat. If you’re looking for more dessert ideas, check out this fabulous fudge recipe for inspiration!
Time Breakdown for Creamsicle Fudge
When diving into the delightful world of creamsicle fudge, understanding the timing can make all the difference in enjoying this treat. Here’s how it breaks down:
Preparation Time
Getting started is quick and easy! You’ll need about 15 minutes to gather your ingredients and mix everything together.
Cooking Time
The fudge requires 10 minutes of cooking on the stovetop, making it a breeze to whip up when you’re short on time.
Chilling Time
Patience is key! Let the fudge chill for about 2 hours in the fridge. This step ensures it sets perfectly, ready for slicing.
Total Time
All in all, you’re looking at roughly 2 hours and 25 minutes from start to finish. In just a short amount of time, you’ll have a delicious batch of creamsicle fudge to share (or keep all to yourself)! For more tips on making fudge, you might want to check out Baker’s Joy for additional insights.
Now you’re well-prepped to dive into this sweet adventure!
Nutritional Facts for Creamsicle Fudge
Calories per serving
When indulging in a piece of creamsicle fudge, it’s essential to keep an eye on your calorie intake. Each serving typically contains around 200 calories. While these are mostly derived from sugar and fat, it’s OK to treat yourself in moderation.
Key nutrients to consider
In addition to calories, consider the following nutrients:
- Fat: Fudge is rich in fats, mainly from butter and cream, providing a creamy texture.
- Carbohydrates: The primary source of energy, mainly from sugar, so enjoy a small piece to satisfy your sweet tooth.
- Calcium: Depending on ingredients like cream, you may also benefit from small amounts of calcium.
Make sure to balance your fudge with nutrient-dense foods throughout the day. For more detailed insights into sugar and fat recommendations, check out the USDA website. Happy indulging!
FAQs about Creamsicle Fudge
How long does creamsicle fudge last?
Once you’ve prepared your delicious creamsicle fudge, proper storage is key to enjoying it for longer. When stored in an airtight container at room temperature, this treat will keep well for about one to two weeks. If you find yourself with leftovers (which is unlikely!), you can refrigerate it, extending its freshness for up to three weeks. Just make sure to wrap it properly to prevent it from absorbing any unwanted odors!
Can I use other flavors in this fudge recipe?
Absolutely! One of the best things about making creamsicle fudge is how adaptable it is. Feel free to explore different flavor combinations! Some popular alternatives include:
- Chocolate Orange: Replace some of the orange flavoring with cocoa or melted chocolate for a rich twist.
- Strawberry Vanilla: Swap in strawberry purée for a fruity flair that also brings a pop of color.
- Mint Chocolate: Add peppermint extract alongside chocolate for a refreshing variation.
The key is to maintain the same consistency and proportions to ensure your fudge sets perfectly.
What should I do if my fudge is too soft?
If your creamsicle fudge doesn’t set as firmly as you’d like, don’t panic! Here are a couple of solutions:
-
Refrigerate Longer: Sometimes, fudge just needs a bit more time. Place it in the fridge for an additional hour or so to allow it to firm up.
-
Remelt and Adjust: If it’s still too soft, you can gently remelt it and add extra powdered sugar or cocoa to stiffen the mixture. Just be careful not to overheat!
Making your fudge is about creativity and experimentation, so don’t hesitate to share your thoughts or tweaks with us. For more tips and tricks, check out this guide on fudge-making basics!
Conclusion on Creamsicle Fudge
Why homemade fudge is worth the effort
Making creamy and vibrant creamsicle fudge at home is a delightful experience that’s absolutely worth the effort. Not only do you get to control the ingredients, ensuring a perfect blend of flavor and texture, but there’s also something incredibly satisfying about creating a treat that brings back childhood memories.
- Freshness Guaranteed: Nothing beats the taste of fresh, homemade fudge, and it’s a fantastic way to customize flavors just for you.
- Creative Outlet: Experiment with different layers and add-ins—you might just stumble upon your new favorite combination.
- Perfect for Sharing: Homemade fudge makes a heartfelt gift or a charming addition to parties.
Why settle for store-bought when you can whip up something truly special? Trust me; your taste buds will thank you! For more tips on making dessert magic, check out King Arthur Baking for baking inspiration or Serious Eats for expert advice.
Print
Creamsicle Fudge: The Indulgent Treat You Can Make at Home
- Total Time: 2 hours
- Yield: 16 squares
- Diet: Vegetarian
Description
Indulge in the creamy and citrusy flavors of Creamsicle Fudge, a delightful treat that you can easily make at home.
Ingredients
- 2 cups white chocolate chips
- 1 cup sweetened condensed milk
- 1/2 cup butter
- 1 teaspoon vanilla extract
- 1/2 teaspoon orange extract
- 1/4 cup orange zest
- 1/4 cup powdered sugar
Instructions
- In a saucepan, melt the white chocolate chips, sweetened condensed milk, and butter over low heat until smooth.
- Remove from heat and stir in the vanilla and orange extracts along with the orange zest.
- Pour the mixture into a greased 8×8 inch pan and spread evenly.
- Sift powdered sugar over the top for a sweet finish.
- Let it cool completely before cutting into squares.
Notes
- For an extra creamy texture, try adding a tablespoon of cream cheese.
- Stay patient while melting the chocolate to avoid burning.
- Prep Time: 10 minutes
- Cook Time: 10 minutes
- Category: Dessert
- Method: No-Bake
- Cuisine: American
Nutrition
- Serving Size: 1 square
- Calories: 150
- Sugar: 18g
- Sodium: 50mg
- Fat: 8g
- Saturated Fat: 5g
- Unsaturated Fat: 2g
- Trans Fat: 0g
- Carbohydrates: 20g
- Fiber: 0g
- Protein: 1g
- Cholesterol: 15mg
")