Introduction to Christmas Cherry Balls
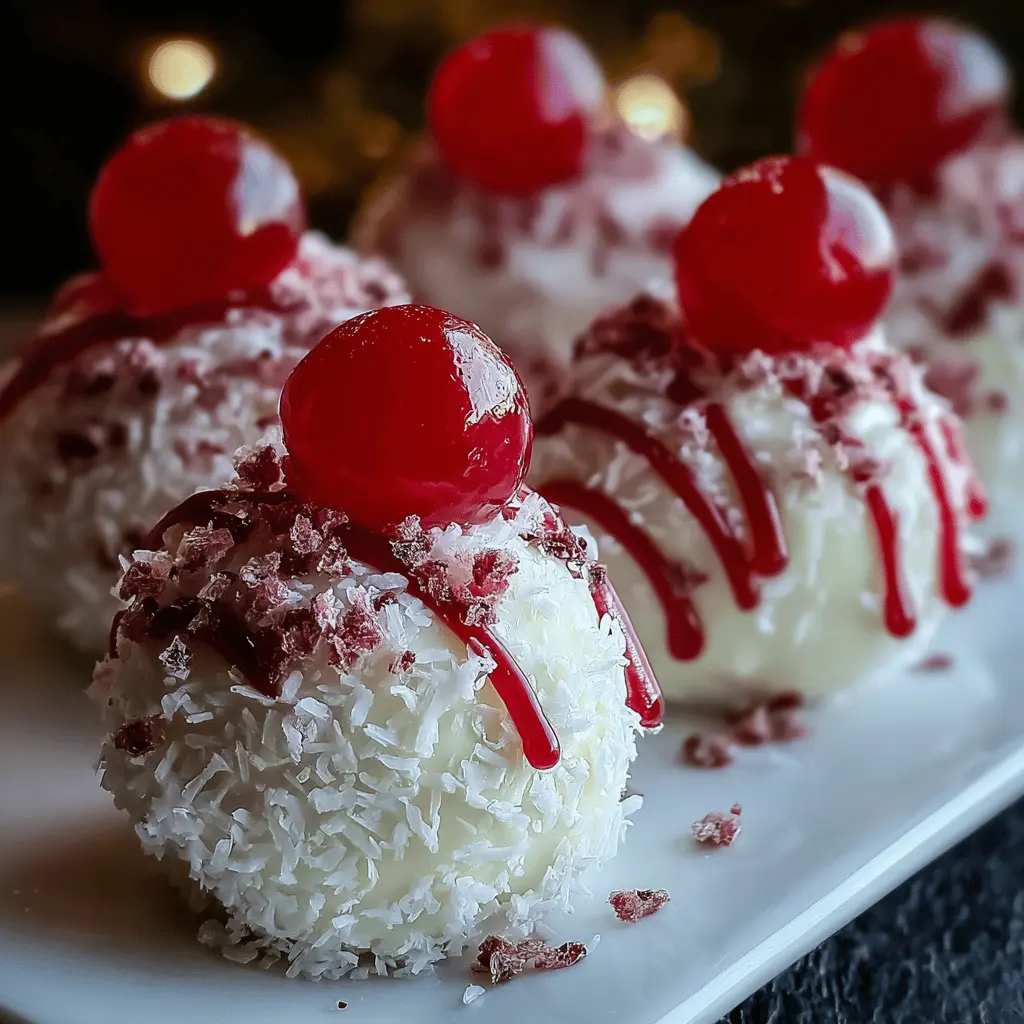
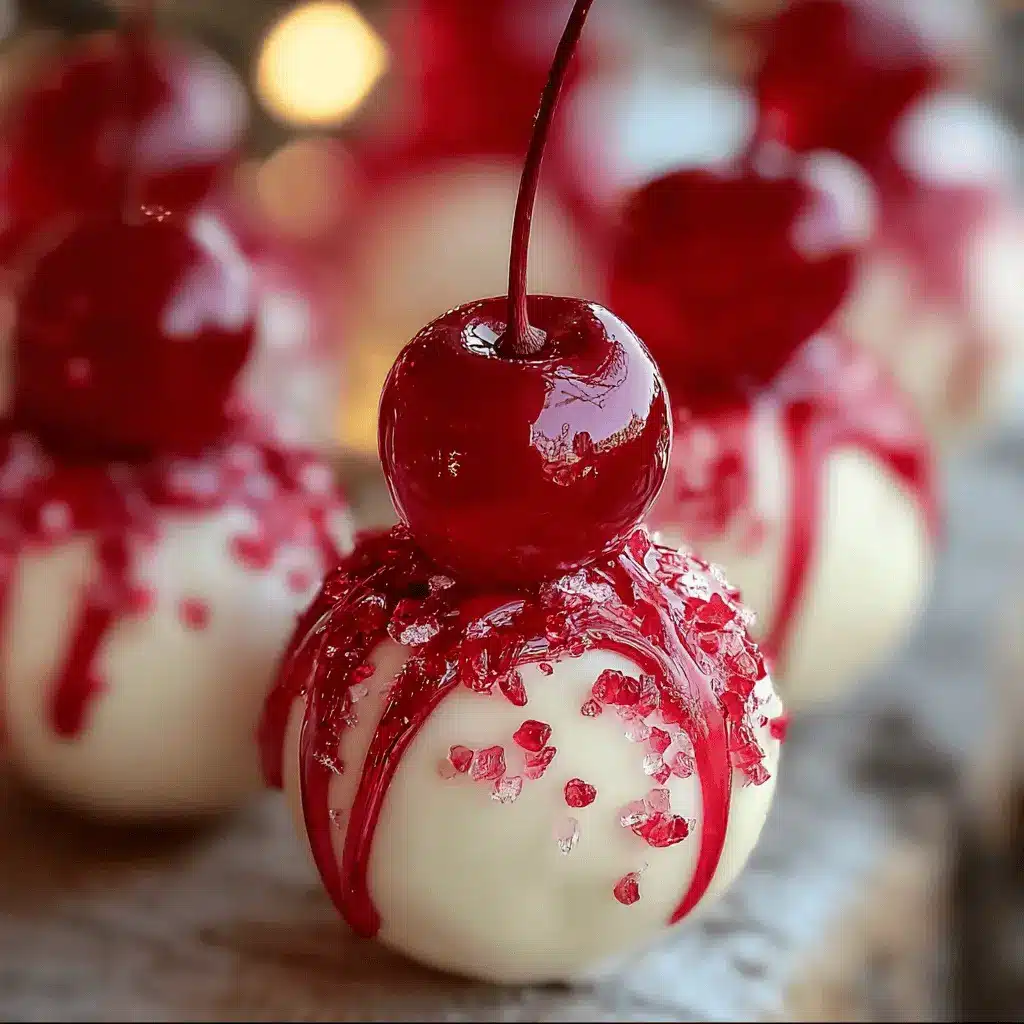
When it comes to festive treats, Christmas Cherry Balls emerge as a delightful delicacy that pairs the vibrancy of cherries with a medley of rich flavors. These sweet-sour morsels not only tantalize your taste buds but also add a splash of color and cheer to any holiday spread. You might be wondering, what makes these festive goodies so perfect for the holiday season?
It’s simple: they bring together the elements of nostalgia, joy, and creativity. As a child, I remember eagerly waiting for that first bite during family gatherings — that unique combination of a slightly tangy cherry enveloped in a sweet, creamy coating. These little balls of happiness often find their way into gift boxes, party platters, and holiday tables, providing a delightful surprise for guests and hosts alike.
A Perfect Holiday Treat
The beauty of Christmas Cherry Balls lies in their versatility. Here are a few reasons why they shine during the holidays:
- Easy to Customize: Whether you prefer a classic recipe or want to add a twist with ingredients like Turkey Bacon or Chicken Ham, these treats can be adapted to fit your taste.
- Visually Appealing: Their vibrant red color makes them an eye-catching addition to any holiday spread, making your dessert table look enchanting.
- Quick to Prepare: Perfect for busy young professionals, these bites can be whipped up in less than an hour, allowing you to impress guests without consuming an entire day in the kitchen.
- Family-Friendly Fun: As you create these festive treasures, it’s a chance to bond with loved ones. Why not invite your friends over for a Christmas Cherry Balls making party?
According to experts at the National Cherry Growers Association, cherries not only taste great but are packed with antioxidants and vitamins, making them a healthier addition to your holiday dessert platter. Why not learn more about the health benefits of cherries here?
In crafting these delightful treats, you’re not just sharing a dessert; you’re creating memories. So, gather your ingredients and prepare to enjoy the magic of Christmas Cherry Balls. Your holiday festivities will never taste better!
Ingredients for Christmas Cherry Balls
Main ingredients you’ll need
Creating delightful Christmas Cherry Balls requires a selection of simple yet flavorful ingredients. Here’s what you’ll need to gather:
- Maraschino cherries: The star of the dish, adding a sweet and tart burst.
- Cream cheese: This forms a creamy base that balances the cherries’ sweetness.
- Turkey bacon or Chicken ham: For a savory touch, these will add a satisfying crunch when cooked.
- Chocolate coating: Choose your favorite type—dark, milk, or white chocolate for dipping.
- Chopped nuts: Almonds or walnuts make a great addition for extra texture.
These key ingredients work together to create a festive treat that seems sophisticated but is surprisingly easy to whip up.
Optional add-ins and variations for added flavor
To give your Christmas Cherry Balls a personal twist, consider these optional add-ins:
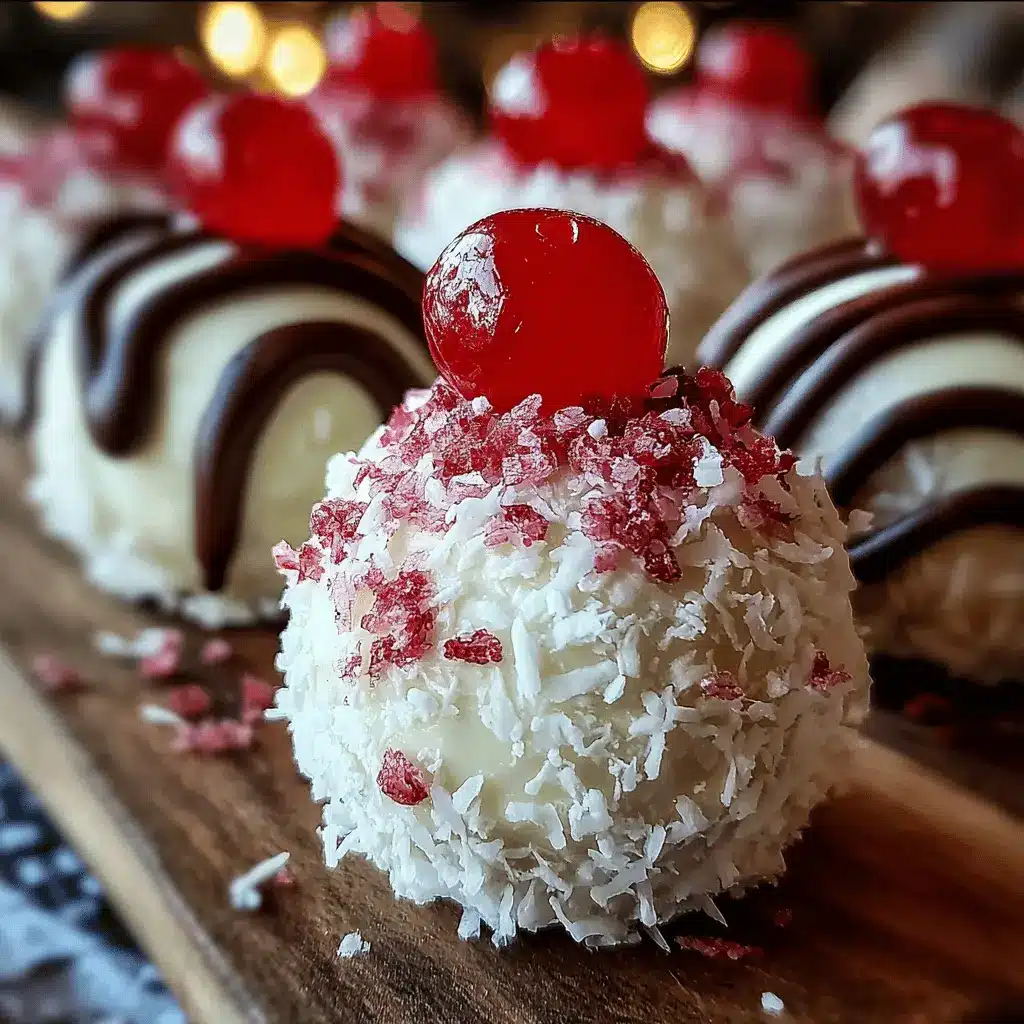
- Coconut flakes: For a tropical flair that pairs nicely with cherries.
- Cinnamon or nutmeg: A sprinkle of spice can elevate the flavor profile to holiday-worthy status.
- Mini chocolate chips: Perfect if you want that extra chocolatey goodness.
- Vanilla extract: A dash can enhance the overall richness of the filling.
Feel free to experiment! Your unique take on this recipe could become a holiday tradition. For more creative ideas, check out this resource for creative twists on festive recipes.
Step-by-step Preparation of Christmas Cherry Balls
Creating festive treats like Christmas Cherry Balls is a joyful way to celebrate the holiday season. These delightful bite-sized gems are not only easy to make but are sure to win the hearts (and taste buds) of your friends and family. Let’s dive into the preparation steps to make your holiday baking as smooth as possible.
Gather your ingredients
The first step in creating your Christmas Cherry Balls is to gather all the necessary ingredients. Here’s what you’ll need:
- 1 package of vanilla cake mix
- 8 oz cream cheese (softened)
- ½ cup of unsalted butter (softened)
- 1 cup powdered sugar
- Maraschino cherries (drained and patted dry)
- A sprinkle of powdered sugar or crushed nuts for garnish (optional)
Make sure you have everything at hand before getting started. This not only makes the process more efficient but also adds to the fun of baking!
Mix the cream cheese and butter
In a large mixing bowl, combine the softened cream cheese and unsalted butter. Using a hand mixer or a stand mixer, beat the mixture on medium speed until it becomes light and fluffy. This might take about 2-3 minutes. The creaminess of the cream cheese and butter provides a rich base for your Christmas Cherry Balls.
Incorporate the vanilla cake mix
Once your butter and cream cheese are well mixed, it’s time to add in the vanilla cake mix. Gradually add it to your creamy mixture; it’ll start to form a dough. Don’t worry if it feels thick—it should! Mix until fully combined. When they come together, you should have a lovely, cookie dough-like consistency that’s both smooth and easy to handle.
Prepare the cherries (if using)
If you’re using maraschino cherries, make sure to properly prepare them. Drain them thoroughly and pat them dry with a paper towel. This step is crucial; excess moisture can affect your dough. If you’d prefer a different variation, consider using fresh cherries, but remember to remove the pits!
Form the dough around the cherries or roll into balls
Here comes the fun part! Using your hands, take a small lump of dough—about the size of a tablespoon—and flatten it slightly. If you are including cherries, wrap the dough around each cherry, creating a ball shape. Alternatively, if you prefer to create simple dough balls, just roll the dough into small 1-inch balls. Both variations will be delicious!
Arrange on a baking sheet
Once you’ve shaped all your Christmas Cherry Balls, place them on a baking sheet lined with parchment paper. Make sure to leave a little space between each ball, as they’ll expand slightly while baking. This is also a great time to preheat your oven to 350°F (175°C), so it’s nice and warm when you’re ready to bake.
Bake to perfection
Slide the baking sheet into the preheated oven and bake for 10-12 minutes or until the Christmas Cherry Balls start to turn a beautiful, golden brown. Keep an eye on them, as oven temperatures can vary. You want them to be just cooked through but still moist!
Cool and sprinkle (if desired)
Once baked, remove the sheet from the oven and allow your Christmas Cherry Balls to cool for at least 5-10 minutes. If you like, now’s the time to sprinkle them with powdered sugar or crushed nuts for a festive touch. Serve them warm or at room temperature—either way, they’re bound to be a hit!
Baking Christmas Cherry Balls not only fills your home with joyful aromas but creates lasting memories during this bustling season. Now grab your loved ones, and let’s make some delightful holiday treats! For more tips and variations on Christmas desserts, check out this handy guide that dives deeper into festive baking. Happy baking!
Variations for Christmas Cherry Balls
Add-ins for a chocolate twist
If you’re looking to elevate your Christmas Cherry Balls beyond the classic recipe, consider adding a chocolate twist. This delightful variation will not only satisfy your sweet tooth but will also impress your guests.
- Chocolate coating: Instead of plain coconut, dip your Christmas Cherry Balls in melted dark or milk chocolate. You can even sprinkle crushed nuts or sprinkles on top for added texture.
- Cocoa powder infusion: Mix some cocoa powder into your base ingredients for a deeper chocolate flavor. This will give your treats a richer, dessert-like essence.
Creating different flavor profiles with alternative ingredients
Why limit yourself to just one flavor when you can create a variety? The beauty of Christmas Cherry Balls lies in their adaptability. Here are some ideas to explore:
- Swap the cherries: Dried cranberries or raspberries can provide a tart contrast that balances beautifully with sweetness.
- Alternative coatings: Instead of coconut, try using crushed graham crackers or finely chopped pistachios for a unique crunch.
- Flavor the base: Consider adding orange zest or almond extract to the mixture for an aromatic twist that pairs perfectly with the other ingredients.
Implementing these variations can turn your Christmas Cherry Balls into a creative and personalized holiday gift or treat. Who doesn’t love a bit of customization in their festive goodies? Plus, these tweaks can elevate your treats into something truly memorable—a great conversation starter at any holiday gathering!
For some additional inspiration, check out these holiday dessert ideas that can spark your creativity this season!
Cooking Tips and Notes for Christmas Cherry Balls
Ensure your cream cheese is at room temperature
One essential tip for making the Christmas Cherry Balls is to let your cream cheese come to room temperature before mixing. This step is crucial, as room-temperature cream cheese blends smoothly, giving your treats that perfectly creamy texture. If you rush this step, you might end up with lumps in your filling that could affect the overall taste and appearance. Just set it out for about 30 minutes before you start cooking, and you’ll thank yourself later!
How to avoid overbaking
Overbaking can turn your delicious Christmas Cherry Balls into dry little nuggets—definitely not what you want during the holiday season! To avoid this, keep an eye on your baking time. Start checking for doneness a few minutes before the timer goes off. A good rule of thumb is to remove your treats when they are light golden brown on the edges. Remember, they’ll continue to cook a bit after taking them out of the oven. Don’t forget to let them cool completely on a wire rack; this helps maintain the moist and chewy texture that everyone loves!
For more baking tips, check out this helpful guide.
Serving Suggestions for Christmas Cherry Balls
Creative Ways to Present Your Christmas Cherry Balls
When it comes to making a statement with your Christmas Cherry Balls, presentation is everything. Consider arranging them on a festive platter, interspersed with sprigs of fresh rosemary or cranberries for a pop of color. You could also skew them on decorative toothpicks for easy handling at holiday parties. Another fun option is to pile them high in a clear glass jar, allowing the vibrant colors to shine. A sprinkle of powdered sugar on top can add both sweetness and visual appeal.
Pairings with Festive Drinks
What better way to elevate your Christmas Cherry Balls than with some delightful non-alcoholic beverages?
- Sparkling Water with a Splash of Cranberry Juice: This refreshing combo brings a fruity zing to your holiday gathering.
- Homemade Ginger Ale: The spiciness of ginger pairs beautifully with the sweetness of the cherry balls.
- Apple Cider: Warm or chilled, this classic drink is always a hit during the holidays.
These lighter options not only enhance the flavors but also keep your holiday spirit bright without the extra calories. For more festive drink ideas, visit Epicurious.
So, as you prepare to share your delicious Christmas Cherry Balls, remember that how you serve them can be just as delightful as their taste!
Time Breakdown for Christmas Cherry Balls
When you start planning your holiday treats, timing is everything. Here’s a quick breakdown of how you can whip up these delightful Christmas Cherry Balls with ease!
Preparation time
Getting the ingredients together and mixing is a breeze, taking about 20 minutes. While it may seem tempting to dive straight in, taking this time ensures your Christmas Cherry Balls will be perfectly balanced in flavor.
Bake time
These bites of joy need just about 30 minutes in the oven. Keep an eye on them as they bake to achieve that golden finish you love.
Total time
From start to finish, you’re looking at roughly 50 minutes. This means you can easily make these festive treats even with a busy schedule!
As you delight in this festive baking, remember to cherish the time spent in the kitchen—check out more holiday recipes to keep the spirit bright!
Nutritional Facts for Christmas Cherry Balls
Caloric Information
When indulging in delicious Christmas Cherry Balls, it’s important to be mindful of their caloric content. Each cherry ball typically contains around 100 calories, depending on the specific ingredients used. While they make a delightful treat for the holiday season, remember that moderation is key!
Key Nutrients
These festive delights not only taste great but also offer some surprises in terms of nutrition. Here are a few key nutrients you can find in your Christmas Cherry Balls:
- Vitamins: Packed with vitamin C from cherries, contributing to immune support.
- Antioxidants: Cherries are rich in antioxidants, promoting overall health.
- Fiber: Depending on your recipe, they can provide a nice dose of dietary fiber.
For a more detailed look at nutrient benefits, the USDA National Nutrient Database can be a fantastic resource. So why not treat yourself this holiday season without feeling too guilty? Your body will thank you!
FAQs about Christmas Cherry Balls
Can I make Christmas Cherry Balls in advance?
Absolutely! One of the great things about Christmas Cherry Balls is that they can be prepared ahead of time. Just make them a day or two before your gathering, and they’ll be good to go. This allows the flavors to meld beautifully, giving your treats that extra oomph. Just remember to keep them in the fridge until you’re ready to serve.
How do I store leftover Christmas Cherry Balls?
If you’re lucky enough to have leftovers, don’t worry about that delectable goodness going to waste! Simply store your Christmas Cherry Balls in an airtight container in the fridge. They should stay fresh for about a week. If you want them to last a bit longer, consider freezing them. Just ensure they’re well-wrapped to prevent freezer burn, and they can be stored for up to three months.
What’s the best way to customize the recipe?
When it comes to customization, the sky’s the limit with Christmas Cherry Balls! Here are some fun ideas to get you started:
- Flavor Variations: Experiment with different extracts or spices. Almond extract can add a delightful twist!
- Coating Choices: Ditch the traditional chocolate coating for a festive sprinkle of crushed nuts, coconut, or even colorful sprinkles.
- Fillings: Swap out the cherries for dried fruits or nuts for a unique texture.
Feeling inspired? Check out this customization guide for more tips and tricks on creating your perfect holiday treat! By experimenting with flavors and textures, you can truly make these Christmas Cherry Balls your own.
Conclusion on Christmas Cherry Balls
Homemade treats bring a unique joy during the holidays, and Christmas Cherry Balls are no exception. These delightful confections not only tantalize your taste buds but also create cherished memories with loved ones. Picture a cozy kitchen filled with laughter as you and your friends craft these sweet treats together.
Making Christmas Cherry Balls allows you to infuse your personality into each bite, while also sharing a piece of your culinary journey. Plus, you can customize them to suit various dietary preferences. For vibrant ideas, check out Food Network for inspiration. So this holiday season, let the spirit of giving and sweetness mingle with joy—dig in, share, and celebrate!
Print
Christmas Cherry Balls: An Easy Indulgence for the Holidays
- Total Time: 2 hours 30 minutes
- Yield: 24 balls
Description
These festive treats combine the richness of chocolate with the tartness of cherries, making them a delightful addition to your holiday celebration!
Ingredients
- 2 cups crushed graham crackers
- 1 cup powdered sugar
- 1 cup chopped pecans
- 1 cup sweetened condensed milk
- 1 cup maraschino cherries, drained and chopped
- 2 cups chocolate chips
- 2 tablespoons butter
Instructions
- In a large bowl, combine the crushed graham crackers, powdered sugar, and chopped pecans.
- Add the sweetened condensed milk and chopped cherries, mixing until well combined.
- Form mixture into small balls and place them on a baking sheet lined with parchment paper.
- Melt chocolate chips and butter together in a microwave-safe bowl, stirring until smooth.
- Dip each ball into the chocolate, coating evenly and placing back on the parchment.
- Refrigerate for at least 2 hours until chocolate is set.
Notes
- These can be made ahead of time and stored in the refrigerator.
- Feel free to substitute walnuts or almonds for the pecans.
- Prep Time: 30 minutes
- Cook Time: 0 minutes
Nutrition
- Serving Size: 1 ball
- Calories: 150
- Sugar: 12g
- Sodium: 30mg
- Fat: 6g
- Saturated Fat: 3g
- Unsaturated Fat: 2g
- Trans Fat: 0g
- Carbohydrates: 22g
- Fiber: 1g
- Protein: 2g
- Cholesterol: 5mg
")