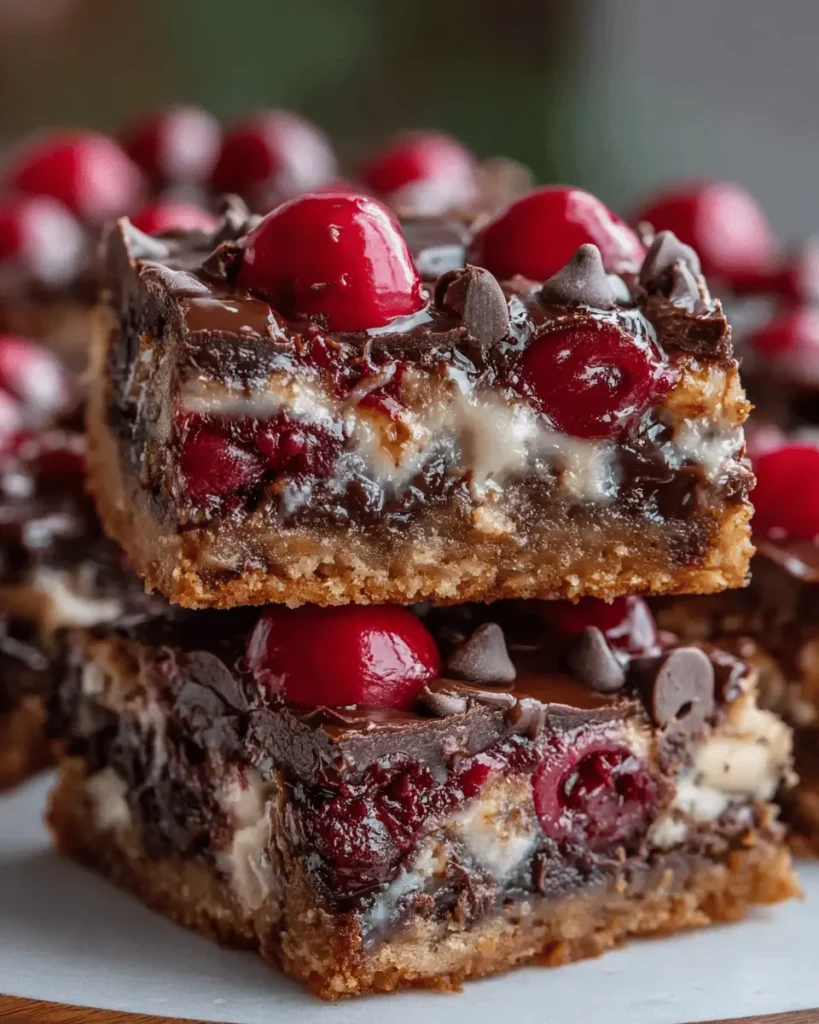
Introduction to Chocolate Covered Cherry Magic Bars
When it comes to desserts that deliver a punch of flavor and creativity, Chocolate Covered Cherry Magic Bars are an undeniable showstopper. Imagine, if you will, layers of graham cracker crust, gooey chocolate, and the delightful tang of cherries all piled high in one easy-to-make treat. What’s not to love? Here’s why you absolutely need these bars in your life.
Why You Need Chocolate Covered Cherry Magic Bars in Your Life
-
Perfect for Any Occasion: Whether it’s a casual get-together with friends or a more formal event, these magic bars fit right in. They’re versatile enough to please a crowd, and who wouldn’t want to be the one known for bringing the show-stopping dessert?
-
Ease of Preparation: Let’s be real—who has time for complicated recipes? Chocolate Covered Cherry Magic Bars are as simple as mixing a few ingredients and layering them in a baking dish. In under an hour, you can whip up a batch that appears to have come from a gourmet bakery. You can find recipes online that guide you step by step, or you can consider checking out The Joy of Baking for fundamentals on dessert layering.
-
A Combination of Flavors That Dances on Your Palate: You’ve got rich chocolate, sweetened condensed milk, and tart cherries all mingling together in a harmonious blend. According to the National Cherry Growers Association, cherries are not just tasty; they also pack a nutritional punch with antioxidants and vitamins. Who knew satisfying your sweet tooth could also be kind to your body?
-
Memories in Every Bite: These bars can evoke nostalgia, creating memories that you’ll want to share with your family and friends. Think back to summer picnics or cozy winter evenings—how perfect would these treats be to enhance those moments?
So, whether you’re looking to impress your friends or simply indulge at home, Chocolate Covered Cherry Magic Bars are your new go-to dessert. Get excited, gather your ingredients, and prepare for your taste buds to be amazed! These bars are not just a treat; they’re an experience waiting to happen.
Ingredients for Chocolate Covered Cherry Magic Bars
Creating Chocolate Covered Cherry Magic Bars is a delicious adventure you won’t want to miss! Let’s gather the essentials to make this sweet treat a reality. Here’s what you’ll need:
Essential Ingredients
-
Graham Cracker Crumbs: About 2 cups to form the crust. They offer a delightful crunch and a hint of sweetness.
-
Unsalted Butter: ½ cup of melted butter binds the crumbs together, creating a rich base.
-
Sweetened Condensed Milk: 1 can (14 ounces) provides the necessary creaminess, giving those bars their magical texture.
-
Semi-Sweet Chocolate Chips: 1 ½ cups to melt and spread on top, bringing a rich, chocolatey flavor.
-
Maraschino Cherries: 1 cup, drained and halved. This is a key ingredient that makes it truly cherry-tastic!
-
Chopped Nuts: ½ cup of walnuts or pecans add a nice crunch. You can skip this if you’re not a fan.
Additional Touch
A sprinkle of flaky sea salt on top can enhance the overall flavor profile.
For a deeper dive into textures and toppings, check out Serious Eats for inspiration! With these ingredients at hand, you’re all set to whip up a batch of Chocolate Covered Cherry Magic Bars that will impress your friends and family. Happy baking!
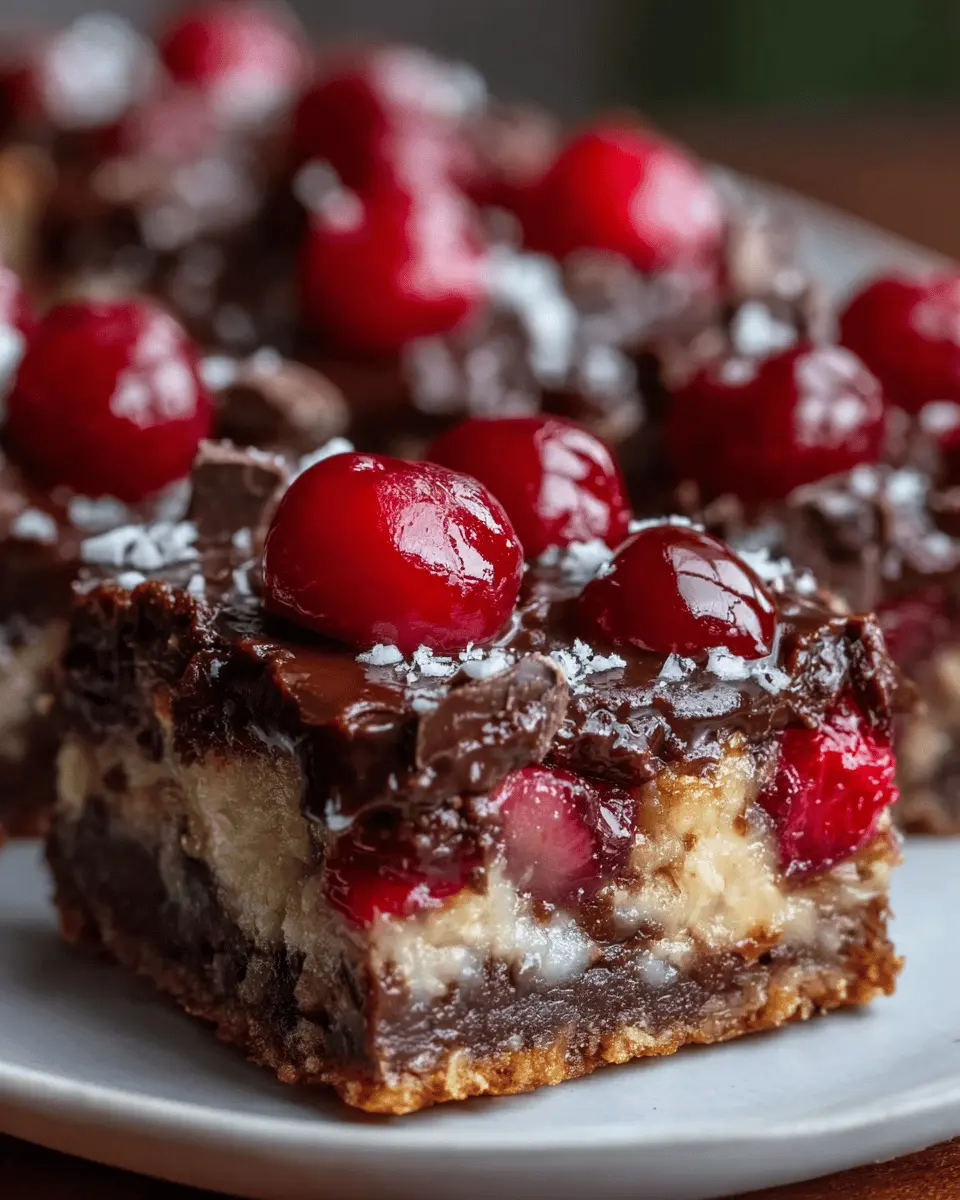
Preparing Chocolate Covered Cherry Magic Bars
Making Chocolate Covered Cherry Magic Bars is like crafting a delicious, indulgent masterpiece in your kitchen. They’re the perfect blend of textures and flavors—sweet cherries, creamy cheesecake, and a crumbly crust. Let’s dive into the details so you can impress your friends and satisfy your sweet tooth!
Prepping your baking dish
First things first, grab a 9×13-inch baking dish and give it a good greasing. You want these magic bars to slide out easily when it’s time to indulge. Using baking spray or lining the bottom with parchment paper works wonders. Lining the dish not only ensures easy removal but also saves you time on cleanup. Pro tip: If you don’t have parchment, a light coat of oil will do just fine!
Making the graham cracker crust
Now it’s time to create that delectable graham cracker crust that serves as the foundation for your Chocolate Covered Cherry Magic Bars. Here’s what you’ll need:
- 1 ½ cups of graham cracker crumbs
- ½ cup of melted unsalted butter
- ¼ cup of granulated sugar (optional for added sweetness)
Mix the graham cracker crumbs and sugar in a bowl, then stir in the melted butter until combined. Pat down the mixture firmly into the bottom of your prepared dish. Remember, the key to a solid crust is pressing it down evenly, so don’t skimp on this step!
Whipping up the cheesecake layer
Next, let’s create that creamy cheesecake layer that’ll bring everything together. You’ll need:
- 8 oz of cream cheese, softened
- 1 cup of powdered sugar
- 1 tsp vanilla extract
- 1 large egg
In a mixing bowl, beat the softened cream cheese until smooth. Gradually add the powdered sugar and mix well. Then, throw in the vanilla extract and egg, continuing to blend until it’s fully incorporated. This layer should be silky and luscious—just what we need to elevate those Chocolate Covered Cherry Magic Bars!
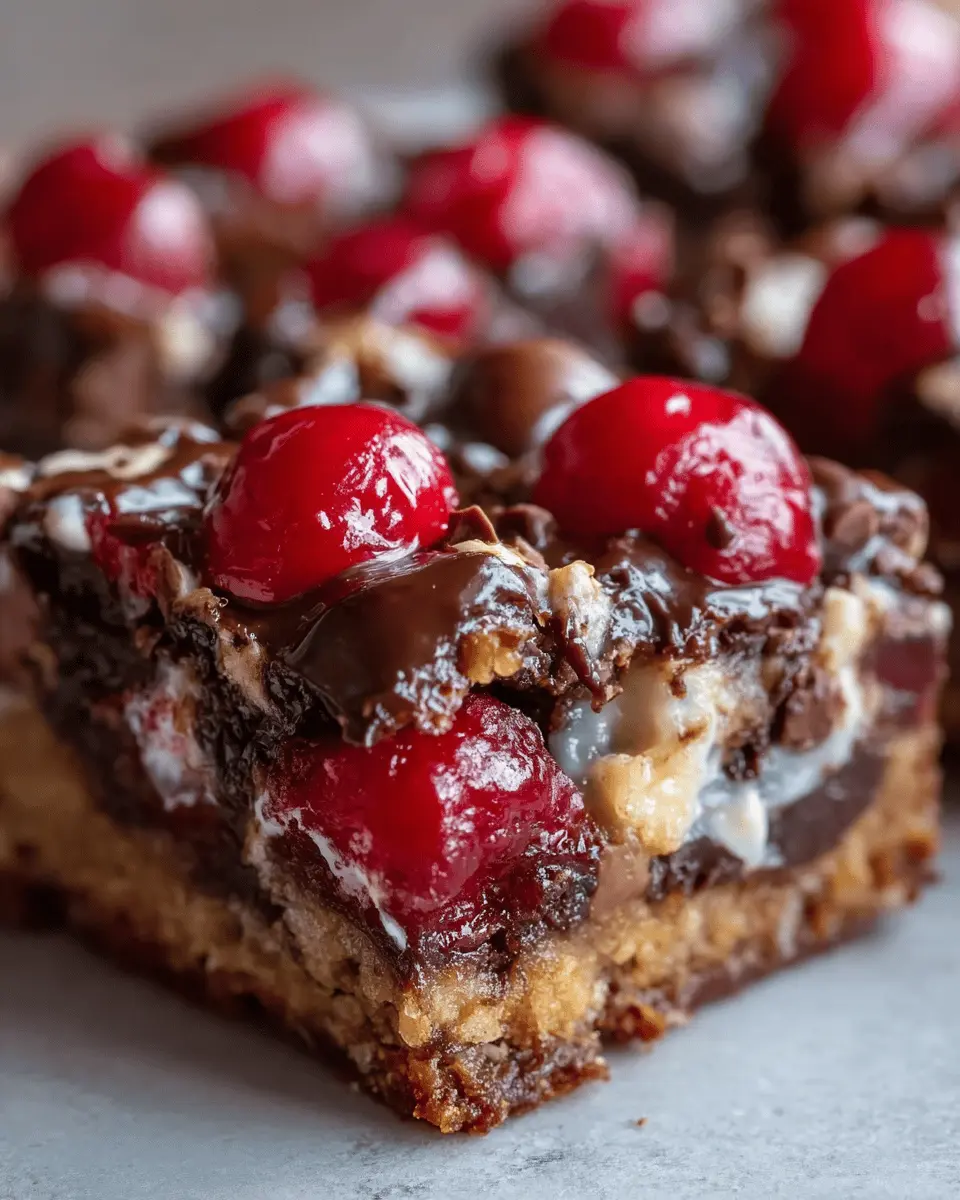
Layering on the cherry pie filling
Now comes the fun part—adding the cherry pie filling. This is what brings that classic cherry flavor we all love. Simply spoon an even layer of cherry pie filling over the cheesecake mixture, making sure to distribute it evenly. This balance is essential for that cherry sweetness to permeate every bite!
Adding the toppings for magic
To transform these bars into true magic, let’s sprinkle some additional toppings on top. Consider using:
- 1 cup of semi-sweet chocolate chips
- ½ cup of chopped nuts (walnuts or pecans work beautifully)
- ½ cup of shredded coconut (if you’re a fan)
Scatter the chocolate chips, nuts, and coconut evenly over the cherry layer. This combination not only adds flavor but also that crunch you didn’t know you needed!
Baking to perfection
Now that your layers are ready, it’s time to bake! Preheat your oven to 350°F (about 175°C) and pop the baking dish inside for approximately 30-35 minutes, or until the top is golden brown and the filling is set. You’ll love the aroma wafting through your kitchen during this time! You can check for doneness by gently tapping the edges—if they bounce back, it’s time to take them out.
Cooling and slicing the bars
Once baked, remove the dish from the oven and allow it to cool completely before attempting to slice into those Chocolate Covered Cherry Magic Bars. Patience is key here! After cooling for about 1-2 hours, refrigerate for at least another hour before cutting into squares. This step helps ensure clean cuts and makes for an appetizing presentation. Whether you’re serving them at a gathering or keeping a stash for yourself, these bars are sure to delight.
So there you have it! Your very own Chocolate Covered Cherry Magic Bars are ready to be enjoyed. They’re perfect for any occasion and incredibly easy to make. Happy baking!
For more kitchen tips or alternative recipe ideas, check out Emily’s Kitchen or Baking Bliss.
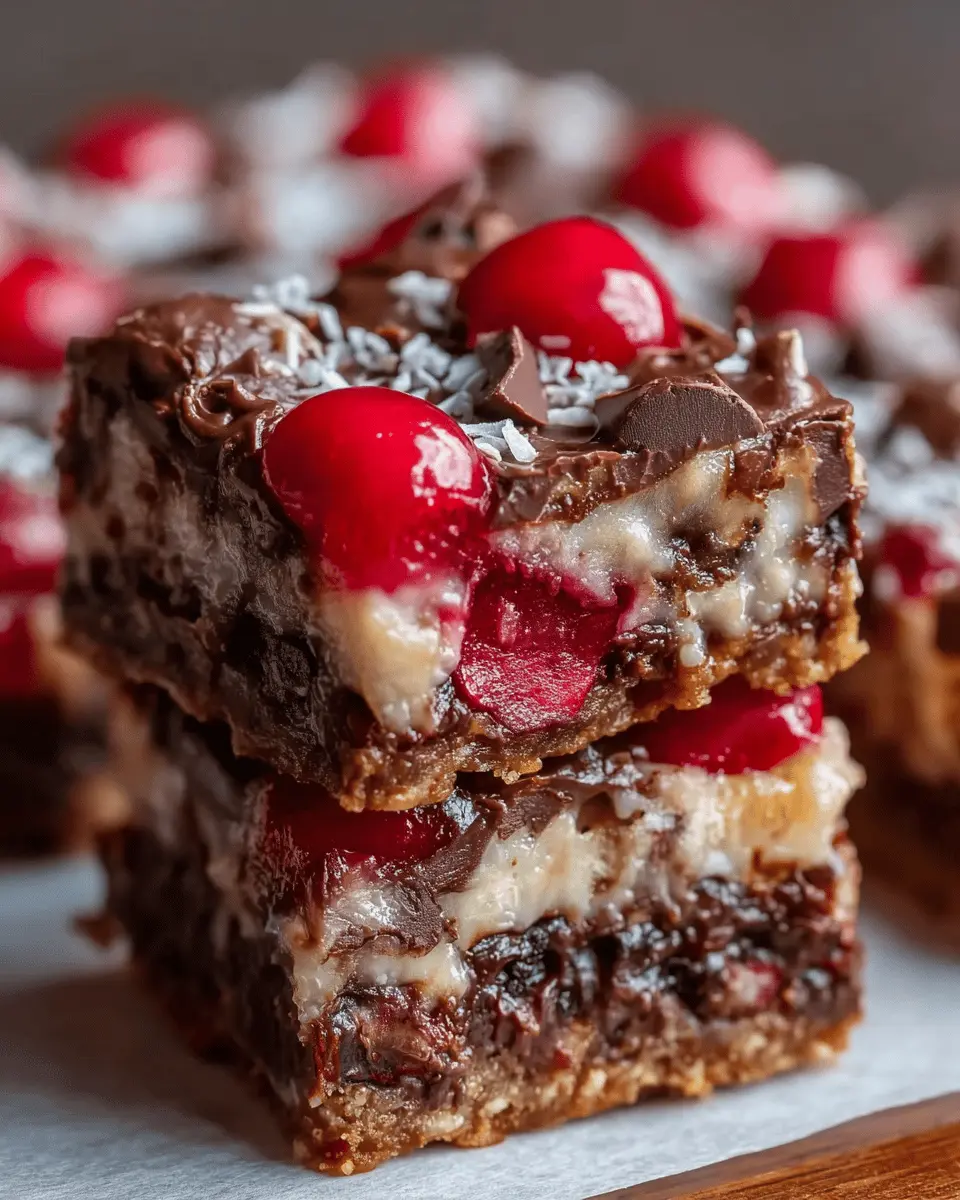
Variations on Chocolate Covered Cherry Magic Bars
Dark chocolate and cherry combo
If you’re a fan of rich flavors, try opting for dark chocolate in your Chocolate Covered Cherry Magic Bars. Dark chocolate not only elevates the overall taste but is also packed with antioxidants. Pair it with those sweet, juicy cherries, and you’ve got a match made in dessert heaven. To achieve that velvety texture, consider using high-quality dark chocolate chips or even a chopped chocolate bar. This twist not only makes the bars more indulgent but gives them a sophisticated touch that’s sure to impress at your next gathering.
For a more in-depth look at the benefits of dark chocolate, check out Healthline’s article.
Nut-free magic bars
For those among us with nut allergies or preferences, creating nut-free Chocolate Covered Cherry Magic Bars is a simple feat! Swap out nut-based crusts with crushed graham crackers or even gluten-free alternatives. Remember to double-check those chocolate chips; some might contain traces of nuts. You can also enhance the texture with a sprinkle of seeds like pumpkin or sunflower seeds for that delightful crunch. Who knew you could create such decadent bars that cater to dietary restrictions without sacrificing flavor?
Mini versions for individual servings
Want to make your dessert feel even more special? Consider crafting mini versions of your Chocolate Covered Cherry Magic Bars. Use a muffin tin and bake these bite-sized delights for quick, individual servings. Not only do they make portion control easier, but they also turn dessert into a fun, shareable experience! Plus, they’re perfect for parties or casual get-togethers. Just picture your friends reaching for these little treats and smiling with each bite—it’s bound to be a hit.
With all these variations, you can make your Chocolate Covered Cherry Magic Bars fit your style and occasion perfectly!
Cooking Tips and Notes for Chocolate Covered Cherry Magic Bars
Creating Chocolate Covered Cherry Magic Bars can be a delightful experience, and with a few handy tips, you’ll be ready to impress anyone who takes a bite!
Choose Quality Ingredients
Using high-quality chocolate and cherries can elevate your magic bars significantly. Opt for semi-sweet or dark chocolate chips for that rich flavor. Fresh cherries can offer a more vibrant taste compared to canned ones. Check out The Spruce Eats for their guide on selecting fruits.
Layering is Key
When layering your ingredients, spread the graham cracker crumbs uniformly for an even base. Don’t overload the toppings; balance is essential. A light hand with nuts and chocolate will allow the cherry flavor to shine.
Timing Matters
Be mindful of baking times. Overbaking can lead to dry bars. Keep an eye on them in the final minutes. You’ll know they’re done when the edges are lightly browned, and a toothpick comes out just barely clean.
Enjoy your time crafting these Chocolate Covered Cherry Magic Bars! They’re perfect for gatherings or a sweet treat at the end of a busy week.
Serving suggestions for Chocolate Covered Cherry Magic Bars
When it comes to enjoying your Chocolate Covered Cherry Magic Bars, presentation and pairing can elevate this dessert to a whole new level. Here are some delightful serving suggestions to make your dessert experience even sweeter:
Pair with Fresh Fruit
Serve alongside fresh fruit like strawberries or raspberries. The tartness of these berries complements the rich chocolate and cherries beautifully, creating a refreshing balance on your palate.
Ice Cream Delight
Consider a scoop of vanilla ice cream or whipped cream on the side. As the warm magic bar meets the cool creaminess, your taste buds will party! You could also explore unique flavors like cherry or chocolate to amplify that chocolate-covered experience.
Creative Plating
For a special touch, dust powdered sugar over each bar before serving. This not only looks appealing but adds a hint of extra sweetness without being overwhelming.
Share the Love
Feeling generous? Cut your Chocolate Covered Cherry Magic Bars into small squares and package them in cute boxes for gifting. It’s a charming way to share your baking results with friends or coworkers.
For more creative ideas, check out resources like The Kitchn or Serious Eats. You’ll find that presentations and pairings can truly enhance your dessert enjoyment. Happy baking!
Time Breakdown for Chocolate Covered Cherry Magic Bars
Preparation Time
Making these Chocolate Covered Cherry Magic Bars requires about 15 minutes. Gather your ingredients, and don’t forget to preheat your oven to ensure a perfect bake from the start. Take a moment to appreciate the sweet combination of chocolate and cherries – it’s truly a labor of love!
Baking Time
Once you’ve got everything ready, pop your bars into the oven for around 25-30 minutes. The magic happens here as the delicious layers meld together into a gooey, chocolaty delight. Make sure to check for that golden-brown top—it’s a sign of goodness!
Total Time
In total, you’re looking at about 45 minutes from prep to finish. Perfect for those busy weeknights or a fun weekend baking session. Trust me, the delicious results of your Chocolate Covered Cherry Magic Bars are worth every second!
Wondering what to pair with these delightful bars? Consider a scoop of vanilla ice cream or a steaming cup of coffee for a truly indulgent treat. Happy baking!
Nutritional Facts for Chocolate Covered Cherry Magic Bars
When indulging in Chocolate Covered Cherry Magic Bars, it’s always good to know what you’re enjoying. Here’s a quick breakdown of the nutritional facts:
Calories
For each bar, you’re looking at approximately 220-240 calories. This means they make for a delightful treat without totally derailing your daily caloric intake.
Protein
While these bars are primarily a sweet treat, you still get about 2-3 grams of protein per serving. Incorporating some lean protein in your diet can help keep you feeling full, so pair these with a protein-rich snack, like a handful of nuts, for a more balanced treat.
Sugar Content
One of the standout features of Chocolate Covered Cherry Magic Bars is their sugar content—around 18-20 grams per bar. Knowing this helps you keep track of your sugar intake, especially if you’re monitoring your dietary habits. If you’re interested in reducing sugar in your recipes, consider using alternatives like stevia or monk fruit.
snack wisely and indulge in moderation!
For more on the health aspects of chocolate, check out this Healthline article. Now, who’s hungry?
FAQs about Chocolate Covered Cherry Magic Bars
Can I use fresh cherries instead of pie filling?
Absolutely! Using fresh cherries can add a delightful, juicy burst of flavor to your Chocolate Covered Cherry Magic Bars. Just make sure to pit and chop them before mixing them in. You might want to toss them in a little sugar to draw out their natural sweetness, ensuring they blend well with the other ingredients. For more guidance on working with fresh fruit, check out this helpful article on ingredient substitutions.
How should I store the leftover bars?
To keep your Chocolate Covered Cherry Magic Bars fresh, place them in an airtight container. They can be stored at room temperature for about three days, or if you’d like to extend their shelf life, refrigerate them for up to a week. If you need to store them for even longer, consider freezing the bars. Just make sure to wrap them well in plastic wrap and foil.
Can I make these bars ahead of time?
Definitely! In fact, making Chocolate Covered Cherry Magic Bars a day ahead can enhance their flavor as they have time to set. It’s a great way to ease your prep for parties or gatherings. Just be sure to store them correctly as mentioned above.
What is the best way to cut these bars neatly?
To achieve perfectly cut bars, I recommend using a sharp knife and cutting through the bars when they are cold. You can even warm the knife slightly under hot water, drying it off before each cut, which helps avoid any sticky situations. Neat slices not only look better but make serving easier!
If you’re looking for more tips on dessert presentation, consider checking out some of our favorite resources here. Enjoy your baking!
Conclusion on Chocolate Covered Cherry Magic Bars
In summary, Chocolate Covered Cherry Magic Bars are not just a dessert; they are an experience that combines decadence with nostalgia. These bars deliver a perfect blend of rich chocolate and the delightful tartness of cherries, making every bite a celebration. Imagine serving these at your next gathering or simply savoring them on a quiet evening—it’s a sweet treat that suits any occasion. Plus, they’re incredibly easy to whip up, which means more time for you to enjoy life’s little moments.
So why wait? Dive into the delicious world of Chocolate Covered Cherry Magic Bars and treat yourself today. For a refreshing beverage to pair, consider a sparkling cherry soda or a fruity iced tea. Happy baking!
Print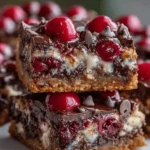
Chocolate Covered Cherry Magic Bars: Indulgent Treats You’ll Love
- Total Time: 45 minutes
- Yield: 12 bars
- Diet: Vegetarian
Description
These Chocolate Covered Cherry Magic Bars are a rich and delightful treat, perfect for any occasion.
Ingredients
- 1 cup graham cracker crumbs
- 1/2 cup unsalted butter, melted
- 1 cup chocolate chips
- 1 cup chopped cherries
- 1 can (14 oz) sweetened condensed milk
- 1/2 cup shredded coconut
Instructions
- Preheat your oven to 350°F (175°C).
- In a bowl, combine graham cracker crumbs and melted butter, then press into the bottom of a greased baking dish.
- Layer chocolate chips and chopped cherries evenly over the crust.
- Pour the sweetened condensed milk over the top, spreading it evenly.
- Sprinkle shredded coconut on top.
- Bake for 25-30 minutes or until golden brown.
- Let cool before cutting into bars.
Notes
- For an extra indulgent treat, drizzle additional melted chocolate on top before serving.
- Feel free to substitute dried cherries if fresh are not available.
- Prep Time: 15 minutes
- Cook Time: 30 minutes
- Category: Dessert
- Method: Baking
- Cuisine: American
Nutrition
- Serving Size: 1 bar
- Calories: 200
- Sugar: 20g
- Sodium: 50mg
- Fat: 10g
- Saturated Fat: 6g
- Unsaturated Fat: 4g
- Trans Fat: 0g
- Carbohydrates: 30g
- Fiber: 1g
- Protein: 2g
- Cholesterol: 15mg
")