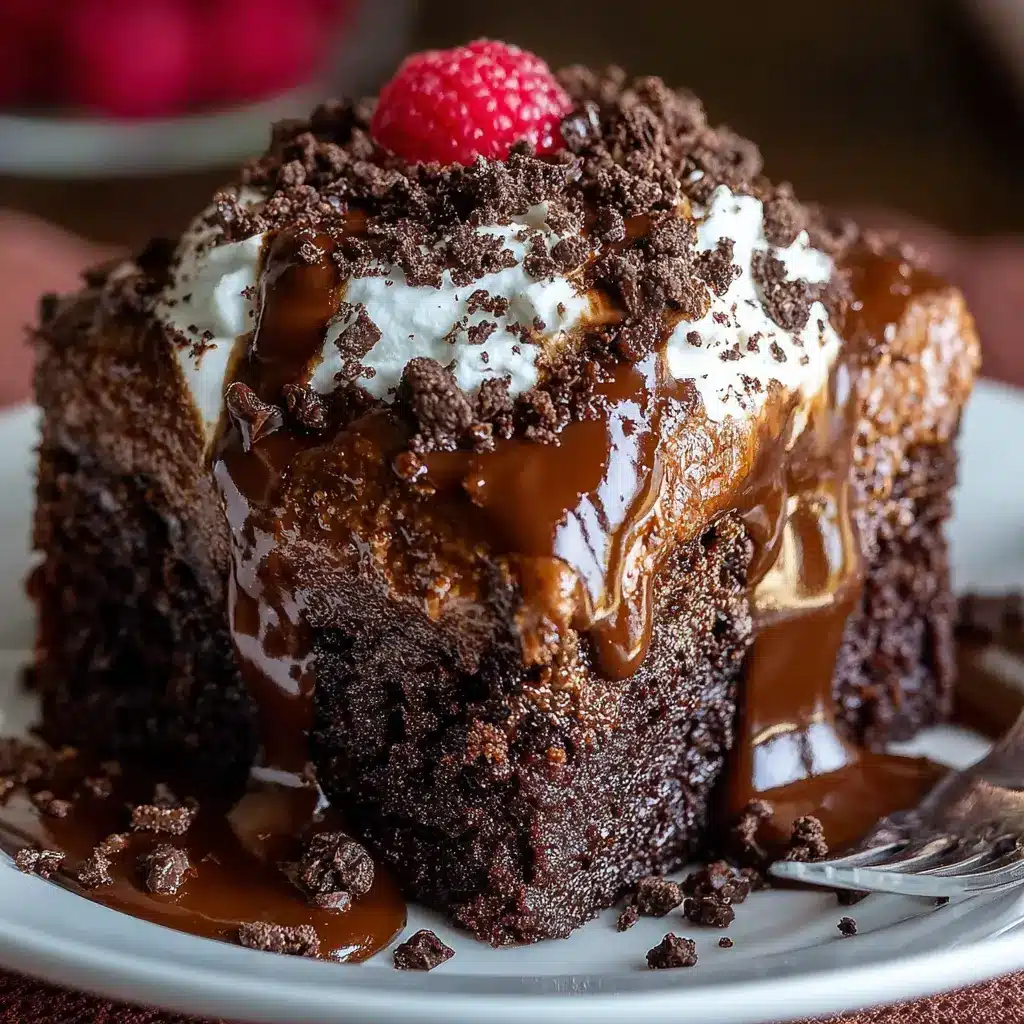
Introduction to Cherry Cheesecake Lush
What is Cherry Cheesecake Lush?
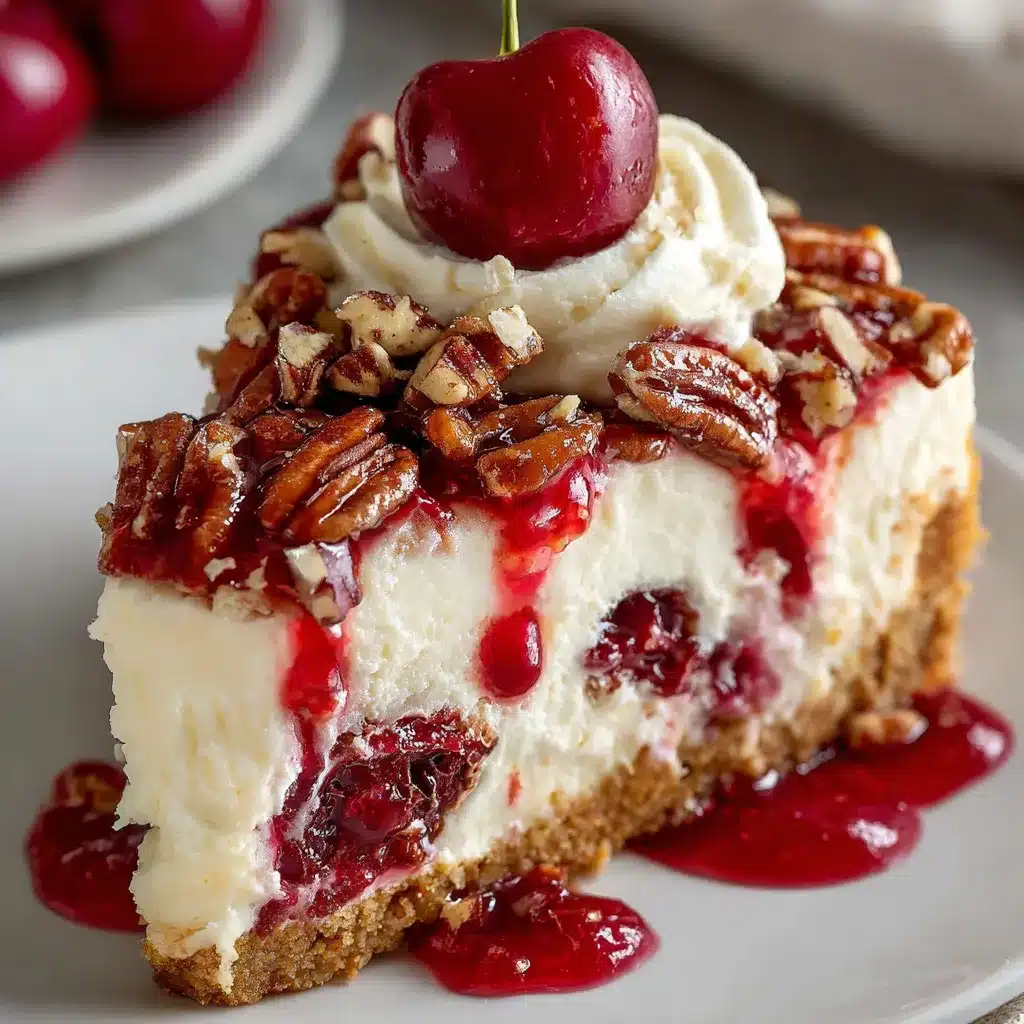
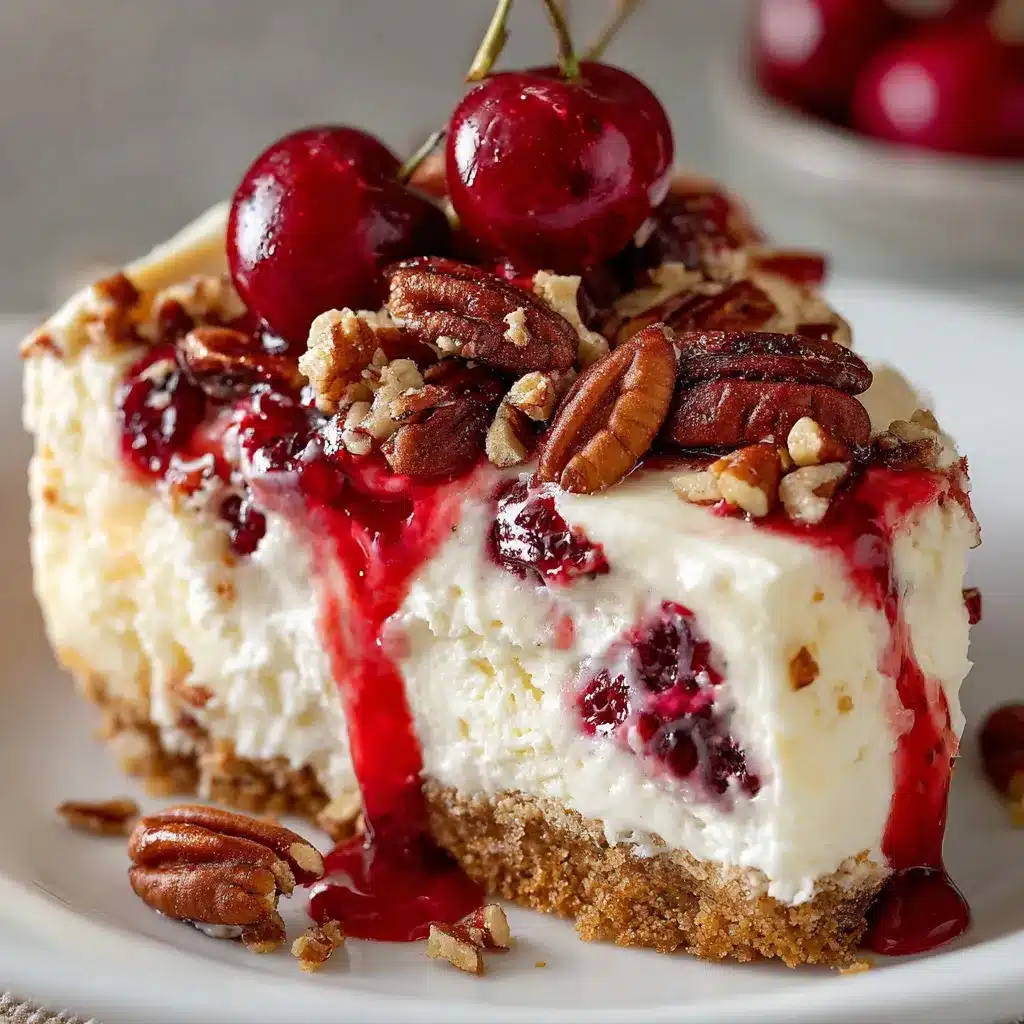
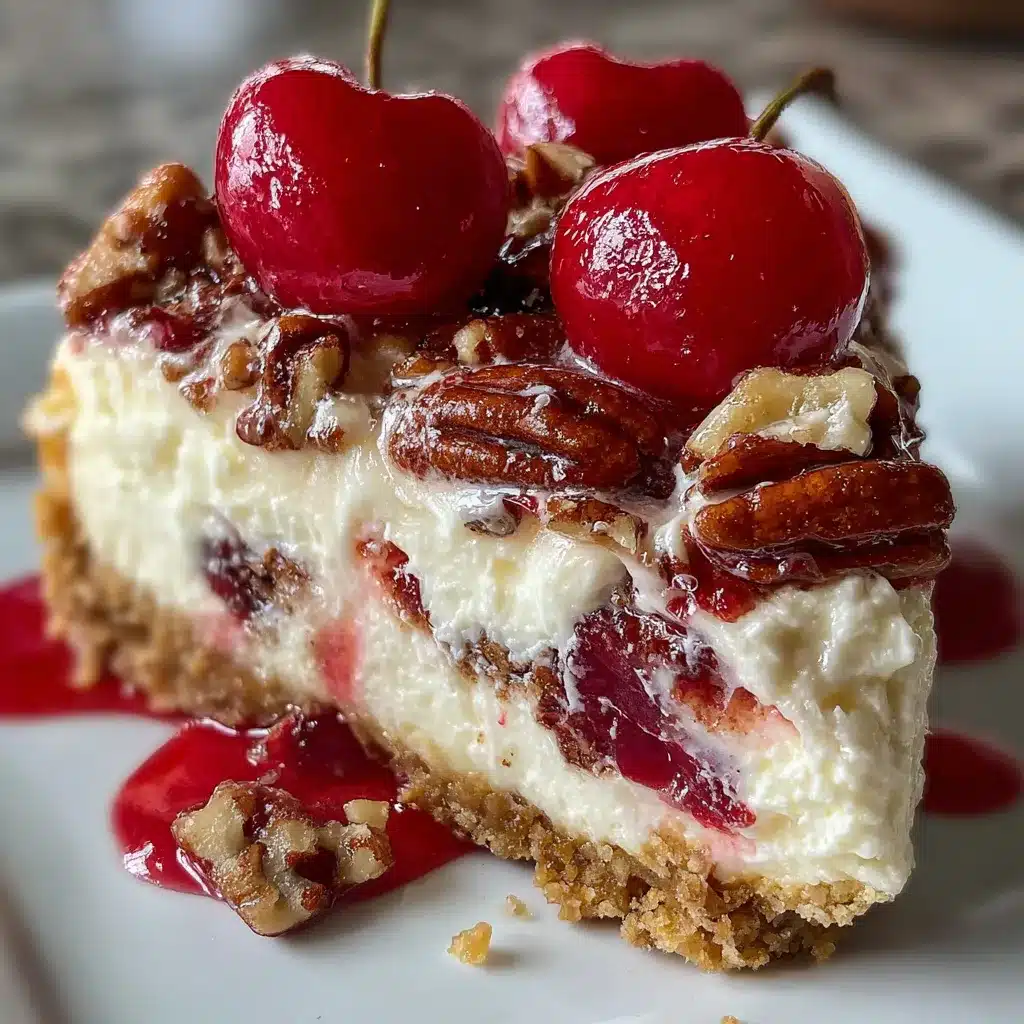
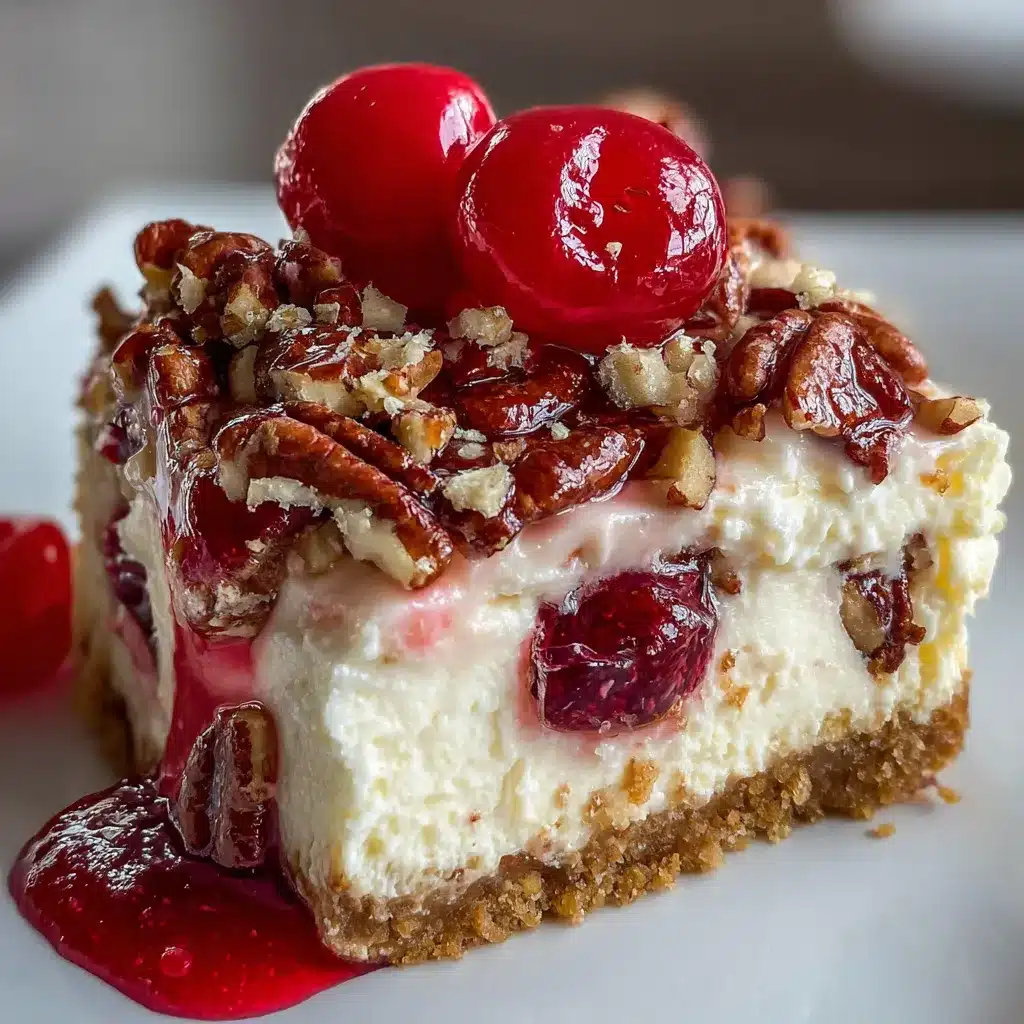
If you haven’t yet heard of Cherry Cheesecake Lush, consider this your delightful introduction. This dessert is a layered delight that combines the rich and creamy texture of cheesecake with the refreshing sweetness of cherries. Think of it as a no-bake cheesecake, but in a splendidly layered, airy fashion. Generally made with a silky cream cheese layer, a crunchy graham cracker crust, and topped with a beautiful cherry pie filling, this dessert beckons to be shared at gatherings and celebrations.
I can’t tell you how many times I’ve prepared this dessert for potlucks and get-togethers, only to find myself bombarded with requests for the recipe! The beauty of Cherry Cheesecake Lush lies not only in its flavor but also in its ease of preparation. There are no fancy baking skills required—just mix, layer, andchill.
Why make Cherry Cheesecake Lush at home?
Making this scrumptious dessert at home offers you several benefits that might surprise you. First and foremost, it allows you to control the ingredients. Store-bought options can often contain preservatives and artificial flavors that can detract from the true taste of cheesecake. A homemade version ensures you use fresh cream cheese, real cherries, and perhaps even a touch of organic sugar if you wish.
Secondly, it’s a cost-effective choice. Creating a beautiful Cherry Cheesecake Lush at home can save you money compared to purchasing it from a bakery. Plus, you can make a larger batch to satisfy a crowd for the same price.
Lastly, it’s an incredibly versatile dessert. You can switch it up by using different fruits or even adding a hint of chocolate or citrus if you’re feeling adventurous. It’s a blank canvas that invites creativity!
So, why not gather your ingredients, invite some friends over, and whip up this luscious treat? You won’t regret it, and your taste buds will be forever grateful. If you’re looking for a recipe that can impress and satisfy, Cherry Cheesecake Lush is definitely the way to go!
Ingredients for Cherry Cheesecake Lush
List of Ingredients
Creating a delightful Cherry Cheesecake Lush requires just a handful of ingredients that come together to form a tasty treat. Here’s what you’ll need:
- 1 package (8 ounces) cream cheese, softened
- 1 cup powdered sugar
- 1 cup whipped topping
- 1 cup graham cracker crumbs
- ½ cup unsalted butter, melted
- 1 can (21 ounces) cherry pie filling
- Fresh cherries for garnish (optional)
Importance of Quality Ingredients
When it comes to making an exceptional cherry cheesecake lush, the quality of your ingredients can truly make or break the dish. Using fresh cherries or high-quality cherry pie filling can enhance the flavor profile immensely. For example, high-quality cream cheese not only adds a creamy texture but also imparts a rich flavor that elevates your dessert.
Investing in good ingredients doesn’t mean you have to break the bank; check out local farmers’ markets or specialty stores for seasonal produce and fresher options. This simple choice will transform your cherry cheesecake lush from a basic dessert into a memorable experience. After all, when you share this lush with friends, you want it to shine!
Preparing Cherry Cheesecake Lush
Creating a cherry cheesecake lush is not only a delightful experience but also an opportunity to impress your friends and family with minimal stress. This no-bake dessert combines rich flavors and textures, making it perfect for gatherings or simply for you to enjoy at home. Let’s break down the preparation process step by step so you can navigate through it with ease and confidence.
Prepare the graham cracker crust
The foundation of any great cheesecake is a delicious crust. For your cherry cheesecake lush, you’ll want a graham cracker crust that balances sweetness and crunch.
- Ingredients you’ll need:
- 1 ½ cups of graham cracker crumbs
- ½ cup of granulated sugar
- ½ cup of unsalted butter, melted
Start by preheating your oven to 350°F (175°C). In a mixing bowl, combine the graham cracker crumbs and sugar. Pour in the melted butter and mix well until everything is evenly combined. It should resemble wet sand. Press this mixture firmly into the bottom of a 9×9 baking dish, creating a solid layer. Bake it in the preheated oven for about 8-10 minutes, then allow it to cool completely.
Make the cheesecake filling
While the crust is cooling, it’s time to whip up the creamy, dreamy cheesecake filling.
- Ingredients you’ll need:
- 16 oz cream cheese, softened
- 1 cup powdered sugar
- 1 tsp vanilla extract
- 1 cup heavy whipping cream
In a large bowl, beat the softened cream cheese until it’s smooth and creamy. Gradually add in the powdered sugar and vanilla extract. This will create a sweet, velvety mixture that’s hard to resist! In another bowl, whip the heavy cream until soft peaks form. Gently fold the whipped cream into the cream cheese mixture, taking care not to deflate it. This step is crucial for achieving that light, airy texture.
Assemble the layers
Now that you have the crust and filling ready, it’s time to bring these elements together.
- Start with a layer of the graham cracker crust at the bottom of your baking dish.
- Next, spread half of the cheesecake filling over it.
- Repeat this process by adding another layer of graham cracker crust followed by the remaining cheesecake filling.
Finally, make sure everything is even, and don’t forget to save some crust crumbles for garnishing later!
Add the cherry topping
No cherry cheesecake lush is complete without its signature cherry topping. You can use fresh cherries if they’re in season or opt for canned cherry pie filling for convenience.
- Ingredients for the topping:
- 1 can of cherry pie filling (or 2 cups fresh pitted cherries)
Spread the cherry pie filling evenly across the top layer of your assembled dessert. If using fresh cherries, slice and scatter them generously over the cheesecake filling. The vibrant red cherries not only add a delicious contrast in flavor but also make the dessert visually appealing.
Chill and set
The final step is critical for achieving that perfect luscious texture that you’re aiming for.
Cover the cherry cheesecake lush with plastic wrap and place it in the refrigerator for at least 4 hours, preferably overnight. This chilling time allows the flavors to meld beautifully and helps the layers set.
Serve chilled, and for that extra touch, sprinkle some reserved graham cracker crumbs on top before you cut into it. Your friends will be impressed, and you might even want to keep it a secret that it was so simple to make!
Now that you’ve mastered the preparation of cherry cheesecake lush, don’t hesitate to explore other variations or toppings. Have fun with it! For additional tips on dessert-making techniques, check out Baker’s Source for more fantastic resources. Enjoy your delightful creation!
Variations on Cherry Cheesecake Lush
When it comes to cherry cheesecake lush, the beauty of this dessert is its versatility. You can easily customize it to suit your taste or dietary needs.
Alternative Fruit Toppings
While cherries are the star of this dessert, don’t hesitate to play with different fruit toppings. Here are a few delicious alternatives you might consider:
- Strawberries: Their sweet and tangy flavor pairs perfectly with the creamy cheesecake layer.
- Blueberries: Add a pop of color and a rich taste that complements the base beautifully.
- Raspberries: These tart berries introduce a wonderful contrast to the sweetness of the cheesecake.
- Peaches or Pineapples: For a tropical twist, fresh peaches or pineapples can elevate your cherry cheesecake lush to a whole new level.
Feel free to mix and match or even create a fruit medley! This approach is not only delicious but also visually stunning.
Vegan or Gluten-Free Options
Adapting cherry cheesecake lush for vegan or gluten-free diets is simpler than you might think. Consider these substitutions:
- For a Vegan Lush: Replace cream cheese with a plant-based alternative like cashew or coconut cream. Use coconut milk for the whipped topping and ensure your graham crackers are vegan-friendly, or swap them out for crushed nuts or gluten-free cookies.
- For Gluten-Free: Opt for gluten-free graham crackers or cookie crumbs and make sure all other ingredients are certified gluten-free.
Experimenting with these variations not only caters to different dietary needs but can also introduce you to new flavor combinations you might fall in love with. As you try new options, remember that the heart of cherry cheesecake lush will always be its creamy layers and delicious toppings.
For more tips on fruit combinations and vegan baking options, check out The Spruce Eats and Minimalist Baker for some inspiration. Your dessert game is about to level up!
Cooking tips and notes for Cherry Cheesecake Lush
Common mistakes to avoid
When whipping up your cherry cheesecake lush, it’s easy to overlook a few details that could alter your outcome:
- Skipping the chilling step: Allow each layer to set in the fridge before adding the next. This helps to maintain those beautiful, distinct layers.
- Using overly soft cream cheese: Make sure your cream cheese is at room temperature for a smooth mixture. Cold cream cheese can lead to lumps in your filling.
- Choosing the wrong cherries: Opt for high-quality, tart cherries (like Morello) for a great contrast against the creamy cheesecake layers, enhancing the overall flavor.
For more guidance, you might find this resource on dairy handling helpful.
Tips for perfecting the layers
Achieving the ideal cherry cheesecake lush is all about technique:
- Patience is key: Take your time layering each component. Spreading gently ensures you don’t disturb the previous layer.
- Consider your crust: For a crunchier base, bake your graham cracker crust for 10-12 minutes prior to layering. This additional step enhances flavor too!
- Experiment with toppings: Get creative! Aside from cherries, try crushed nuts or chocolate shavings for added texture and taste.
The right approach can make your cherry cheesecake lush a showstopper at any gathering. Enjoy every bite!
Serving Suggestions for Cherry Cheesecake Lush
Best pairings and accompaniments
When you think of cherry cheesecake lush, you’re probably craving something that complements its creamy, fruity goodness. Here are a few delightful pairings to elevate your dessert experience:
- Fresh Fruits: Serve it alongside ripe strawberries or blueberries to add a burst of color and flavor.
- Light Whipped Cream: A dollop of whipped cream on top not only enhances its creaminess but also gives it that extra touch of elegance.
- Tea or Coffee: Pairing your dessert with a warm cup of herbal tea or a rich coffee can balance the sweetness beautifully.
Consider checking out this guide on herb teas for some fantastic options.
Presentation ideas
Making your cherry cheesecake lush visually appealing can make it even more enticing. Here are some creative ideas:
- Layered Glass Bowls: Serve your lush in individual glass bowls or cups to showcase those beautiful layers.
- Garnish Creatively: A sprinkle of crushed graham crackers on top, along with fresh cherries or mint leaves, can add texture and color.
- Charming Plates: Use vintage-style plates for a homey feel or modern geometrical plates for a chic look.
These simple touches not only enhance your presentation but also create an inviting atmosphere for your guests, turning any gathering into a special occasion!
Time breakdown for Cherry Cheesecake Lush
Preparation time
Getting started on your cherry cheesecake lush is a breeze! You’ll need about 20 minutes to prepare the layers, mix your ingredients, and set the stage for this decadent dessert. This is the time to gather your tools, get your ingredients, and create delicious chaos in your kitchen.
Cooking time
The beauty of a cherry cheesecake lush is that there’s no cooking involved! Instead, you’ll chill this delightful treat. Just let it rest in the refrigerator for at least 4 hours (or even overnight) so the flavors can meld beautifully.
Total time
Overall, you’re looking at about 4 hours and 20 minutes from start to finish if you include the chilling time. In less than a day, you can impress your friends and family with a stunning dessert that tastes as good as it looks. How could you not want a sweet treat like this?
For more tips on making desserts like this, check out Taste of Home or Serious Eats.
Nutritional Facts for Cherry Cheesecake Lush
When it comes to enjoying a delightful dessert like cherry cheesecake lush, knowing its nutritional facts helps you indulge guilt-free. Let’s break it down:
Calories per serving
Each serving of this luscious dessert typically contains around 250 calories. It’s a satisfying amount that balances treat and moderation, making it a fantastic option for your occasional sweet craving. If you want to lower the calories, consider using low-fat cream cheese or reducing the serving size.
Sugars and fats
In terms of sugars, you’ll find about 20 grams per serving, mainly from the sweet cherry topping and any added sugar. For those watching their fat intake, this dessert has approximately 10 grams of fat. Most of it comes from the creamy layers, but you can substitute with light cream cheese to trim those numbers while still enjoying the rich flavor.
For a deeper dive into healthier dessert alternatives, feel free to check out Healthline’s article on desserts.
Enjoying cherry cheesecake lush in moderation can be part of a balanced lifestyle, so savor every delicious bite!
FAQs about Cherry Cheesecake Lush
When it comes to Cherry Cheesecake Lush, you might have a few burning questions. Don’t worry, I’m here to help you navigate through your cravings and kitchen concerns!
Can I make Cherry Cheesecake Lush ahead of time?
Absolutely! One of the best things about Cherry Cheesecake Lush is that it actually improves in flavor when made a day ahead. Just prepare it, cover it tightly with plastic wrap, and store it in the refrigerator. The layers meld beautifully overnight, creating a deliciously creamy dessert that’s ready to impress at your next gathering.
How do I store leftovers?
If you find yourself with leftovers (which, let’s be honest, is a good problem to have), simply cover the dish with plastic wrap or transfer it to an airtight container. Stored properly in the fridge, your Cherry Cheesecake Lush will last for up to 3 days. However, be mindful that the crust may get a bit soggy over time, so try to enjoy it while it’s fresh!
What other toppings can I use?
Get creative! While cherries are classic, there are tons of fabulous alternatives. Consider:
- Sliced strawberries or blueberries
- A drizzle of chocolate sauce for those chocolate lovers
- Chopped nuts for a crunchy contrast
- A sprinkle of crushed graham crackers or cookies
The beauty of Cherry Cheesecake Lush is its versatility. Feel free to experiment with your favorite flavors and toppings!
For more dessert ideas, check out this link for inspiration from top chefs. Your cherry cheesecake adventure awaits!
Conclusion on Cherry Cheesecake Lush
Recap of the Recipe Benefits
The cherry cheesecake lush is not only a delightful treat but also a breeze to prepare. With layers of creamy cheesecake filling, crushed graham crackers, and sweet cherry topping, it’s a dessert that balances texture and flavor perfectly. Plus, its no-bake design makes it a fantastic option for those hot summer days when you want something refreshing but easy.
Encouragement to Try Making It at Home
If you’re looking to impress your friends or simply satisfy your sweet tooth, why not give this recipe a whirl? Making a cherry cheesecake lush at home is both fun and rewarding. There’s a certain satisfaction in creating something so delicious with your own hands. So grab your ingredients and start layering—your taste buds will thank you later! Don’t forget, cooking can be a great way to unwind. Dive into this recipe, and share your experience with others! For more tips and variations, check out this cooking resource.
Print
Cherry Cheesecake Lush: A Delightfully Easy No-Bake Dessert
- Total Time: 3 hours 15 minutes
- Yield: 12 servings
Description
Cherry Cheesecake Lush is a delicious and simple no-bake dessert that layers creamy cheesecake with cherry pie filling and a crunchy crust.
Ingredients
- 1 1/2 cups graham cracker crumbs
- 1/2 cup unsalted butter, melted
- 2 cups cream cheese, softened
- 1 cup powdered sugar
- 1 teaspoon vanilla extract
- 2 cups whipped topping
- 1 can (21 ounces) cherry pie filling
Instructions
- In a bowl, combine graham cracker crumbs and melted butter, then press into a 9×13 inch pan.
- In another bowl, beat together cream cheese, powdered sugar, and vanilla until smooth.
- Fold in whipped topping and spread over the crust.
- Top with cherry pie filling evenly.
- Refrigerate for at least 3 hours before serving.
Notes
- For a firmer texture, refrigerate overnight.
- Feel free to substitute other fruit toppings as desired.
- Prep Time: 15 minutes
- Cook Time: 0 minutes
Nutrition
- Serving Size: 1 slice
- Calories: 300
- Sugar: 20g
- Sodium: 150mg
- Fat: 18g
- Saturated Fat: 10g
- Unsaturated Fat: 8g
- Trans Fat: 0g
- Carbohydrates: 30g
- Fiber: 1g
- Protein: 3g
- Cholesterol: 30mg
")