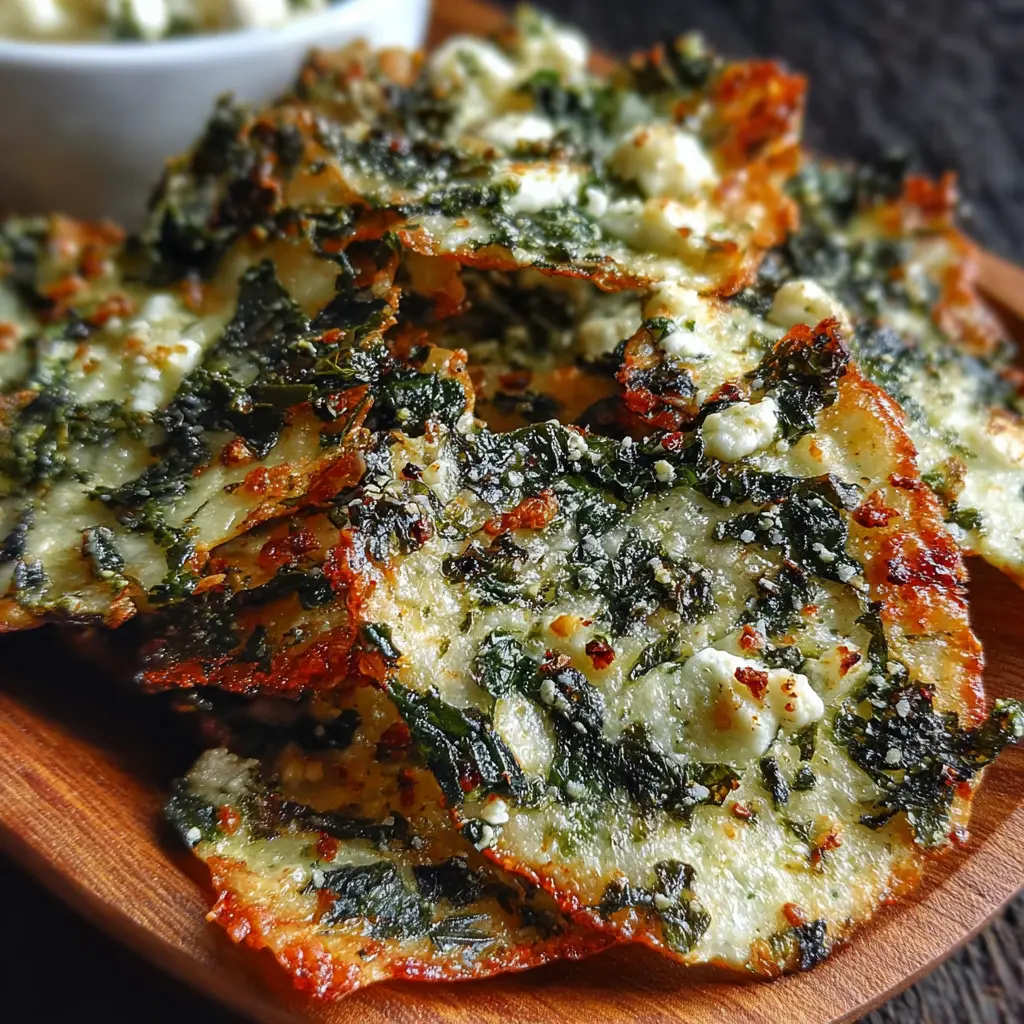
There’s something magical about the smell of cheese baking in the oven—rich, savory, and just a little indulgent. That’s exactly what you get with this Cheese Bread recipe, also known as cheese crisps or a low-carb pizza crust. Whether you’re following a keto lifestyle, looking to cut down on carbs, or just love cheese (who doesn’t?), this recipe is a game-changer. It’s simple, quick, and so satisfying—perfect for snacking, dipping, or building your own guilt-free pizza.
Let’s walk through the process together step-by-step, just like you would with a friend in the kitchen.
What is Cheese Bread (Low-Carb Pizza Crust)?
Cheese Bread is a baked, crispy creation made almost entirely of—you guessed it—cheese. With just a few ingredients, it transforms into a golden, flavorful round that can be eaten on its own or used as a pizza base. The beauty of this recipe is that it’s naturally low in carbohydrates, high in protein, and completely flour-free, making it a go-to for those on ketogenic or gluten-free diets.
Think of it as a cross between a cheese crisp and a thin-crust pizza, with a chewy edge and a crunch you can hear. It’s incredibly versatile—serve it with dips, top it like a pizza, or just snack on it right out of the oven.
Curious about how low-carb fits into your overall eating plan? Healthline’s beginner guide to keto is a great starting point.
Ingredient Breakdown and Substitutes
This recipe calls for a short list of pantry staples. Here’s what you’ll need:
-
1 large egg – acts as the binder to hold everything together.
-
1 cup shredded mozzarella cheese – brings that gooey melt and classic cheese-pull texture.
-
1 cup shredded parmesan cheese – adds a rich, nutty flavor and helps create a crisp edge.
-
½ tsp garlic powder – infuses the dough with savory depth.
-
½ tsp Italian seasoning – gives that pizza-shop aroma.
-
Optional: fresh herbs (like basil or oregano) – for added freshness.
-
Optional: crushed red pepper – if you like a little heat.
Now, let’s talk substitutions:
-
Mozzarella: Want more stretch and gooeyness? Stick with whole-milk mozzarella. If you’re dairy-sensitive, try a plant-based mozzarella alternative, though results may vary in texture.
-
Parmesan: Pecorino Romano is a great swap if you prefer a saltier, sharper flavor.
-
Egg-free version: You can try a flax egg (1 tbsp ground flax + 2.5 tbsp water), but be aware it won’t crisp up quite the same.
-
Seasonings: No Italian seasoning? Combine equal parts dried oregano, basil, thyme, and rosemary.
For a deeper dive into the types of cheeses and how they behave in baking, check out Bon Appetit’s cheese breakdown.
Step-by-Step Recipe Instructions
This recipe is as easy as mix, spread, bake, and enjoy. But each step matters when you’re aiming for that golden, crispy perfection. Here’s how to do it right.
Step 1 – Preheat Your Oven and Prep Your Tray
First things first—get your oven going. Preheat it to 350°F (175°C). While it’s heating up, line a baking sheet with parchment paper and give it a light mist of non-stick spray. This helps prevent sticking (cheese can get clingy when it bakes) and makes cleanup a breeze.
If you have a silicone baking mat, you can use that instead of parchment. It’s a great reusable option and handles high heat well.
Step 2 – Mix the Ingredients
In a medium mixing bowl, toss in your mozzarella, parmesan, egg, garlic powder, and Italian seasoning. Stir until everything is fully combined. The mixture will be thick and sticky—that’s exactly what you want.
Don’t worry if it seems a little messy. Just keep folding everything together until the cheese and egg are evenly distributed. You’ll start to see a “dough” form, although it’s not like your typical flour dough. It’s all cheese and flavor here.
Step 3 – Shape the Cheese “Dough”
Now for the fun part. Use a spoon or your hands to scoop the mixture onto your prepared baking sheet. You can form small rounds, about 3–4 inches across, which make excellent snack-sized crisps.
If you’re planning to turn this into a pizza crust, spread the mixture into a large circle, about 10 inches wide, and aim for even thickness all around (roughly ¼ inch). A silicone spatula or the back of a spoon works great for this step.
For the most even cooking, avoid any thick clumps in the center—they’ll take longer to crisp up.
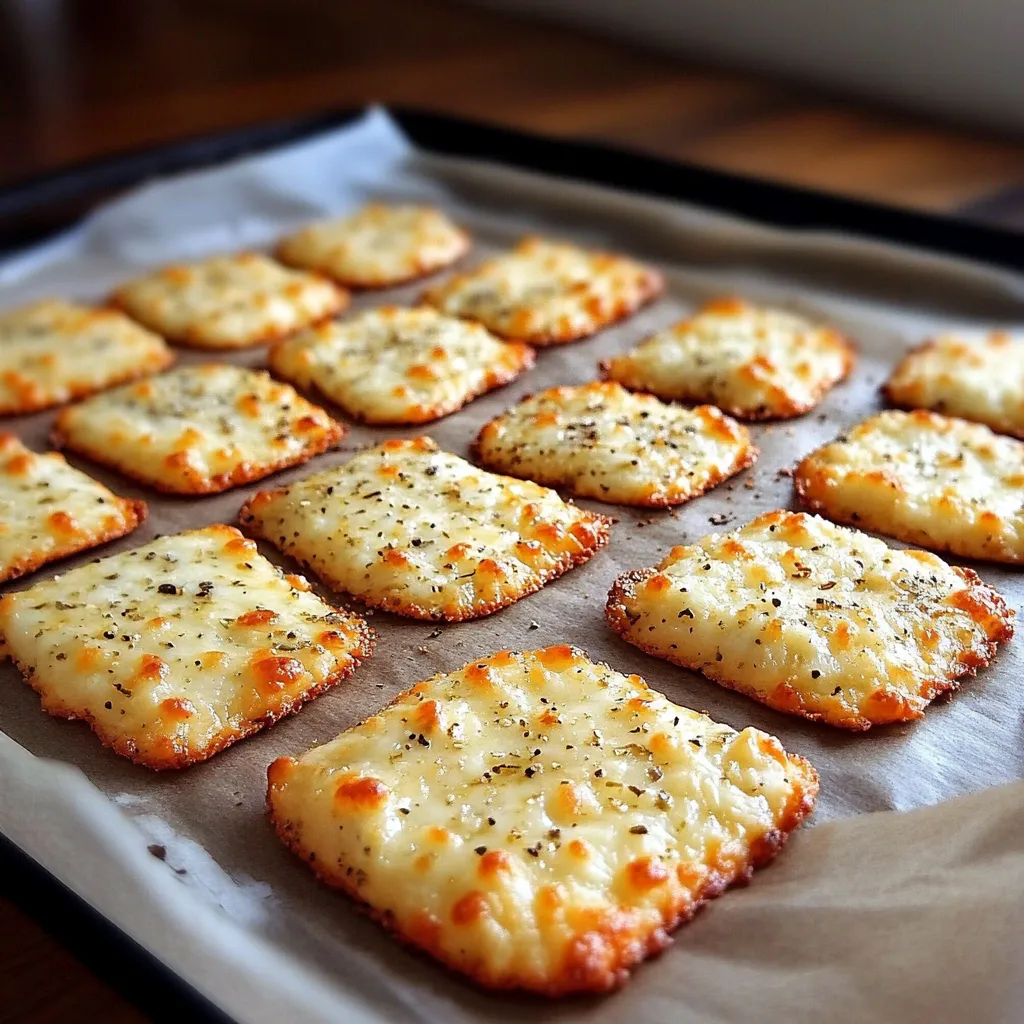
Step 4 – Bake Until Bubbly and Golden
Slide the baking sheet into your preheated oven and bake for 12–15 minutes. Keep an eye on the edges—when they start turning golden brown and you see little bubbles across the surface, it’s almost ready.
Every oven is a little different, so if yours runs hot, start checking around the 11-minute mark. You want color without burning.
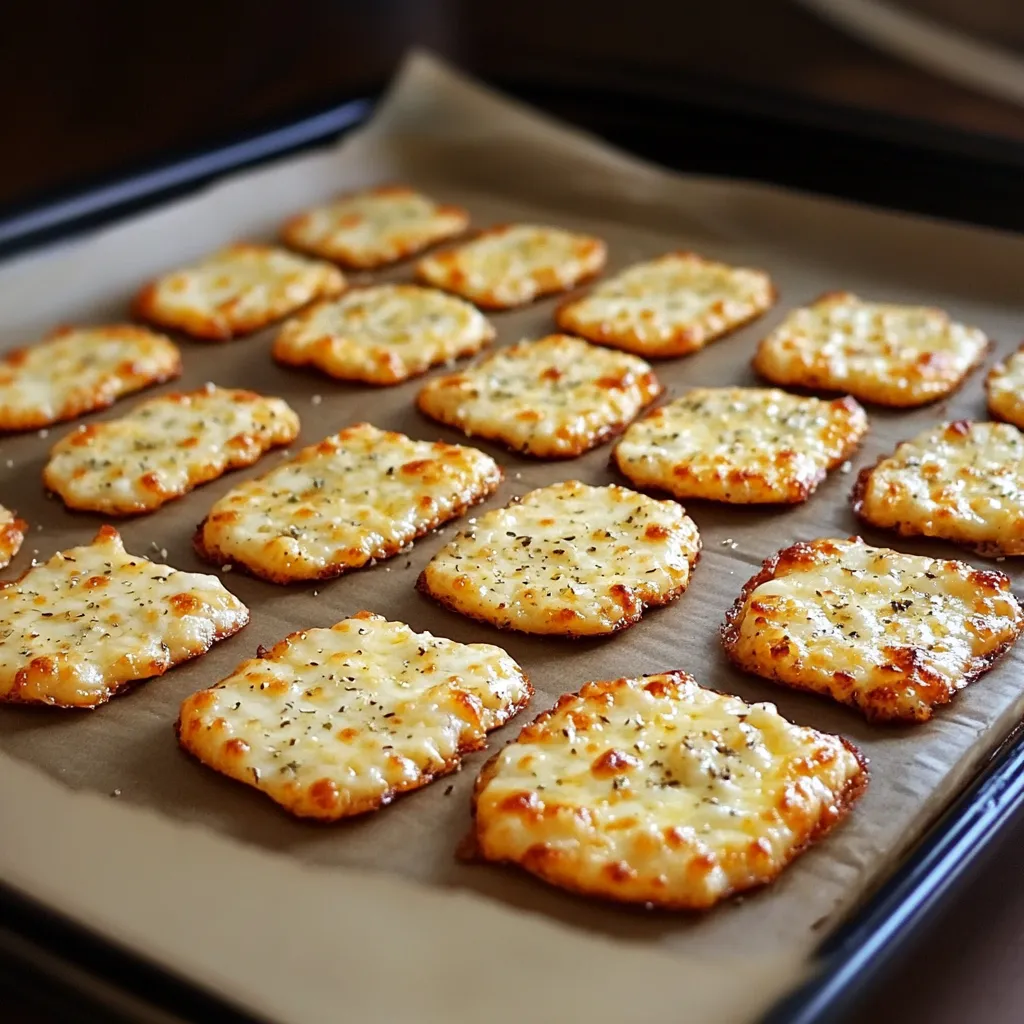
Step 5 – Broil for that Perfect Crispy Finish
Here’s where the magic happens. Once the cheese bread has baked through, turn on the broiler for about 1 minute. This adds a crisp, golden finish that takes the texture to the next level.
But don’t walk away—cheese under a broiler goes from perfectly golden to scorched in seconds. Watch it closely and pull it out as soon as it’s bubbly and bronze.
Step 6 – Cool Slightly and Enjoy!
Let the cheese bread cool for just a few minutes before slicing or serving. It will crisp up even more as it cools and is easier to handle.
Serve it as-is for a savory snack, or set out a dipping sauce like homemade marinara or a creamy ranch. If you’re making a pizza, hold tight—we’ll get to toppings in Part 2.
Helpful Baking Tips
Here are a few extra nuggets of wisdom to help you nail this recipe every time:
-
Even thickness is key: Thicker centers may stay soft while edges crisp. Spread the mixture evenly.
-
Use a cooling rack: If you like extra crunch, place the cheese bread on a cooling rack right after baking to let air circulate underneath.
-
Double the batch: These go fast. If you’re cooking for a crowd (or just your future self), make a double batch and store leftovers in the fridge.
How to Use Cheese Bread as Pizza Crust

Turning your cheese bread into a pizza is as simple as adding toppings and baking it for a few more minutes. Here’s how to do it without making a soggy mess.
Step 1 – Bake the Crust First
Before anything else, your cheese bread needs to be fully baked and broiled as described in Part 1. This ensures the base is strong enough to hold your toppings without falling apart.
Step 2 – Add Your Favorite Toppings
Once your base is cooled slightly, spread a thin layer of sauce. Stick to low-moisture options like thick marinara, pesto, or even garlic butter to avoid sogginess. Then layer on your favorites—think:
-
Pepperoni or cooked sausage
-
Fresh or roasted vegetables
-
Olives, mushrooms, or jalapeños
-
Extra shredded cheese
If you’re looking for keto-friendly topping inspiration, Delish’s keto pizza roundup is a great place to explore new ideas.
Step 3 – Bake Again
Slide the topped pizza back into the oven at 375°F (190°C) for about 5–7 minutes, or until the cheese is melted and bubbly. If you like it extra toasty, flip on the broiler for 30 seconds at the end—but keep a close eye on it.
Portion Control and Smart Snacking
Cheese Bread is delicious, but it’s also rich—and incredibly easy to overeat. Here are a few gentle strategies to keep things in balance without missing out on flavor.
-
Make minis: Instead of one large crust, shape the dough into palm-sized rounds. Perfect for portioning (and dipping).
-
Pair it with a side salad: Balance out the richness with crisp greens, fresh tomatoes, and a tangy vinaigrette.
-
Use it as a base, not the whole meal: Treat cheese bread like a crust, then pile on veggies and protein for a more complete dish.
If you’re trying to keep portions in check, try storing the rest out of sight once you’ve served your plate. A good motto: enjoy now, save the rest for later.
Serve It With Dips or as Part of a Meal
Cheese bread is a perfect companion to dips—anything creamy, tangy, or herby works beautifully. A few go-to ideas:
-
Tzatziki or ranch for a cool contrast
-
Guacamole for a creamy, heart-healthy pairing
-
Marinara sauce for pizza-style dipping
If you’re looking for a classic dip recipe, Simply Recipes has a great marinara sauce guide that’s easy to whip up.
Want to go bigger? Use the cheese bread as the base for open-faced sandwiches, topped with roasted vegetables and fresh herbs.
How to Store and Reheat Cheese Bread
Yes, this stuff keeps! And it reheats beautifully—especially if you like a good crunch.
Storing
-
Fridge: Keep leftovers in an airtight container. It’ll last for 3–4 days.
-
Freezer: Freeze the baked rounds between layers of parchment paper in a zip-top bag. When you’re ready to enjoy, just pop them straight into the oven—no need to thaw.
Reheating
For best texture, reheat in:
-
A toaster oven or conventional oven at 375°F for 5–7 minutes
-
An air fryer at 350°F for 4–6 minutes
Microwaving works in a pinch, but expect a softer texture. For a comparison of oven vs air fryer results, BBC Good Food breaks it down well.
Frequently Asked Questions About Cheese Bread
Let’s answer some of the most common questions that come up when people try this recipe.
Is cheese bread keto?
Yes! This recipe contains almost no carbs, thanks to the lack of flour and the focus on cheese and eggs. It’s a go-to for anyone on a ketogenic or low-carb diet.
Can I use a different cheese?
Absolutely. While mozzarella and parmesan are classic for texture and flavor, cheddar, provolone, or even pepper jack can add fun twists. Just be mindful that some cheeses release more oil than others.
Why didn’t mine get crispy?
If your cheese bread stayed soft, it could be from spreading the mixture too thick, using a cheese with higher moisture, or skipping the broiler step. Next time, spread the dough thinner and don’t forget the broil.
Can I make this in an air fryer?
Yes, and it works great for smaller rounds. Place them on parchment in the air fryer basket and cook at 350°F for about 8–10 minutes. Just make sure there’s enough space for the air to circulate.
How long can I store it?
Up to 4 days in the fridge and about 1 month in the freezer. Always reheat to restore the crisp.
Can I prep it ahead?
You can mix the “dough” a day in advance and store it in the fridge. Bake it fresh for best results.
Related Recipes
If you loved this cheese bread recipe, you might also enjoy these other savory low-carb or cheesy favorites from RecipeSeasys:
-
Garlic Parmesan Chicken Pasta Recipes – Creamy, rich, and loaded with flavor.
-
Keto Sloppy Joe Casserole – A hearty low-carb comfort meal.
-
Easy Garlic Butter Cheese Bombs – Cheesy bites with a soft center and crisp edges.
-
Garlic and Butter Flatbread – A fluffy bread option to contrast your crispy cheese bread.
-
Creamy Mushroom and Asparagus Chicken Penne – Ideal for pairing with your cheese bread for a complete dinner.
Final Thoughts: Cheese Bread You’ll Crave Again and Again
There’s something so comforting about a simple, cheesy recipe that just works. This cheese bread delivers on flavor, crunch, and satisfaction—and it’s incredibly versatile. Use it as a crispy snack, a dipper, or the base for your next low-carb pizza night.
Once you’ve mastered the basics, feel free to experiment with flavors, cheeses, and toppings. The possibilities are as endless as your cravings.
Print
Cheese Bread (A.K.A. Cheese Crisps or Low-Carb Pizza Crust)
- Total Time: 20 minutes
- Yield: 2–4 servings
Description
This easy cheese bread recipe is a low-carb, keto-friendly alternative to traditional crusts. Made with mozzarella, parmesan, and a few spices, it’s crispy, savory, and perfect as a snack or pizza base.
Ingredients
- 1 large egg
- 1 cup shredded mozzarella cheese
- 1 cup shredded parmesan cheese
- 1/2 tsp garlic powder
- 1/2 tsp Italian seasoning
- Pam or any non-stick spray
- Optional: Fresh herbs (like basil or oregano)
- Optional: Crushed red pepper
Instructions
- Preheat the oven to 350°F (175°C) and line a baking sheet with parchment paper. Lightly spray with non-stick spray.
- In a bowl, combine mozzarella, parmesan, egg, garlic powder, and Italian seasoning. Mix until well combined.
- Spoon the mixture onto the baking sheet and flatten into round shapes or spread into a large circle for pizza crust.
- Bake for 12–15 minutes, until edges turn golden and the cheese bubbles.
- Switch the oven to broil and cook for 1 minute to crisp the top. Watch carefully to avoid burning.
- Let cool slightly before serving or adding toppings for pizza.
Notes
- Use a silicone mat for easier release and extra crispness.
- Thinner rounds will cook faster and get crispier.
- Best served warm or freshly reheated for crunch.
- Store leftovers in an airtight container in the fridge.
- Prep Time: 5 minutes
- Cook Time: 15 minutes
Nutrition
- Serving Size: 1/4 of recipe
- Calories: 210
- Sugar: 1g
- Sodium: 480mg
- Fat: 16g
- Saturated Fat: 10g
- Unsaturated Fat: 5g
- Trans Fat: 0g
- Carbohydrates: 2g
- Fiber: 0g
- Protein: 15g
- Cholesterol: 65mg
")